Before setting down the path of advanced concepts, first let’s all agree on the basics. React Router provides:

In this tutorial, I’ll highlight some advanced React Router concepts like code splitting, animated transitions, scroll restoration, recursive path, and server-side rendering.
At the end, I’ll demonstrate how these concepts can be used in a React app.
Code splitting is, effectively, the process of incrementally downloading the app for the user. In this way, a large, bundled JavaScript file can be separated into smaller chunks and used only when needed. Code splitting lets you ship a smaller app bundle to your users and only download additional JS code when they go to specific “pages” of your SPA.
In a React app, code splitting can be achieved by using the import() syntax and webpack.
Even better, you can use react-loadable, which is a higher order component for loading components with dynamic imports. React Loadable is a small library that makes component-centric code splitting incredibly easy in React.
Let’s see how code splitting was implemented in the React app created above.
Check out the code-splitting branch and navigate to the index.js file in the routes folder (/src/routes/index.js). Or, you can view the file online here.
At the beginning of the file, you’ll see a few imports statements. They are basically modules being imported to be used in the code.
import React, { Component } from 'react'
import {
  BrowserRouter as Router,
  Route,
  Switch,
  Link
} from 'react-router-dom'
import Loadable from 'react-loadable'
import LoadingPage from '../components/LoadingPage/LoadingPage'
As you can see above, Loadable is imported from react-loadable, and it will be used to carry out code splitting. The LoadingPage component renders a view that will be used as loader.
Loadable is a higher-order component (a function that creates a component) which lets you dynamically load any module before rendering it into your app. In the code block below, the loader uses the import function to dynamically import a particular component to be loaded and the LoadingPage component is used for the loading state. delay is the time to wait (in milliseconds) before passing props.pastDelay to your loading component. This defaults to 200.
const AsyncHome = Loadable({
  loader: () => import('../components/Home/Home'),
  loading: LoadingPage
})
const AsyncAbout = Loadable({
  loader: () => import('../components/About/About'),
  loading: LoadingPage,
  delay: 300
})
const AsyncNotFound = Loadable({
  loader: () => import('../components/NotFound/NotFound'),
  loading: LoadingPage
})
You can check if code splitting is actually happening by building the app for production and observing how the JavaScript code is bundled. Run the npm run build command to build the app for production.

As you can see, the JavaScript code including the components is now being separated into different chunks thanks to code splitting.
Animated transitions help to provide an easy flow to navigating a site. There are many React plugins that help with this in React but we’ll be considering the react-router-transition plugin for the app.
Here is a preview of what we’ll be building:

Check out to the animated-transitions branch and navigate to the index.js file in the routes folder (/src/routes/index.js) or you can view the file online here. As seen above, I’ll only highlight the important bits of the code that helps with animated transitions.
import { AnimatedSwitch, spring } from 'react-router-transition';
The AnimatedSwitch module is imported from react-router-transition and React Motion’s spring helper function is also imported for specifying the spring configuration for the animation. AnimatedSwitch is basically a <Switch />, but with transitions when the child route changes.
function mapStyles(styles) {
  return {
    opacity: styles.opacity,
    transform: `scale(${styles.scale})`,
  };
}
// wrap the `spring` helper to use a bouncy config
function bounce(val) {
  return spring(val, {
    stiffness: 330,
    damping: 22,
  });
}
// child matches will...
const bounceTransition = {
  // start in a transparent, upscaled state
  atEnter: {
    opacity: 0,
    scale: 1.2,
  },
  // leave in a transparent, downscaled state
  atLeave: {
    opacity: bounce(0),
    scale: bounce(0.8),
  },
  // and rest at an opaque, normally-scaled state
  atActive: {
    opacity: bounce(1),
    scale: bounce(1),
  },
};
The mapStyles() function uses an argument of styles to return a value for opacity and transform. This will be used in configuring the transitions later on.
The bounce() function wraps the spring helper from React motion to give a bouncy config and the bounceTransition object defines how the child matches will transition at different positions such as atEnter , atLeave and atActive.
It was mentioned above that AnimatedSwitch replaces Switch in the Routes so let’s see how.
class Routes extends Component {
  render () {
    return (
      <Router history={history}>
        <div>
          <header className="header container">
            <nav className="navbar">
              <div className="navbar-brand">
                <Link to="/">
                  <span className="navbar-item">Home</span>
                </Link>
              </div>
            </nav>
          </header>
          <AnimatedSwitch
            atEnter={bounceTransition.atEnter}
            atLeave={bounceTransition.atLeave}
            atActive={bounceTransition.atActive}
            mapStyles={mapStyles}
            className="route-wrapper"
          >
            <Route exact path="/" component={Home} />
            <Route path="/p/1" component={One} />
            <Route path="/p/2" component={Two} />
            <Route path="*" component={NotFound} />
          </AnimatedSwitch>
        </div>
      </Router>
    )
  }
}
It works the same way a Switch would have been used, albeit with some additional props such as atEnter, atLeave, atActive, and mapStyles.
To see the animated transitions in action, run the command npm start in your terminal to run the app in development mode. Once the app is up and running, navigate through the routes of the app.
Scroll restoration can be useful when you are trying to make sure that users return to the top of the page when switching routes or navigating to another page. It helps with scrolling up on navigation so you don’t start a new screen scrolled to the bottom.
Another important use case is that when a user returns to a long page in your app after navigating somewhere else, you can put them back at the same scroll position so they can continue where they left off.
Here is a link to see scroll restoration in action.
Let’s see how scroll restoration was implemented in the React app created above.
Check out to the scroll-restoration branch and navigate to the index.js file in the routes folder (/src/routes/index.js) or you can view the file online here.
import ScrollToTop from '../components/ScrollToTop/ScrollToTop'

class Routes extends Component {
  render () {
    return (
      <Router history={history}>
        <ScrollToTop>
          <div>
            <header className="header container">
              <nav className="navbar">
                <div className="navbar-brand">
                  <Link to="/">
                    <span className="navbar-item">Home</span>
                  </Link>
                </div>
                <div className="navbar-end">
                  <Link to="/about">
                    <span className="navbar-item">About</span>
                  </Link>
                  <Link to="/somepage">
                    <span className="navbar-item">404 page</span>
                  </Link>
                </div>
              </nav>
            </header>
            <Switch>
              <Route exact path="/" component={Home} />
              <Route path="/about" component={About} />
              <Route path="*" component={NotFound} />
            </Switch>
          </div>
        </ScrollToTop>
      </Router>
    )
  }
}
The important bits of that file is shown in the code block above. The ScrollToTop component does all the heavy lifting when it comes to implementing scroll restoration and in the render() function, it is used under Router to encompass the Routes.
Let’s open the ScrollToTop component to see the code for scroll restoration. Navigate to src/components/ScrollToTop and open the ScrollToTop.js or view the file online here.
import { Component } from 'react'
import { withRouter } from 'react-router-dom'

class ScrollToTop extends Component {
    componentDidUpdate(prevProps) {
        if (this.props.location !== prevProps.location) {
            window.scrollTo(0, 0)
        }
    }

    render() {
        return this.props.children
    }
}

export default withRouter(ScrollToTop)
In the code block above, The component module is imported from react and withRouter is imported from react-router-dom.
The next thing is the ES6 class named ScrollToTop that extends the component module from react. The componentDidUpdate lifecycle checks if its a new page and uses the window.scroll function to return to the top of the page.
The ScrollToTop component is then wrapped in an exported withRouter to give it access to the router’s props.
To see scroll restoration in action, run the command npm start in your terminal to run the app in development mode. Once the app is up and running, navigate to the about page and scroll down until you get to the bottom of the page and then click on the Go Home link to see the scroll restoration in action.
A recursive path is a path that uses nested routes to display nested views by calling on the same component. An example of a recursive path in action could be the common use of breadcrumb on websites. A “breadcrumb” is a type of secondary navigation scheme that reveals the user’s location in a website or Web application.
Breadcrumbs offer users a way to trace the path back to their original landing point even after going through multiple routes, and that can be implemented using React Router’s functionality, specifically the match object, it provides the ability to write recursive routes for nested child components.
Check out to the recursive-paths branch and navigate to the About.js file in the About folder (/src/components/About/About.js) or you can view the file online here.
import React, { Component } from 'react'
import './About.css'
import { Link, Route } from 'react-router-dom'

class About extends Component {

    componentDidMount () {
        console.log(this.props.match.url)
    }

    render () {
        return (
            <div className="container">
                <h1>Recursive paths</h1>
                <p>Keep clicking the links below for a recursive pattern.</p>
                <div>
                    <ul>
                        <li><Link className="active" to={this.props.match.url + "/1"}>Link 1</Link></li>
                        <li><Link className="active" to={this.props.match.url + "/2"}>Link 2</Link></li>
                        <li><Link className="active" to={this.props.match.url + "/3"}>Link 3</Link></li>
                    </ul>
                </div>
                <div>
                    <p className="recursive-links">New recursive content appears here</p>
                    <Route path={`${this.props.match.url}/:level`} component={About} />
                </div>
            </div>
        )
    }
}

export default About
In the code block above, Link uses this.props.match.url to lead to the current URL which is then appended with a /1 , /2, or /3. Recursion actually happens inside the Route where the path is set to the current this.props.match.url with a params of /:level added to it and the component being used for the route is the About component.
To see recursive paths in action, run the command npm start in your terminal to run the app in development mode. Once the app is up and running, navigate to the about page and keep clicking on any of the links there to see a recursive pattern.

One of the downsides of using a JavaScript framework like React, Angular, or Vue is that the page is basically empty until the browser has executed the app’s JavaScript bundle. This process is called client-side rendering. That can lead to higher waiting time if the user’s internet connection is poor.
Another downside to client-side rendering is that web crawlers do not care if your page is still loading or waiting for a JavaScript request. If the crawler doesn’t see anything, obviously that’s bad for SEO.
Server-side rendering (SSR) helps to fix that by loading all the HTML, CSS, and JavaScript in the initial request. This means all the content is loaded and dumped into the final HTML that a web crawler can crawl through.
A React app can be rendered on the server using Node.js and React Router library can be used for navigation in the app. Let’s see how to implement that.
The SSR React app is on the GitHub repo, you can check out the SSR branch or you can view the repo here. I’ll highlight only the most important section of the app that touches on SSR.
The webpack.development.config.js file contains the webpack config needed for the React app and the contents of the file can be seen below or on GitHub.
var path = require('path')
var webpack = require('webpack')
var ExtractTextPlugin = require("extract-text-webpack-plugin")

var config = {

  devtool: 'eval',

  entry: [
    './src/App',
    'webpack-hot-middleware/client'
  ],

  output: {
    filename: 'bundle.js',
    path: path.join(__dirname, 'dist'),
    publicPath: '/dist/'
  },

  resolve: {
    extensions: ['*', '.js']
  },

  plugins: [
    new webpack.HotModuleReplacementPlugin(),
    new webpack.NoEmitOnErrorsPlugin(),
    new webpack.DefinePlugin({
      "process.env": {
        BROWSER: JSON.stringify(true)
      }
    }),
    new ExtractTextPlugin("[name].css")
  ],

  module: {
    loaders: [
      {
        test: /\.js$/,
        loaders: ['react-hot-loader', 'babel-loader'],
        include: [path.join(__dirname, 'src')]
      },
      {
        test: /\.css$/,
        loader: ExtractTextPlugin.extract('style-loader','css-loader')
      }
    ]
  }
}

module.exports = config
The entry point of the app is server.js which is the Node.js backend needed to run the app on a server. The content of the file can be seen below or on GitHub.
require('babel-core/register')({});

//Adding a Development Server
let webpack = require('webpack')
let webpackDevMiddleware = require('webpack-dev-middleware')
let webpackHotMiddleware = require('webpack-hot-middleware')
let config = require('./webpack.development.config')
let path = require('path')
let Express = require('express')
let requestHandler = require('./requestHandler')

let app = new Express()
let port = 9000

let compiler = webpack(config)

app.use(webpackDevMiddleware(compiler, {
  noInfo: true,
  publicPath: config.output.publicPath,
  historyApiFallback: true
}))

app.use(webpackHotMiddleware(compiler))

delete process.env.BROWSER;


app.get('/dist/main.css', (req, res) => {
  res.sendFile(path.join(__dirname, '/public/main.css'))
});

app.use(requestHandler);

app.listen(port, (error) => {
  if (error) {
    console.error(error)
  } else {
    console.info('==> Listening on port %s. Open up http://localhost:%s/ in your browser.', port, port)
  }
})
In the code block above, we basically set up an Express web server in which the app will be run on and also set up a development server with webpackDevMiddleware and webpackHotMiddleware. At the top of the file, requestHandler.js is imported and this is used to build the app’s view later with app.use(requestHandler). Let’s see the contents of that JavaScript file. You can also check it out here.
import React from 'react'
import { renderToString } from 'react-dom/server'
import { StaticRouter } from 'react-router'
import { App } from './src/Components'

function handleRender(req,res) {
    // first create a context for <StaticRouter>, it's where we keep the
  // results of rendering for the second pass if necessary
  const context = {}
  // render the first time
  let markup = renderToString(
    <StaticRouter
      location={req.url}
      context={context}
    >
      <html>
        <head>
          <title>Advanced React Router Usage</title>
          <link rel="stylesheet" href="https://cdnjs.cloudflare.com/ajax/libs/bulma/0.6.0/css/bulma.min.css" />
          <link href="dist/main.css" media="all" rel="stylesheet" />
        </head>
        <body>
          <div id="main">
            <App/>
          </div>
          <script src="dist/bundle.js"></script>
        </body>
      </html>
    </StaticRouter>
  )

  // the result will tell you if it redirected, if so, we ignore
  // the markup and send a proper redirect.
  if (context.url) {
    res.writeHead(301, {
      Location: context.url
    })
    res.end()
  } else {
    res.write(markup)
    res.end()
  }
}
module.exports = handleRender
Rendering React apps on the server requires that you render components to static markups and that’s why renderToString is imported from react-dom/server at the top of the file. There are other imports to highlight too, the StaticRouter import is used because rendering on the server is a bit different since it’s all stateless.
The basic idea is that we wrap the app in a stateless <StaticRouter> instead of a <BrowserRouter>. We then pass in the requested URL from the server so the routes can match and a context prop we’ll discuss next.
Whenever there’s a Redirect on the client side, the browser history changes state and we get the new screen. In a static server environment we can’t change the app state. Instead, we use the context prop to find out what the result of rendering was. If we find a context.url, then we know the app redirected.
So how do we actually define the routes and the matching components in a server rendered app? That’s happening in the src/router-config.js file and the src/components/App.js file.
import React from 'react'
import { Home, About, NotFound } from './Components'

export const routes = [
   {
      'path':'/',
      'component': Home,
      'exact': true
   },
   {
      'path':'/about',
      'component': About
   },
   {
      'path':'*',
      'component': NotFound
   }
]
In the code block above, the exported routes array contains different object containing the different routes and their accompanying components. This will then be used in the src/components/App.js file below.
import React, { Component } from 'react'
import { Switch, Route, NavLink } from 'react-router-dom'
// The exported routes array from the router-config.js file is imported here to be used for the routes below
import { routes } from '../router-config'
import { NotFound } from '../Components'

export default class App extends Component {
  render() {
    return (
      <div>
          <header className="header container">
            <nav className="navbar">
                <div className="navbar-brand">
                    <NavLink to="/" activeClassName="active">
                        <span className="navbar-item">Home</span>
                    </NavLink>
                </div>

                <div className="navbar-end">
                    <NavLink to="/about" activeClassName="active">
                        <span className="navbar-item">About</span>
                    </NavLink>
                    <NavLink to="/somepage" activeClassName="active">
                        <span className="navbar-item">404 Page</span>
                    </NavLink>
                </div>

            </nav>
          </header>

          <div className="container">
              <Switch>
                  {/*The routes array is used here and is iterated through to build the different routes needed for the app*/}
                  {routes.map((route,index) => (
                      <Route key={index} path={route.path} component={route.component} exact={route.exact} />
                  ))}
                  <Route component={NotFound}/>
              </Switch>
          </div>
      </div>
    )
  }
}
In the code block above, the exported routes array from the previous file is imported to be used, and inside the Switch component, the routes array is then iterated through to build the different routes needed for the app.
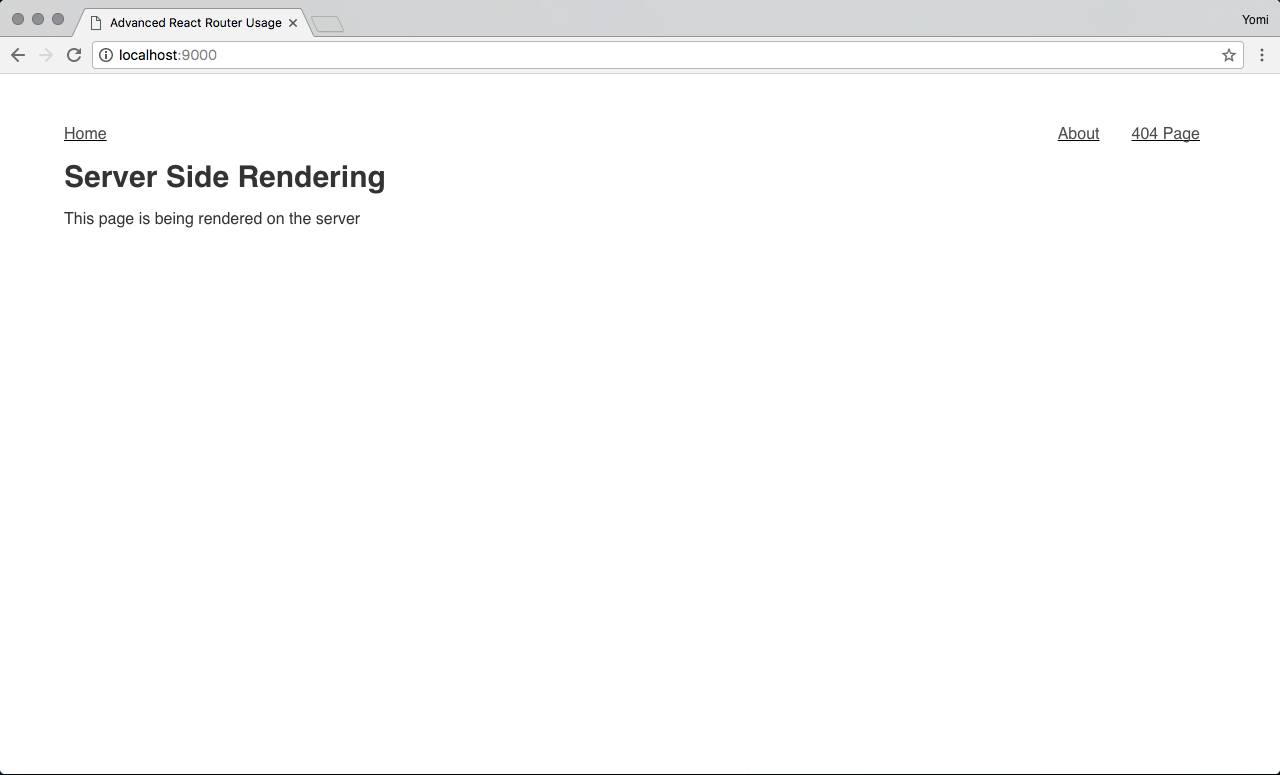
To see server-side rendering in action, run the command node server.js in your terminal to run the app in development mode. Once the app is up and running, navigate to http://localhost:9000 or whatever port the app is running on and the app should load fine and similar to the screenshot one below.
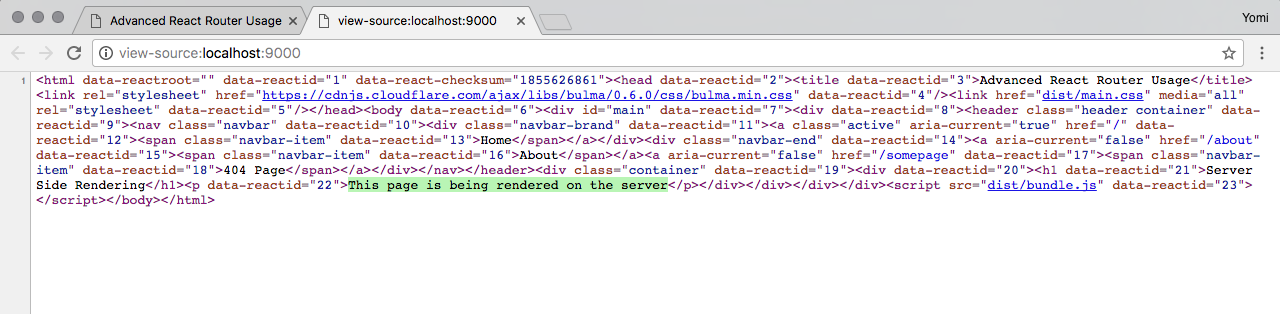
To check if the app is truly being rendered on the server-side, right click on the page and click on View Page Source and you’ll see that the content of the page is rendered fully as opposed to being rendered from a JavaScript file.
The codebase for this tutorial can be seen on this GitHub repo. There are different branches for each advanced concept. Feel free to browse through them and let me know what you think.
Install LogRocket via npm or script tag. LogRocket.init() must be called client-side, not
server-side
$ npm i --save logrocket

// Code:

import LogRocket from 'logrocket';
LogRocket.init('app/id');
// Add to your HTML:

<script src="https://cdn.lr-ingest.com/LogRocket.min.js"></script>
<script>window.LogRocket && window.LogRocket.init('app/id');</script>
Hey there, want to help make our blog better?
Join LogRocket’s Content Advisory Board. You’ll help inform the type of content we create and get access to exclusive meetups, social accreditation, and swag.
Sign up now
Not sure if low-code is right for your next project? This guide breaks down when to use it, when to avoid it, and how to make the right call.

Compare Firebase Studio, Lovable, and Replit for AI-powered app building. Find the best tool for your project needs.

Discover how to use Gemini CLI, Google’s new open-source AI agent that brings Gemini directly to your terminal.

This article explores several proven patterns for writing safer, cleaner, and more readable code in React and TypeScript.


