Enabling screen capture for users has become an integral part of the user experience in mobile apps. This functionality enables users to save or share the current state of an app’s interface to remember a memorable moment, share achievements with friends, or report issues to developers.

In this article, we will explore how to achieve screen capture in a React Native app using the react-native-view-shot library. This library streamlines the process of taking screenshots of specific views or the entire screen. Jump ahead:
react-native-view-shot?react-native-view-shotreact-native-view-shotreact-native-view-shotreact-native-view-shot library’s imperative APIreact-native-view-shot issuesWe’ll go through a practical demonstration of this library’s capabilities in this tutorial. You can check out the full code for our simple demo app on GitHub.
If you found this article by searching for a guide to implementing screen capture in React Native, then you may already have a use case in mind. However, if you’re just researching features or looking for creative ways to make your app more engaging, let’s discuss a few potential use cases.
In gaming apps, providing screen capture functionality allows users to share their scores, completed levels, and in-game achievements with friends on social media.
When reporting bugs or issues in an app, users can capture their screens to show the current state of the app at the time of — or as a result of — the problem they’re experiencing. This can help the app maintainers find or reproduce the issue.
Users can also take screen captures of things like products in ecommerce apps, listings in real estate apps, or lecture slides in educational apps to share with others.
These use cases are specific to screen capture functionality in an app. If you’re interested in working directly with a device’s camera in a React Native app instead, you may want to look into our guides on using React Native Camera or creating a native CameraView UI component.
react-native-view-shot?react-native-view-shot is by far the best-maintained library for implementing screen capture functionalities in React Native apps. It’s also highly customizable, so you can adjust it according to your needs.
There are a few other libraries available that deal with specific use cases related to screen capture in React Native apps. However, these libraries are either not as well-maintained as react-native-view-shot or do not provide the particular screen capture functionality we’re looking for in this tutorial.
For example, the react-native-record-screen library records the user’s whole screen rather than capturing a specific view. Meanwhile, the react-native-screenshot-detect library checks if the user took a screenshot with their device, but only works with iOS apps built with React Native.
If you want to take a snapshot of a view or entire screen, I recommend using react-native-view-shot. However, if you want to record the entire screen, then use react-native-record-screen.
For this article, we’re going to use react-native-view-shot to capture a screen and view it within the app.
react-native-view-shot in your React Native projectTo get started with the react-native-view-shot library in your app, you first need to install it. Fortunately, that’s as simple as opening your terminal, navigating to your project directory, and running one of the following commands:
//npm
$ npm install react-native-view-shot --save

//Yarn
$ yarn add react-native-view-shot
Once the installation is complete, you need to build the app once. This is because react-native-view-shot adds new native code to the app.
After the build is complete and installed on your device, you can start using the library to capture screens or views within your React Native app.
react-native-view-shotUsing react-native-view-shot is fairly straightforward. We’ll go through a more detailed demo shortly, but first, let’s see how this library works.
Start by importing the necessary components from React and the react-native-view-shot library:
import ViewShot from 'react-native-view-shot`;
import { useRef, useState } from "react";
Next, create a viewShot component and set its useRef to null. Any content rendered inside this component will be capturable as an image:
const viewShot = useRef(null);
...
<ViewShot ref={viewShot} style={styles.viewShot}></ViewShot>
Then, we will create a state to store the URI of the captured image:
const [uri, setUri] = useState("");
Now create a function to capture the contents of the viewShot component and save the resulting URI to the state:
const captureScreen = () => {
    viewShot.current.capture().then((uri) => {
      setUri(uri);
    });
};
Finally, we’ll use the uri stored in the state to display a preview of the captured image:
<View style={styles.previewContainer}>
    <Text>Preview</Text>
    <Image
      source={{ uri: uri }}
      style={styles.previewImage}
      resizeMode="contain"
    />
</View>
react-native-view-shotNow that we’ve seen how react-native-view-shot works, let’s explore a complete demo of how to use it in a simple React Native app. We’ll implement this library to allow the user to capture a specific view within the app and display a preview of the captured image:
import { useRef, useState } from "react";
import {
  Dimensions,
  Image,
  StyleSheet,
  Text,
  TouchableOpacity,
  View,
} from "react-native";
import ViewShot from "react-native-view-shot";
const ScreenCapture = () => {
  const viewShot = useRef(null);
  const [uri, setUri] = useState("");
  const captureScreen = () => {
    viewShot.current.capture().then((uri) => {
      setUri(uri);
    });
  };
  return (
    <View style={styles.container}>
      <ViewShot ref={viewShot} style={styles.viewShot}>
        <View style={{ width: 200, height: 200, backgroundColor: "red" }} />
      </ViewShot>
      <View style={styles.buttonContainer}>
        <TouchableOpacity onPress={captureScreen} style={styles.btn}>
          <Text style={styles.btnTxt}>CAPTURE</Text>
        </TouchableOpacity>
      </View>
      {uri ? (
        <View style={styles.previewContainer}>
          <Text>Preview</Text>
          <Image
            source={{ uri: uri }}
            style={styles.previewImage}
            resizeMode="contain"
          />
        </View>
      ) : null}
    </View>
  );
};
const SCREEN_WIDTH = Dimensions.get("screen").width;
const styles = StyleSheet.create({
  container: {
    flex: 1,
  },
  viewShot: {
    width: SCREEN_WIDTH,
    height: SCREEN_WIDTH,
  },
  buttonContainer: {
    alignSelf: "stretch",
    justifyContent: "center",
    alignItems: "center",
    marginTop: 10,
  },
  btn: {
    padding: 8,
  },
  btnTxt: {
    fontSize: 20,
    fontWeight: "bold",
  },
  //   previewContainer
  previewContainer: {
    flex: 1,
    justifyContent: "center",
    alignItems: "center",
    marginTop: 10,
    backgroundColor: "#000",
  },
  previewImage: { width: 200, height: 200, backgroundColor: "#fff" },
});
export default ScreenCapture;
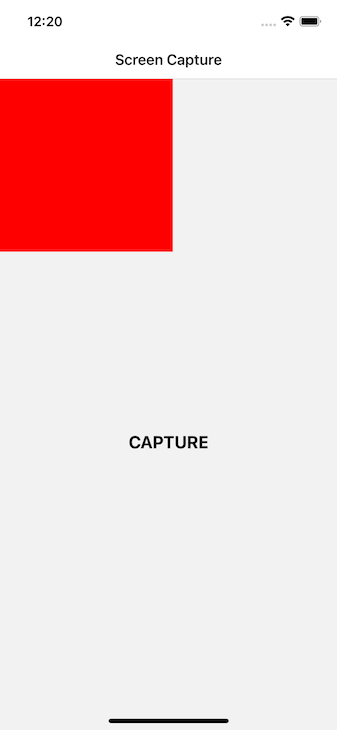
In this example, the user triggers the screen capture by pressing a button within the app. Here’s how the basic state of the app should look before the viewShot is captured:
The captured image is then displayed within the app itself rather than being saved to the device’s camera roll. The preview will look like so:
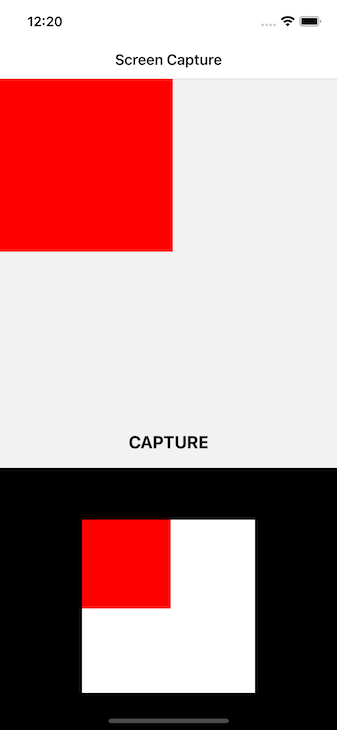
If the user wants to retake the image, they can simply press the CAPTURE button again to replace the previous capture.
Remember that react-native-view-shot doesn’t allow the app to capture the entire screen, only the content within the viewShot component. This means the captured view’s size depends on the viewShot component’s dimensions — in this case, the portion of the screen above the CAPTURE button.
You can change these dimensions by editing the viewShot component’s styles. For this example, the width and height of the viewShot are equal, allowing us to display the full preview under the CAPTURE button.
When using react-native-view-shot, the captured image is stored in the user’s device’s temporary storage. You can leverage another third-party library, like react-native-camera-roll, to allow the user to save the captured image to their device’s camera roll.
react-native-view-shot library’s imperative APIreact-native-view-shot also provides a lower-level imperative API with more customizability. You can set the format and quality of the captured image with this API:
captureRef(viewRef, {
  format: "jpg",
  quality: 0.8,
}).then(
  (uri) => console.log("Image can be accessed at: ", uri),
  (error) => console.error("Snapshot failed", error)
);
The available formats are png, jpg, and webm. When using the jpg format only, you can configure the screen capture quality to fall between the values of 0.0 and 1.0.
react-native-view-shot issuesWhile react-native-view-shot is the best-maintained option for snapshotting views in a React Native app, there are multiple open issues in the library’s GitHub repo. Some are still being looked into, but let’s take a look at the most commonly encountered issue below.
When using react-native-view-shot with React Native v0.72.0, trying to capture a screenshot results in the following error:
Failed to capture view snapshot
The library works completely fine with previous versions of React Native. For example, the demo we went through above was set up and tested on React Native v0.71.8.
For v0.72.0, you can resolve this issue by setting the collapsable prop to false like so:
collapsable={false}
Note that this is a temporary solution and might not work as expected. You can learn more or check for more recent updates via the active issue on GitHub.
In this article, we explored how to capture screens or specific views within a React Native app using the react-native-view-shot library. You can see the full code for our simple demo on GitHub.
Enabling users to capture and share app content can enhance user engagement, improve bug reporting, and enable a variety of creative and functional use cases. Please be sure to consult the react-native-view-shot library’s docs for the most up-to-date information and additional features.
From gaming achievements to educational tutorials, the applications of screen capture are diverse. Following the steps outlined here, you can easily integrate screen capture capabilities into your React Native projects and provide an enriched user experience.
Also, while this library doesn’t require direct access to the user’s camera, microphone, or other features, you may want to check out our guide to managing app permissions in React Native depending on your use case.

LogRocket's Galileo AI watches sessions for you and and surfaces the technical and usability issues holding back your React Native apps.
LogRocket also helps you increase conversion rates and product usage by showing you exactly how users are interacting with your app. LogRocket's product analytics features surface the reasons why users don't complete a particular flow or don't adopt a new feature.
Start proactively monitoring your React Native apps — try LogRocket for free.

Learn how to protect full-stack projects from NPM supply chain attacks with a practical security checklist.

Explore 15 essential MCP servers for web developers to enhance AI workflows with tools, data, and automation.

Learn how contrast-color() automatically picks accessible text colors using native CSS, without JavaScript.

Learn how to build a harness-style AI workflow using Claude Code with specialized Dev, QE, and Ops subagents, gated handoffs, MCP telemetry, and LEARNING.md.
Hey there, want to help make our blog better?
Join LogRocket’s Content Advisory Board. You’ll help inform the type of content we create and get access to exclusive meetups, social accreditation, and swag.
Sign up now

