Meta tags are special HTML tags that offer more details about your webpage to search engines and website visitors.

They are vital for search engine optimization (SEO). Not only that — have you ever seen the nice preview that appears when you share a link on social platforms like Facebook or Twitter? That is possible thanks to meta tags.
If you want your app to stand out in search results and on social media and messaging platforms, you need to set up SEO meta tags. In particular, you should always specify the meta tags of the Open Graph protocol, which is the most used protocol to provide information about any webpage on the web.
There are two major ways to incorporate meta tags for SEO in a React app. If your meta tags are static, just write them in the index.html of your app and you’re ready.
If you want to set up dynamic meta tags based on different URLs in your project (e.g., /home, /about, /detail?id=1, /detail?id=2), do it on the server side. Web crawlers don’t always execute JavaScript code when examining a webpage, so if you want to make sure that they read your meta tags, you need to set them up before the browser receives the page.
And now, here comes the question that brought you here: What if I don’t have server-side rendering (SSR) for my app? In this article, we’ll see a simple and effective solution applied to this real-world scenario.
Let’s assume you have a blog created with Create React App (CRA). Your blog has two routes:
/ the homepage, where users can see a list of posts/post?id=<POST-ID>, which leads to a specific blog postThe second route is where we’ll need to place dynamic meta tags because we want to change the og:title, og:description, and og:image tags based on the <POST-ID> passed as a query string.
To achieve this, we’ll serve our app from a Node/Express backend. Before returning the response to the browser, we’ll inject the desired tags in the <head> of the page.
Create the project by running npx create-react-app dynamic-meta-tags. I’ll keep the starter template of CRA so that we focus directly on the point of our interest.
Before we move to the backend code, we need to add the tag placeholders in the index.html page. Later, we’ll replace these placeholders with the post information before returning the page.
  <head>
    ...
    <meta name="description" content="__META_DESCRIPTION__"/>
    <meta name="og:title" content="__META_OG_TITLE__"/>
    <meta name="og:description" content="__META_OG_DESCRIPTION__"/>
    <meta name="og:image" content="__META_OG_IMAGE__"/>
    ...
  </head>
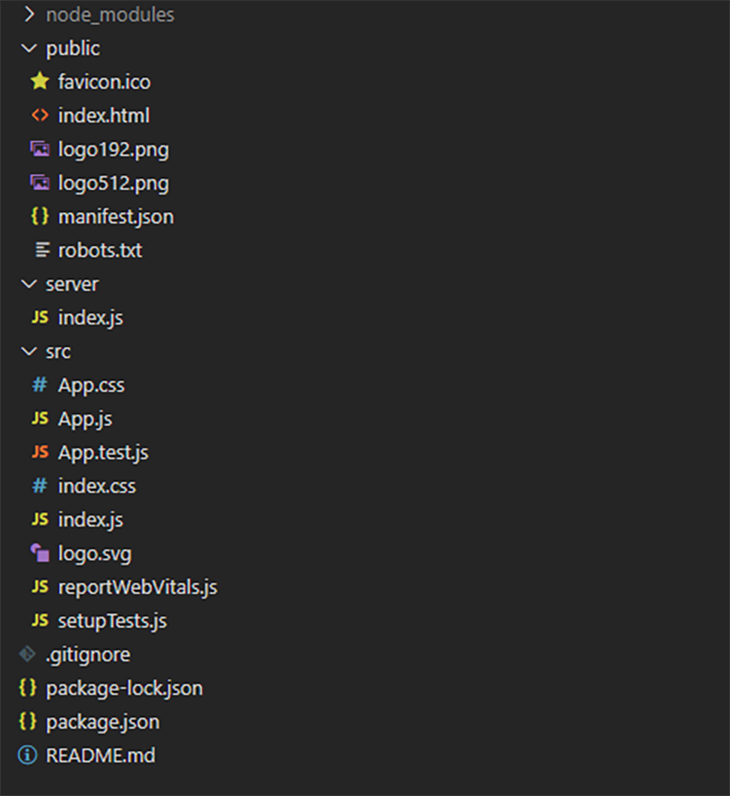
Add a server folder at the same level as the src folder and create a new index.js file. This is what the project structure should look like:
Install Express with npm i express and open the server/index.js file. Let’s write our backend.
The first thing to do is to configure middleware to serve static resources from the build folder.
const express = require('express');
const app = express();
const path = require('path');
const PORT = process.env.PORT || 3000;

// static resources should just be served as they are
app.use(express.static(
    path.resolve(__dirname, '..', 'build'),
    { maxAge: '30d' },
));
Then, we prepare the server to listen on the defined port.
app.listen(PORT, (error) => {
    if (error) {
        return console.log('Error during app startup', error);
    }
    console.log("listening on " + PORT + "...");
});
For testing, I created a static list of posts in server/stub/posts.js. As you can see from the code below, each post has a title, a description, and a thumbnail. getPostById is the function we’ll use to get a specific post from the list.
const posts = [
    {
        title: "Post #1",
        description: "This is the first post",
        thumbnail: "https://images.unsplash.com/photo-1593642532400-2682810df593?ixlib=rb-1.2.1&ixid=MnwxMjA3fDB8MHxwaG90by1wYWdlfHx8fGVufDB8fHx8&auto=format&fit=crop&w=750&q=80"
    },
    {
        title: "Post #2",
        description: "This is the second post",
        thumbnail: "https://images.unsplash.com/photo-1625034712314-7bd692b60ecb?ixid=MnwxMjA3fDB8MHxwaG90by1wYWdlfHx8fGVufDB8fHx8&ixlib=rb-1.2.1&auto=format&fit=crop&w=750&q=80"
    },
    {
        title: "Post #3",
        description: "This is the third post",
        thumbnail: "https://images.unsplash.com/photo-1625034892070-6a3cc12edb42?ixid=MnwxMjA3fDB8MHxwaG90by1wYWdlfHx8fGVufDB8fHx8&ixlib=rb-1.2.1&auto=format&fit=crop&w=766&q=80"
    }
]
module.exports.getPostById = id => posts[id-1];
Naturally, in a real project, this data can be retrieved from a database or another remote source.
Now we can focus on the main handler.
 // here we serve the index.html page
app.get('/*', (req, res, next) => {
  // TODO
});
Here is what we’re going to do:
index.html page from the build folderThe first step is to load the index page into memory. To do this, we take advantage of the readFile function from the fs module.
const indexPath  = path.resolve(__dirname, '..', 'build', 'index.html');
app.get('/*', (req, res, next) => {
    fs.readFile(indexPath, 'utf8', (err, htmlData) => {
        if (err) {
            console.error('Error during file reading', err);
            return res.status(404).end()
        }
        // TODO get post info

        // TODO inject meta tags
    });
});
Once we get it, we use getPostById to get the requested post based on the ID passed as a query string.
app.get('/*', (req, res, next) => {
    fs.readFile(indexPath, 'utf8', (err, htmlData) => {
        if (err) {
            console.error('Error during file reading', err);
            return res.status(404).end()
        }
        // get post info
        const postId = req.query.id;
        const post = getPostById(postId);
        if(!post) return res.status(404).send("Post not found");

        // TODO inject meta tags
    });
});
Next, we replace the placeholders with the post title, description, and thumbnail.
app.get('/*', (req, res, next) => {
    fs.readFile(indexPath, 'utf8', (err, htmlData) => {
        if (err) {
            console.error('Error during file reading', err);
            return res.status(404).end()
        }
        // get post info
        const postId = req.params.id;
        const post = getPostById(postId);
        if(!post) return res.status(404).send("Post not found");

        // inject meta tags
        htmlData = htmlData.replace(
            "<title>React App</title>",
            `<title>${post.title}</title>`
        )
        .replace('__META_OG_TITLE__', post.title)
        .replace('__META_OG_DESCRIPTION__', post.description)
        .replace('__META_DESCRIPTION__', post.description)
        .replace('__META_OG_IMAGE__', post.thumbnail)
        return res.send(htmlData);
    });
});
We’ve also replaced the default page title with the post title.
Finally, we send the HTML data to the client.
To recap, this is what our server/index.js should look like:
const express = require('express');
const path = require('path');
const fs = require("fs");
const { getPostById } = require('./stub/posts');
const app = express();

const PORT = process.env.PORT || 3000;
const indexPath  = path.resolve(__dirname, '..', 'build', 'index.html');

// static resources should just be served as they are
app.use(express.static(
    path.resolve(__dirname, '..', 'build'),
    { maxAge: '30d' },
));
// here we serve the index.html page
app.get('/*', (req, res, next) => {
    fs.readFile(indexPath, 'utf8', (err, htmlData) => {
        if (err) {
            console.error('Error during file reading', err);
            return res.status(404).end()
        }
        // get post info
        const postId = req.query.id;
        const post = getPostById(postId);
        if(!post) return res.status(404).send("Post not found");

        // inject meta tags
        htmlData = htmlData.replace(
            "<title>React App</title>",
            `<title>${post.title}</title>`
        )
        .replace('__META_OG_TITLE__', post.title)
        .replace('__META_OG_DESCRIPTION__', post.description)
        .replace('__META_DESCRIPTION__', post.description)
        .replace('__META_OG_IMAGE__', post.thumbnail)
        return res.send(htmlData);
    });
});
// listening...
app.listen(PORT, (error) => {
    if (error) {
        return console.log('Error during app startup', error);
    }
    console.log("listening on " + PORT + "...");
});
In order to run the app, we first need to generate a new build with npm run build, and then we can run the server with node server/index.js.
Alternatively, you can define a new script in your package.json file to automate this task. As shown below, I called it “server,” so now I can run the app with npm run server.
"scripts": {
    "start": "react-scripts start",
    "build": "react-scripts build",
    "test": "react-scripts test",
    "eject": "react-scripts eject",
    "server" : "npm run build&&node server/index.js"
}
If everything works, your app is now running on http://localhost:3000. In my case, it just displays the default homepage of CRA.
Now, let’s test what really matters to us: meta tags!
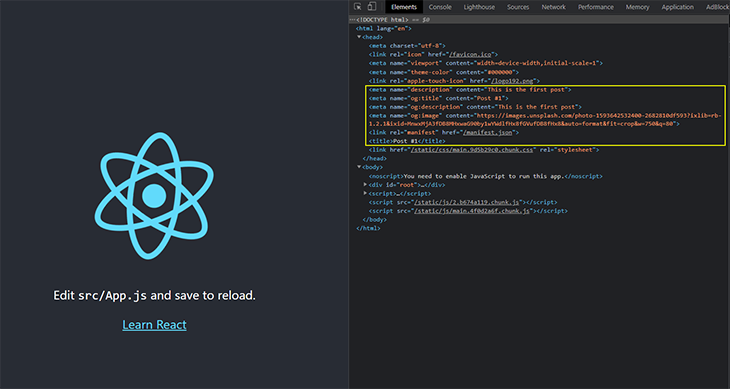
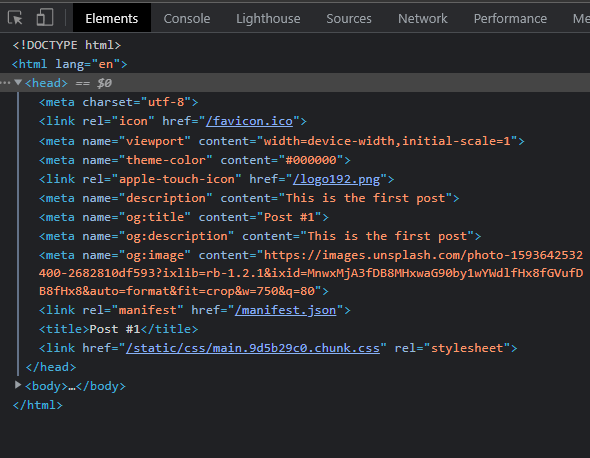
You should get the correct meta tags for the first post by opening the URL http://localhost:3000/post?id=1. You can see them by opening the Inspect panel to view the page and looking in the <head> tag.
The same should happen for post 2 and post 3.
If you need to test your page previews before you’ve published your app, you can use platforms like opengraph.xyz that let you test the preview by examining the meta tags on your page. In order to test it, we need a publicly accessible URL.
To get a public URL for our local environment, we can use a tool called localtunnel. After installing it with npm i localtunnel, we can run it by executing lt --port 3000. It will connect to the tunnel server, set up the tunnel, and give us the URL to use for our testing.
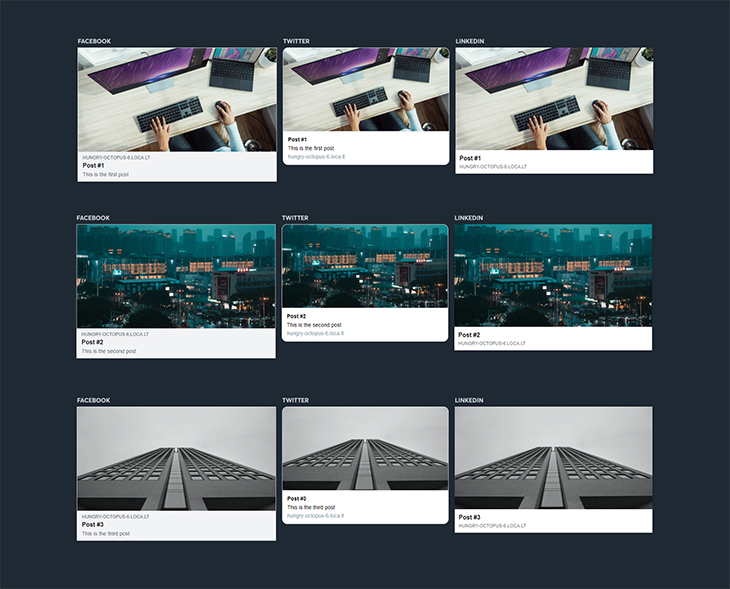
With this in place, we can test on opengraph.xyz. If you did everything right, you should see something like this:
I’ll describe how to deploy the app on Heroku, but you can deploy it on any platform capable of hosting a Node app. I use Heroku because it makes the deployment of the app easy.
In order to proceed, you must have:
After creating an account and installing the CLI, create a new file called Procfile at the root level of your app and write the command web: ENV_SILENT=true npm run server in the file. Commit and push all the changes to your repo:
git add .
git commit -m “Add Procfile”
git push
Now that our Procfile is ready, we can deploy the app on Heroku. First, log into Heroku by running heroku login in your terminal. Once you’ve logged in, run heroku create to create a new Heroku app. At the end of the process, you will see the URL of your newly created app (in my case, https://whispering-depths-73452.herokuapp.com).
Lastly, we push our main branch to Heroku with git push work main.
By opening the previous URL, you should see your app’s homepage. If you navigate here, you can see that it set the meta tags correctly.
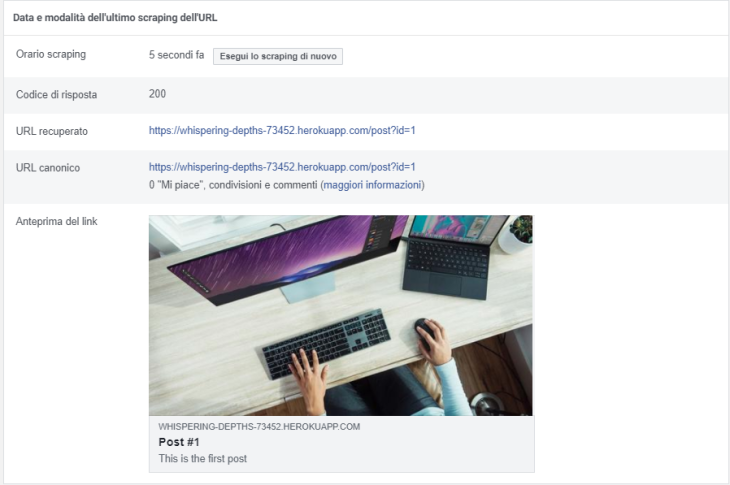
If you want to test the page preview on a specific platform, there are official tools like Facebook Debugger and Twitter Debugger that give you useful tips about your meta tags. In the following image, you can see a test of our page on Facebook Debugger.
We’ve seen how to dynamically add meta tags to a React app. Of course, what I used as an example is just one of the scenarios in which you can apply this solution. You can find the support repository on my GitHub.
Be aware, the backend code I wrote is focused only on adding the meta tags so that things were more straightforward for this article. If you plan to use this solution in production, make sure you add at least the basic security mechanism to avoid vulnerabilities like XSS and CSRF. On the Express website, you can find an entire section dedicated to security best practices.
Install LogRocket via npm or script tag. LogRocket.init() must be called client-side, not
server-side
$ npm i --save logrocket

// Code:

import LogRocket from 'logrocket';
LogRocket.init('app/id');
// Add to your HTML:

<script src="https://cdn.lr-ingest.com/LogRocket.min.js"></script>
<script>window.LogRocket && window.LogRocket.init('app/id');</script>

Learn how to set up Meilisearch, index documents, and build keyword, semantic, and hybrid search with AI-powered retrieval.

Compare pnpm and npm across security defaults, disk usage, dependency strictness, and workspace policy to decide which package manager fits your project.

I migrated 20 production-style components from Tailwind to StyleX. Here’s what the data showed about LOC, CSS bundle size, build time, and type safety.

A guide for using JWT authentication to prevent basic security issues while understanding the shortcomings of JWTs.
Hey there, want to help make our blog better?
Join LogRocket’s Content Advisory Board. You’ll help inform the type of content we create and get access to exclusive meetups, social accreditation, and swag.
Sign up now

