Editor’s note: This article was last updated on 27 April 2022 to reflect the most recent updates to Gatsby.

Gatsby is a free, open source framework based on React that helps developers build blazing-fast websites and apps using modern web technologies.
Gatsby comes shipped with features like server-side rendering, providing the ability to generate static progressive web apps (PWAs). You also get code and data splitting out-of-the-box. Gatsby loads only the critical HTML, CSS, data, and JavaScript so that your site loads as fast as possible.
TypeScript is a superset of JavaScript that primarily provides optional static typing, classes, and interfaces. With TypeScript, you can catch bugs early, thereby making you a more efficient developer, while at the same time leveraging the already existing JavaScript community.
In this article, we’ll take one of the starter Gatsby projects and turn it into a TypeScript app. You can follow along with the repository for the Gatsby app. Let’s get started!
The Replay is a weekly newsletter for dev and engineering leaders.
Delivered once a week, it's your curated guide to the most important conversations around frontend dev, emerging AI tools, and the state of modern software.
To set up the Gatsby app, you first need to install the Gatsby CLI, which lets you quickly create new Gatsby-powered sites and run commands for developing Gatsby sites. You can install Gatsby globally with Yarn by running the command below:
yarn global add gatsby-cli
Alternately, you can use npm:
npm install -g gatsby-cli
Next, we’ll create a Gatsby site using the Gatsby CLI tool. To start, we’ll grab one of the starter projects, the Gatsby blog starter. The starter ships with the main Gatsby configuration files you’ll need to get up and running. It also uses GraphQL to fetch data for the blog:
gatsby new my-blog-starter https://github.com/gatsbyjs/gatsby-starter-blog
The command above pulls all the files for the blog into a folder and then installs all the necessary required dependencies for the app to work. You can navigate into your new site’s directory and start it up to see if everything is working as expected. Run the following commands in your terminal:
cd my-blog-starter
yarn develop
npm run develop or gatsby develop should also work if you are not using Yarn.
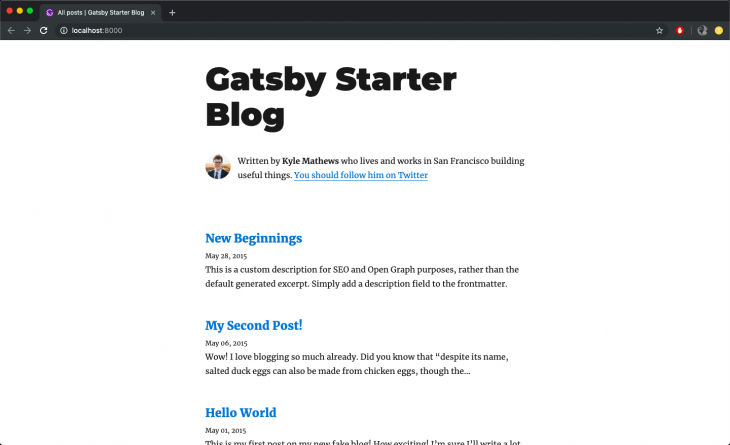
Once the yarn develop command is completed, you can open up a new tab in your browser and navigate to http://localhost:8000 to see the Gatsby app in action:
GraphQL is a query language that allows you to pull data into your website. Gatsby uses GraphQL as its interface for managing site data. Before we see how easily Gatsby incorporates GraphQL, let’s take a look at some of the files and folders that ship with Gatsby and what they do.
The /src directory contains all of the code related to what is displayed on the frontend of your site, like your site header or a page template. prettierrc is a configuration file for Prettier, a tool that helps keep the formatting of your code consistent.
In the gatsby-browser.js file, Gatsby expects to find any usage of the Gatsby browser APIs, which allow customization and extension of the default Gatsby settings affecting the browser.
The gatsby-config.js is the main configuration file for a Gatsby site. Here, you can specify information about your site, or metadata, like the site title, description, the Gatsby plugins you’d like to include, etc.
In the gatsby-node.js file, Gatsby expects to find any usage of the Gatsby Node APIs. These allow customization and extension of the default Gatsby settings affecting pieces of the site build process.
Finally, the gatsby-ssr.js file is where Gatsby expects to find usage of the Gatsby server-side rendering APIs, if any. These allow customization of default Gatsby settings affecting server-side rendering.
Gatsby also supports other methods of fetching data, so you don’t have to use GraphQL. You can use the createPages API to pull unstructured data into Gatsby pages directly, rather than through the GraphQL data layer. There are two ways that Gatsby can fetch data from GraphQL, the Page Query and StaticQuery.
We can query data in pages with GraphQL using Gatsby’s graphql tag. In the gatsby-config file, at the top of the file in lines lines two through ten, information about the site is declared, specifically, the siteMetadata object:
siteMetadata: {
  title: `Gatsby Starter Blog`,
  author: `Kyle Mathews`,
  description: `A starter blog demonstrating what Gatsby can do.`,
  siteUrl: `https://gatsby-starter-blog-demo.netlify.com/`,
  social: {
    twitter: `kylemathews`,
  },
},
Let’s see how to fetch the data above in a component using GraphQL. The 404.js file in the src/pages folder is an example of how to use page queries to fetch data using GraphQL. If you scroll down to the bottom of the file in lines 24 to 32, you should see a code snippet similar to the one below:
export const pageQuery = graphql`
  query {
    site {
      siteMetadata {
        title
      }
    }
  }
`
The code snippet above is a GraphQL query, and we are fetching the site’s siteMetadata info, specifically the title of the file. The data retrieved from the query above can then be used in the render function of the component, as seen below in the same file:
const { data } = this.props
const siteTitle = data.site.siteMetadata.title
You can query data in Gatsby using StaticQuery, a newer API at the time of writing that allows components to retrieve data via a GraphQL query. In addition to using StaticQuery, we’ll also use the Hooks version of StaticQuery called useStaticQuery.
The seo.js file located in the src/components folder is an example of a component using StaticQuery:
import { useStaticQuery, graphql } from "gatsby"

// ...

function SEO({ description, lang, meta, title }) {
  const { site } = useStaticQuery(
    graphql`
      query {
        site {
          siteMetadata {
            title
            description
            author
          }
        }
      }
    `
  )

  // ...
}
As you can see in the code block above, we first import the useStaticQuery method from Gatsby. The useStaticQuery method allows your React components to retrieve data via a GraphQL query that will be parsed, evaluated, and injected into the component.
The GraphQL query above queries for the site title, description, and author from the gatsby-config.js file.
To integrate TypeScript into the Gatsby app, we’ll need to install some dependencies:
yarn add gatsby-plugin-typescript
yarn add typescript --dev
or
npm install gatsby-plugin-typescript
npm install --save-dev typescript
gatsby-plugin-typescript is the Gatsby plugin required to change all .js files to .tsx files. It’s responsible for type checking and transpiling TypeScript code.
Once the dependencies are installed, we can add gatsby-plugin-typescript to the gatsby-config.js file after gatsby-plugin-react-helmet:
`gatsby-plugin-react-helmet`,
    `gatsby-plugin-typescript`,
Next, add eslintrc.js and tsconfig.json to the root directory of the codebase. eslintrc.js contains the set of rules that will help with linting TypeScript files, and tsconfig.json contains the set of rules that help determine the behavior of TypeScript in the project. The code below goes in eslintrc.js:
module.exports = {
  parser: '@typescript-eslint/parser', // Specifies the ESLint parser
  extends: [
    'eslint:recommended',
    'plugin:react/recommended',
    'plugin:@typescript-eslint/recommended',
    'prettier/@typescript-eslint',
    'plugin:prettier/recommended'
  ],
  settings: {
    react: {
      version: 'detect'
    }
  },
  env: {
    browser: true,
    node: true,
    es6: true
  },
  plugins: ['@typescript-eslint', 'react'],
  parserOptions: {
    ecmaFeatures: {
      jsx: true
    },
    ecmaVersion: 2018, // Allows for the parsing of modern ECMAScript features
    sourceType: 'module' // Allows for the use of imports
  },
  rules: {
    'react/prop-types': 'off', // Disable prop-types as we use TypeScript for type checking
    '@typescript-eslint/explicit-function-return-type': 'off'
  },
  overrides: [
    // Override some TypeScript rules just for .js files
    {
      files: ['*.js'],
      rules: {
        '@typescript-eslint/no-var-requires': 'off' //
      }
    }
  ]
};
The code below goes in tsconfig.json:
// tsconfig.json
{
  "compilerOptions": {
    "module": "commonjs",
    "target": "esnext",
    "jsx": "preserve",
    "lib": ["dom", "esnext"],
    "strict": true,
    "noEmit": true,
    "isolatedModules": true,
    "esModuleInterop": true,
    "noUnusedLocals": false,
    "allowJs": true
  },
  "exclude": ["node_modules", "public", ".cache"]
}
The .eslintrc.js file uses some packages that we’ll need to help with linting our TypeScript project. You can install them with the command below:
yarn add -D @typescript-eslint/eslint-plugin @typescript-eslint/parser @types/react-helmet eslint
or
npm install --save-dev @typescript-eslint/eslint-plugin @typescript-eslint/parser eslint @types/react-helmet --force
Additionally, we need to add a script to the package.json file that we can use to carry out type checking across the whole codebase:
"scripts": {
    // ...
    "type-check": "tsc --noEmit"
  }
Now, we can rename the necessary .js files to .tsx files. In addition to renaming the files, we define TypeScript interfaces for any props.
bio.jsLet’s start with the bio.js file. Rename the file or simply change the extension so that it’s now src/components/bio.tsx.
layout.jsNext, we change the extension of the layout.js file to .tsx. Open the file and edit it with the code snippet below:
import * as React from "react"
import { Link } from "gatsby"

interface Props {
  location: Location
  title: string
  children?: any
}
const Layout = ({ location, title, children }: Props) => {
  const rootPath = `${__PATH_PREFIX__}/`
  const isRootPath = location.pathname === rootPath
  let header
  if (isRootPath) {
    header = (
      <h1 className="main-heading">
        <Link to="/">{title}</Link>
      </h1>
    )
  } else {
    header = (
      <Link className="header-link-home" to="/">
        {title}
      </Link>
    )
  }
  return (
    <div className="global-wrapper" data-is-root-path={isRootPath}>
      <header className="global-header">{header}</header>
      <main>{children}</main>
      <footer>
        © {new Date().getFullYear()}, Built with
        {` `}
        <a href="https://www.gatsbyjs.com">Gatsby</a>
      </footer>
    </div>
  )
}
export default Layout
In the code block above, we created an interface for the component’s props. In TypeScript, interfaces help to shape the specifications of an entity. An interface usually contains the name of all the properties along with their types.
seo.jsChange the extension of the seo.js file to .tsx, then open the file and edit it with the code snippet below:
/**
 * SEO component that queries for data with
 *  Gatsby's useStaticQuery React hook
 *
 * See: https://www.gatsbyjs.com/docs/use-static-query/
 */
import * as React from "react"
import PropTypes from "prop-types"
import { Helmet } from "react-helmet"
import { useStaticQuery, graphql } from "gatsby"

interface Props {
  description?: string
  lang?: string
  meta?: []
  title: string
}
interface Meta {
  property?: string,
  name?: string,
  content: string
}
const Seo = ({ description, lang, meta, title }:Props) => {
  const { site } = useStaticQuery(
    graphql`
      query {
        site {
          siteMetadata {
            title
            description
            social {
              twitter
            }
          }
        }
      }
    `
  )
  const metaDescription = description || site.siteMetadata.description
  const defaultTitle = site.siteMetadata?.title
  let typeSafeMeta: Array<Meta>
  if (meta instanceof Array){
    typeSafeMeta = meta
  } else {
    typeSafeMeta = []
  }
  return (
    <Helmet
      htmlAttributes={{
        lang,
      }}
      title={title}
      titleTemplate={defaultTitle ? `%s | ${defaultTitle}` : ''}
      meta={[
        {
          name: `description`,
          content: metaDescription,
        },
        {
          property: `og:title`,
          content: title,
        },
        {
          property: `og:description`,
          content: metaDescription,
        },
        {
          property: `og:type`,
          content: `website`,
        },
        {
          name: `twitter:card`,
          content: `summary`,
        },
        {
          name: `twitter:creator`,
          content: site.siteMetadata?.social?.twitter || ``,
        },
        {
          name: `twitter:title`,
          content: title,
        },
        {
          name: `twitter:description`,
          content: metaDescription,
        },
        ...typeSafeMeta
      ]}
    />
  )
}
Seo.defaultProps = {
  lang: `en`,
  meta: [],
  description: ``,
}
Seo.propTypes = {
  description: PropTypes.string,
  lang: PropTypes.string,
  meta: PropTypes.arrayOf(PropTypes.object),
  title: PropTypes.string.isRequired,
}
export default Seo
Like in the layout.tsx file, we’ve also defined an interface for the component’s props and meta tag array along with some minor tweaks to make sure we comply with the Helmet prop types.
404.jsNext, we navigate to the 404.js file. Navigate to the src/pages folder, change the extension to .tsx, then open the file and edit it with the code snippet below:
import * as React from "react"
import { graphql } from "gatsby"
import Layout from "../components/layout"
import Seo from "../components/seo"
interface Props {
data: {
site: {
siteMetadata: {
title: string
}
}
}
location?: any
}
const NotFoundPage = ({ data, location }: Props) => {
const siteTitle = data.site.siteMetadata.title
return (
<Layout location={location} title={siteTitle}>
<Seo title="404: Not Found" />
<h1>404: Not Found</h1>
<p>You just hit a route that doesn't exist... the sadness.</p>
</Layout>
)
}
export default NotFoundPage
export const pageQuery = graphql`
query {
site {
siteMetadata {
title
}
}
}
`
In the code block above, we defined an interface for the component’s props.
index.jsNext, we change the extension in the index.js file to .tsx, then open the file and edit it with the code snippet below:
import * as React from "react"
import { Link, graphql } from "gatsby"
import Bio from "../components/bio"
import Layout from "../components/layout"
import Seo from "../components/seo"

interface Props {
  data: {
    allMarkdownRemark: any
    site: {
      siteMetadata: {
        title: string
      }
    }
  },
  location?: any
}
const BlogIndex = ({ data, location }:Props) => {
  const siteTitle = data.site.siteMetadata?.title || `Title`
  const posts = data.allMarkdownRemark.nodes
  if (posts.length === 0) {
    return (
      <Layout location={location} title={siteTitle}>
        <Seo title="All posts" />
        <Bio />
        <p>
          No blog posts found. Add markdown posts to "content/blog" (or the
          directory you specified for the "gatsby-source-filesystem" plugin in
          gatsby-config.js).
        </p>
      </Layout>
    )
  }
  return (
    <Layout location={location} title={siteTitle}>
      <Seo title="All posts" />
      <Bio />
      <ol style={{ listStyle: `none` }}>
        {posts.map((post:any) => {
          const title = post.frontmatter.title || post.fields.slug
          return (
            <li key={post.fields.slug}>
              <article
                className="post-list-item"
                itemScope
                itemType="http://schema.org/Article"
              >
                <header>
                  <h2>
                    <Link to={post.fields.slug} itemProp="url">
                      <span itemProp="headline">{title}</span>
                    </Link>
                  </h2>
                  <small>{post.frontmatter.date}</small>
                </header>
                <section>
                  <p
                    dangerouslySetInnerHTML={{
                      __html: post.frontmatter.description || post.excerpt,
                    }}
                    itemProp="description"
                  />
                </section>
              </article>
            </li>
          )
        })}
      </ol>
    </Layout>
  )
}
export default BlogIndex
export const pageQuery = graphql`
  query {
    site {
      siteMetadata {
        title
      }
    }
    allMarkdownRemark(sort: { fields: [frontmatter___date], order: DESC }) {
      nodes {
        excerpt
        fields {
          slug
        }
        frontmatter {
          date(formatString: "MMMM DD, YYYY")
          title
          description
        }
      }
    }
  }
`
As seen in the previous code blocks, we defined an interface for the component’s prop and also added an any type in our map of posts to avoid errors.
blog-post.jsFor the blog-post.js file in the src/components folder, we’ll have to define an interface for the props. Change the extension to .tsx, then open the file and edit it with the code snippet below:
import * as React from "react"
import { Link, graphql } from "gatsby"
import Bio from "../components/bio"
import Layout from "../components/layout"
import Seo from "../components/seo"

interface Props {
  data: {
    markdownRemark: any
    site: {
      siteMetadata: {
        title: string
      }
    }
  }
  pageContext?: any,
  location?: any
}
const BlogPostTemplate = ({ data, location }) => {
  const post = data.markdownRemark
  const siteTitle = data.site.siteMetadata?.title || `Title`
  const { previous, next } = data
  return (
    <Layout location={location} title={siteTitle}>
      <Seo
        title={post.frontmatter.title}
        description={post.frontmatter.description || post.excerpt}
      />
      <article
        className="blog-post"
        itemScope
        itemType="http://schema.org/Article"
      >
        <header>
          <h1 itemProp="headline">{post.frontmatter.title}</h1>
          <p>{post.frontmatter.date}</p>
        </header>
        <section
          dangerouslySetInnerHTML={{ __html: post.html }}
          itemProp="articleBody"
        />
        <hr />
        <footer>
          <Bio />
        </footer>
      </article>
      <nav className="blog-post-nav">
        <ul
          style={{
            display: `flex`,
            flexWrap: `wrap`,
            justifyContent: `space-between`,
            listStyle: `none`,
            padding: 0,
          }}
        >
          <li>
            {previous && (
              <Link to={previous.fields.slug} rel="prev">
                ← {previous.frontmatter.title}
              </Link>
            )}
          </li>
          <li>
            {next && (
              <Link to={next.fields.slug} rel="next">
                {next.frontmatter.title} →
              </Link>
            )}
          </li>
        </ul>
      </nav>
    </Layout>
  )
}
export default BlogPostTemplate
export const pageQuery = graphql`
  query BlogPostBySlug(
    $id: String!
    $previousPostId: String
    $nextPostId: String
  ) {
    site {
      siteMetadata {
        title
      }
    }
    markdownRemark(id: { eq: $id }) {
      id
      excerpt(pruneLength: 160)
      html
      frontmatter {
        title
        date(formatString: "MMMM DD, YYYY")
        description
      }
    }
    previous: markdownRemark(id: { eq: $previousPostId }) {
      fields {
        slug
      }
      frontmatter {
        title
      }
    }
    next: markdownRemark(id: { eq: $nextPostId }) {
      fields {
        slug
      }
      frontmatter {
        title
      }
    }
  }
`
Before running the app again, we need to edit the gatsby-node.js file. In that file, we declare the path of the component used to render the blog post page. We’ll need to change the extension of that file from .js to .tsx. Open up the gatsby-node.js file on line seven and edit it with the code below:
const blogPost = path.resolve(`./src/templates/blog-post.tsx`)
When that’s done, restart the Gatsby app and try checking out the blog at localhost:8000. It should be working fine now!
In this article, we looked at Gatsby and its usage with GraphQL and TypeScript. We saw how to use interfaces to structure data, or props, for components. We also learned how to fetch data in Gatsby apps using GraphQL with either page queries or StaticQuery. I hope you enjoyed this article, and happy coding!

LogRocket lets you replay user sessions, eliminating guesswork by showing exactly what users experienced. It captures console logs, errors, network requests, and pixel-perfect DOM recordings — compatible with all frameworks, and with plugins to log additional context from Redux, Vuex, and @ngrx/store.
With Galileo AI, you can instantly identify and explain user struggles with automated monitoring of your entire product experience.
Modernize how you understand your web and mobile apps — start monitoring for free.
While GraphQL has some features for debugging requests and responses, making sure GraphQL reliably serves resources to your production app is where things get tougher. If you’re interested in ensuring network requests to the backend or third party services are successful, try LogRocket.

LogRocket lets you replay user sessions, eliminating guesswork around why bugs happen by showing exactly what users experienced. It captures console logs, errors, network requests, and pixel-perfect DOM recordings — compatible with all frameworks.
LogRocket's Galileo AI watches sessions for you, instantly aggregating and reporting on problematic GraphQL requests to quickly understand the root cause. In addition, you can track Apollo client state and inspect GraphQL queries' key-value pairs.

TSRX adds first-class control flow, conditional hooks, and scoped styles to React via a TypeScript compiler extension — no new framework required.

Learn how to build a full React Native auth system using Better Auth and Expo — with email/password login, Google OAuth, session persistence, and protected routes.

Compare the top AI development tools and models of June 2026. View updated rankings, feature breakdowns, and find the best fit for you.

Learn how Bloom filters reduce database lookups for username availability checks while preserving correctness at scale.
Would you be interested in joining LogRocket's developer community?
Join LogRocket’s Content Advisory Board. You’ll help inform the type of content we create and get access to exclusive meetups, social accreditation, and swag.
Sign up now

