Serverless architecture has been one of the hot points of discussion concerning software development and deployment in recent years. This tutorial explains the concept of implementing serverless architecture in a Django app using Zappa and Amazon Web Services (AWS) Lambda.

To follow along with this tutorial, Zappa assumes you have the following:
To go serverless simply means that you no longer need to manually maintain your own servers. Instead, you subscribe to a platform such as AWS Lambda that manages the workaround infrastructure for you. A bit of a misnomer, being serverless does not mean there are no servers, but rather that the management of servers, operating systems, and other related infrastructure are handled for you.
AWS Lambda is a popular function as a service (FAAS) that helps you run and manage servers by doing virtually all the heavy-lifting for you. As a bonus, you only have to pay for the time your servers are actually in use.
Zappa is a dev ops toolbox designed to help ease the workload developers face when deploying and managing serverless web applications compatible with the Web Server Gateway Interface (WSGI) on AWS Lambda and the AWS API Gateway. If you are familiar with using Laravel Vapor for managing Laravel applications, then you’ll notice that Zappa serves a similar function for Python web-based frameworks like Django and Flask.
While Zappa has many functions as a deployment tool, here are a few of its most notable advantages:
Next, we will walk through how to set up Zappa and AWS Lambda in a Django app.
Zappa supports Python 3.6, 3.7, and 3.8. Before we can set up our Django project, verify that you have a supported version of Python by running:
$ python3 --version
If an error message is returned, you may want to consider downgrading to an earlier version of Python.
One issue I experienced was receiving an error when running Django version 2.2. There is an SQLite version conflict that seems to throw an error when Zappa is being run. To avoid this, you may need to use version 2.1.9.
Scaffold a Django 2.1.9 with Zappa installed below:
mkdir djangoprojects && cd djangoprojects # creates and navigate into directory called djangoprojects
pipenv install --python 3.7 # Sets up a Pipenv environment specific to Python 3.7
pipenv install django~=2.1.9 # Install Django 2.1.9
pip3 install zappa #install zappa with pip3 (I ran into an issue installing with pipenv but pip3 seemed to work just fine)
django-admin startproject zappatest
cd zappatest ## navigate to the zappatest folder
pipenv shell #activate the pipenv shell
python3 manage.py runserver ## serve the project locally
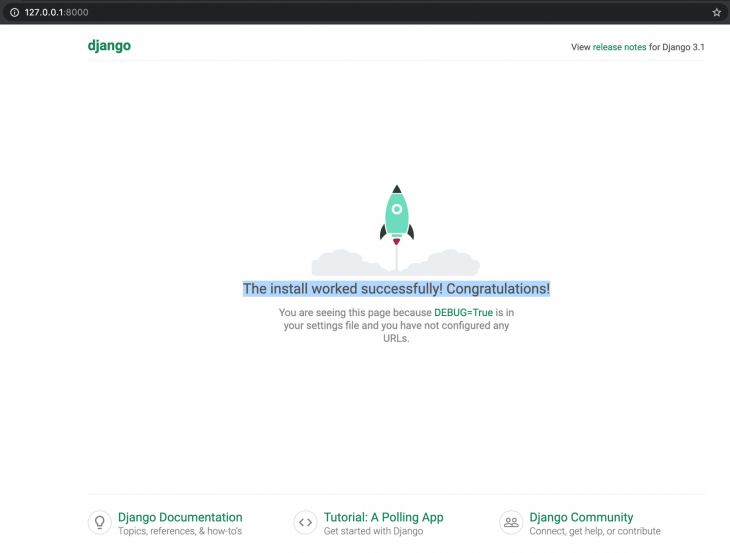
When the install is successful, the output should look like this:
To set up AWS access keys locally on your computer, open up your AWS dashboard console to create an IAM user with Administrator access and grab the AWS credentials section and grab the access_key as well as the asecc_secret_key.
Next, cd into your computer’s root directory and create the a .aws folder inside the .aws folder. Then, create a file called credentials and add your AWS access keys in this format:
cd ~ # navigate to your root directory
mkdir .aws # create a .aws folder
cd .aws # navigate into the created aws folder
touch credentials # create a file named credentials
Open up the credentials file in a text editor of your choice (I used nano) and add the following:
[default]
aws_access_key_id = your_aws_access_key_id
aws_secret_access_key = your_aws_secret_access_key
Before saving and exiting, do not forget to replace your_aws_access_key_id and your_aws_secret_key with the values from the key provided in the AWS console.
Once you’re ready to setup Zappa on your project, initialize the zapp_settings.json file by running zappa init .
When you do this, you are going to be asked a few questions including whether you want you application to be deployed globally. My recommendation would be to decline since this is only a demo project. For the rest of the prompts, select the default options.
At the end of the configurations process, your zappa_settings.json file should look like this:
{
    "dev": {
        "django_settings": "zappatest.settings",
        "profile_name": "default",
        "project_name": "zappatest",
        "runtime": "python3.7",
        "s3_bucket": "zappa-bqof1ad4l"
    }
}
Finally, you’ll need to specify which region you want your application to deploy in. To do this, open up the zappa_setting.json file and add your specified aws_region to the dev object, for example:
{
    "dev": {
        ...
        "profile_name": "default",
        "aws_region" : "us-east-2",
        ...
    }
}
To deploy your application to AWS Lambda in dev mode, run:
$ zappa deploy dev
Note that when you visit your application’s URL at this stage, you will get a DisallowedHost error message because Django does not recognize the URL where the app is being served from:
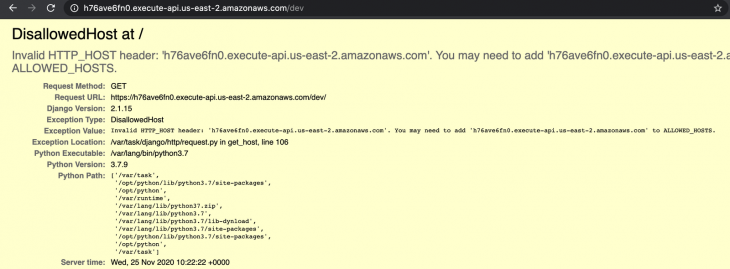
To fix this, add the host to the ALLOWED_HOSTS array in the zappatest/settings.py file as show below:
...
ALLOWED_HOSTS = ['127.0.0.1', 'h76ave6fn0.execute-api.us-east-2.amazonaws.com',]
...
Next, update the remote deployment by running:
$ zappa update dev
You should now see the standard 404 Django page:
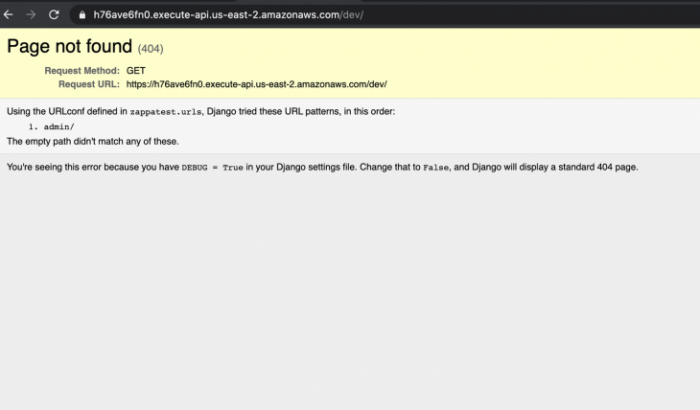
If you were working on a project such as a simple API, this should be enough to get you started.
For more complex projects, if you visit the /admin route to access the django-admin interface, you will see the following result:
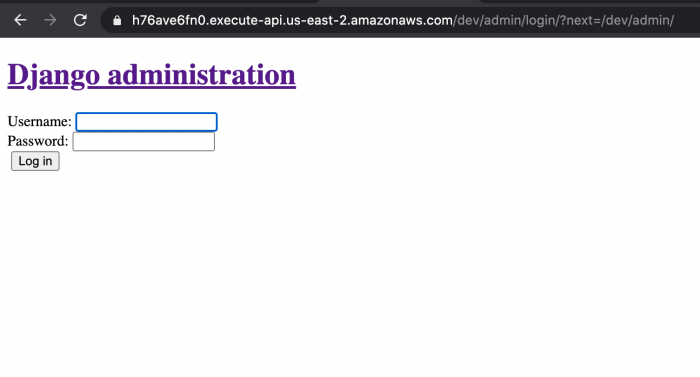
This is because our deployed project has not been configured to handle static files. We will discuss this configuration in the next section.
First, create an S3 bucket with a unique name (you’ll need to remember this name for later):
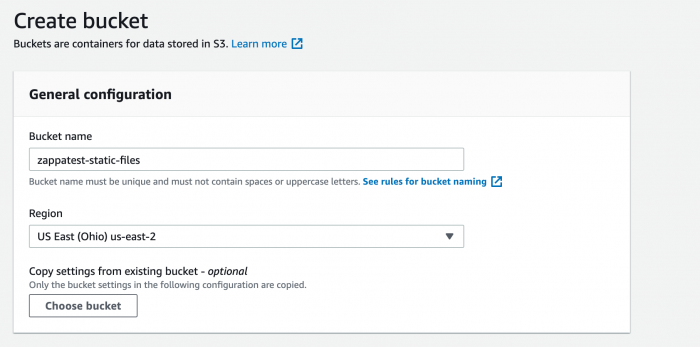
In the “permissions” tab for your bucket, navigate to the CORS rules settings and add the following configuration to allow access from other hosts:
[
    {
        "AllowedHeaders": [
            "*"
        ],
        "AllowedMethods": [
            "GET"
        ],
        "AllowedOrigins": [
            "*"
        ],
        "MaxAgeSeconds": 3000
    }
]
Open up the terminal in your project’s root folder once more and install the django-s3-storage package by running:
$ pip install django-s3-storage
Open up settings.py and include djangos3storage as such:
INSTALLED_APPS = [
  ...
'django_s3_storage'
]
Place the following block of code anywhere in your settings.py and then replace ‘zappatest-static-files’ with whatever name you used in naming your bucket:
S3_BUCKET_NAME = "zappatest-static-files"
STATICFILES_STORAGE = "django_s3_storage.storage.StaticS3Storage"
AWS_S3_BUCKET_NAME_STATIC = S3_BUCKET_NAME
# serve the static files directly from the specified s3 bucket
AWS_S3_CUSTOM_DOMAIN = '%s.s3.amazonaws.com' % S3_BUCKET_NAME
STATIC_URL = "https://%s/" % AWS_S3_CUSTOM_DOMAIN
# if you have configured a custom domain for your static files use:
#AWS_S3_PUBLIC_URL_STATIC = "https://static.yourdomain.com/"
Next, update the changes and push the static files to the bucket by running:
$ zappa update dev
$ zappa manage dev "collectstatic --noinput"
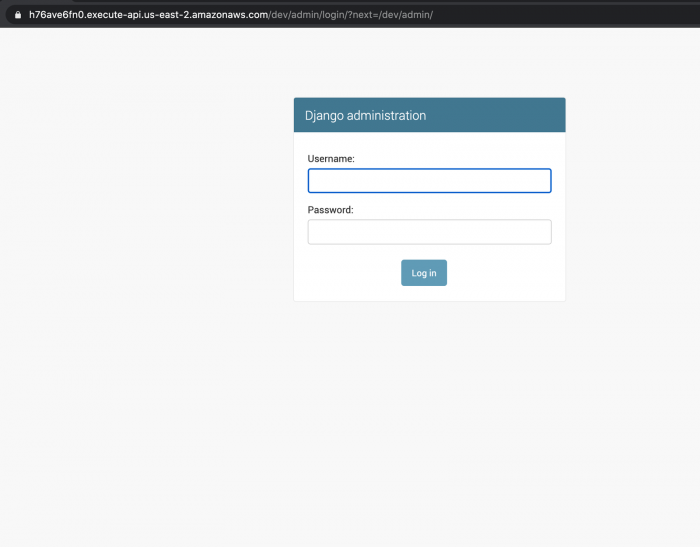
Finally, open up the admin page once more and your page should render correctly:
In this article, we explored serverless architecture in a Django app using Zappa and Amazon Web Services (AWS) Lambda.
We started by getting our Django project up and running locally with pipenv and pip3. Then, we set up our Zappa configurations and deployed to AWS Lambda in dev mode. Finally, we added support for static files with AWS S3 to make sure our web app looks and functions the way we want it to.
While we covered a lot in this article, there is still much to learn about serverless Django. To continue your education, I recommend that you check out the official Zappa documentation on the Python Python Index (PYPI) website, as well as the AWS Lambda docs.
Install LogRocket via npm or script tag. LogRocket.init() must be called client-side, not
server-side
$ npm i --save logrocket

// Code:

import LogRocket from 'logrocket';
LogRocket.init('app/id');
// Add to your HTML:

<script src="https://cdn.lr-ingest.com/LogRocket.min.js"></script>
<script>window.LogRocket && window.LogRocket.init('app/id');</script>
Hey there, want to help make our blog better?
Join LogRocket’s Content Advisory Board. You’ll help inform the type of content we create and get access to exclusive meetups, social accreditation, and swag.
Sign up now
A breakdown of the wrapper and container CSS classes, how they’re used in real-world code, and when it makes sense to use one over the other.

This guide walks you through creating a web UI for an AI agent that browses, clicks, and extracts info from websites powered by Stagehand and Gemini.

This guide explores how to use Anthropic’s Claude 4 models, including Opus 4 and Sonnet 4, to build AI-powered applications.

Which AI frontend dev tool reigns supreme in July 2025? Check out our power rankings and use our interactive comparison tool to find out.
5 Replies to "Using Zappa and AWS Lambda to deploy serverless Django apps"
Great post, thanks for writing it up. I wonder if you have a recommendation for a database to go together with a Django/Lambda project. Using RDS is always an option but it’s a shame that you end up with such a large baseline expense even though the app itself is serverless.
Hello. Thanks for great post.
I try it all, but when i deploy zappa i ‘ve got erro:
”
Deploying API Gateway..
Scheduling..
Unscheduled zappatest-dev-zappa-keep-warm-handler.keep_warm_callback.
Scheduled zappatest-dev-zappa-keep-warm-handler.keep_warm_callback with expression rate(4 minutes)!
Waiting for lambda function [zappatest-dev] to be updated…
Error: Warning! Status check on the deployed lambda failed. A GET request to ‘/’ yielded a 502 response code.
”
Can you tell me how fix it error?
I used `zappa tail` to see the error message, and this error is from File “/var/task/django/db/models/base.py” where it checks the version of sqlite. To the best of my knowledge there are 3 ways of solving this, though none is ideal:
1. Edit `settings.py` and comment out the DATABASES lines
2. Install django-s3-sqlite. (See http://blog.perwagnernielsen.dk/django_sqlite_zappa.html )
3. Edit your base.py (if you use a virtual environment then this file should be in venv/lib/python3.9/site-packages/django/db/backends/sqlite3/base.py) and replace “`raise ImproperlyConfigured(
“SQLite 3.9.0 or later is required (found %s).” % Database.sqlite_version
)“`
with `pass`
Hi, I was using Python v3.8 and Django v4 and this didn’t work for me at the step “zappa deploy dev” I get error “File “/var/task/django/db/backends/sqlite3/base.py”, line 67, in check_sqlite_version
raise ImproperlyConfigured(“
All works great! Only problem I have is with: zappa manage dev “collectstatic –noinput”
I can do it local but can not do it from zappa which I would like to so I could put in my build process.
I am thinking it has to do with access to the S3 bucket but I have tried setting various admin level permissions to see and can not resolve this error.
The app deploys fine and statics work fine from s3 from pushing local env but not from zappa env.
Any ideas?
[DEBUG] 2022-04-05T18:01:27.040Z 7cca4688-e589-4ddb-882b-1fbe38084e8e S3 request was previously redirected, not redirecting.
[ERROR] ClientError: An error occurred (400) when calling the HeadObject operation: Bad Request
Traceback (most recent call last):
File “/var/task/handler.py”, line 655, in lambda_handler
return LambdaHandler.lambda_handler(event, context)
File “/var/task/handler.py”, line 252, in lambda_handler
return handler.handler(event, context)
File “/var/task/handler.py”, line 430, in handler
management.call_command(*event[“manage”].split(” “))
File “/var/task/django/core/management/__init__.py”, line 198, in call_command
return command.execute(*args, **defaults)
File “/var/task/django/core/management/base.py”, line 460, in execute
output = self.handle(*args, **options)
File “/var/task/django/contrib/staticfiles/management/commands/collectstatic.py”, line 209, in handle
collected = self.collect()
File “/var/task/django/contrib/staticfiles/management/commands/collectstatic.py”, line 135, in collect
handler(path, prefixed_path, storage)
File “/var/task/django/contrib/staticfiles/management/commands/collectstatic.py”, line 368, in copy_file
if not self.delete_file(path, prefixed_path, source_storage):
File “/var/task/django/contrib/staticfiles/management/commands/collectstatic.py”, line 278, in delete_file
if self.storage.exists(prefixed_path):
File “/var/task/storages/backends/s3boto3.py”, line 469, in exists
self.connection.meta.client.head_object(Bucket=self.bucket_name, Key=name)
File “/var/task/botocore/client.py”, line 401, in _api_call
return self._make_api_call(operation_name, kwargs)
File “/var/task/botocore/client.py”, line 731, in _make_api_call
raise error_class(parsed_response, operation_name)[END] RequestId: 7cca4688-e589-4ddb-882b-1fbe38084e8e