The Replay is a weekly newsletter for dev and engineering leaders.
Delivered once a week, it's your curated guide to the most important conversations around frontend dev, emerging AI tools, and the state of modern software.
Bash is a command language that typically comes as a command-line interpreter program where users can execute commands from their terminal software. For example, we can use Ubuntu’s terminal to run Bash commands. We can also create and run Bash script files through what is known as shell scripting.

Programmers use shell scripts in many automation scenarios, such as for build processes, and CI/CD- or computer maintenance-related activities. As a full-featured command language, Bash supports pipelines, variables, functions, control statements, and basic arithmetic operations.
However, Bash is not a general purpose developer-friendly programming language. It doesn’t support OOP, structures like JSON, common data structures other than arrays, and built-in string or array manipulation methods. This means programmers often have to call separate Python or Node scripts from Bash for such requirements.
This is where the zx project comes in. zx introduced a way to write Bash-like scripts using JavaScript.
JavaScript, by comparison, has almost all the inbuilt features that developers need. zx lets programmers write shell scripts with JavaScript by providing wrapper APIs for several crucial CLI-related Node.js packages. Therefore, you can use zx to write developer-friendly, Bash-like shell scripts.
In this article, I will explain zx and teach you how to use it in your projects.
Bash is a single-pass interpreted command language initially developed by Brian Fox. Programmers often use it with the help of Unix or Unix-like commands.
Most of the time, Bash starts separate processes to perform different sub-tasks. For example, if you use the expr command for arithmetic operations, the Bash interpreter will always spawn another process.
The reason is that expr is a command-line program that needs a separate process to run. Your shell scripts may look complex when you add more logic to their script files. Your shell scripts may also end up performing slowly due to the spawning of additional processes and interpretation.
The zx project implements a shell script executor similar to Bash but using JavaScript modules. It provides an inbuilt asynchronous JavaScript API to call other commands similar to Bash. Besides that, it provides wrapper functions for several Node.js-based command-line helpers such as chalk, minimist, fs-extra, OS, and Readline.
Every zx shell script file has .mjs as the extension. All built-in functions and wrappers for third-party APIs are pre-imported. Therefore, you don’t have to use additional import statements in your JavaScript-based shell scripts.
zx accepts scripts from standard input, files, and as a URL. It imports your zx commands set as an ECMAScript module (MJS) to execute, and the command execution process uses Node.js’s child process API.
Now, let’s write some shell scripts using zx to understand the project better.
First, you need to install the zx npm package globally before you start writing zx scripts. Make sure that you have already installed Node.js v14.8.0 or higher.
Run the following command on your terminal to install the zx command line program.
npm install -g zx
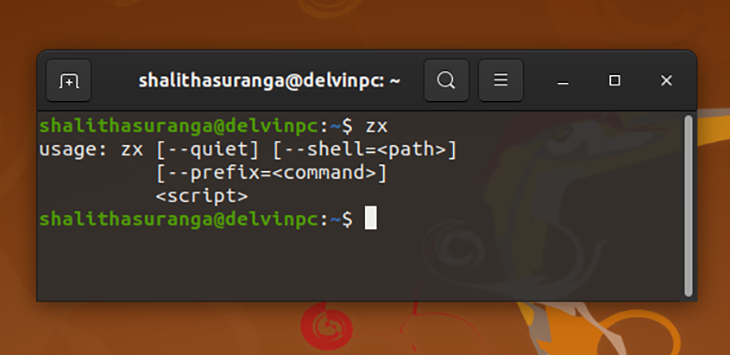
Enter zx in your terminal to check whether the program was installed successfully. You will get an output like below.

Let’s create a simple script to get the current branch of a Git project.
Create get_current_branch.mjs inside one of your projects, and add the following code.
#!/usr/bin/env zx
const branch = await $`git branch --show-current`
console.log(`Current branch: ${branch}`)
The first line is the shebang line that tells the operating system’s script executor to pick up the correct interpreter. The $ is a function that executes a given command and returns its output when it’s used with the await keyword. Finally, we use console.log to display the current branch.
Run your script with the following command to get the current Git branch of your project.
zx ./get_current_branch.mjs
It will also show every command you’ve executed because zx turns its verbose mode on by default. Update your script as below to get rid of the additional command details.
#!/usr/bin/env zx
$.verbose = false
const branch = await $`git branch --show-current`
console.log(`Current branch: ${branch}`)
You can run the script without the zx command as well, thanks to the topmost shebang line.
chmod +x ./get_current_branch.mjs
./get_current_branch.mjs
zx exposes the chalk library API, too. Therefore, we can use it for coloring and formatting, as shown below.
#!/usr/bin/env zx
$.verbose = false
let branch = await $`git branch --show-current`
console.log(`Current branch: ${chalk
                                .bgYellow
                                .red
                                .bold(branch)}`)
More coloring and formatting methods are available in chalk’s official documentation.
zx provides the question function to capture user inputs from the command line interface. You can enable traditional Unix tab completion as well with the choices option.
The following script captures a filename and template from the user. After that, it scaffolds a file using the user-entered configuration. You can use the tab completion with the second question.
#!/usr/bin/env zx
$.verbose = false
let filename = await question('What is the filename? ')
let template = await question('What is your preferred template? ', {
  choices: ["function", "class"] // Enables tab completion.
})
let content = ""

if(template == "function") {
    content = `function main() {
    console.log("Test");
}`;
}
else if(template == "class") {
    content = `class Main {
    constructor() {
        console.log("Test");
    }
}`;
}
else {
    console.error(`Invalid template: ${template}`)
    process.exit();
}
fs.outputFileSync(filename, content)
A parsed command-line arguments object is available as the global argv constant. The parsing is done using the minimist Node.js module.
Take a look at the following example that captures two command-line argument values.
#!/usr/bin/env zx
$.verbose = false
const size = argv.size;
const isFullScreen = argv.fullscreen;
console.log(`size=${size}`);
console.log(`fullscreen=${isFullScreen}`);
Run the above script file as shown below to check the command line argument’s support.
./yourscript.mjs --size=100x50 --fullscreen
Programmers often use the curl command to make HTTP requests with Bash scripts. zx offers a wrapper for the node-fetch module, and it exposes the specific module’s API as fetch. The advantage is that zx doesn’t spawn multiple processes for each network request like Bash does with curl — because the node-fetch package uses Node’s standard HTTP APIs for sending network requests.
Let’s make a simple HTTP request to get familiar with zx’s network requests API.
#!/usr/bin/env zx
$.verbose = false
let response = await fetch('https://cheat.sh');
if(response.ok) {
    console.log(await response.text());
}
The above zx script will download and show the content of the specific URL with the help of the node-fetch module. It doesn’t spawn a separate process like Bash’s network calls.
In shell scripting, pipelines refer to multiple sequentially-executed commands. We often use the well-known pipe character (|) inside our shell scripts to pass output from one process to another. zx offers two different approaches to build pipelines.
We can use the | character with the commands set similar to Bash scripting — or we can use the .pipe() chain method from zx’s built-in API. Check how pipelines are implemented in both ways in the following example script.
#!/usr/bin/env zx
$.verbose = false
// A pipeline using |
let greeting = await $`echo "Hello World" | tr '[l]' [L]`
console.log(`${greeting}`)
// The same pipeline but with the .pipe() method
greeting = await $`echo "Hello World"`
    .pipe($`tr '[l]' [L]`)

console.log(`${greeting}`)
Apart from JavaScript-based shell scripting support, zx supports several other useful features.
By default, zx uses a Bash interpreter to run commands. We can change the default shell by modifying the $.shell configuration variable. The following script uses the sh shell instead of bash.
$.shell = '/usr/bin/sh'
$.prefix = 'set -e;'

$`echo "Your shell is $0"` // Your shell is /usr/bin/sh
You can use the zx command-line program to execute a particular Markdown file’s code snippets written in JavaScript. If you provide a Markdown file, the zx command-line program will parse and execute code blocks.
Let’s look at an example. Download this example Markdown file from the zx GitHub, and save it as markdown.md. After that, run the following command to execute code blocks.
zx markdown.md
The zx command-line program can also run scripts from a URL. Provide a link to your zx script the same way you’d provide a filename. The following remote script will display a greeting message.
zx https://raw.githubusercontent.com/shalithasuranga/zx-scripting-examples/main/greeting.mjs
You can import the $ function from your Node-based web applications as well. Then, it is possible to run commands from your web application’s backend.
Import zx’s $ function as shown below to call the operating system’s commands from other JavaScript source files.
import { $ } from 'zx'
await $`whoami`
zx has TypeScript definitions as well, though full support has yet to come. Therefore, programmers can use all of zx’s inbuilt APIs with TypeScript. We can directly provide TypeScript files as zx files to the zx command-line program. Then, zx will transpile and execute the provided TypeScript source files.
Moreover, it is possible to use zx in your TypeScript-based web applications to execute the operating system’s commands.
Bash scripting is a great way to automate your development processes. But, when your Bash scripting becomes complex, you may have to write separate scripts with other programming languages sometimes.
The zx project provides an easy way to write Bash-like scripts with JavaScript and TypeScript. It offers Bash-like minimal APIs to give a shell-scripting feel to what we’re doing — even if we are writing a JavaScript source file.
Besides, zx motivates developers to write JavaScript-based shell scripts without semicolons to make zx scripts and Bash scripts syntactically similar.
However, zx is not a replacement for Bash — it uses a command-line interpreter (Bash by default) internally to execute commands anyway.
There’s no doubt that frontends are getting more complex. As you add new JavaScript libraries and other dependencies to your app, you’ll need more visibility to ensure your users don’t run into unknown issues.
LogRocket is a frontend application monitoring solution that lets you replay JavaScript errors as if they happened in your own browser so you can react to bugs more effectively.

LogRocket works perfectly with any app, regardless of framework, and has plugins to log additional context from Redux, Vuex, and @ngrx/store. Instead of guessing why problems happen, you can aggregate and report on what state your application was in when an issue occurred. LogRocket also monitors your app’s performance, reporting metrics like client CPU load, client memory usage, and more.
Build confidently — start monitoring for free.

React Server Components and the Next.js App Router enable streaming and smaller client bundles, but only when used correctly. This article explores six common mistakes that block streaming, bloat hydration, and create stale UI in production.

Gil Fink (SparXis CEO) joins PodRocket to break down today’s most common web rendering patterns: SSR, CSR, static rednering, and islands/resumability.

@container scroll-state: Replace JS scroll listeners nowCSS @container scroll-state lets you build sticky headers, snapping carousels, and scroll indicators without JavaScript. Here’s how to replace scroll listeners with clean, declarative state queries.

Explore 10 Web APIs that replace common JavaScript libraries and reduce npm dependencies, bundle size, and performance overhead.
Would you be interested in joining LogRocket's developer community?
Join LogRocket’s Content Advisory Board. You’ll help inform the type of content we create and get access to exclusive meetups, social accreditation, and swag.
Sign up now