Figma is a fully-featured, collaborative, graphical interface designing tool that most UI/UX designers use to create interactive, beautiful software system prototypes. Flutter offers a complete toolkit for developing native cross-platform apps for Android, iOS mobile platforms, and popular desktop operating systems. Nowadays, most software development teams choose Figma for user interface prototyping and Flutter for app development, so transferring Figma designs into Flutter code becomes a common requirement in the modern software industry.
You can manually translate Figma designs into Flutter code using the Dev Mode inspection tool or translate generated HTML/CSS snippets into Flutter widget definitions. Still, it’s a time-consuming approach. Figma Dev Mode supports generating code only for native iOS, Android, and HTML/CSS targets, so you should find alternative methods for auto-generating Flutter widgets code based on Figma designs.
Several popular community Figma plugins and third-party cloud services offer Figma to Flutter code generation. These plugins and services let you generate Flutter code without purchasing a Figma Dev Mode-enabled subscription plan. In this tutorial, you’ll learn several strategies for Figma-to-Flutter manual translation and explore four Figma plugins that offer automated Flutter widget code generation.
Before code generation features in UI/UX designing tools, developers manually implemented development components by inspecting design specifications. The Figma Dev Mode offers a productive UI element inspector tool that works the same as the Google Chrome DevTools inspect feature. So, Flutter developers can create and style the widget tree using the Figma inspector by analyzing app design specifications:
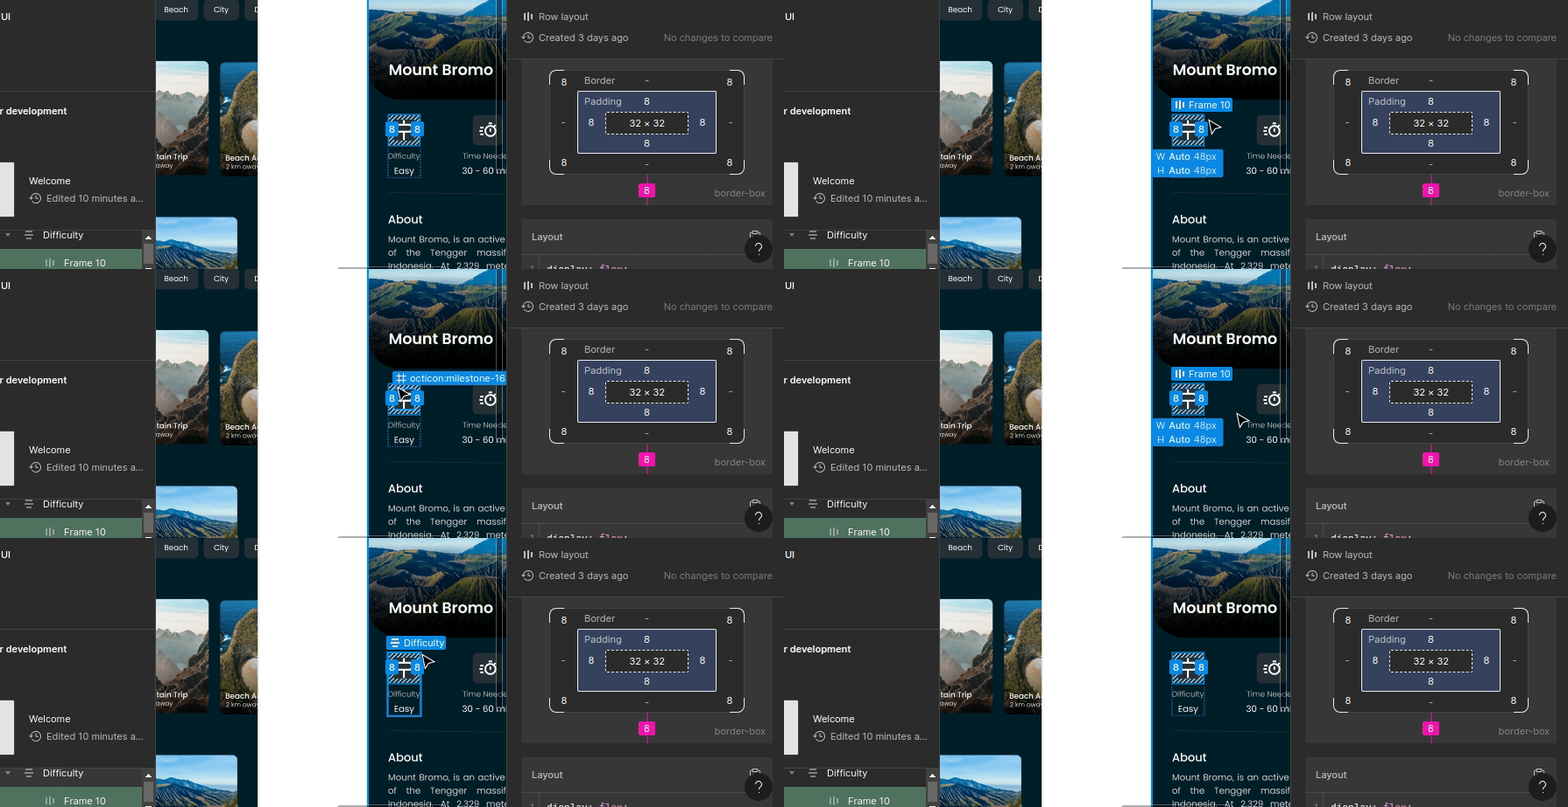
Manual Figma-to-Flutter code translation is undoubtedly time-consuming, but it offers endless flexibility for developers to plan the widget tree as they expect.
Figma-to-Flutter code generation tools help you fully or partially automate the Figma-to-Flutter design translation process. Some code generation methods generate code per UI element, so we can copy-paste them into existing Flutter widget trees.
Meanwhile, some methods generate the entire Flutter app with all prototype screens by reducing the development time drastically. Automatic code generation methods save you time, but they may limit development flexibility due to predefined design patterns in the auto-generated code.
Let’s create a new Flutter app to test auto-generated code snippets. First, install the latest stable Flutter version into your development computer according to the official installation guide.
For GNU/Linux systems, you can install Flutter easily via Snapcraft as follows:
snap install flutter --classic
When you have a working Flutter SDK after the installation process, create a new project to continue with this tutorial:
flutter create figma_demo
The above command will create a new minimal Flutter project. Run it on Chrome to make sure that everything works fine:
cd figma_demo
flutter run -d chrome
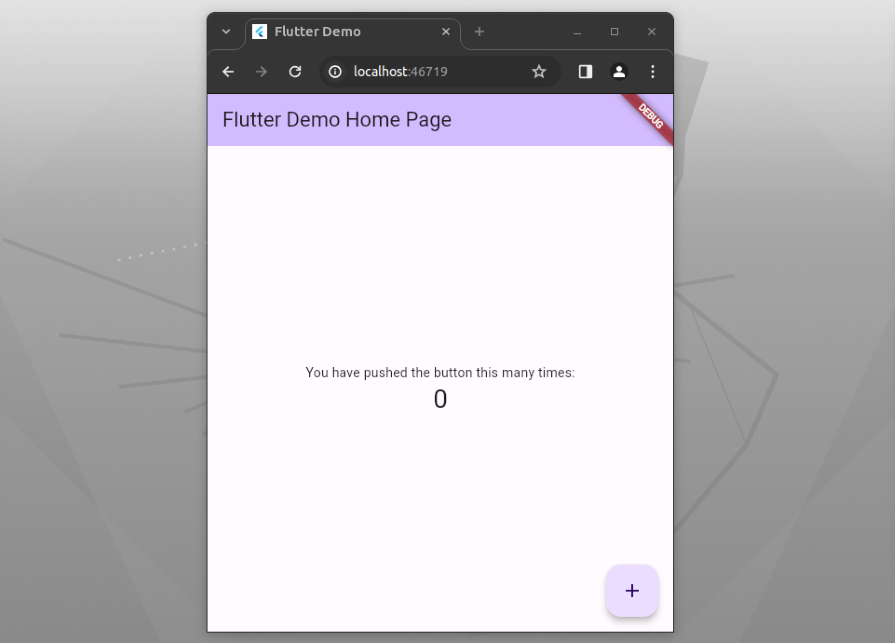
The above runs the newly created Flutter app Chrome and renders the default counter app interface, as shown in the following preview:
Add the following code content to your lib/main.dart file to simplify the app structure, so you can copy-paste auto-generated codes easily in upcoming sections of this tutorial:
import 'package:flutter/material.dart';

void main() {
  runApp(const MyApp());
}

class MyApp extends StatelessWidget {
  const MyApp({super.key});
  @override
  Widget build(BuildContext context) {
    return MaterialApp(
      title: 'Flutter Demo',
      theme: ThemeData(
        colorScheme: ColorScheme.fromSeed(seedColor: Colors.deepPurple),
        useMaterial3: true,
      ),
      home: Scaffold(
        body: null
      ),
    );
  }
}
Now, the sample app renders no visible UI elements on the screen.
Now let’s use a simple welcome screen of a travel app design to generate Flutter code. You can copy this sample Figma design into your Figma account dashboard by visiting this community template link. This sample design file has one screen named WelcomeScreen as follows:
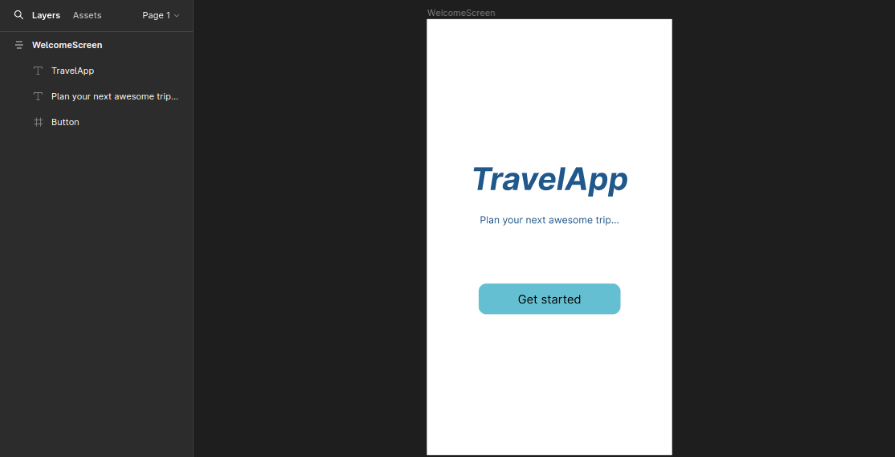
The above sample template will explain how to generate Flutter code within this tutorial, but you can also use your existing Figma designs or create a quick one with the auto layout feature.
The manual Figma to Flutter app conversion involves mapping, creating, and styling the Flutter widget tree manually. Developers can design the Flutter app layout and widgets based on the Figma design element specifications. You can follow the following strategies for translating Figma to Flutter manually according to your preference:
You can turn the sample design screen of this tutorial just by looking at it since you can design it with a simple one Column-widget-based layout. Besides, you don’t have more complex styles in Figma frames or other atomic elements to be transferred to Flutter.
First, create a new stateless component in the lib/main.dart file as follows:
class WelcomeScreen extends StatelessWidget {
  @override
  Widget build(BuildContext context) {
    return Container(
      width: double.maxFinite,
      child:
        Column(
            mainAxisAlignment: MainAxisAlignment.center,
            children: [],
        )
    );
  }
}
The above code snippet creates a stretched Column-widget-based layout where you can add multiple vertically-ordered child widgets. Next, add the following widget tree segment to the above children array to render the app title text:
Padding(
    padding: EdgeInsets.only(bottom: 12),
    child: Text('TravelApp',
        style: TextStyle(
          fontWeight: FontWeight.bold,
          fontStyle: FontStyle.italic,
          color: Color(0xff21588B),
          fontSize: 48,
        ))),
Add the next text segment by adding the following widget tree item as the second array element:
Padding(
    padding: EdgeInsets.only(bottom: 80),
    child: Text('Plan your next awesome trip...',
        style: TextStyle(
          color: Color(0xff21588B),
          fontSize: 15,
        ))),
In the above code snippets, you rendered a styled Text widget within a Padding widget instance. Add the last vertically ordered item, which is the primary action button using the following code snippet:
ElevatedButton(
  onPressed: () {},
  child: Padding(
      padding: EdgeInsets.symmetric(vertical: 14, horizontal: 24),
      child:
          Text('Get started', style: TextStyle(color: Colors.black))),
  style: ButtonStyle(
    backgroundColor:
        MaterialStateProperty.all<Color>(Color(0xff65BFD2)),
    shape: MaterialStateProperty.all<RoundedRectangleBorder>(
      RoundedRectangleBorder(
        borderRadius: BorderRadius.circular(12),
      ),
    ),
  ),
)
The above code snippet renders a customized Material elevated button that adheres to the Figma design specification. Here is the complete WelcomeScreen source code after adding all three vertically-ordered widgets:
class WelcomeScreen extends StatelessWidget {
  @override
  Widget build(BuildContext context) {
    return Container(
        width: double.maxFinite,
        child: Column(mainAxisAlignment: MainAxisAlignment.center, children: [
          Padding(
              padding: EdgeInsets.only(bottom: 12),
              child: Text('TravelApp',
                  style: TextStyle(
                    fontWeight: FontWeight.bold,
                    fontStyle: FontStyle.italic,
                    color: Color(0xff21588B),
                    fontSize: 48,
                  ))),
          Padding(
              padding: EdgeInsets.only(bottom: 80),
              child: Text('Plan your next awesome trip...',
                  style: TextStyle(
                    color: Color(0xff21588B),
                    fontSize: 15,
                  ))),
          ElevatedButton(
            onPressed: () {},
            child: Padding(
                padding: EdgeInsets.symmetric(vertical: 14, horizontal: 24),
                child:
                    Text('Get started', style: TextStyle(color: Colors.black))),
            style: ButtonStyle(
              backgroundColor:
                  MaterialStateProperty.all<Color>(Color(0xff65BFD2)),
              shape: MaterialStateProperty.all<RoundedRectangleBorder>(
                RoundedRectangleBorder(
                  borderRadius: BorderRadius.circular(12),
                ),
              ),
            ),
          )
        ]));
  }
}
Finally, render the newly created WelcomeScreen widget from the app scaffold, as shown in the following code snippet:
// ...
home: Scaffold(
  body: Center(
    child: SingleChildScrollView(child: WelcomeScreen())
  )
),
// …
Run the app after updating the lib/main.dart file. You’ll see a welcome screen that looks the same as the Figma design:
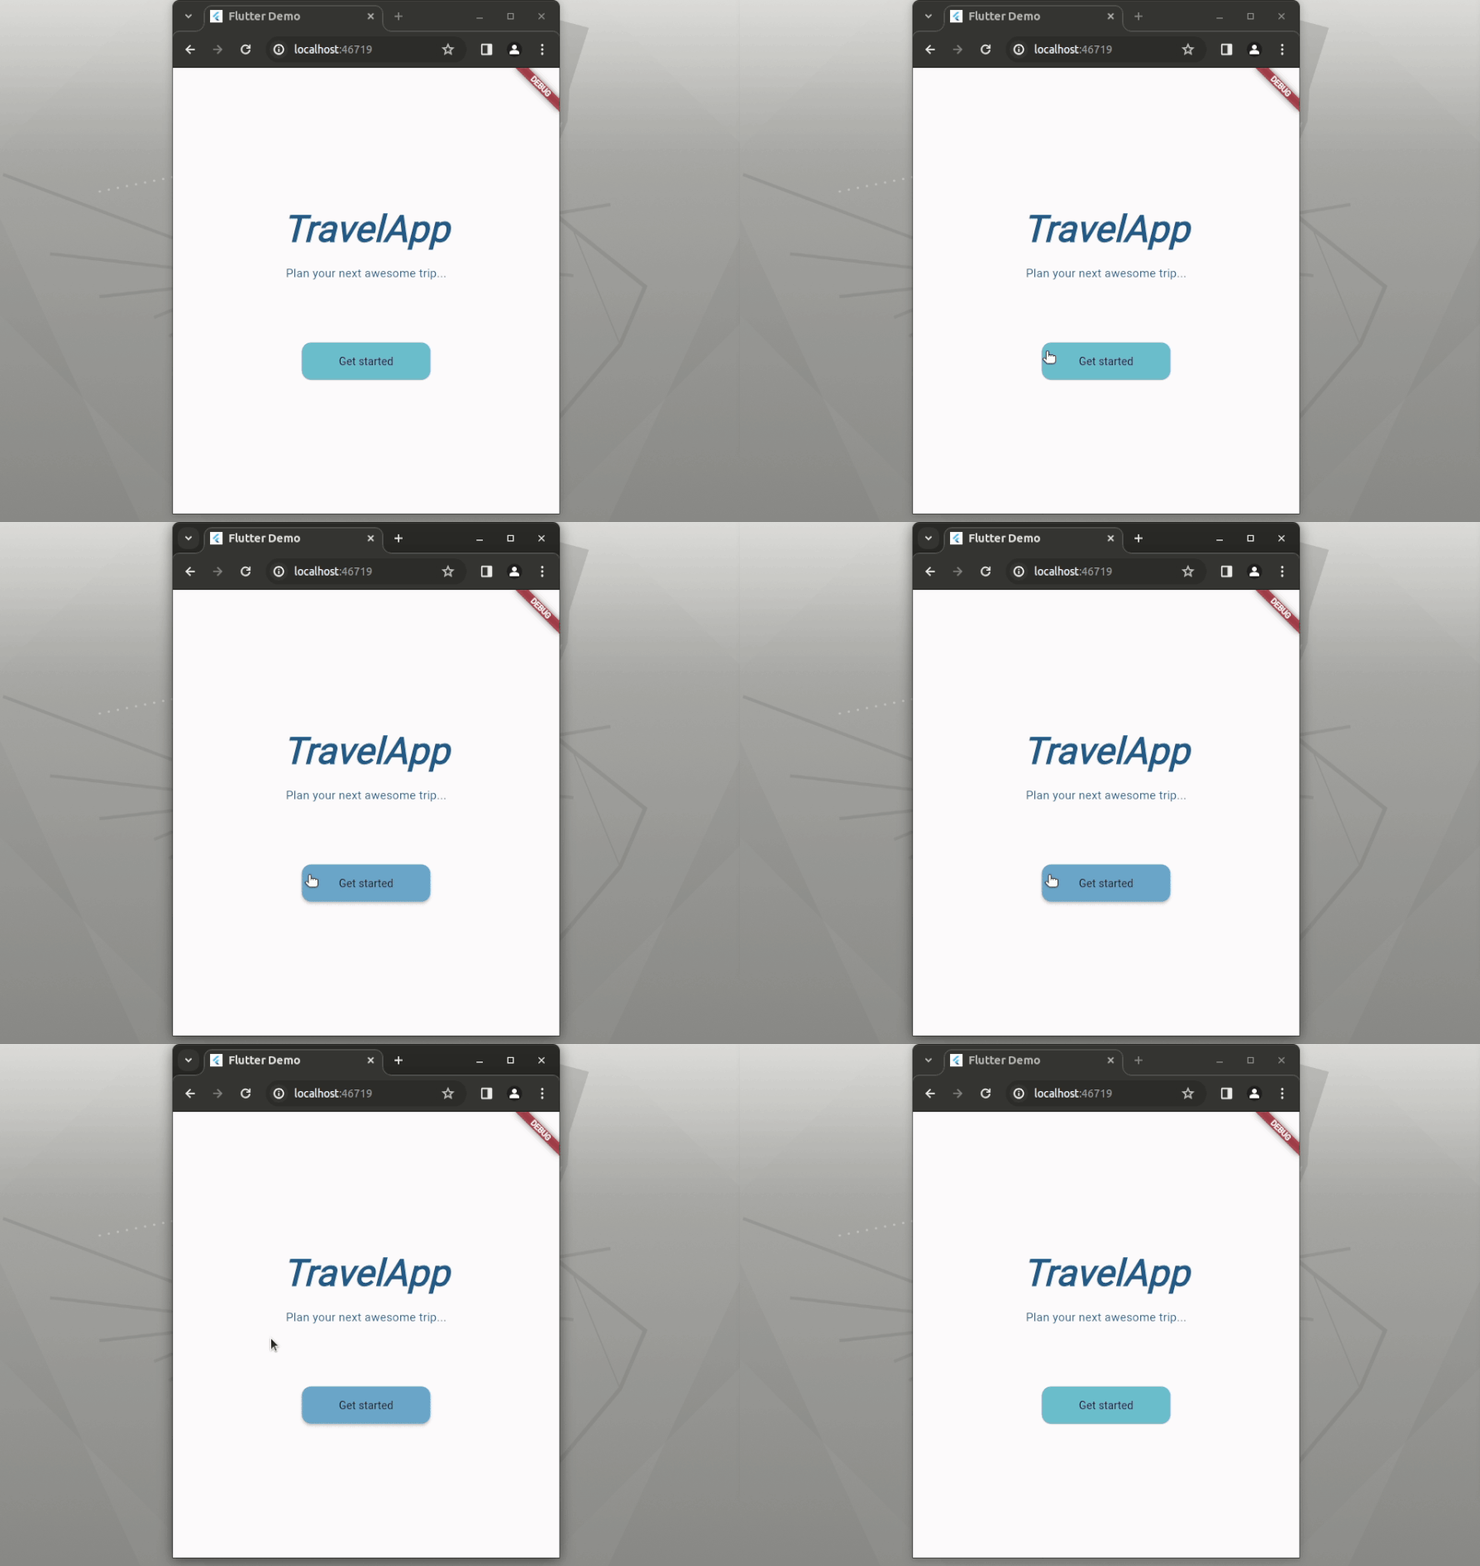
Translating Figma designs manually into Flutter code is indeed time-consuming, but it gives the best results possible since developers can structure the widget tree as they want.
The Figma to Code community plugin can generate code for HTML/CSS, Tailwind, Flutter, and SwiftUI targets. It generates Flutter stateless widget code and widget tree structure when you select a specific Figma UI element. This plugin even lets you create a quick Flutter app by generating the whole content of the lib/main.dart file. Apart from this plugin’s primary code generation feature, it displays a responsive UI preview and color theme preview.
This popular Figma plugin has more than one million users. Moreover, it’s an open-source project, so you can request new features and submit your patches via this GitHub repository.
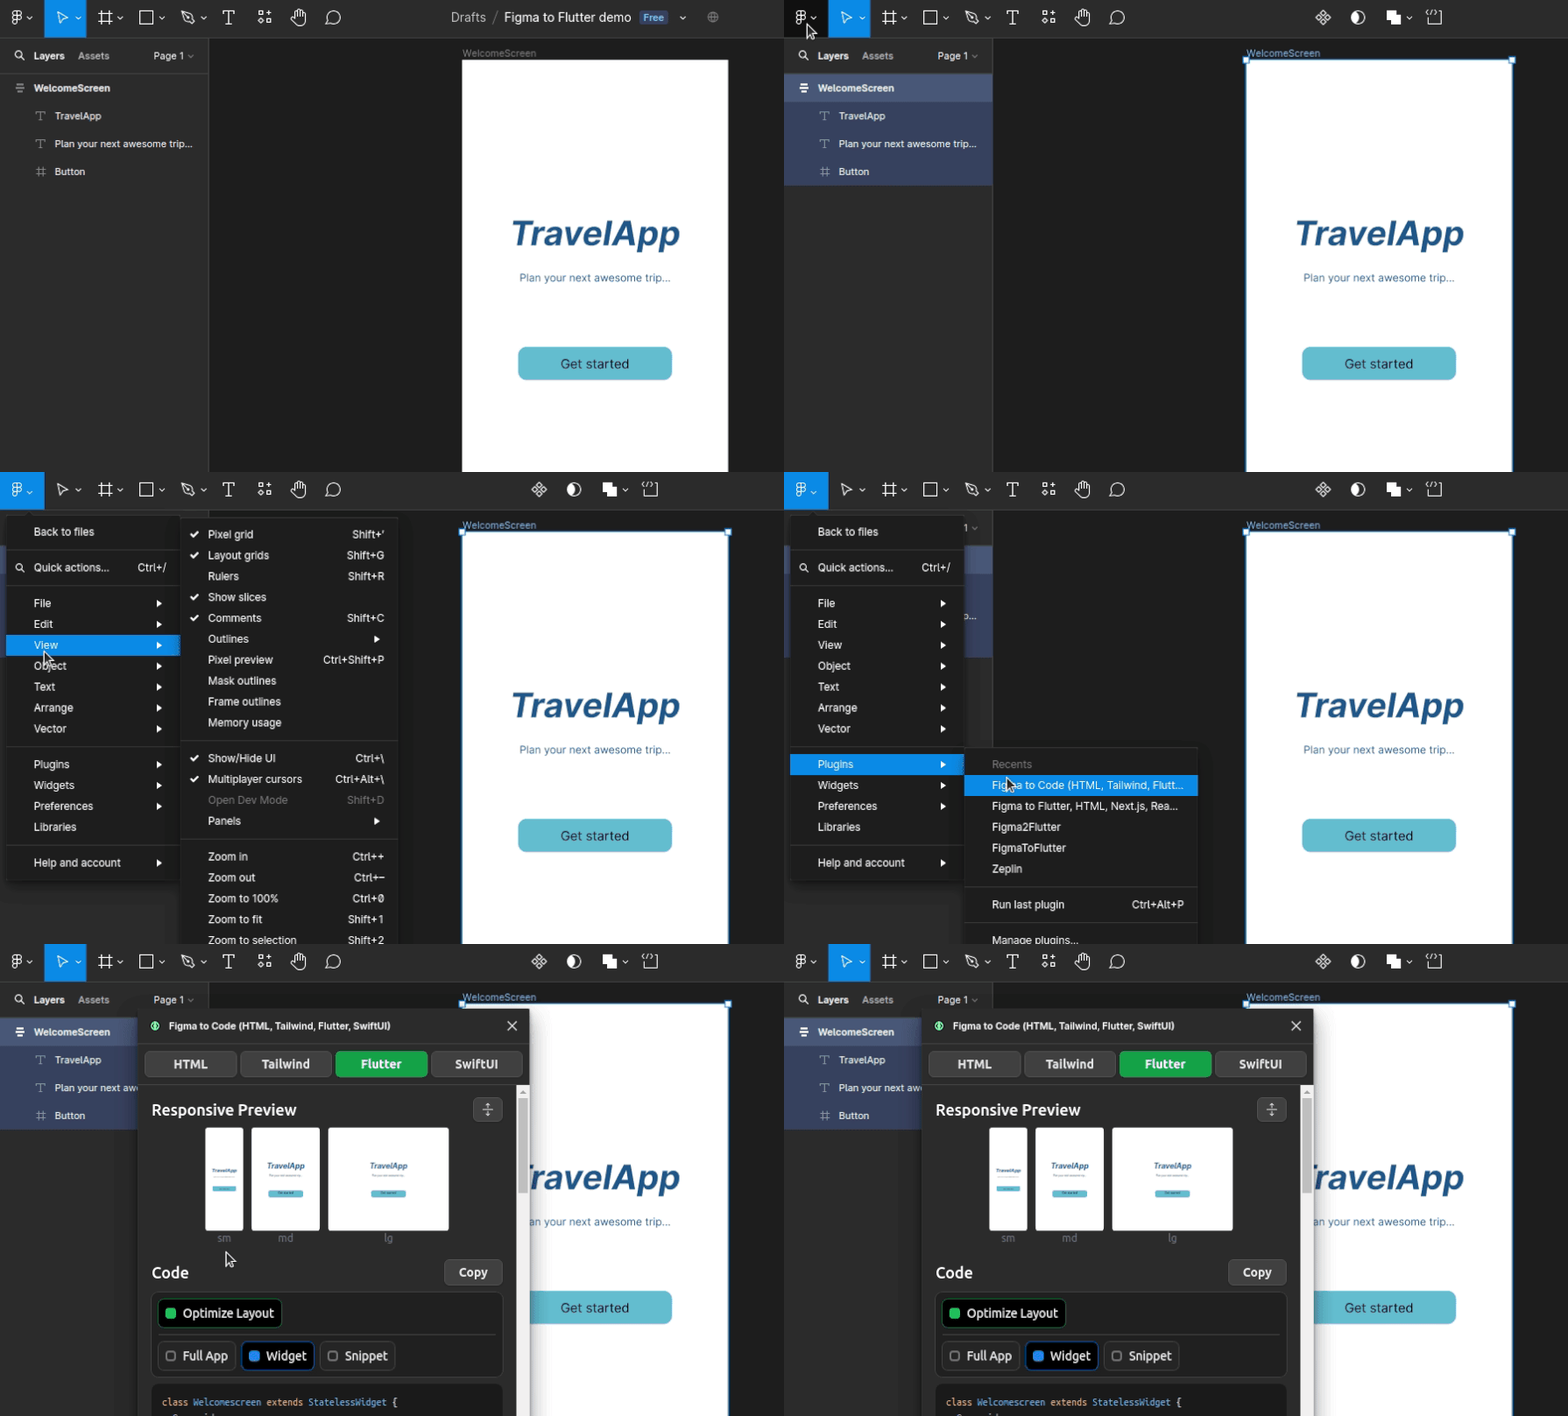
Once you install this plugin, it will appear inside the plugins menu item. Select the WelcomeScreen frame and open the plugin from the plugins menu as follows:
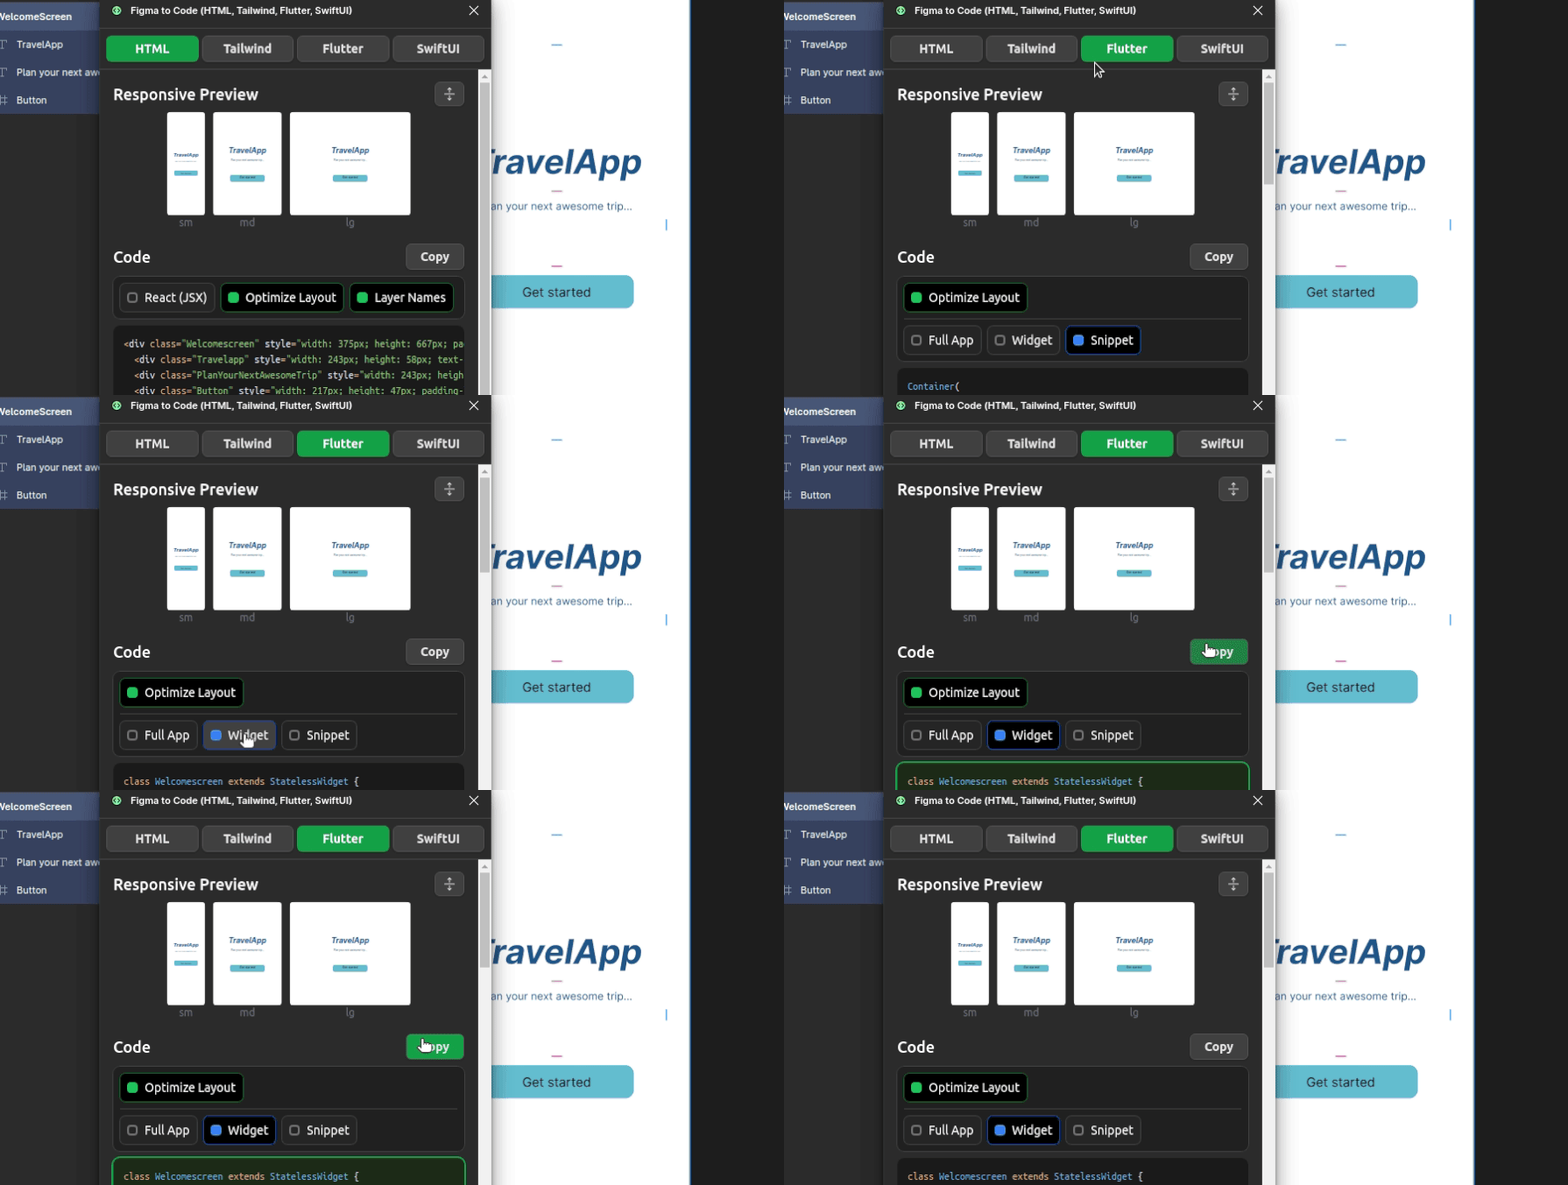
Figma spawns the plugin within a popup window, as shown in the above preview. Select the Flutter option and check the Widget option to generate the Flutter code for the selected frame. Now, click on the Copy button to copy auto-generated code contents to the system clipboard:
This plugin can generate Flutter code for complex frames that host multiple child element layers. It typically constructs code using the Flutter framework’s inbuilt Row, Column, and Container widgets. You can generate code for an atomic UI element (i.e., text label) as well.
Copy the widget source of the welcome screen. Go to the lib/main.dart file and paste it after the MyApp class implementation. Next, render the auto-generated Welcomescreen stateless widget through the app scaffold, as shown in the following code snippet:
//...
home: Scaffold(
  body: SingleChildScrollView(child: Welcomescreen())
),
//...
Generated code typically needs a few adjustments to make it exactly look like the original design. Here, you need to adjust the width property of the first parent Container widget instance to expand it to fill the available device width:
// ...
Container(
  width: double.maxFinite,
// ...
// ...
Reload the running app by pressing the r key on your terminal. You’ll see a welcome screen rendered very similar to the original Flutter design:
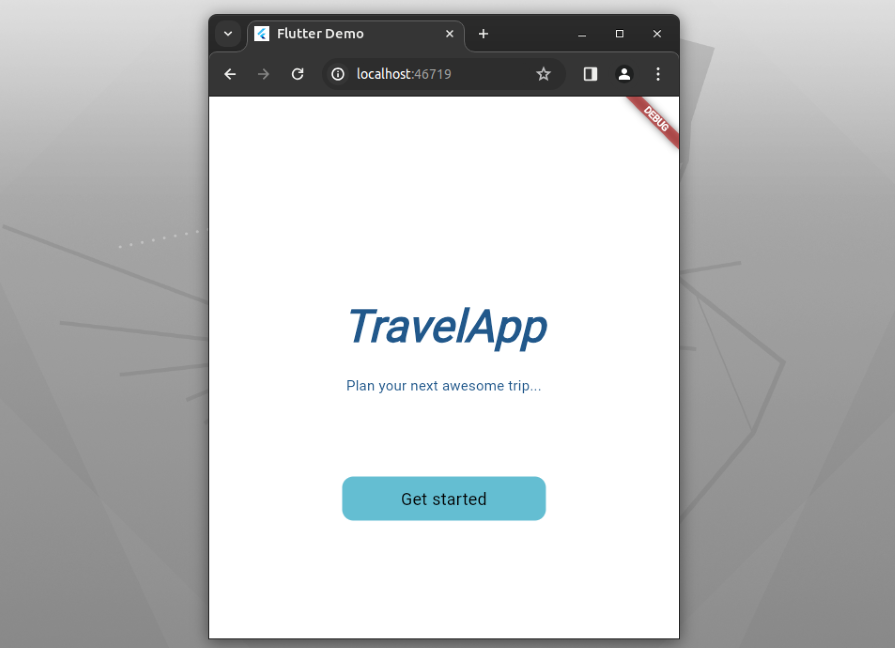
This plugin doesn’t identify form controls like buttons, so here you received a get started button assembled with flutter inbuilt layout widgets — it doesn’t use a dedicated native button widget (i.e., ElevatedButton).
The FigmaToFlutter community plugin helps us transfer Figma designs into Flutter code by generating widget code for selected frames. This plugin lets you copy-paste auto-generated widget tree code or complete stateless/stateful widget class code into your codebases. Also, this plugin handles graphical resources and font styles by generating the pubspec file content.
Once you install this plugin, it’ll appear inside the plugins menu item. Select the WelcomeScreen frame and open the plugin window from the plugins menu item, as shown in the following preview:
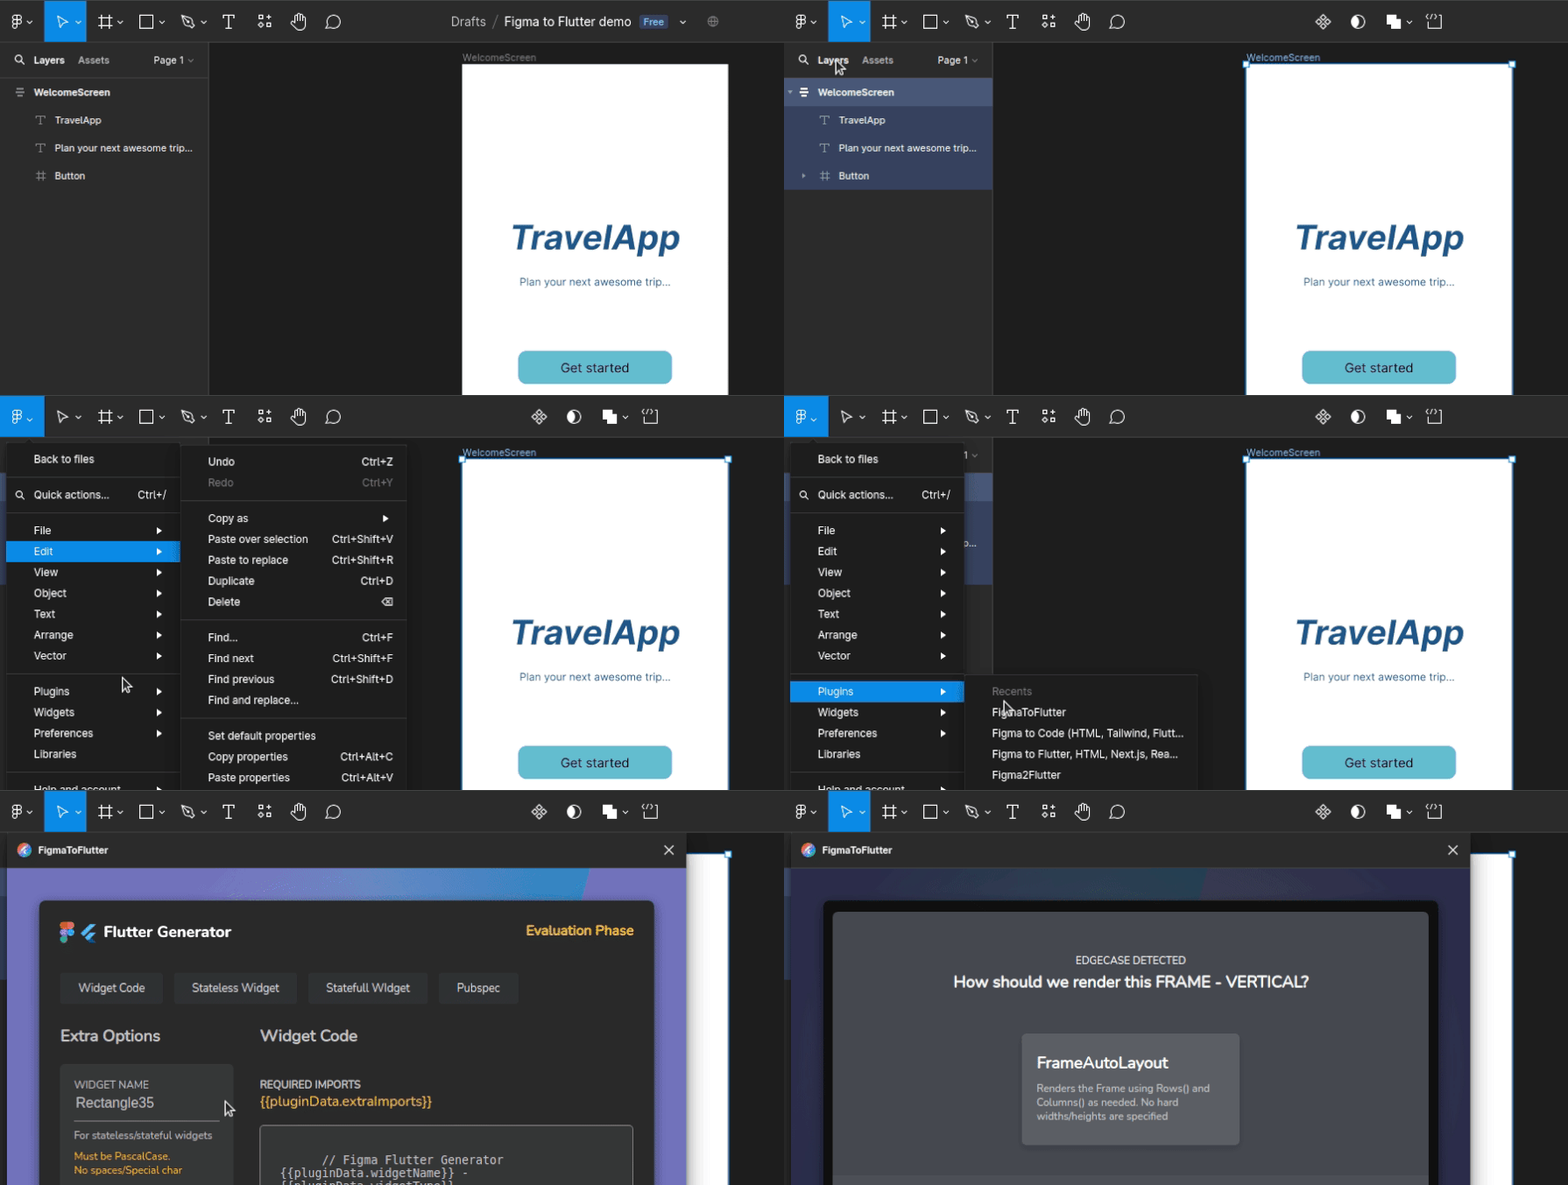
First, confirm the layout selection. Next, select the Stateless Widget option to generate Dart-based source code for the welcome screen stateless widget. Press the Copy Code button to copy the auto-generated code into the system clipboard:
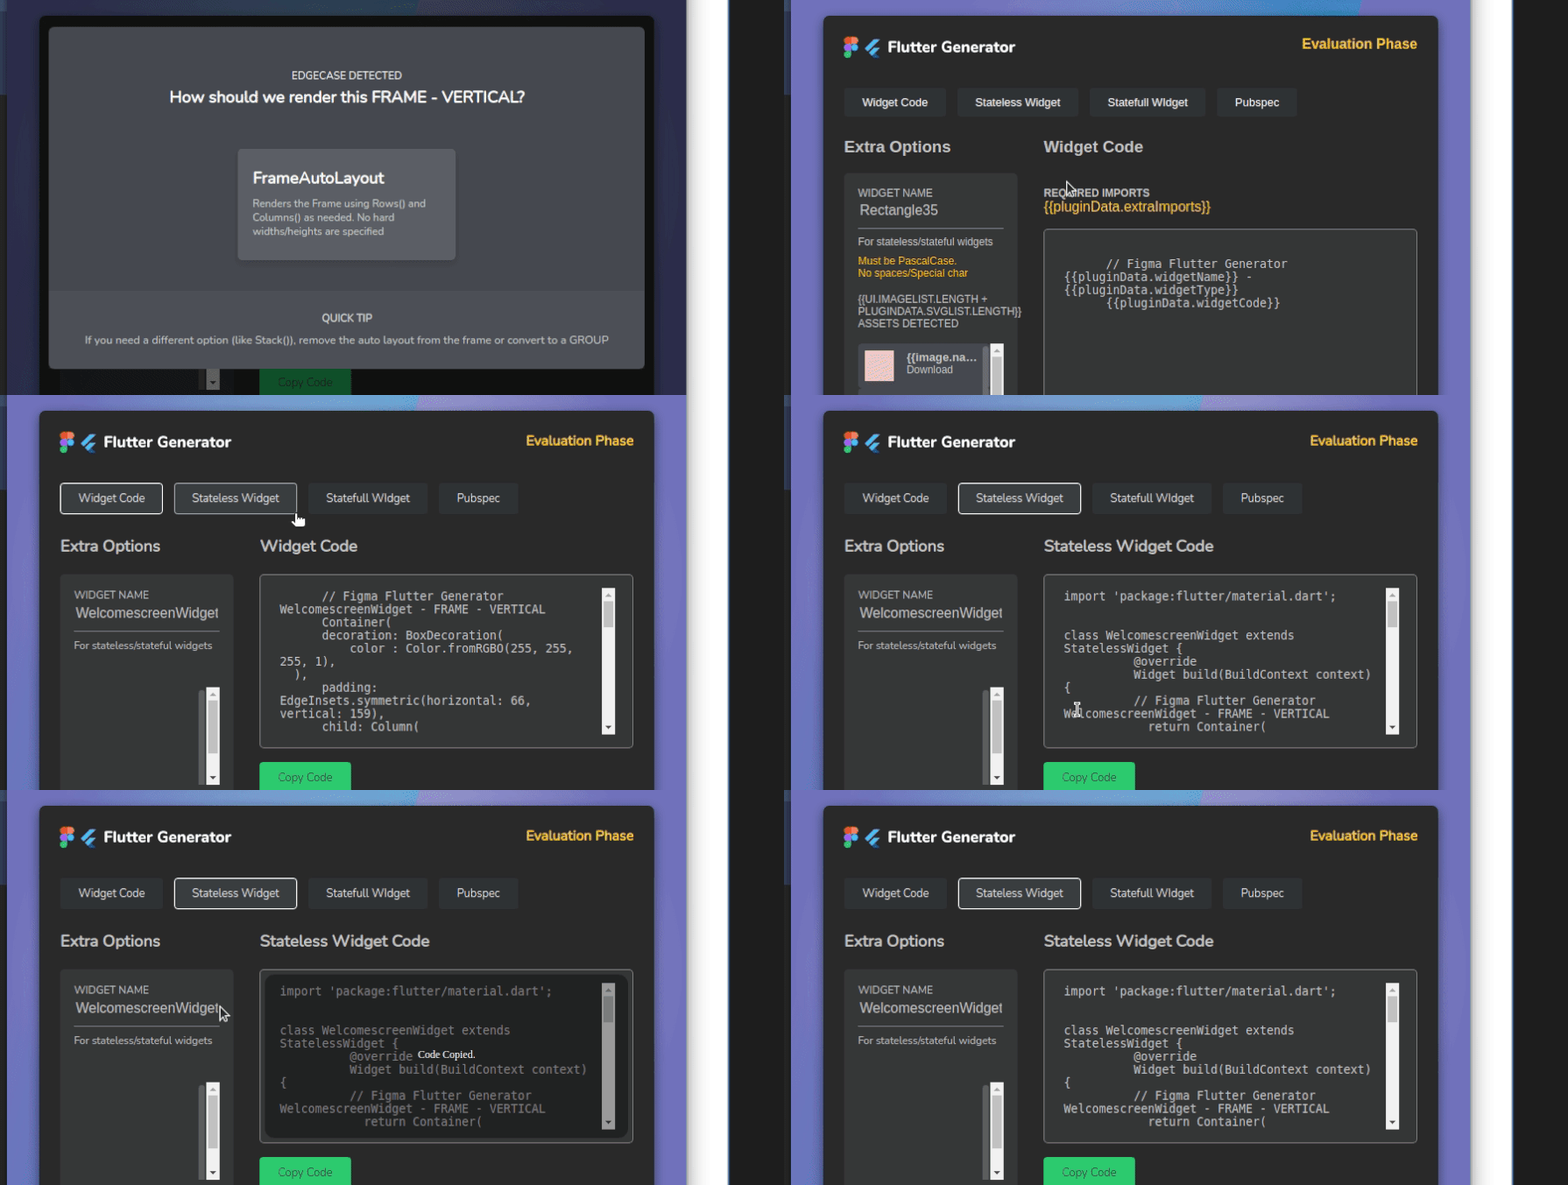
This plugin can generate Flutter code for complex frames that host multiple child element layers similar to the Flutter to Code plugin using the row-column-container layout concept.
Once you select the welcome screen frame and load the plugin, the plugin will generate the WelcomescreenWidget stateless widget. Copy-paste it into the lib/main.dart file and render it to widget three by modifying the app scaffold, as shown in the following code snippet (make sure to remove the auto-generated import statement):
//...
home: Scaffold(
  body: SingleChildScrollView(child: WelcomescreenWidget())
),
// ...
Set the width similar to the previous plugin to solve the screen width issue:
//...
return Container(
  width: double.maxFinite,
//...
Reload the Flutter app. You’ll see a welcome screen similar to the Figma design:
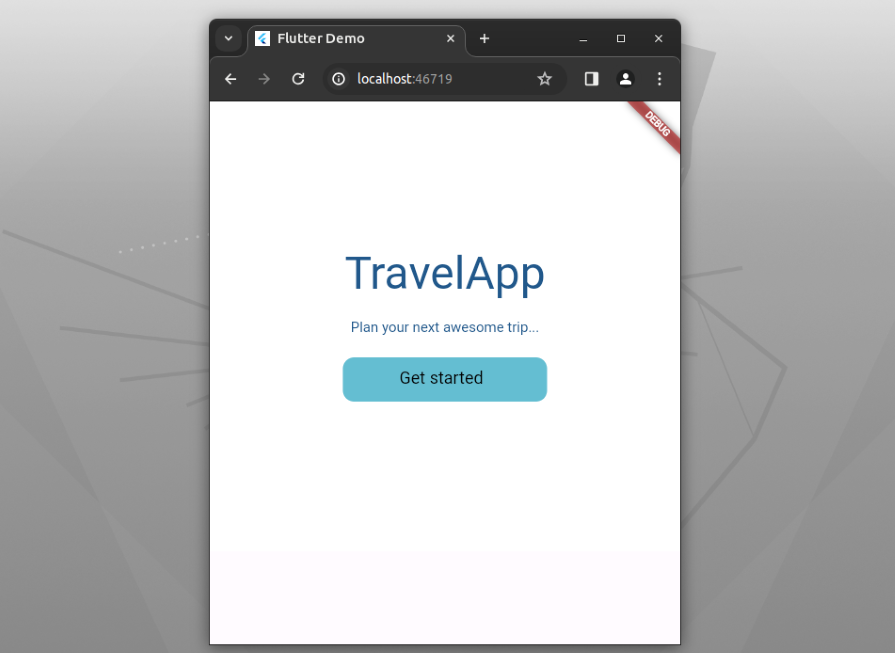
You may notice some minor issues with padding between auto-layout elements and font styling— you can solve these issues by updating the auto-generated code.
The Figma2Flutter plugin helps you generate a complete Flutter project from a Figma design prototype. You can set matching Flutter widget types of each Figma UI element before generating Flutter code, so it reduces time-consuming widget tree changes after the code generation process.
This plugin won’t generate code for selected Figma elements as the previous plugins did, but it generates a complete Flutter project codebase by inspecting the entire Figma prototype. The Figma2Flutter plugin typically communicates with an external web service and generates a Flutter project that contains the app source in an auto-generated external Dart package.
First, install this plugin into the current Figma design file and launch the plugin window. You should set Flutter widget types for each prototype element for better results. Once you map widget types, the plugin generates a better Flutter widget tree based on the stored mappings.
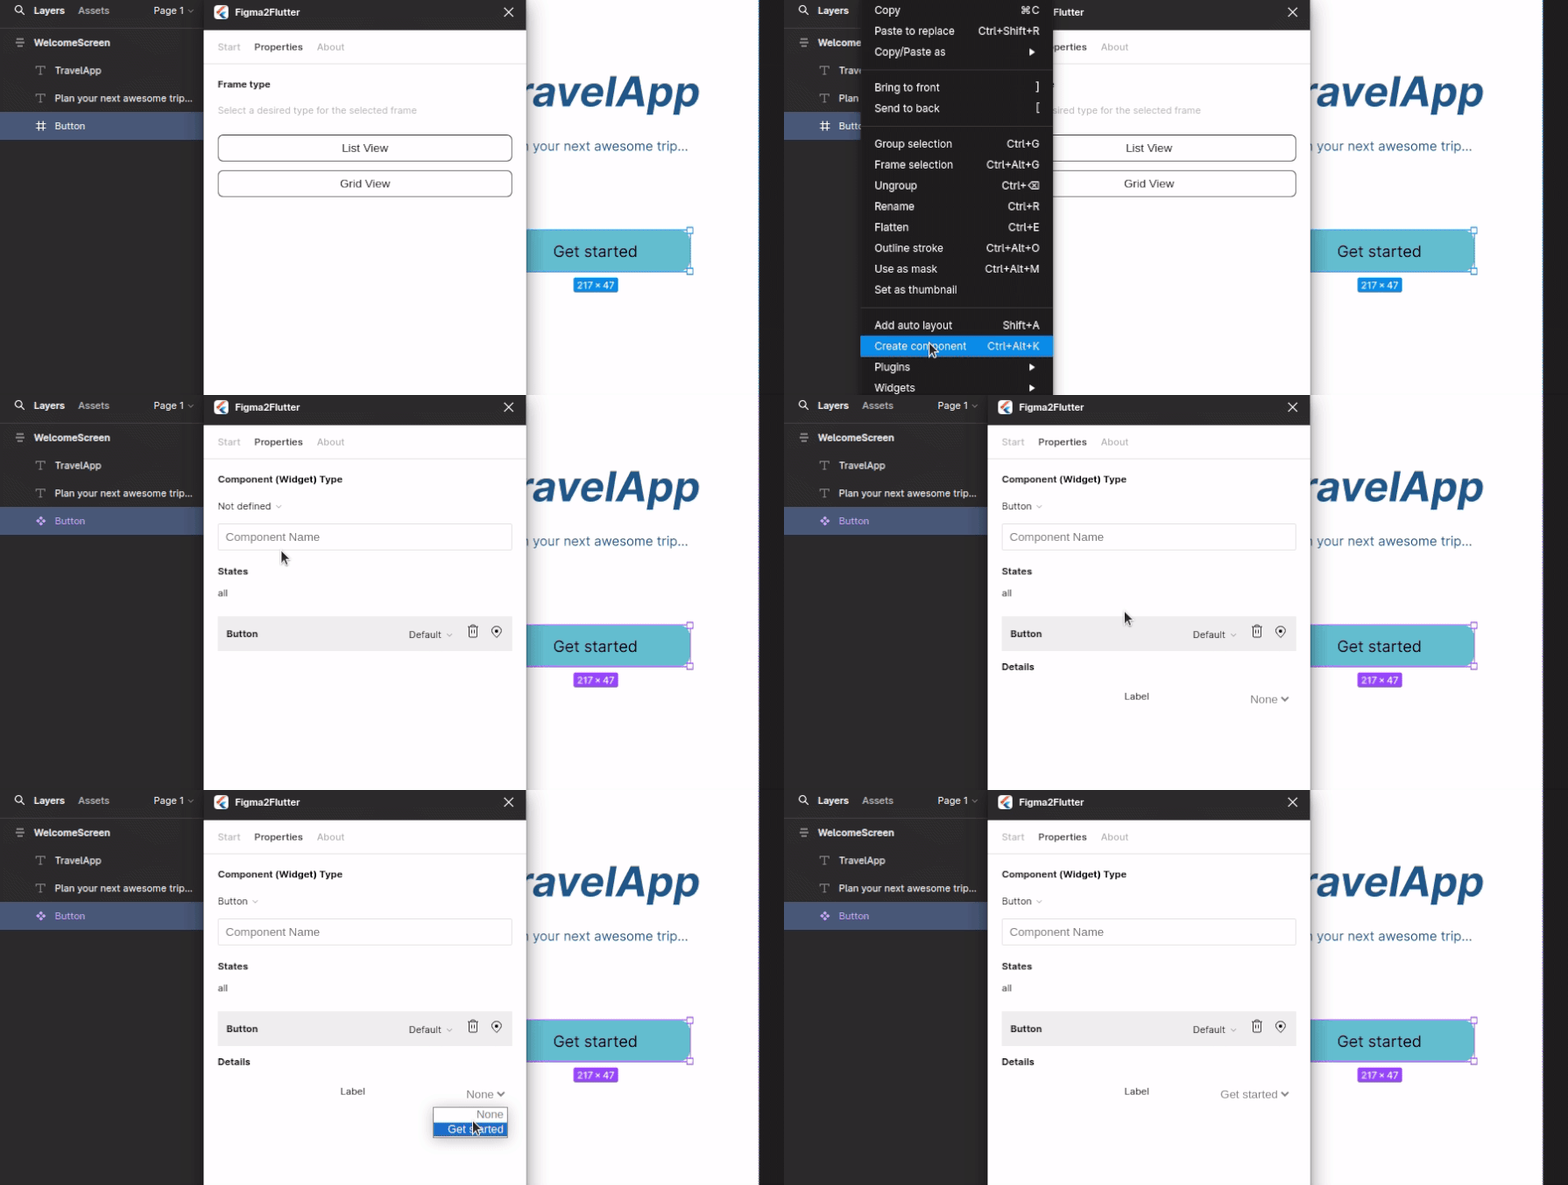
Let’s create element-to-widget mappings in the sample design. Select the WelcomeScreen element, and select the Screen widget type as follows:

Select the Button frame and create a new Figma component. Next, select it as a Flutter button, as shown in the following preview:
Export your Figma design as a Flutter project by clicking the last action button of the plugin window. Once you export the Figma design, you’ll be redirected to an external web service that shows the results of the code generation process. Download the generated ZIP file into a new directory and extract it. Now, you’ll see a complete Flutter project source in extracted files.
Once the Flutter project is on your local computer, you can test it by running it on Chrome as follows:
flutter run -d chrome
This project properly sets the welcome screen width and renders a native button for the Figma button component since we pre-selected target widget types explicitly before code generation. Look at the following preview:
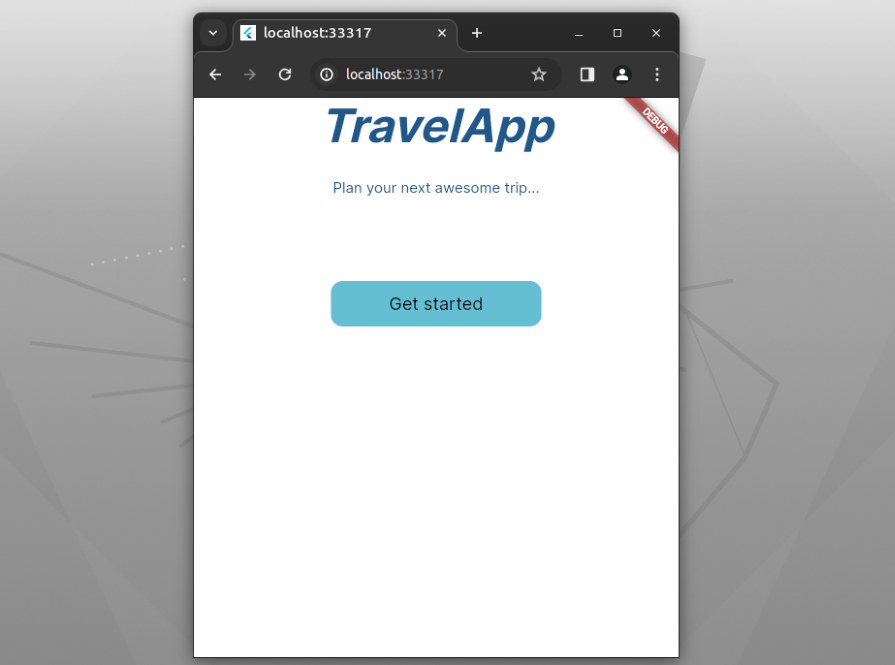
This project renders Flutter widgets and handles app events using a custom wrapper API module that gets included by the plugin, so developers have to learn it from the official library documentation for continuing development activities with the generated Flutter codebase. This plugin generates better outputs, but the generated code isn’t as readable as developers expect, so developers have to refactor it as they wish.
Even though this Figma plugin generates Flutter app codebases using an external cloud service, it is still a free plugin in the Figma community.
DhiWise is a fully-featured app builder that can generate Flutter, HTML, Next.js, React, Android (Kotlin), and iOS (Swift) projects based on Figma design files. This platform can generate app codebases either within the platform by importing Figma designs or within Figma by using the DhiWise Figma plugin.
DhiWise doesn’t ask you to select target Flutter widget types before code generation like the Figma2Flutter plugin — it recommends you use a Figma UI element creation specification for generating better outputs. For example, DhiWise detects a button component if we use a text block inside a Figma frame — otherwise, it won’t detect a specific shape as a Flutter button widget.
DhiWise also provides a pre-designed UI kit that has various UI elements that follow this specification, so you can create designs with those elements to generate better Flutter code with DhiWise.
DhiWise turns prototype navigations into Flutter navigation actions and integrates state management libraries like Bloc. This platform offers a free account type with limited facilities and two paid account types with extended, advanced facilities.
First, install the DhiWise plugin and launch it. Login with DhiWise, select the Design to Code option, and generate Flutter code by entering the Figma design URL, as shown in the following preview:
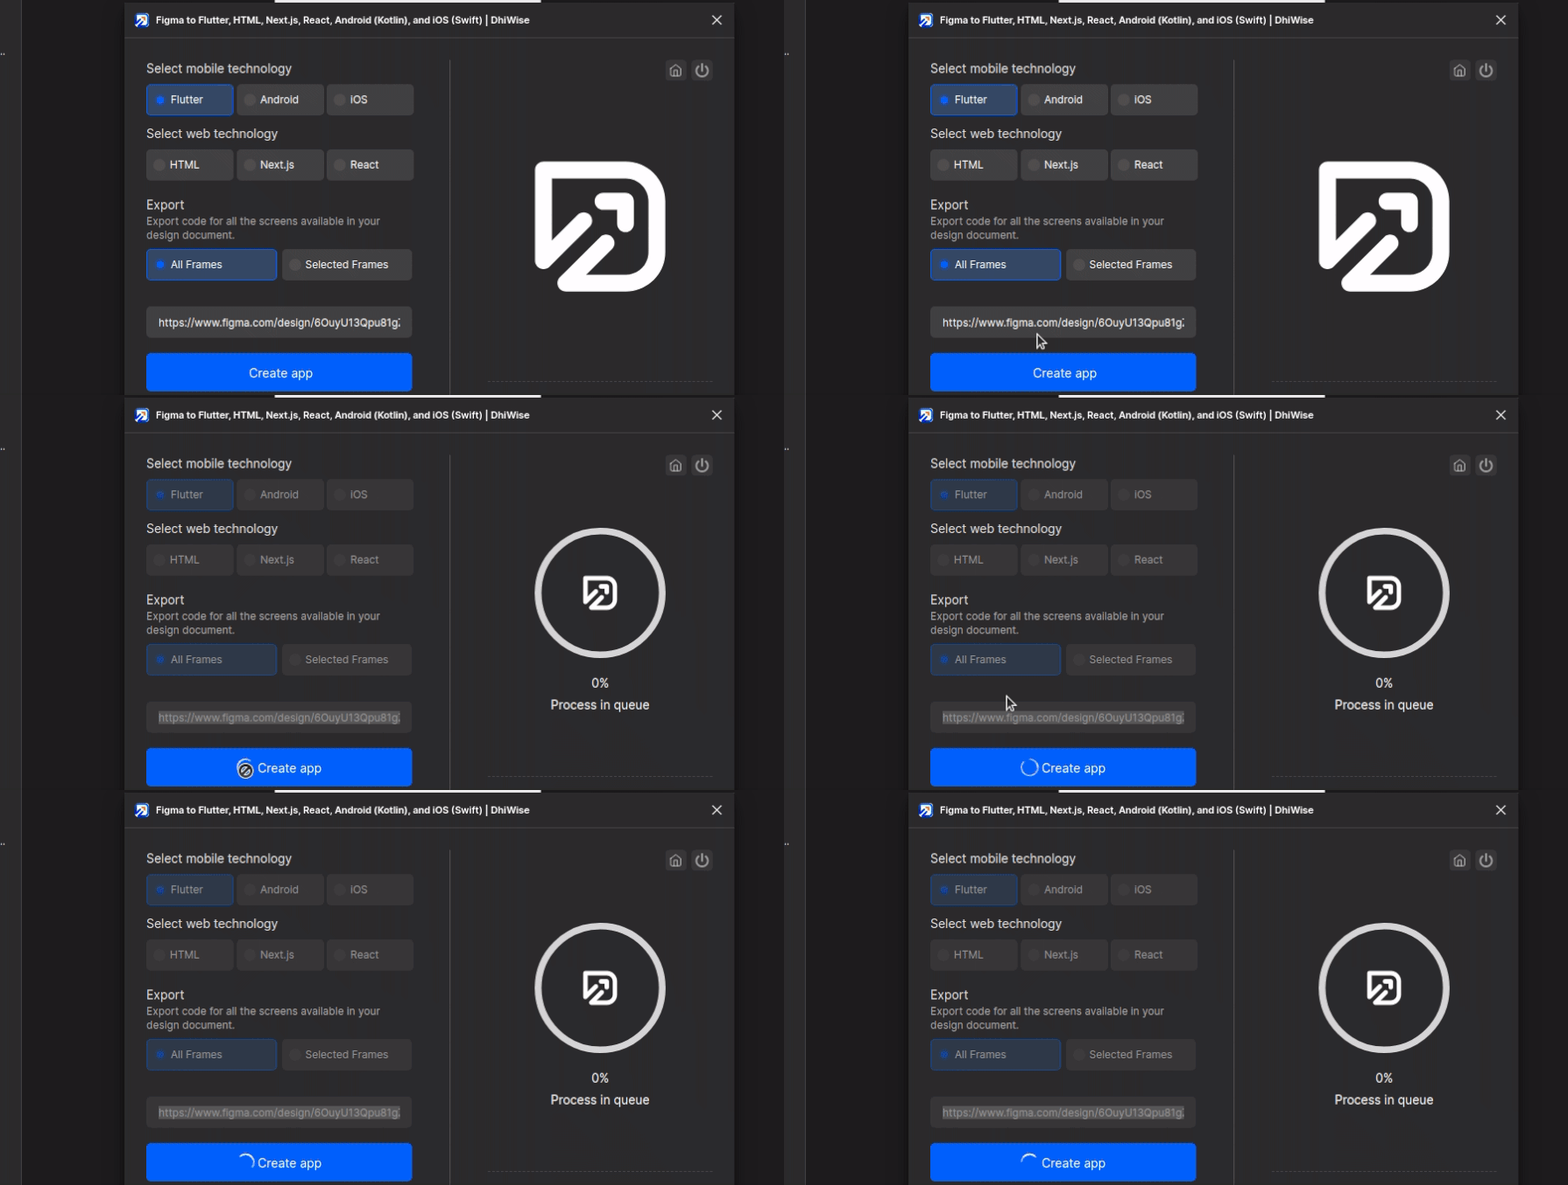
Once DhiWise generates the app UI, you will see a navigation button that brings you to the DhiWise platform where you can access the Flutter app builder. The app builder interface lets you adjust the welcome screen UI by editing its UI source file, and it displays a preview section where you can compare the generated UI with the original Figma design preview. Click the Build app button and download the source code onto your computer.
Extract the downloaded ZIP file and access the source code generated by the DhiWise platform. The generated code has a well-designed structure with better maintainability and clean code practices, unlike other Figma to Flutter code generation plugins.
Run the app on Chrome using the following command:
flutter run -d chrome
As you can see, the generated app code doesn’t require any adjustment since it uses a proper width for the welcome screen and a button widget for the Figma button element. Moreover, the UI elements scale with the device width changes, unlike previous codes generated with other plugins.
Look at the following preview:
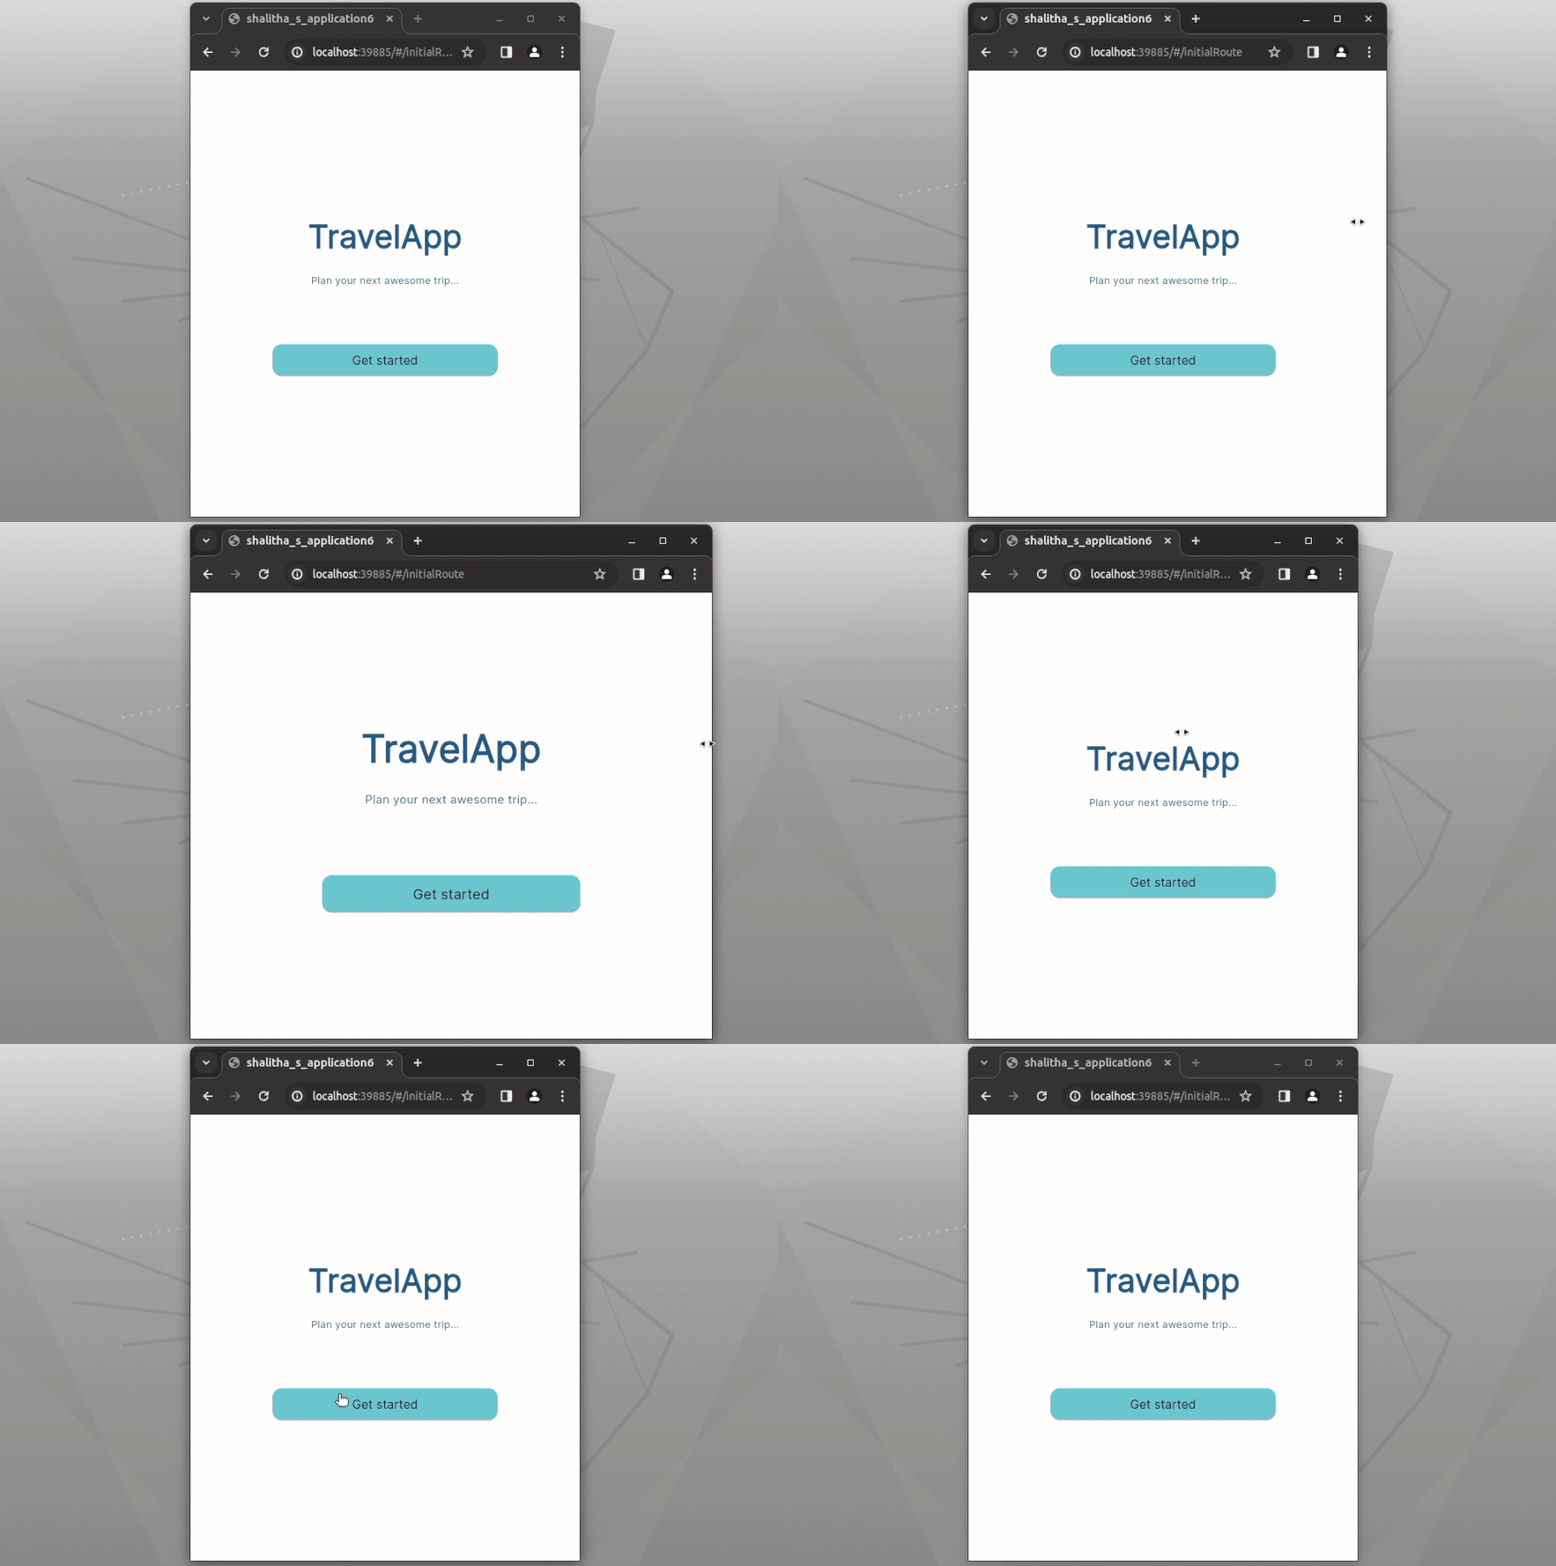
The generated code is easy to edit since it doesn’t use a custom widget rendering API. DhiWise typically creates separate widget files for components with a well-structured theme, so you can easily customize them as you wish!
Each Figma-to-Flutter code generation plugin has various pros and cons, so select a better one for your development scenario using the following comparison table:
| Comparison factor | Figma to Code | FigmaToFlutter | Figma2Flutter | DhiWise |
| Supported output code type | Widget | Widget | App | App |
| Converts form control widgets (i.e., buttons, dropdowns, etc.) properly | No | No | Yes, but after explicit element-to-widget mapping | Yes, but after creating UI elements based on a given specification (a UI kit is also provided) |
| Includes a custom API for rendering widgets and working with events | No | No | Yes, figma2flutter | No |
| Translates prototype transitions into screen transitions | No | No | Yes | Yes |
| Code quality | Good | Good | Code is not readable as we expect | Good, uses better maintainability-first design patterns |
| Cost | Free | Free | Free | Free account with limited facilities and prop plans with extended, advanced facilities |
| Interface similarity with the original Figma design | Good, but require some adjustments to make the screen look the same as the Figma design | Average, require more adjustments to make the screen look the same as the Figma design | Very good, but a few padding/margin tweaks may be required | Very good |
| Detects and includes common app resources like images and fonts | No | Yes | Yes | Yes |
| Integrates Flutter state management libraries | No | No | No | Yes |
| Displays a preview of the generated UI | Yes | No | No | Yes, but within the cloud app |
Overall, every plugin has various pros and cons. However, DhiWise exports overall the best auto-generated code among these plugins. Meanwhile, the Figma2Flutter plugin competitively improves its code generation features by staying as a free service. Both Figma2Flutter and DhiWise plugins help you export your Figma design as a complete Flutter app.
Figma to Code and FigmaToFlutter plugins help you to generate Flutter widget code for selected Figma UI elements, so those plugins are very helpful if you partially automate the Figma-to-Flutter translation process by copy-pasting some widget codes while designing/structuring the Flutter app yourself.
In this tutorial, you learned how to transfer your Figma designs into Flutter code. You discussed manual design translation strategies and created a Flutter app based on a welcome screen designed with Figma. You explored two community plugins that generate Flutter code for selected Figma elements and two external-services-based Figma plugins that let you export a complete Figma design file as a multi-screen Flutter app. Finally, you compared all four Figma-to-Flutter conversion plugins in a table.
Automatic code generation plugins help you to create Flutter apps faster. Still, they typically limit the flexibility of the codebase, so developers may have to adhere to the code generator’s layout and styling principles. So, if you expect a flexible and highly maintainable Flutter app codebase, transferring the Figma file into Flutter manually is still a great decision. However, using automatic code generators to deliver a medium-scale Flutter app under a tight budget is also a smart decision.
LogRocket's Galileo AI watches sessions and understands user feedback for you, automating the most time-intensive parts of your job and giving you more time to focus on great design.
See how design choices, interactions, and issues affect your users — get a demo of LogRocket today.

I’ve spent enough time designing with WCAG 2.2 to know it’s not enough. Here’s why I’m skeptical and cautiously hopeful about WCAG 3.0.
I learned this lesson the hard way. Good UX doesn’t survive endless approval loops. Here’s what went wrong — and how to protect your vision.
I’ve reviewed “final” designs more times than I can count — and the copy almost always gives users a reason to hesitate.

The checkbox is one of the most common elements in UX design. Learn all about the feature, its states, and the types of selection.