React.cloneElement() function to clone elementsReact.cloneElement()?React.cloneElement() is part of the React Top-Level API used to manipulate elements. It clones and returns a new element using its first argument as the starting point. This argument can be a React element or a component that renders a React element.

The new element will have the following characteristics:
key and ref from the original element are preservedReact.cloneElement() is useful when you want to add or modify the props of a parent component’s children while avoiding unnecessary duplicate code.
React.cloneElement()Before we look at some examples, let’s look at the syntax of React.cloneElement(). The syntax is given in the next code block, followed by some term definitions.
React.cloneElement(element, [props], [...children])
element: The element to be cloned[props]: Props that will be added to the cloned element in addition to those of the original element[...children]: The children of the cloned object. Note that the children of the existing object are not copiedYou can use React.cloneElement() within the definition of a parent component to perform the following processes:
This article dives deep into each of these three kinds of manipulations using the following examples:
React.cloneElement()When you modify children properties, that means you change the children’s properties by passing them through the parent component.
There is no better way to explain than through real code examples. We’ll use the following examples to illustrate this concept:
Before we move on, please note that in these examples, the modified properties are merged shallowly — the key and ref are maintained. There is no creation of new children yet, though we’ll take a look at that in the last example of this article.
In the next code block, RepeatCharacters is a parent component and CreateTextWithProps is a child component.
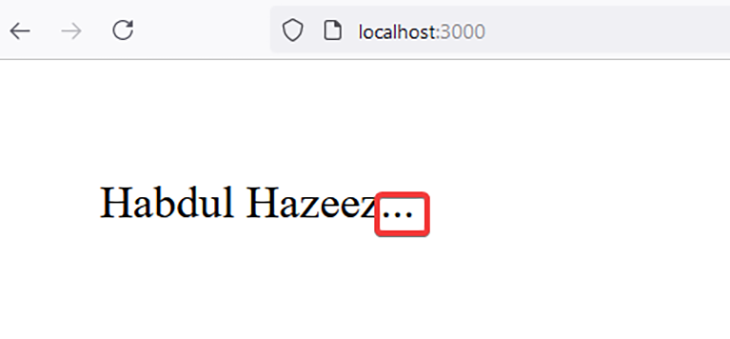
CreateTextWithProps has an attribute called ASCIIChar whose value is any valid ASCII character. RepeatCharacters will use React.cloneElement() to repeat this character in the cloned element the number of times specified in its times property.
import React from "react";
const CreateTextWithProps = ({ text, ASCIIChar, ...props }) => {
return (
<span {...props}>
{text}{ASCIIChar}
</span>
)
};
const RepeatCharacters = ({ times, children }) => {
return React.cloneElement(children, {
// This will override the original ASCIIChar in the text.
ASCIIChar: children.props.ASCIIChar.repeat(times),
})
};
function App() {
return (
<div>
<RepeatCharacters times={3}>
<CreateTextWithProps
text="Habdul Hazeez"
ASCIIChar='.'
/>
</RepeatCharacters>
</div>
)
}
export default App
Below is the result as seen in a Web browser:

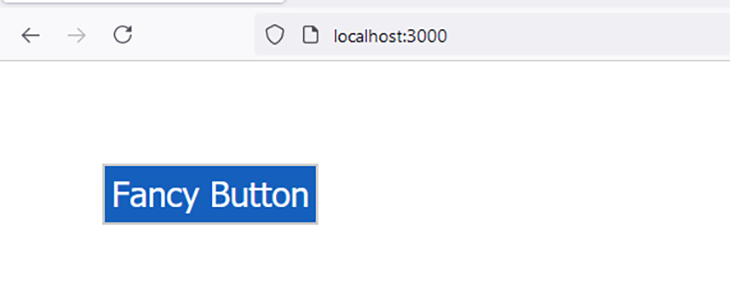
Nothing fancy here — this is some code that shows a button with the text “Fancy button” on it. It’s proof that you can customize these components to suit your needs.
The ButtonContainer component uses React.cloneElement() to modify the appearance of the element rendered by the Button component.
In this case, you provide null as the third argument to React.cloneElement() because, as a reminder, you are not creating any new children.
import React from "react";
const ButtonContainer = (props) => {
let newProp = {
backgroundColor: "#1560bd",
textColor: '#ffffff',
border: '1px solid #cccccc',
padding: '0.2em',
}
return (
<div>
{React.Children.map(props.children, child => {
return React.cloneElement(child, {newProp}, null)
})}
</div>
)
};
const Button = (props) => {
return <button
style={{
color: props.newProp.textColor,
border: props.newProp.border,
padding: props.newProp.padding,
backgroundColor: props.newProp.backgroundColor
}}>Fancy Button</button>
}
function App() {
return (
<ButtonContainer>
<Button />
</ButtonContainer>
)
}
export default App
When you view the result in a Web browser, you’ll get something similar to the image below.

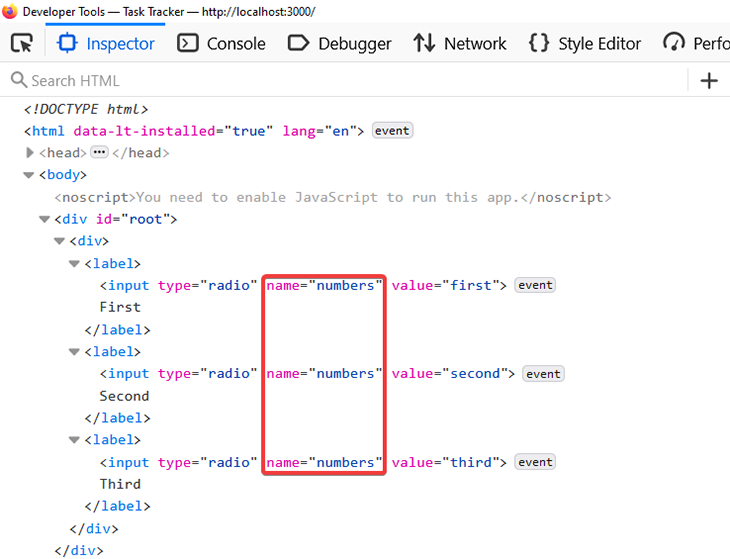
In HTML, radio buttons are grouped. You can only select one of the provided options, and they always seem to have a name attribute attached to them.
With the knowledge that you’ve gained so far, you can dynamically add this name attribute to multiple child components via a single parent component.
In this case, the child component should be either radio buttons or a component that renders the radio buttons.
import React from "react";
const RadioGroup = (props) => {
const RenderChildren = () => (
React.Children.map(props.children, child => {
return React.cloneElement(child, {
name: props.name,
})
})
)
return (
<div>
{<RenderChildren />}
</div>
)
}
const RadioButton = (props) => {
return (
<label>
<input type="radio" value={props.value} name={props.name} />
{props.children}
</label>
)
}
function App() {
return (
<RadioGroup name="numbers">
<RadioButton value="first">First</RadioButton>
<RadioButton value="second">Second</RadioButton>
<RadioButton value="third">Third</RadioButton>
</RadioGroup>
)
}
export default App
You can use your browser’s Inspect Element feature to confirm this.

You’ll likely find yourself in a situation where you have to create a website header with different text for different web pages.
Multiple options are available in your React arsenal, which likely includes storing the header text in a variable, passing this variable as a prop to a component, and rendering the text. You would probably then do this inside every component that requires this header text.
As you might guess, this creates unnecessary code duplication, and as software developers will know, we should always advocate for keeping things simple.
Instead, you can use React.cloneElement to achieve this same goal more easily. Create three reusable components, namely:
HeaderDefaultHeaderBigHeaderThe Header component would receive a component as a prop. This component will eventually render the header text. To be on the safe side, DefaultHeader will be the default component passed to Header.
DefaultHeader will render the default text. This default text is rendered when Header is called with no props.
Meanwhile, the BigHeader component will have a message prop whose value is your chosen header text. Every time you pass BigHeader to Header, you can modify the value of this message prop before it’s rendered by BigHeader.
All of this is illustrated in the next code block.
import React from "react";
import { BrowserRouter as Router, Route, Link } from 'react-router-dom';
const DefaultHeader = (color) => {
return (
<div style={{ color: "#1560bd" }}>
<p>Website of Habdul Hazeez</p>
</div>
)
}
const defaultMessage = 'Website of Habdul Hazeez';
const BigHeader = ({ color, message = defaultMessage }) => {
return (
<div style={{ color, fontSize: '2em' }}>
{message}
</div>
)
}
const Header = ({ hero = <DefaultHeader />}) => {
return (
<div>
{React.cloneElement(hero, { color: "#1560bd"})}
</div>
)
}
const HomePage = () => {
return (
<Header hero={<BigHeader message="This is the home page" />} />
)
}
const AboutMe = () => {
return (
<Header hero={<BigHeader message="Information about me" />} />
)
}
const ContactPage = () => {
return (
<Header hero={<BigHeader message="This contains my contact information." />} />
)
}
function App() {
return (
<React.Fragment>
<Router>
<nav>
<ul>
<li>
<Link to="/">Home</Link>
</li>
<li>
<Link to="/contact-page">Contact</Link>
</li>
<li>
<Link to="about-me">About</Link>
</li>
</ul>
</nav>
<Route exact path="/"><HomePage /></Route>
<Route path="/contact-page"><ContactPage /></Route>
<Route path="/about-me"><AboutMe /></Route>
</Router>
</React.Fragment>
)
}
export default App
When you add to a child property, that means you’ve inserted something new into the child via the parent component.
The following examples discussed in this section will explain how to add props via React.cloneElement().
Note, as I stated in the previous section, the new props are merged in, key and ref are maintained and new children are not created (at least for now).
Don’t get discouraged when you read this section’s title and think: “This is easy.” I know it’s “easy” — on its face. The lesson here is adding a property to the child element(s) using React.cloneElement().
To show you how this works, we’ll revisit the first example in this article, about repeated characters. You will not be repeating any characters, though — instead, you’ll define a custom CSS style that is added to the child using the React.cloneElement() function.
This is illustrated in the next code block.
import React from "react";

const CreateTextWithProps = ({ text, ...props }) => {
  return (
    <span {...props}>
      {text}
    </span>
  )
};

const BoldText = ({ children }) => {
  return React.cloneElement(children, {
    style: {
      fontWeight: 'bold'
    },
  })
};

function App() {
  return (
    <div>
      <BoldText>
        <CreateTextWithProps
          text="Habdul Hazeez"
        />
      </BoldText>
    </div>
  )
}

export default App;
React.cloneElement()This is similar to what you did in the above section, titled “Clone another React element as a prop,” but here, you’ll clone a prop using React.cloneElement(). This prop has to be a valid React element, such as <h1> or <button>.
When you clone this prop, you can pass additional properties like CSS styling or an event handler.
In the next code block, you’ll pass a handleClick function to the prop that gets rendered by AlertOnClick. Therefore, every time the element is clicked, the code within handleClick is executed.
import React from "react";
const AlertOnClick = (props) => {
function handleClick () {
alert("Hello World")
}
const Trigger = props.trigger;
return (
<div>
{React.cloneElement(Trigger, {
onClick: handleClick
})}
</div>
)
}
function App() {
return (
<div>
{
<AlertOnClick trigger={<button>Click me</button>} />
}
</div>
)
}
export default App
So far, you’ve modified and added to children props. This example demonstrates the last characteristics of a cloned element because we are finally creating a new child! This new child is passed as the third argument to React.cloneElement().
In this example, we’ll extend the functionality of the children.
In the next code block, a new button element created via React.cloneElement() from the Button component has two additional twists: an onClick event handler and new text.
import React from "react";
const Button = () => {
return (
<button type="button" style={{ padding: "10px" }}>
This is a styled button
</button>
)
}
function App() {
return (
<section>
{
React.cloneElement(
Button(), // component to overwrite
{
onClick: () => { // additional props
alert("You are making progress!!!")
}
},
<>
Styled button with onClick
</>
)
}
</section>
)
}
export default App
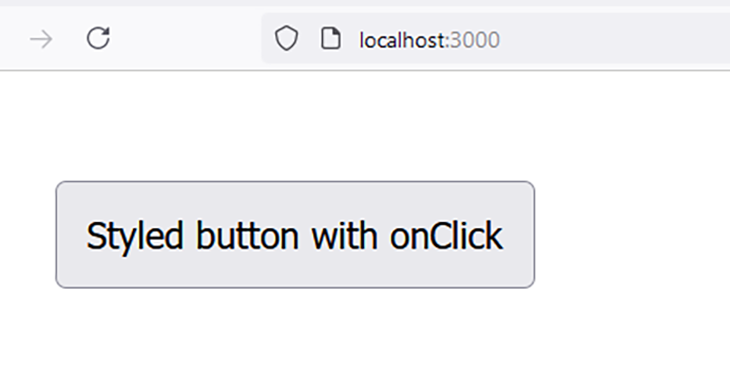
When this code is executed, the button will render with the text added via React.cloneElement() function which will read “Styled button with onClick” as seen in the image below.

This article explained how to use the React.cloneElement() function using seven different examples. Four of those examples explained how to modify the props of child components; another two examples detailed how to add props to child components; and, finally, our last example showed how to extend the functionality of a child component.
Hopefully, what you learn in this article can add some touch of creativity to your React applications!
Install LogRocket via npm or script tag. LogRocket.init() must be called client-side, not
server-side
$ npm i --save logrocket

// Code:

import LogRocket from 'logrocket';
LogRocket.init('app/id');
// Add to your HTML:

<script src="https://cdn.lr-ingest.com/LogRocket.min.js"></script>
<script>window.LogRocket && window.LogRocket.init('app/id');</script>
Hey there, want to help make our blog better?
Join LogRocket’s Content Advisory Board. You’ll help inform the type of content we create and get access to exclusive meetups, social accreditation, and swag.
Sign up now
Not sure if low-code is right for your next project? This guide breaks down when to use it, when to avoid it, and how to make the right call.

Compare Firebase Studio, Lovable, and Replit for AI-powered app building. Find the best tool for your project needs.

Discover how to use Gemini CLI, Google’s new open-source AI agent that brings Gemini directly to your terminal.

This article explores several proven patterns for writing safer, cleaner, and more readable code in React and TypeScript.
One Reply to "Using the <code>React.cloneElement()</code> function to clone elements"
Thanks a lot for this comprehensive article on the React.cloneElement() function. I was looking for a way to add new html classes to the child element of a component and this helped.