Editor’s note: This article was updated on 27 June, 2022 to include troubleshooting tips and more up-to-date information about Mapbox GL JS.
The Replay is a weekly newsletter for dev and engineering leaders.
Delivered once a week, it's your curated guide to the most important conversations around frontend dev, emerging AI tools, and the state of modern software.
Mapbox is a live location platform that allows developers to create interactive and intuitive map interfaces for a variety of applications. On the web, this is done using a JavaScript library called Mapbox GL JS, which uses Web GL to render interactive maps from vector tiles and Mapbox styles.
If you’re adding map interfaces to your React application, the Uber engineering team has created a React package called react-map-gl that makes this process much easier. The package provides an integration for Mapbox GL JS, as well as an easy-to-use component library to build on.
In this article, we are going to make use of react-map-gl to build two map components: one that displays our current location and another that allows us to search for locations across the globe.
To get started, let’s create a new React application with the following command:
npx create-react-app mapbox-react
To start using the react-map-gl package, we’ll also need to install it with npm in our application, along with the Mapbox GL JS library (mapbox-gl) so that we can import its styling.
We can also do this with the command below:
npm install react-map-gl mapbox-gl
Let’s start by pinpointing our current location. With the react-map-gl package, we can do just that by importing a built-in component called GeolocateControl, which allows us to track the user’s location through the browser by simply clicking a button.
However, before we can start using Mapbox stylings, we’ll need to create a free account to retrieve our MAPBOX_TOKEN. If you haven’t already, you can head over to their signup page.
Let’s try this out by creating a new React component with the following code:
import Map, { GeolocateControl } from "react-map-gl";
import "mapbox-gl/dist/mapbox-gl.css";

function MyMap() {
  return (
    <div>
      <Map
        mapboxAccessToken="MAPBOX_TOKEN"
        initialViewState={{
          longitude: -100,
          latitude: 40,
          zoom: 3.5,
        }}
        mapStyle="mapbox://styles/mapbox/streets-v11"
      >
        <GeolocateControl
          positionOptions={{ enableHighAccuracy: true }}
          trackUserLocation={true}
        />
      </Map>
    </div>
  );
}
export default MyMap;
Kindly make sure to update MAPBOX_TOKEN on line eight above with the token you retrieve from your own Mapbox dashboard.
The code shown above creates a map with the ability to get our current position by clicking on a button at the top left corner of the page, and we can see how easy this works by merely importing two components from the react-map-gl library with a few lines of code.
We also used the <Map/> component to set a map view, along with a default longitude and latitude via the initialViewState prop. Next, we imported a second component, <GeolocateControl/>, which is responsible for the icons that let us retrieve our current location.
One flaw with our example is that our current location is not loaded immediately after our map is active; we still have to click a button to get it. We can fix this by leveraging the browser’s Geolocation API to get our current location during load time, and setting the result as our default viewport.
Below is an updated example showing how to do this:
import { useState, useEffect } from "react";
import Map, { Marker } from "react-map-gl";
import "mapbox-gl/dist/mapbox-gl.css";

function MyMap() {
  const [viewport, setViewport] = useState({});
  useEffect(() => {
    navigator.geolocation.getCurrentPosition((pos) => {
      setViewport({
        ...viewport,
        latitude: pos.coords.latitude,
        longitude: pos.coords.longitude,
        zoom: 3.5,
      });
    });
  }, []);
  return (
    <div>
      {viewport.latitude && viewport.longitude && (
        <div>
          <h1>Your Location:</h1>
          <Map
            mapboxAccessToken="MAPBOX_TOKEN"
            initialViewState={viewport}
            mapStyle="mapbox://styles/mapbox/streets-v11"
          >
            <Marker
              longitude={viewport.longitude}
              latitude={viewport.latitude}
            />
          </Map>
        </div>
      )}
    </div>
  );
}
export default MyMap;
In this new example, we’ve used React’s useState hook to create a new viewport state, and with the useEffect hook, updated the value for this state to be our current location as retrieved from the browser’s navigation API. You might also notice that we’ve ditched the GeolocateControl component, as we are now getting our current location automatically.
Finally, we took this a bit further by adding a marker to our location via the Marker component.
With this, we are able to see our current location via a marker whenever our React application has been loaded.
To be able to search for a user’s location, we will build on the capabilities of react-map-gl using a package called react-map-gl-geocoder, a React wrapper for the mapbox-gl-geocoder for use with react-map-gl. And, to add an overlay, we will be marking the area we have searched on our map.
For greater readability, we will also be employing another visualization framework, deck-gl, also created by the Uber engineering team. We can install these two libraries with the command below:
npm install react-map-gl-geocoder deck.gl
Once we have this all set up, let’s create a new SearchableMap map with the code below:
import "mapbox-gl/dist/mapbox-gl.css";
import "react-map-gl-geocoder/dist/mapbox-gl-geocoder.css";
import { useEffect, useRef, useState } from "react";
import Map from "react-map-gl";
import DeckGL, { GeoJsonLayer } from "deck.gl";
import Geocoder from "react-map-gl-geocoder";

const token = "MAPBOX_TOKEN";

const SearchableMap = () => {
  const [viewport, setViewPort] = useState({
    latitude: 0,
    longitude: 0,
    zoom: 1,
    transitionDuration: 100,
  });
  const [searchResultLayer, setSearchResult] = useState(null);
  const mapRef = useRef();
  const handleOnResult = (event) => {
    console.log(event.result);
    setSearchResult(
      new GeoJsonLayer({
        id: "search-result",
        data: event.result.geometry,
        getFillColor: [255, 0, 0, 128],
        getRadius: 1000,
        pointRadiusMinPixels: 10,
        pointRadiusMaxPixels: 10,
      })
    );
  };
  const handleGeocoderViewportChange = (viewport) => {
    const geocoderDefaultOverrides = { transitionDuration: 1000 };
    console.log("Updating");
    return setViewPort({
      ...viewport,
      ...geocoderDefaultOverrides,
    });
  };
  useEffect(() => {
    console.log({ viewport });
  }, [viewport]);
  return (
    <div>
      <h1>Use the search bar to find a location on the map</h1>
      <Map
        ref={mapRef}
        {...viewport}
        mapStyle="mapbox://styles/mapbox/streets-v9"
        width="100%"
        height="70vh"
        onViewportChange={setViewPort}
        mapboxAccessToken={token}
      >
        <Geocoder
          mapRef={mapRef}
          onResult={handleOnResult}
          onViewportChange={handleGeocoderViewportChange}
          mapboxAccessToken={token}
          position="top-left"
        />
      </Map>
      <DeckGL {...viewport} layers={[searchResultLayer]} />
    </div>
  );
};
export default SearchableMap;
First, we create a map container with the <Map/> component, as we did in our previous examples. Next, we used the Geocoder component from react-map-gl-geocoder, which works as a search component that returns the coordinates of a given location from the Mapbox API.
It takes a few props; the onResult prop is a function that is called when a result parameter is returned from the search and in our case, it creates a GeoJsonLayer object and places it in state as searchResultLayer. This GeoJsonLayer is then used to create a deck-gl layer over the map, indicating the location searched for in the map.
Just like the <Map/> component, the Geocoder also has an onViewportChange function that is called to update the map; in our case we’ve chosen to create a separate function to handle this called handleGeocoderViewportChange so as to override the transition duration when updating the viewport on the map.
If you wish to use the defaults, you can use the same viewport change handler as Mapbox. The geocoder also requires the Mapbox token to access the Mapbox API and fetch locations.
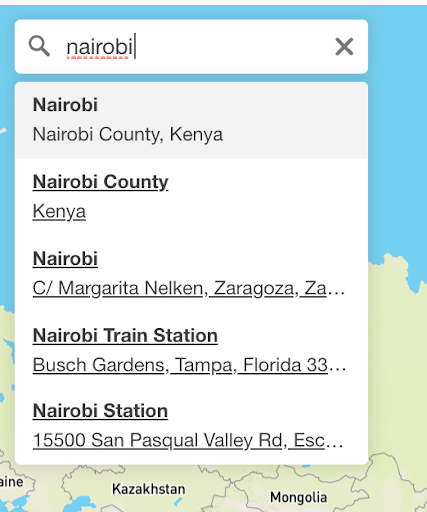
When searching, our geocoder will suggest some locations as shown below.
You will also notice that we created and used a ref that integrates the two components, and is passed to both as a mapRef prop.
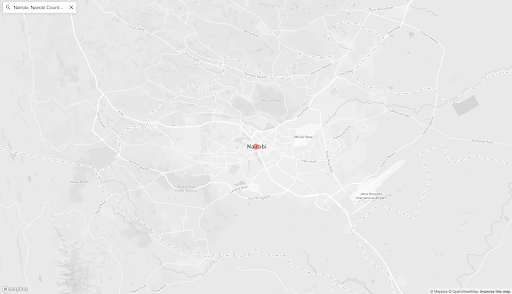
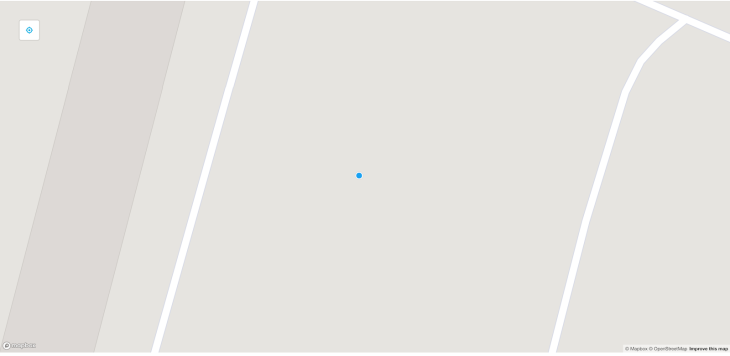
The last piece in our searchable map is the deck.gl layer we created data for. This will render on the map when we search for an area. It is passed the viewport details as well as the searchResultLayer, which it uses to generate the dot over our location as shown below.
And that’s it, we have a searchable map!
So far, we’ve created two React components for our map examples (MyMap and SearchableMap). Let’s take our application a little further by routing between these two components. We can do this by simply installing react-router-dom:
npm install react-router-dom
And to achieve the routing, let’s update our App.js file with the following code:
import MyMap from  './components/MyMap'
import SearchableMap from './components/SearchableMap';
import { Route, Switch, BrowserRouter } from 'react-router-dom'

function App() {
  return (
      <div>
        <div style={{ margin: '0 auto', textAlign: 'center', fontSize: '2rem'}}>
          <a href="/">Show My Location</a> or <a href="/search">Search</a>
        </div>
        <BrowserRouter >
        <Switch>
            <Route exact path="/" component={Map} />
            <Route exact path="/search" component={SearchableMap} />
        </Switch>
        </BrowserRouter>
      </div>
  )
}

export default App
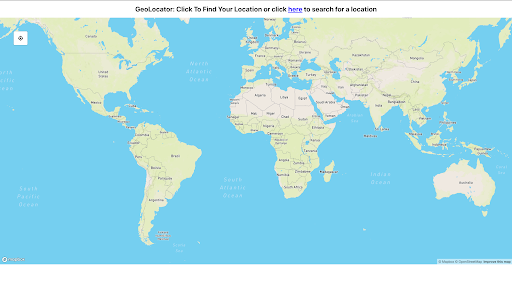
We’re all set! Run your app to play around two components. Here’s how they’ll look once completed; we can navigate between the search and location pages by using the links at the top of the page.
If you are using an incompatible version of the react-map-gl-geocoder package, you may encounter the following error when attempting to import the Geocoder component:
export 'FlyToInterpolator' (imported as 'r') was not found in 'react-map-gl'
This error occurs because the react-map-gl-geocoder package is dependent on a component that may not be compatible with the version of the react-map-gl library you have installed. To resolve this, we need re-create the Geocoder component from scratch by installing and following the instructions highlighted in this GitHub repository.
For other errors, make sure you’ve installed all of the necessary packages, as your map may not function properly without them.
Mapbox GL JS is a great tool for creating interactive map interfaces, and with react-map-gl, it’s even easier to integrate into React applications. In addition to the surrounding ecosystem of packages from Uber, you can expand on its functionality to create a variety of great looking interfaces using deck-gl to create stunning looking overlays.
Uber has put more emphasis on web geospatial technology like Mapbox through vis.gl under which their various suite of frameworks (including Mapbox) fall, and it will be interesting to see what else the future holds for them.
Install LogRocket via npm or script tag. LogRocket.init() must be called client-side, not
server-side
$ npm i --save logrocket

// Code:

import LogRocket from 'logrocket';
LogRocket.init('app/id');
// Add to your HTML:

<script src="https://cdn.lr-ingest.com/LogRocket.min.js"></script>
<script>window.LogRocket && window.LogRocket.init('app/id');</script>

Why the future of DX might come from the web platform itself, not more tools or frameworks.

A hands-on test of Claude Code Review across real PRs, breaking down what it flagged, what slipped through, and how the pipeline actually performs in practice.

CSS art once made frontend feel playful and accessible. Here’s why it faded as the web became more practical and prestige-driven.

Learn how inline props break React.memo, trigger unnecessary re-renders, and hurt React performance — plus how to fix them.
Hey there, want to help make our blog better?
Join LogRocket’s Content Advisory Board. You’ll help inform the type of content we create and get access to exclusive meetups, social accreditation, and swag.
Sign up now

