The Firebase Emulator suite enables a local-first development workflow which is not only perfect for prototyping, but it’s also faster than communicating directly with the Firebase console, safer because your development environment is completely isolated (giving you the chance to test edge cases without worrying about corrupting or wiping your production data), and cheaper.

Regardless of how many developers are working on a project, all interactions with Firebase remain local.
To make use of this guide, you need:
To get started, create a react-app using $ yarn create react-app todo && cd my-app and install firebase-tools globally by running $ yarn global add firebase-tools. Run $ firebase login to authenticate yourself.
To create a Firebase project, run $ firebase projects:create and enter a unique ID. You can store your ID in a variable $ fbid=your-unique-id-here (which can be used as $fbid.)
Next, create a Firebase web app in your project by running $ firebase apps:create --project $fbid web my-app.
Inside the root of your react app directory, enable Firestore by running $ firebase init firestore --project $fbid, which will error out with a link to enable the feature in the Firebase console. After doing so, re-run $ firebase init firestore --project $fbid, which will create a couple of files.
Having done that, now run $ firebase init emulators --project $fbid and select the Authentication and Firestore emulators. Accept the default ports for each emulator, make sure to enable the Emulator UI, and download the emulators. (Again, Java must be installed on your system to run the emulators.)
Append the following to your .gitignore:
firebase-debug.log*
firestore-debug.log*
ui-debug.log*
Then install firebase as a dependency.
$ yarn add firebase
After initializing your Firebase project and app, put your app’s configuration in src/firebase.js by running $ firebase apps:sdkconfig --project $fbid > src/firebase.js and edit the file as such:
// src/firebase.js

import firebase from 'firebase/app';
import 'firebase/auth';
import 'firebase/firestore';

// TODO: Use a configuration object
firebase.initializeApp({
  projectId: '',
  appId: '',
  databaseURL: '',
  storageBucket: '',
  locationId: '',
  apiKey: '',
  authDomain: '',
  messagingSenderId: '',
});

const db = firebase.firestore();
const auth = firebase.auth;

// eslint-disable-next-line no-restricted-globals
if (location.hostname === 'localhost') {
  db.useEmulator('localhost', 8080);
  auth().useEmulator('http://localhost:9099/', { disableWarnings: true });
}

export default firebase;
export { db, auth };
The noteworthy part of this is that we check if we’re on localhost, which covers development and test environments, and tells firebase.auth() and firebase.firestore() to useEmulator.
In the auth useEmulator call, we disable warnings, which warn you not to use any real credentials (e.g., your Google credentials) as the data between your app and the emulator is transmitted via unencrypted HTTP.
In two separate shells, run $ yarn start and $ firebase emulators:start. Open the Firestore emulator UI at http://localhost:4000/firestore, which should look like this:
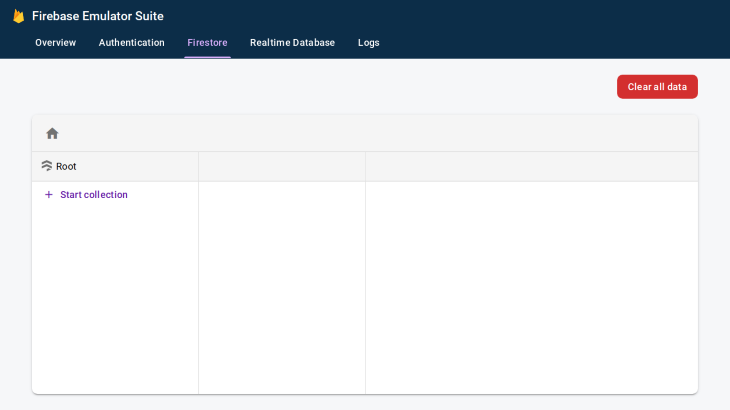
Alternatively, you can add npm script "emulators": "firebase emulators:start" and use $ yarn emulators to start the emulator.
In src/App.js, import db and write some data to Firestore Emulator:
// src/App.js
import React from "react";
import { db } from "./firebase";

function App() {
  db.doc("hello/world").set({ hello: "world" });
  return <div />;
}

export default App;
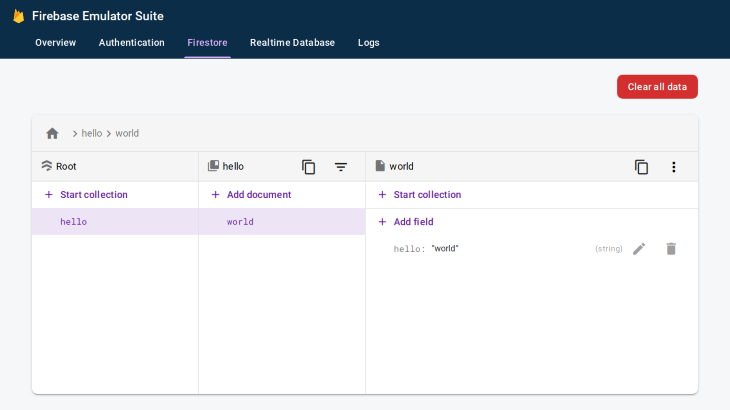
The Firestore tab should now have the data we set. If it doesn’t, refresh the page or navigate away and back to the tab.
To read data from Firestore Emulator, enter data in the UI first.
// src/App.js

import React from 'react';
import { db } from './firebase';

function App() {
  const [data, setData] = React.useState();
  React.useEffect(() => {
    db.doc('people/me')
      .get()
      .then((data) => setData(data.data()));
  }, []);

  return <p>{data?.hungry ? "I'm hungry" : "I'm full"}!</p>;
}

export default App;
A quick tip: you can run any Firestore method and interact with your local Firestore instance directly from the dev tools.
By default, the data written to the emulated database does not persist between sessions, but you can manually export and import data from the Realtime Database emulator UI or alter your emulators npm script to do that automatically:
"emulators": "firebase emulators:start --import=data --export-on-exit",
This will create a data directory that you can add to .gitignore. It’s worth noting that the Authentication emulator does not support automatic import/export in the current firebase-tools (version 9.0.1).
But, the feature is already merged into upstream, so it shouldn’t take long until you can persist users between sessions. If you need this feature and cannot wait, check out this issue for an array of workarounds.
To start using the authentication emulator, make sure that the Firebase emulator is running, and implement the authentication logic using any provider you want. I will use the Google auth provider with a popup:
import React from 'react';
import { auth } from './firebase';

function Login() {
  const login = async () => {
    const provider = new auth.GoogleAuthProvider();
    try {
      await auth().signInWithPopup(provider);
    } catch (e) {}
  };
  return <button onClick={login}>login</button>;
}

export default Login;
Clicking the login button will redirect us to a sign-in page that may have previously-created users:
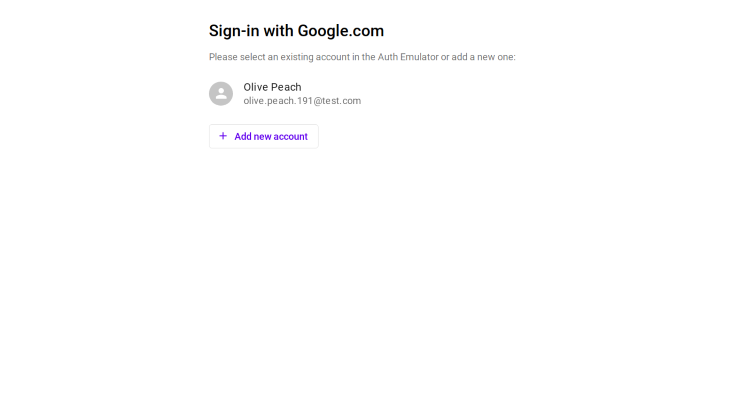
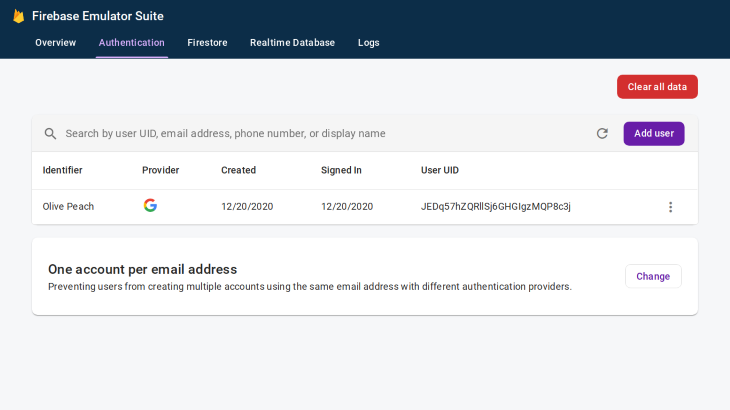
Again, it is strongly recommended that you don’t enter any real credentials. Any newly created users will appear in the Authentication tab:
You can retrieve a user in two ways. Set the user to be auth().currentUser after a successful sign-in:
try {
  await auth().signInWithPopup(provider);
  const user = await auth().currentUser;
  setUser(user);
} catch(e) {}
Or listen to authentication changes inside a useEffect hook:
React.useEffect(() => {
  return auth().onAuthStateChanged((user) => {
    if (user) {
      setUser(user);
    } else {
      setUser(null);
    }
  });
}, []);
Either way, the authentication is emulated and no actual users will be created through the provider. Notice that we did not need to enable the Google provider in the Firebase Console. You will have to do so before deployment, however.
In this article, you learned how to set up a Firebase project using the command line, as well as how to use the Firebase Emulator for a local-first workflow to emulate Firestore and Firebase Authentication. Thanks for reading.
Install LogRocket via npm or script tag. LogRocket.init() must be called client-side, not
server-side
$ npm i --save logrocket

// Code:

import LogRocket from 'logrocket';
LogRocket.init('app/id');
// Add to your HTML:

<script src="https://cdn.lr-ingest.com/LogRocket.min.js"></script>
<script>window.LogRocket && window.LogRocket.init('app/id');</script>
Would you be interested in joining LogRocket's developer community?
Join LogRocket’s Content Advisory Board. You’ll help inform the type of content we create and get access to exclusive meetups, social accreditation, and swag.
Sign up now
This guide walks you through creating a web UI for an AI agent that browses, clicks, and extracts info from websites powered by Stagehand and Gemini.

This guide explores how to use Anthropic’s Claude 4 models, including Opus 4 and Sonnet 4, to build AI-powered applications.

Which AI frontend dev tool reigns supreme in July 2025? Check out our power rankings and use our interactive comparison tool to find out.

Learn how OpenAPI can automate API client generation to save time, reduce bugs, and streamline how your frontend app talks to backend APIs.


3 Replies to "Using Firebase Emulator Suite and React for local-first development"
How do I emulate cloud functions? React does NOT want to work with:
firebase.functions().useEmulator(‘localhost’, 5001)
I followed those steps, but didn’t work. It doesn’t write anything on the firebase local database. Also, I noticed that on the firebase.js file you used “firebaseApp.initializeApp({“, shouldn’t be “firebase.initializeApp({?
> firebaseApp should be firebase
Yes, you’re right.
> I followed those steps, but didn’t work.
Can you give me more details on what didn’t work? Did you, by any chance, use the beta release of Firebase? You can also contact me at [email protected].