Editor’s note: This article was last updated by Pascal Akunne on 3 July 2024 to replace the outdated Colors.js tool, which is no longer maintained, and replace it with picocolors, as well as to cover the ANSI escape codes approach for coloring.

Since the rise of Node.js, we’ve seen more console apps released than ever before. Sometimes, the console output is enough if you don’t need the complexity of writing a UI. But, by default, a Node.js app’s output renders as simple white text on a black background.
This means it’s easy to clutter your view of the app or miss important bits of information. In this article, we’ll learn how to implement console colors and how to use tools like Chalk, picocolors, and Color-CLI to do so.
The Replay is a weekly newsletter for dev and engineering leaders.
Delivered once a week, it's your curated guide to the most important conversations around frontend dev, emerging AI tools, and the state of modern software.
Let’s imagine the example app below uses Node.js to connect to an endpoint and retrieve some data. We’re not actually doing any of the heavy lifting when connecting to these endpoints, rather, we’re simply producing an output that we normally expect to see from an app like this.
However, in an app like this, we’d be tempted to write text as an output to our console. Maybe we’re incredibly busy and don’t have the time to add colors to our app, or it simply doesn’t cross our minds.
Whatever the reason may be, the output of our simple console Node.js app looks like this:
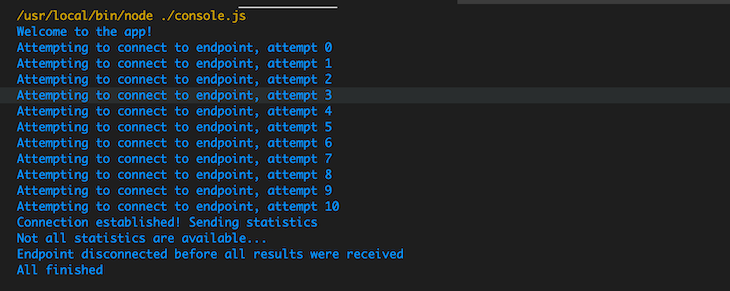
If you read the output as the creator of the program, you know what to look for, and you will notice several connection attempts before the connection succeeds, with only a partial result set received, and you will know how to fix it. But, if you work in a team and other people use this script, different people can interpret the results differently.
If this script ran as part of a scheduled operation or as a part of a larger series of scripts, there’s a good chance that people would skip to the last line, and interpret the All finished message as everything working as intended.
To give our users the right impression, we can use visual aspects to clearly indicate if everything worked as intended or if something failed. That’s where our console colors come in.
To use console colors in our Node.js app, we must first understand what’s happening under the hood.
Programs producing text outputs have been around for decades, so the standards involved that let us make these color changes can feel a bit primitive. We must understand how we can use an escape code to signal to the console that we want to change the output’s color.
ANSI escape codes are byte sequences that control the format, color, and other output settings on video text terminals. In Node.js, we can use these codes to color our console output. Normally, our console prints the text that we supply to it via console.log. However, if we send an escape character (\x1b) and a certain sequence ([33m ) to the console, the console actually catches the sequence before printing it, thus allowing basic terminal configuration.
In this case, we use it to tell the console that we want to change the color. We then need to accomplish two things: first, we must change the color of our text to what we want, and second, we must reset the color of the console back to what it was before we changed it. Otherwise, all subsequent console outputs will retain that color.
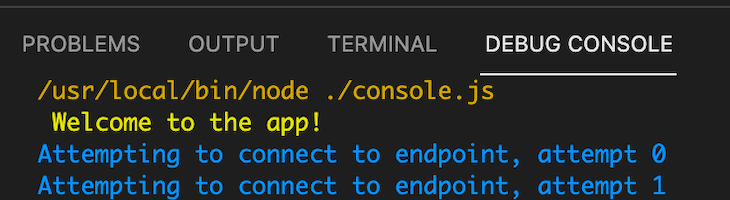
So, if we wanted to print, “Welcome to the app!” in yellow, this would be our console.log statement:
console.log('\x1b[33m Welcome to the app! \x1b[0m');
The result would look like this:
Even though we have our yellow string, what on earth is going on with the square brackets and the backslashes? Let’s break it down.
\x1b is a control character that indicates to the console that we want to do something that isn’t related to actually printing text to the console. Everything written after this control character, on the same line, configures the terminal in some way.
After our control character, we specify what we would like to do. In this case, we want to change to the yellow character for our foreground, which has an ID of 33 in the ANSI color chart. By placing [33m after our initial control character, we switch the console output color to yellow.
There are quite a few number of colors to choose from. Here are some of the basic ones:
Text colors:
3031323334353637Background colors:
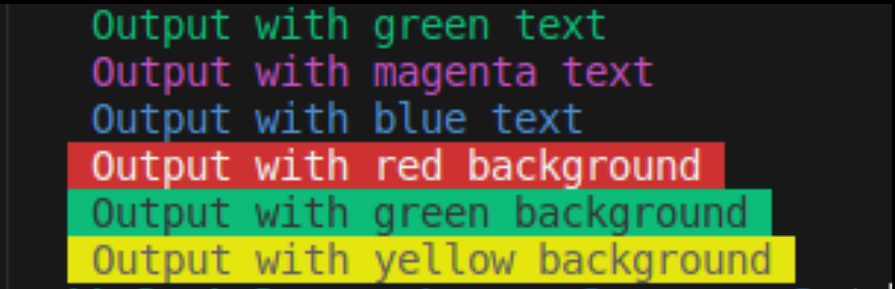
4041424344454647Let’s consider another example:
console.log("\x1b[32m Output with green text \x1b[0m")
console.log("\x1b[35m Output with magenta text \x1b[0m")
console.log("\x1b[34m Output with blue text \x1b[0m")

console.log("\x1b[41m Output with red background \x1b[0m")
console.log("\x1b[42m Output with green background \x1b[0m")
console.log("\x1b[43m Output with yellow background \x1b[0m")
This would be the output:
The ANSI escape code comes with pros and cons. The good side is that we introduce no new dependencies on our Node.js project, and our app will produce the correct colors on millions of computers around the world.
The bad side is that our code becomes slightly cryptic. People won’t intuitively know that we set our console characters through this string, and maintaining this code in the future can become a problem.
It’s also annoying to reference a table when all we want to do is color our console output. We must also remember to always put \x1b[0m after using colors so the console resets back to the default color scheme.
Fortunately, as is usually the case in the Node.js world, there’s not just one package that can help us. In the following sections, we’ll look at three popular options for implementing CLI colors.
Chalk is a simple way to style console colors in your Node.js project. A useful feature of Chalk is that it doesn’t extend String.prototype. Extending native objects in JavaScript essentially changes the implementation of a built-in function and is usually regarded as a poor idea.
This is because if library 1 sets a function on String like .colorify, and then library 2 sets its own function of .colorify on the String implementation, the second library would override the first. That’s a pretty big issue to debug.
Chalk’s syntax is also easy to understand and use. For our code sample, let’s assign console.log to a constant value of log so we can access it a little easier. Then, we can use the chalk function with the appropriate function calls to get the colors that we want.
To demonstrate this, quickly bootstrap a Node application by creating a project directory and, from that directory, run the following:
npm init -y
Then, install Chalk by running this:
npm install chalk
Next, create a file named console.js. You can do this with the CLI by running the following:
touch console.js
Then, add the code below to the console.js file:
import chalk from 'chalk';

const log = console.log;
chalk.level = 1; // Use colours in the VS Code Debug Window
log(chalk.yellow('Welcome to the app!'));
for (var i = 0; i <= 10; i++){
    log(chalk.white('Attempting to connect to endpoint, attempt ' + i));
}

log(chalk.green('Connection established! Sending statistics'));
log(chalk.red('Not all statistics are available...'));
log(chalk.redBright('Endpoint disconnected before all results were received'));
log(chalk.magenta('All finished'));
Update our package.json file to use ES6 modules by adding "type": "module" to the list of properties in the package.json file. You can add this below the "name": "chalk", property.
Finally, update the scripts section by replacing the code with:
 "scripts": {
    "start": "node console.js"
  },
Now, we can test our app and see Chalk in action by running:
npm start
The output is as follows:
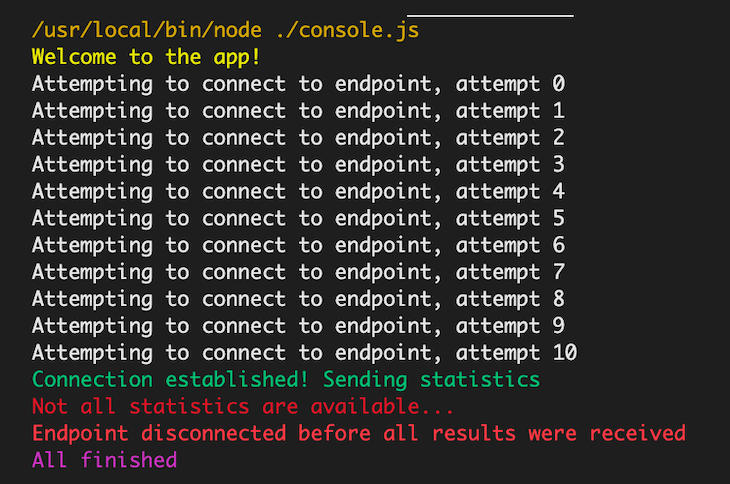
Of course, your tastes may vary, and you might not want to use this many colors in your console app. But, they’re there if you ever want them.
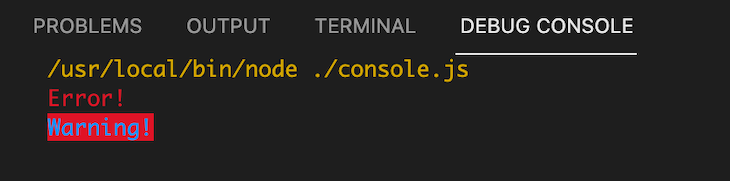
With Chalk, we also have the option to assign some basic themes to our colors. For example, to set a universal color for our errors or warnings, it’s as simple as assigning the appropriate functions to names, like so:
import chalk from 'chalk';

const error = chalk.red;
const warning = chalk.bgRed; // Orange color

console.log(error('Error!'));
console.log(warning('Warning!'));
You can replace the code in the console.js with the code above and run:
npm start
The output of this code is as expected:
You can mix and match these styles as much as you want and as much as your app requires.
picocolors is a simple, zero-dependency library for coloring terminal text. It is notable for being lightweight and offering good performance, making it an ideal choice for developers seeking simplicity and speed.
To use picocolors, create a directory and run the following command to set up a Node.js project:
npm init -y
Install Picocolors with the following command:
npm -i picocolors
Then, create a console.js file and add the following:
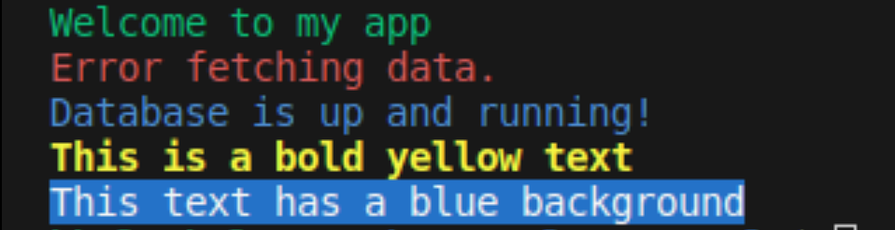
import pc from 'picocolors';

console.log(pc.green('Welcome to my app'));
console.log(pc.red('Error fetching data.'));
console.log(pc.blue('Database is up and running!'));

console.log(pc.bold(pc.yellow('This is a bold yellow text')));
console.log(pc.bgBlue(pc.white('This text has a blue background')));
Next, update the scripts in the package.json file:
"scripts" : {
  "start": "node console.js"
},
Finally, run npm start to start the app. The output will look like this:
picocolors is an excellent tool for adding color to console outputs while avoiding heavy dependencies.
cli-color is another great option for coloring our console. It has a lot in common with Chalk because it doesn’t modify the String.prototype implementation.
To use cli-color, first create a project directory. Then, from within this directory, initialize a Node.js project by running the following:
npm init -y
Then, install color-cli:
npm install cli-color
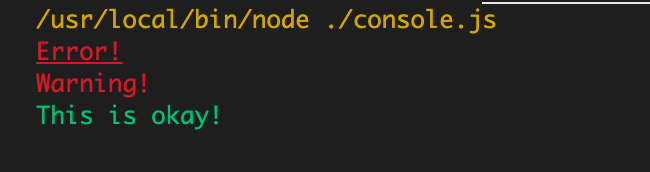
Now, create a console.js file inside the project directory with the following code:
var clc = require("cli-color");

console.log(clc.red.underline("Error!"));
console.log(clc.red("Warning!"));
console.log(clc.green('This is okay!'));
Update the scripts section in the package.json file by replacing the code with this:
 "scripts": {
    "start": "node console.js"
  },
Finally, we can test our app by running:
npm start
Our output will look like this:
In Node.js, you can use middleware to automate color logging based on request types or response status codes. You can achieve this by using libraries like Morgan for HTTP request logging and Winston for general logging.
Morgan is a popular middleware for logging HTTP requests, and it allows you to change the color of the console output based on the type of request or the response status code.
First, install the library with the following command:
npm install morgan
This is what the code will look like in our console.js file:
import express from "express";
import morgan from "morgan";
import chalk from "chalk";
const app = express();
// Apply color to the status code
morgan.token("status", (req, res) => {
const status = res.statusCode;
const color =
status >= 500
? "red"
: status >= 400
? "yellow"
: status >= 300
? "cyan"
: status >= 200
? "green"
: "white";
return chalk\[color\](status);
});
// Apply color to the method
morgan.token("method", (req, res) => {
const method = req.method;
const color =
method === "GET"
? "green"
: method === "POST"
? "yellow"
: method === "PUT"
? "cyan"
: method === "DELETE"
? "red"
: "white";
return chalk\[color\](method);
});
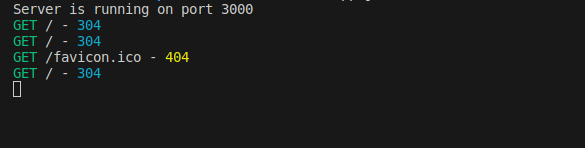
app.use(morgan(":method :url - :status"));
app.get("/", (req, res) => {
res.send("Welcome to my app!");
});
app.listen(3000, () => {
console.log("Server is running on port 3000");
});
And this is what the terminal will display:
Winston is a flexible logging library that can handle more than simply HTTP requests. It can be set up to use colors depending on log levels.
This is the command to install Winston:
npm install winston
This is what the code will look like in the console.js file:
import express from "express";
import chalk from "chalk";
import winston from "winston";
import expressWinston from "express-winston";
const app = express();
const colorize = winston.format((info) => {
const level = info.level;
const color =
level === "error"
? "red"
: level === "warn"
? "yellow"
: level === "info"
? "green"
: "white";
info.message = chalk\[color\](info.message);
return info;
});
const logger = winston.createLogger({
level: "info",
format: winston.format.combine(colorize(), winston.format.simple()),
transports: [new winston.transports.Console()],
});
app.use(
expressWinston.logger({
winstonInstance: logger,
meta: false, // control whether you want to log the meta data about the request (default is true)
msg: "HTTP {{req.method}} {{req.url}} - {{res.statusCode}}", // customize the default logging message
})
);
app.get("/", (req, res) => {
res.send("Welcome to my app!");
});
app.listen(3000, () => {
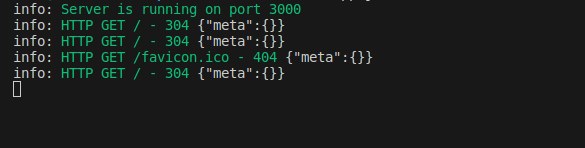
logger.info("Server is running on port 3000");
});
And this is what the terminal will output:
For more information about these Node.js logging tools, and others like Bunyan, Pino, and npmlog, check out our comparison guide.
Coloring your console within Node.js is an easy way to make your app’s output more readable. You’re not short on options when it comes to accomplishing this, but if you want to implement this with a package, it seems like Chalk is the most up-to-date, comprehensive option.
Happy coloring! 🎨
 Monitor failed and slow network requests in production
Deploying a Node-based web app or website is the easy part. Making sure your Node instance continues to serve resources to your app is where things get tougher. If you’re interested in ensuring requests to the backend or third-party services are successful, try LogRocket.

LogRocket lets you replay user sessions, eliminating guesswork around why bugs happen by showing exactly what users experienced. It captures console logs, errors, network requests, and pixel-perfect DOM recordings — compatible with all frameworks.
LogRocket's Galileo AI watches sessions for you, instantly identifying and explaining user struggles with automated monitoring of your entire product experience.
LogRocket instruments your app to record baseline performance timings such as page load time, time to first byte, slow network requests, and also logs Redux, NgRx, and Vuex actions/state. Start monitoring for free.

Claude Code vs. OpenCode in a real Next.js refactor: benchmark results, mistakes, prompts, and when to use each CLI agent.

Every time you explain your team’s coding standards to Claude, you are doing work that should be reusable. The same […]

Learn how to move beyond one-shot prompting in Claude with structured workflows for AI-assisted coding, debugging, PR reviews, documentation, testing, and automation.

Learn how to build advanced Next.js forms with rule engines, client-side previews, Server Actions, and server-validated form logic.
Hey there, want to help make our blog better?
Join LogRocket’s Content Advisory Board. You’ll help inform the type of content we create and get access to exclusive meetups, social accreditation, and swag.
Sign up now

