As app developers, it is crucial to manage the security of our app. Let’s take the example of a banking app: implementing the encryption component won’t be an easy feat. We have to:

This isn’t an easy task for small teams because it involves hiring security professionals, which costs time and money. Instead, it’s likely better to use a third-party library that has already done the heavy lifting for us.
In this article, you will learn how to use encryption libraries in React Native. We will be using Expo to set up our apps in this article. To set up a bare Expo project:
npx create-expo-app --template bare-minimum
Let’s get started!
The Replay is a weekly newsletter for dev and engineering leaders.
Delivered once a week, it's your curated guide to the most important conversations around frontend dev, emerging AI tools, and the state of modern software.
RSA is a household name when it comes to the cryptography world; HTTPS and SSH use RSA encryption because it is a robust algorithm. It uses two keys, a public and a private, to encrypt and decrypt messages.
The algorithm executes these steps to generate keys and perform encryption:
p and q. The larger the numbers, the better the securityp and q. Name this result n:
n = p*q
e, where e should be relatively prime to nd, using this formula:
m, convert it to a number, and encrypt it like so:
c is the encrypted message or the ciphertext
Now that we have learned about the fundamentals of RSA encryption, let’s learn about initialization vectors.
An initialization vector (IV) is a random number that ensures that the ciphertext is always different, even if the secret key is the same. This prevents attackers from decoding the data.
Though the IV is not secret, it is critical to use a different IV for each encryption step. If the algorithm reuses an IV for an encryption operation, it could allow an attacker to decrypt the ciphertext, even if they do not know the secret key.
Here is a simpler analogy:
A salt is a random string of characters that is added to a password before it is hashed. This helps to protect the password from being cracked, even if the attacker has a list of pre-computed hashes, such as a rainbow table.
When a user creates a password, the website or application generates a random salt and adds it to the password before hashing it. The server then stores the salt and the hashed password in the database.
Moreover, salts are important because they make it much trickier to crack passwords. Even if an attacker has a list of precomputed hashes, they will not be able to crack the passwords unless they also have the salts. This is because salts change function output, making the same hashed password differ.
In the next section of this article, we will explore some of the most used React Native encryption libraries.
Introduced by the Expo team, SecureStore is a library that allows developers to encrypt and store key-value pairs in device storage.
To use Expo SecureStore, first install in your project:
# note, if you are building a React Native app,
#make sure you have Expo libraries installed
npx expo install expo-secure-store
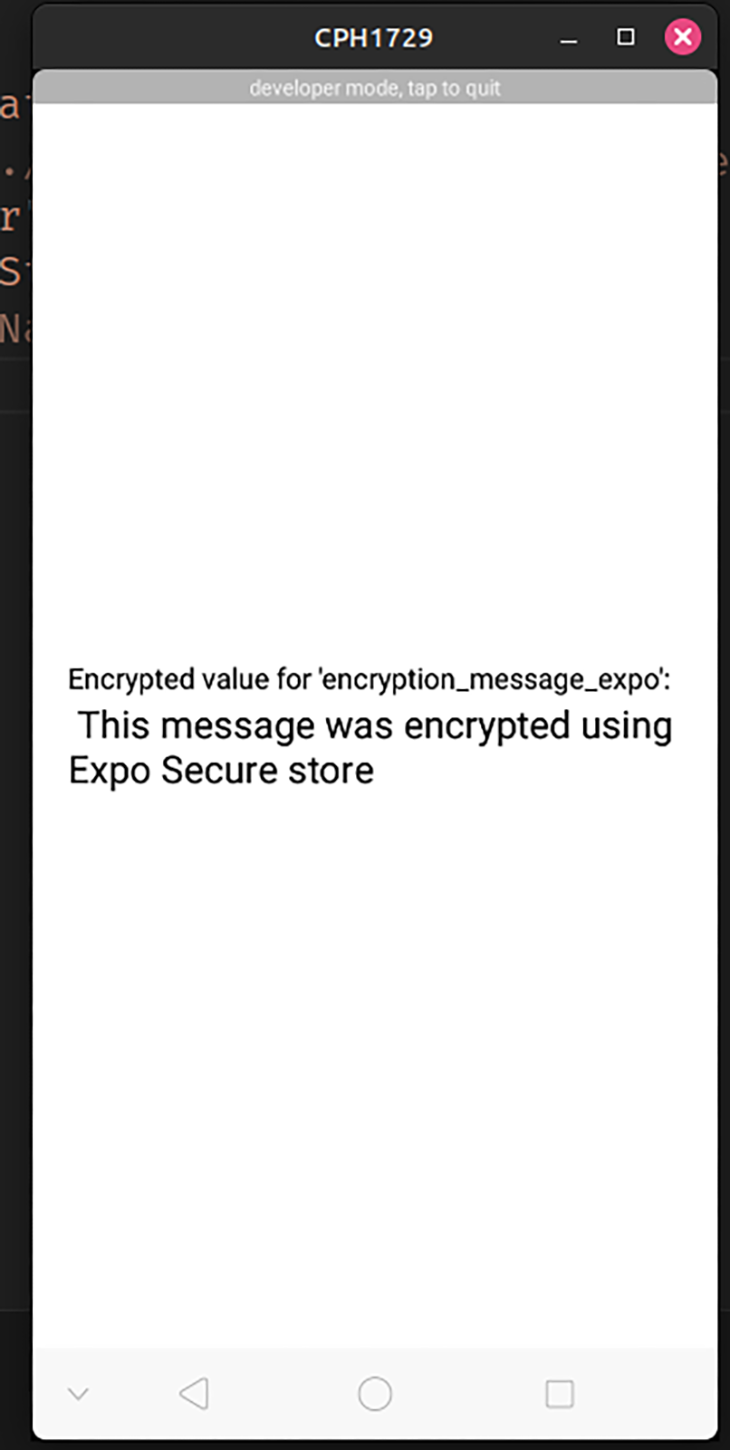
The code below uses SecureStore to encrypt, save, and retrieve data from storage:
import React, { useEffect, useState } from "react";
import { Text, View } from "react-native";
import * as SecureStore from "expo-secure-store";

//first store the data in the encrypted database using a key:
async function storeData() {
  await SecureStore.setItemAsync(
    "encryption_message_expo",
    "This message was encrypted using Expo Secure store"
  );
}

//now retrieve it with the given key:
async function retrieveData() {
  const result = await SecureStore.getItemAsync("encryption_message_expo");
  if (result) {
    return result;
  }
  alert("The value could not be saved");

}
export default function ExpoSecureStore() {
  const [obtainedData, setObtainedData] = useState("");
  const performEncryption = async () => {
    await storeData();
    const data = await retrieveData();
    setObtainedData(data);
  };

  //when component is first mounted, save and retrieve the value:
  useEffect(() => {
    performEncryption();
  }, []);

  //now display it:
  return (
    <View>
      <Text style={{ fontSize: 15 }}>
        Encrypted value for 'encryption_message_expo':
      </Text>
      <Text style={{ fontSize: 20 }}> {obtainedData}</Text>
    </View>
  );
}
To run this app, run this terminal command:
npm run start

Here are some reasons why you would want to use this technology in your project:
However, there are a couple of drawbacks:
React Native MMKV Storage is another alternative that aids in saving data locally. Although the saved data is unencrypted by default, the library makes it easy to switch to secure storage.
As a first step, integrate react-native-mmkv-storage in your Expo project like so:
npx expo install react-native-mmkv-storage
npx expo prebuild #generate native code
Then, in your project, create a blank file called useStorage.js. Here, write the following code:
// file name: useStorage.js. This file will hold our custom Hook
// this hook will encrypt, save and retrieve our data.
import { MMKVLoader, useMMKVStorage } from "react-native-mmkv-storage";

//create a db. The 'withEncryption' function encrypts the database.
const MMKV = new MMKVLoader().withEncryption().initialize();

export const useStorage = (key, defaultValue) => {
  //our custom hook will get and store data:
  const [value, setValue] = useMMKVStorage(key, MMKV, defaultValue);
  return [value, setValue];
};
The code snippet below demonstrates our custom Hook in action:
import { View, Text } from "react-native";
import { useStorage } from "./useStorage"; //import the Hook

export default function ReactNativeMMKVStorage() {
    //access the database and set a field called 'user'. It's default value will be 'LoRocket'.
  const [data, setData] = useStorage("user", "LogRocket");

  return (
    <View>
      <Text>value for user in MMKV {data}</Text>
    </View>
  );
}

Here are some factors that make it suitable for your next project:
However, there is one thing I would like to point out: later updates have brought in breaking changes. This means that you cannot use recent versions of this library without upgrading your project’s React Native version.
Built by reputed developer Oblador, React Native Keychain allows developers to securely store credentials in their apps. Unlike other libraries mentioned in this article, Keychain has built-in support for Apple’s FaceID.
Run this terminal command to install react-native-keychain in your project:
npm install react-native-keychain
The block of code below shows the basic usage of React Native Keychain:
import { useEffect, useState } from "react";
import { View, Text } from "react-native";
import * as Keychain from "react-native-keychain";

async function saveCredentials() {
  const username = "LogRocketName";
  const password = "LogPassword";
  //save credentials to database
  await Keychain.setGenericPassword(username, password);
}

async function getCredentials() {
  //now retrieve credentials
  const credentials = await Keychain.getGenericPassword();
  return credentials;
}

export default function ReactNativeKeychain() {
  const [unencryptedData, setUnencryptedData] = useState({});

  const performEncryption = async () => {
    saveCredentials();
    const data = await getCredentials();
    setUnencryptedData(data);
  };

  useEffect(() => {
    performEncryption();
  }, []);
//finally, display user data:
  return (
    <View>
      <Text>Your username is: {unencryptedData.username}</Text>
      <Text>Password is: {unencryptedData.password}</Text>
    </View>
  );
}

There are a few things I loved about it:
However, there was one major flaw: Keychain is only geared towards storing credentials, not key-value pairs.
RNES uses platform-native cryptography tools to encrypt and store sensitive data.
To install react-native-encrypted-storage in your app:
npm install react-native-encrypted-storage
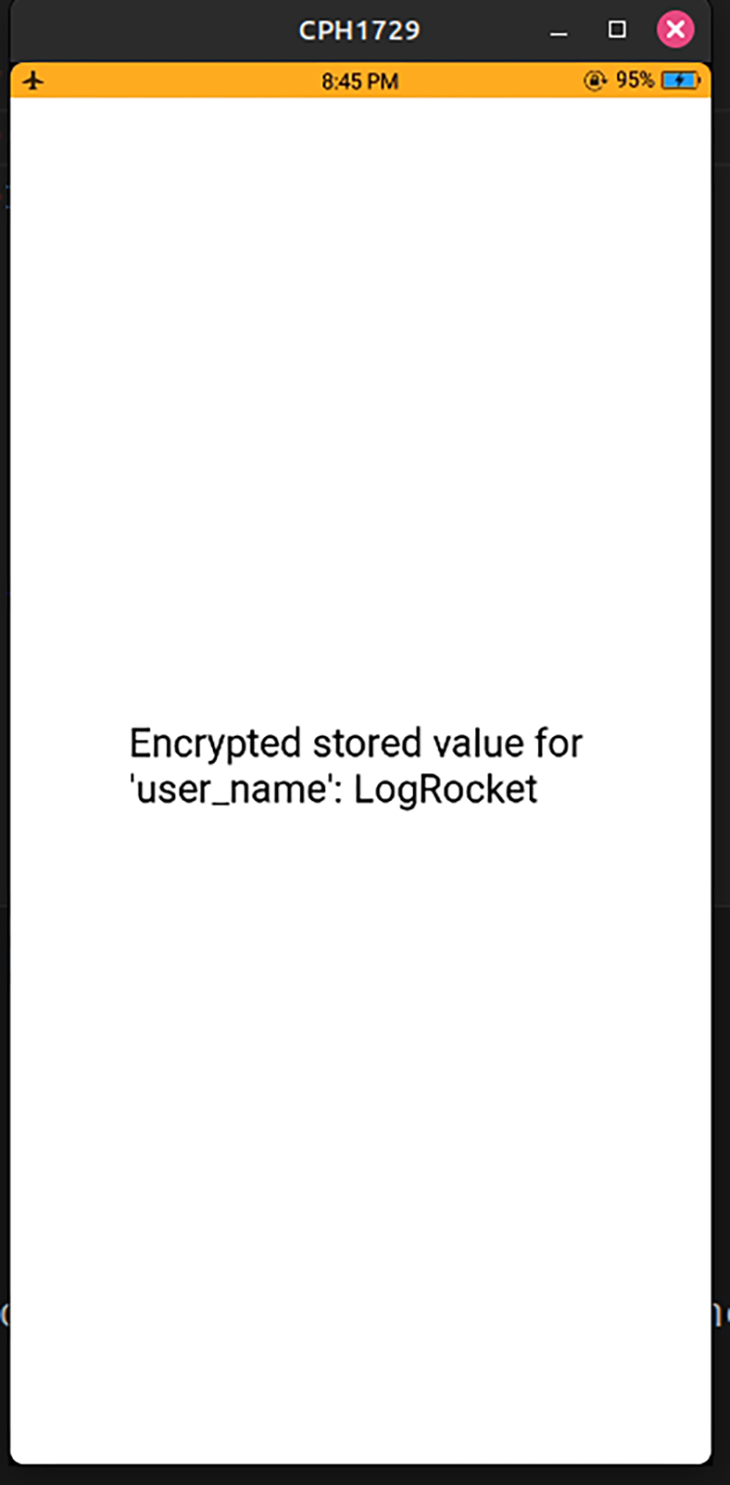
This code snippet shows sample usage of the library:
import EncryptedStorage from "react-native-encrypted-storage";
//some of the code removed for brevity purposes
const [textData, setTextData] = useState(null);

//first, save an item to the encrypted DB
async function storeUserSession() {
  try {
    await EncryptedStorage.setItem("user_name", "LogRocket");
  } catch (error) {
    console.log("An error occurred! ", error);
  }
}

//now try to retrieve this item:
async function retrieveUserSession() {
  try {
    const session = await EncryptedStorage.getItem("user_name");
    //if item is found, then store it in a state variable
    if (session !== undefined) {
      setTextData(session);
    }
  } catch (error) {
    console.log(error);
  }
}

const performEncryption = async () => {
  await storeUserSession();
  await retrieveUserSession();
};

//on first mount, save and retrieve the user_name item:
useEffect(() => {
  performEncryption();
}, []);

return (
  <View>
    <Text>Encrypted stored value for 'user_name': {textData}</Text>
    <StatusBar style="auto" />
  </View>
);

RNES might be a great fit for your project for these reasons:
However, one major flaw of this library is that the project is not frequently updated. As a result, this can introduce bugs and dependency conflicts in the future.
In this article, you learned about the basics of RSA encryption, IVs, and salts. We also explored some trustworthy security libraries for React Native.
In my projects, I use React Native Keychain. This is because it is feature-rich and has excellent community support.
Thank you so much for reading!

LogRocket's Galileo AI watches sessions for you and and surfaces the technical and usability issues holding back your React Native apps.
LogRocket also helps you increase conversion rates and product usage by showing you exactly how users are interacting with your app. LogRocket's product analytics features surface the reasons why users don't complete a particular flow or don't adopt a new feature.
Start proactively monitoring your React Native apps — try LogRocket for free.

React Server Components and the Next.js App Router enable streaming and smaller client bundles, but only when used correctly. This article explores six common mistakes that block streaming, bloat hydration, and create stale UI in production.

Gil Fink (SparXis CEO) joins PodRocket to break down today’s most common web rendering patterns: SSR, CSR, static rednering, and islands/resumability.

@container scroll-state: Replace JS scroll listeners nowCSS @container scroll-state lets you build sticky headers, snapping carousels, and scroll indicators without JavaScript. Here’s how to replace scroll listeners with clean, declarative state queries.

Explore 10 Web APIs that replace common JavaScript libraries and reduce npm dependencies, bundle size, and performance overhead.
Would you be interested in joining LogRocket's developer community?
Join LogRocket’s Content Advisory Board. You’ll help inform the type of content we create and get access to exclusive meetups, social accreditation, and swag.
Sign up now