
The Replay is a weekly newsletter for dev and engineering leaders.
Delivered once a week, it's your curated guide to the most important conversations around frontend dev, emerging AI tools, and the state of modern software.
Over the years, we’ve seen various JavaScript build tools arise, right from the era of Google Closure Tools to today. There’s been great improvement in JavaScript build tools, especially when it comes to build time, speed, customization, configuration, and extensibility.
In this article, we’ll explore the latest build tools that the JavaScript ecosystem uses.
For this tutorial, you’ll need the following:
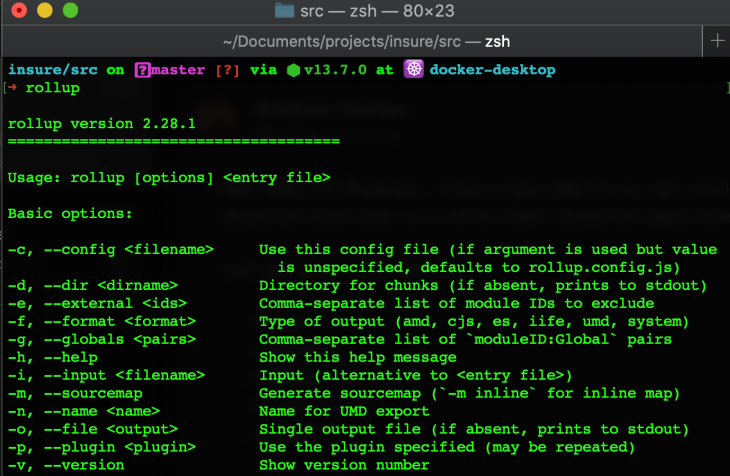
According to its official website, “Rollup is a module bundler for JavaScript that compiles small pieces of code into something larger and more complex, such as a library or application.” Its first version was released in December 2018, but it didn’t gain popularity until late 2019.
Currently in version 2, Rollup has now become the standard for building JavaScript packages and modules. It’s been adopted by several organizations and individual developers around the world.
The following are some of the cool features that Rollup offers to JavaScript developers:
To get started with Rollup, you need to install the package on your machine by running the following command:
npm install --global rollup
This command will install Rollup globally, so you don’t need to re-install it on your machine when you need it next.
If you need to, you can install it locally for a particular project on your machine by running the following commands:
npm
npm install rollup --save-dev
yarn
yarn -D add rollup
If you installed Rollup globally, you can quick start it by running the following commands, depending on your development environment:
For browsers:
rollup <your application entry point> --file bundle.js --format iife
This command will compile the code in your application entry file (e.g., main.js or script.js), including its imports into a single file (bundle.js) and then serve it to the browser as an IIFE (Immediately Invoked Function Expression) in a script tag.
For Node.js:
rollup <your application entry point> --file bundle.js --format cjs
This command will compile the code in your application entry file in CommonJS format (e.g., main.js or script.js), including its imports into a single file (bundle.js) so that it can be recognized and executed by Node.js.
For both browsers and Node.js:
rollup <your application entry point> --file bundle.js --format umd --name "myBundle"
This compiles your application code in UMD format into a single file (bundle.js) for both the browser and Node.js.
If you installed Rollup locally, you can start it by running the following command in the root folder of your project:
npm:
npx rollup --config
yarn:
yarn rollup --config
Rollup might not be entirely new like other build tools available now, but it’s been adopted by many JavaScript developers. In my opinion, if you need a build tool or bundler for your JavaScript package or library, Rollup.js is your best bet.
For more information on how to use Rollup.js in your project, you can check the tutorials and official documentation here.
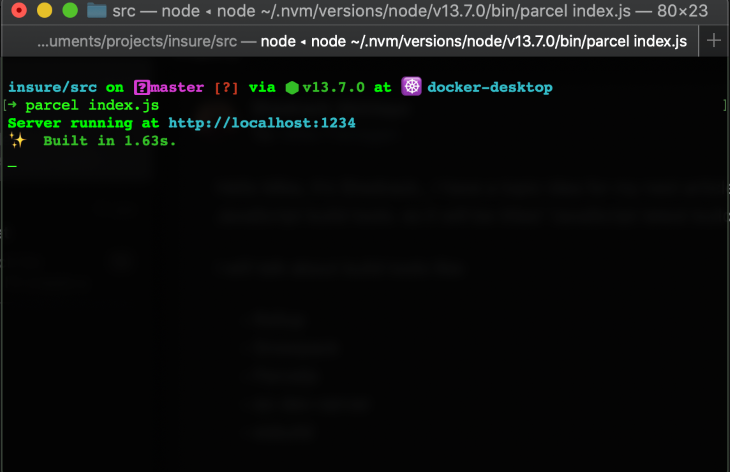
Parcel is one of the latest JavaScript bundlers in the ecosystem. Its official documentation describes it as “a web application bundler, differentiated by its developer experience.”
Released in 2019, Parcel is fast, and it requires zero configuration, unlike Rollup.js and Webpack. It’s essentially a plug-and-play bundler that is currently in version 2, beta 1 at the time of this publication.
Parcel bundles your code by taking all of your project files and dependencies, transforming them, then merging them together into smaller pieces of files that can be used to execute your code.
In the documentation for its v2 release, Parcel is referred to as “a compiler for all your code, regardless of the language or toolchain.”
Parcel is a zero-configuration build tool, so getting started is easy. First, install Parcel in your project by running the following command:
yarn:
yarn global add parcel-bundler
npm:
npm install -g parcel-bundler
After installing it in your project (or globally), you can bundle your project by running the following command:
parcel <your application entry point>
Parcel provides a fast development server, which will automatically rebuild your application code as you make any changes. It also provides support for Hot Module Replacement to increase your development speed.
You can build your application code for production with Parcel by running the following command:
parcel <your application entry point>
Parcel is an awesome compiler that doesn’t require using plugins for most tasks. When version 2 is finally available for the public, it’ll be a game-changer.
Parcel’s zero-config nature and its support for low-level languages like Rust and WebAssembly make it multi-purpose, and not just for the JavaScript ecosystem.
For more information on how to use Parcel in your project, you can check its official documentation here and it’s v2 documentation that is still in development here.
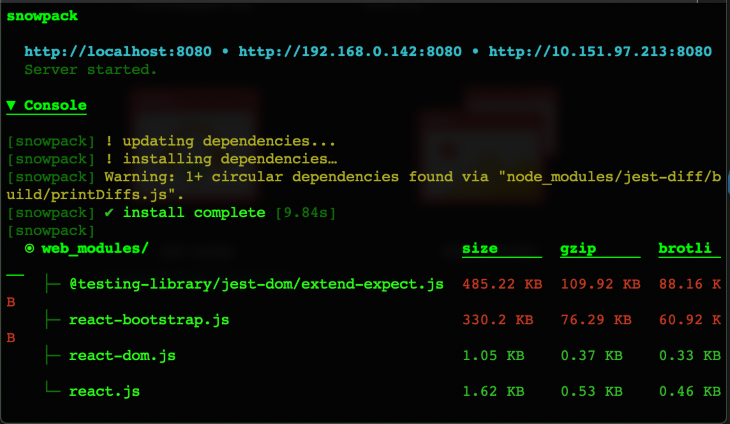
According to its official website, “Snowpack is a modern frontend build tool for faster web development. It replaces heavier, more complex bundlers like Webpack or Parcel in your development workflow.”
Snowpack was built as a replacement for Webpack and Parcel, and that’s its main selling point. Its best feature is that it skips the bundling process in development, making development fast because there is nothing to build. It’s a much faster build tool than Webpack, Rollup, and Parcel.
Snowpack is in version 2.7. You can also read my article on the release of Snowpack v2 here.
To get started with Snowpack, you need to first install it in your project and launch its development server. You can do that by running the following commands:
npm:
npm install --save-dev snowpack
yarn:
yarn add --dev snowpack
According to its official website, Snowpack can also be installed globally, but I recommend that you install it locally.
The following command will start the Snowpack development server and load your site locally:
snowpack dev
Next, build your application for production:
snowpack build
Note: Snowpack does not come with an in-built bundler for production because it gives you an optimized version of your code. If you need to build your application for production, you can easily connect it to your favourite bundler via a plugin.
Snowpack is a next-generation build tool that leverages on ES Modules to deliver builds quickly and skip the bundling process in development. It also helps make the development environment build faster even as your codebase grows.
For more information on how to use Snowpack in your project, you can check its official documentation here.
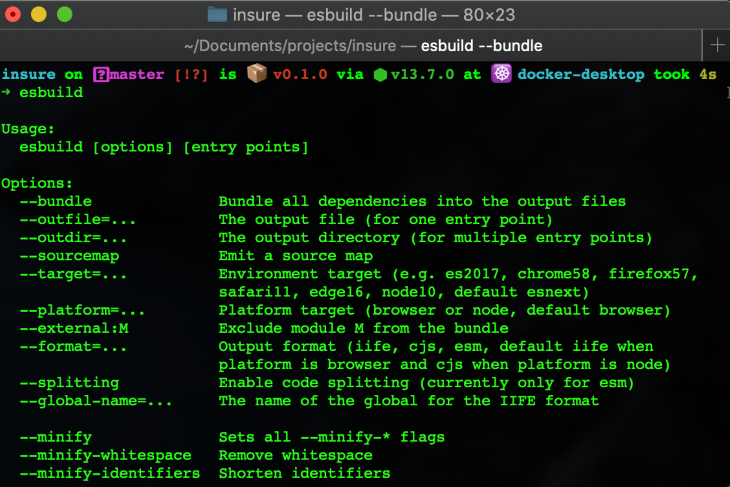
esbuild is an extremely fast next-gen JavaScript bundler and minifier. It packages up JavaScript and TypeScript code for distribution on the web. It was written in Go, making it extremely fast. It’s also lighter than other bundlers, including Parcel and Webpack.
Here is a graph of its JavaScript and TypeScript benchmark:
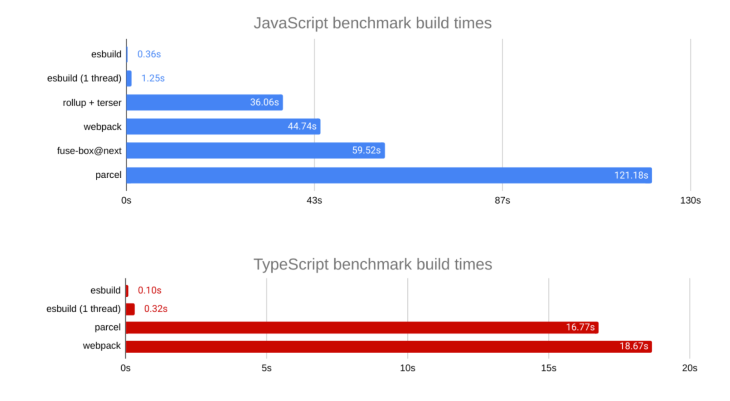
It is still experimental, currently in version 0.72, and actively being developed.
esbuild is still highly experimental but it can be installed by running the following commands:
npm:
npm install --save-dev esbuild
yarn:
yarn add --dev esbuild
You can also install esbuild locally by running the following command:
npm install --global esbuild
For example, if you have a single React file like this:
//hello.tsx
import * as React from 'react'
import * as ReactDOM from 'react-dom'

ReactDOM.render(
  <h1>Hello, esbuild!</h1>,
  document.getElementById('root')
);
We can bundle it for development by running the following command:
esbuild hello.tsx --bundle '--define:process.env.NODE_ENV="development"' --outfile=src.js
We can also bundle it for production by running this:
esbuild hello.tsx --bundle '--define:process.env.NODE_ENV="production"' --outfile=build.js
esbuild is a new and experimental JavaScript bundler, but it’s fast and provides out-of-the-box support for TypeScript.
For more information on esbuild, visit the website here.
Packem is a pre-compiled JavaScript bundler primarily implemented in Rust. It can also compile other file types like YAML/TOML. Packem uses YAML to structure configuration data instead of JSON.
To install Packem, run the following command in your terminal:
npm:
npm install -g packem
yarn:
yarn global add packem
In order to use Packem in your project, you’ll have to create a .packemrc file in the root folder of your project. This file will contain all the necessary configuration options for your project. In this file, you’ll need to define the following fields:
input: "./src/index.js"
output: "./dist/bundle.js"
format: "iife"
The input field is where the bundling process starts, and the output field is where your final concatenated bundle ends up. You need to point to an existing file (no dynamic file creations) to get the input point right. The format option will hold the format you want your JavaScript file to be processed as. Packem takes care of the rest of the process according to how you’ve defined it.
In order to build your project, you’ll need to run pakem in the root folder of your project. Then you’re good to go.
Packem is a neat build tool, especially because it’s Rust based, so it uses YML for data structuring. It’s lightweight, too. Adoption is still low, but it should be more widely adopted soon, given that JavaScript is gradually moving toward Rust-based tools.
In this blog post, we’ve explored various JavaScript build tools that many developers use. Moving forward, we expect build tools to continue having faster builds, as well as better customizations and zero-prototyping and configurations, more out-of-the-box support, and more Rust-focused core technology.
There’s no doubt that frontends are getting more complex. As you add new JavaScript libraries and other dependencies to your app, you’ll need more visibility to ensure your users don’t run into unknown issues.
LogRocket is a frontend application monitoring solution that lets you replay JavaScript errors as if they happened in your own browser so you can react to bugs more effectively.

LogRocket works perfectly with any app, regardless of framework, and has plugins to log additional context from Redux, Vuex, and @ngrx/store. Instead of guessing why problems happen, you can aggregate and report on what state your application was in when an issue occurred. LogRocket also monitors your app’s performance, reporting metrics like client CPU load, client memory usage, and more.
Build confidently — start monitoring for free.

Compare the top AI development tools and models of February 2026. View updated rankings, feature breakdowns, and find the best fit for you.

Broken npm packages often fail due to small packaging mistakes. This guide shows how to use Publint to validate exports, entry points, and module formats before publishing.

Discover what’s new in The Replay, LogRocket’s newsletter for dev and engineering leaders, in the February 11th issue.

Cut React LCP from 28s to ~1s with a four-phase framework covering bundle analysis, React optimizations, SSR, and asset/image tuning.
Would you be interested in joining LogRocket's developer community?
Join LogRocket’s Content Advisory Board. You’ll help inform the type of content we create and get access to exclusive meetups, social accreditation, and swag.
Sign up now