
Someone sold you on Flutter? Fantastic! Send them my regards; they did a good thing, as you’ll be building apps in no time. You’ll likely find that running and testing Flutter apps is much more frustration-free than you might have experienced with other frameworks like Ionic or React Native. Soon, you’ll never want to build apps in anything else ever again!

So, now that I’ve got you all excited about building Flutter apps, you might be wondering what’s the best way to run and test your shiny new app? For example, with Ionic, you probably relied on the browser for a lot of the development work. Maybe this wasn’t ideal, but it provided an idea of how the app’s UI behaved.
With Flutter, you can actually still do this, although the same limitation applies. However, if the hardware you’re meant to use in the app is not available via the browser, you’ll have no choice but to resort to something a little more advanced — testing with simulators or real devices.
As always, when choices are presented one must weigh the options. After all, using the right tool for the right job is the number one universal rule in software development.
In this article, we’ll explore the benefits of using simulation vs. real device testing for Flutter apps. By the end of this guide, you’ll hopefully see that neither option is really optional! The good news? With Flutter, both simulation and real device testing work really well and are mostly frustration-free.
If you’re on a Windows machine, you can ignore all iOS-related steps in this guide. For Android, everything mentioned in this article should be relevant.
Jump ahead:
The Replay is a weekly newsletter for dev and engineering leaders.
Delivered once a week, it's your curated guide to the most important conversations around frontend dev, emerging AI tools, and the state of modern software.
Before we get into the main portion of the article, I’d like to make a quick detour to highlight a few important points:
N.B., for further context, the development machine used in the guide is an Apple MacBook Air M2 with macOS Monterey 12.5.1, 16 GB RAM, and 512 SSD
Before I start developing an app, I always run Flutter doctor to make sure I’m starting with a healthy Flutter development environment. This is an extremely handy tool, and all you have to do is run flutter doctor in the command line.
Ideally, you’ll want to see every relevant requirement checked off. For example, if you’re not interested in developing Android apps, seeing the ❌ next to the Android-specific items, is not something you need to worry about.
If you’re like me, though, and want to see everything with the ✅ mark, then just make sure to follow Flutter doctor’s instructions.
Next, let’s fire up some simulators and see why they’re so important to your Flutter development flow.
Fun fact: Apple calls its app testing tools simulators, but in the Android world they’re referred to as emulators. Practically speaking, though, there is no difference; simulators and emulators do the same thing.
You’ll notice that Apple’s simulators tend to be more lightweight on system resources, while Android’s emulators are a tad more bloated, which can lead to slower boot times and even running out of memory. Having said that, emulators have improved a lot since 2015, or so.
This is where installing Xcode becomes inevitable. The good news is that, for simulators, all you really need to do is install it and accept terms and conditions if and when it asks. Xcode is available on the Apple App Store, and I would highly advise against downloading it from anywhere else. The last thing you want is a compromised development environment.
Downloading and installing Xcode will take an unusually long time. The shortest time I’ve seen was just under 30 minutes. Watch an episode of your favorite show, have a meal, call your parents, or take your pet ferret for a walk. It’ll take a while. 🙂
Once Xcode is installed, it is recommended that you run the following two commands in your terminal:
sudo xcode-select --switch /Applications/Xcode.app/Contents/Developer
sudo xcodebuild -runFirstLaunch
To be perfectly honest, I’ve never run those commands and I’ve always somehow gotten away with it. So, if you forget to run these commands, it probably won’t be the end of the world. Flutter is also great at telling you what needs to be done in case you missed something.
Like most things on a Mac, running a simulator can be done in several ways. Here are three options:
open -a SimulatorI think it’s also worth noting that you can have more than one simulator open at the same time.
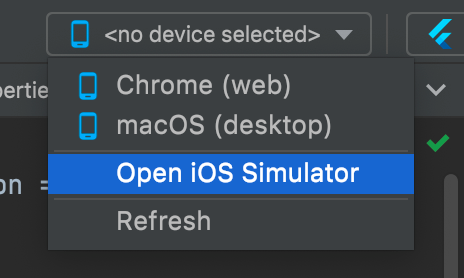
At this point, all there is left to do is fire up that fantastic new app you started building. The quickest way to do that is by pressing the green Play button in Android Studio with your chosen simulator selected.
Before closing the simulator, I recommend stopping the app with the red Stop button. Closing the simulator instance is as simple as pressing the Close button on the device window, but that won’t actually close the Simulator app. If you’d like to close that too, the simplest way is to right-click on the Simulator icon, then select Quit.
Installing Android emulators is a tad more involved, but just an extra few clicks, nothing too complicated. The main difference between Xcode and Android Studio is that the latter does not come with devices already installed. It is entirely up to you what device and what Android version you want to add.
To add a new device, go to the Virtual Device Manager in Android Studio and then go to View > Tool Windows > Device Manager. To ensure a smooth experience, I recommend selecting a machine running with 16GB of RAM. Adding a new device is as simple as pressing the Create Device button and selecting the appropriate device from the list.
This is the point where things probably start to feel familiar. To ensure your app has an Android device to run on, you’ll need to start that device from your device manager by pressing the Play button. If you skip this step, the device won’t show up in your device list when you want to run your app.
![]()
Now that you’re all set up to run an app in an Android emulator, you can do exactly what you’ve been doing with iOS instances. Select the device, press the green Play button, and watch your app come to life on an Android device!
Closing the emulator is a tad less intuitive compared to iOS simulators. You’ll need to go to the window your emulator is running in, and press the ✖️ next to the emulator’s name.
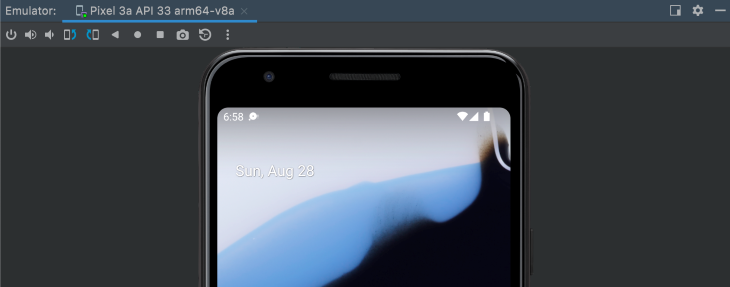
Opening a simulator can be done both from the command line, from Android Studio’s GUI or even VS Code’s GUI. I prefer using the GUIs as they allow me to select the exact simulator I want, but you should use the method that feels most comfortable.
The biggest selling point of a simulator is its hassle-free setup. Once you have Xcode installed, you’re good to go.
The same goes for Android apps. Once you’ve added a simulator, you simply start it and then merrily work away on your app. There’s no need to stress about code signing, developer profiles, or accounts.
During a time of increasingly complex software development, running Flutter apps on a simulator feels uncharacteristically simple and straightforward.
The second-biggest selling-point of simulators is the speed. Hot reload is pretty much instantaneous, and even a fresh run can be as fast as just a few seconds. For example, a mid-level complexity app that I’m working on right now can spin up in just 8.8sec on an Apple M2 MacBook Air.
Running your app on a physical iOS device is generally straightforward; however, there are two categories of developers:
If you’re part of the first category of developers, you’ll need to set up an Apple Developer Provisioning Profile manually.
I recommend that anyone seriously considering building iOS apps, purchase an Apple developer account subscription. The developer account subscription makes things virtually plug-and-play and it’s required to release the app.
If you’d rather not spend the upfront subscription fee, you’ll need to open the Runner.xcodeproj file located in your Flutter project’s iOS folder:
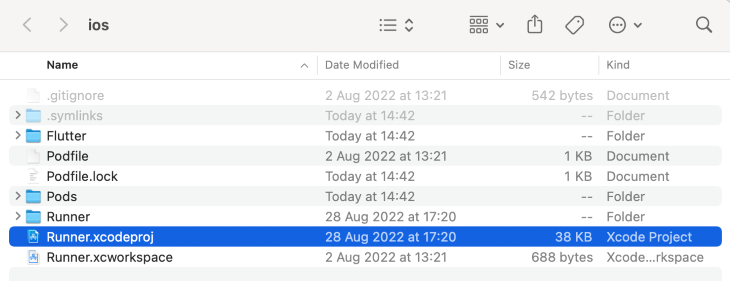
Next, you’ll need to complete several fields under Identity, such as “Display Name,” “Bundle Identifier,” “Version,” and “Build.” What’s crucial here is to choose a fairly unique app name, perhaps something like: com.yourFullName.yourAppName.
You’ll want to automatically manage signing and choose yourself as the team, like so:

You will likely be prompted to allow keychain access; to save yourself some extra clicks, select Always Allow.
Finally, given that you’re on a free developer account, on the connected iPhone or iPad, you’ll probably have to go to Settings > General > VPN and Device Management and trust the app and developer.
If you’re part of the second category of developers, you’ll just need to select the appropriate team, check that Automatically Manage Signing is on, plug the device in, tap Trust on the prompt, and you should be ready to go!
All that’s left to do now is select the device from the dropdown and run the app.
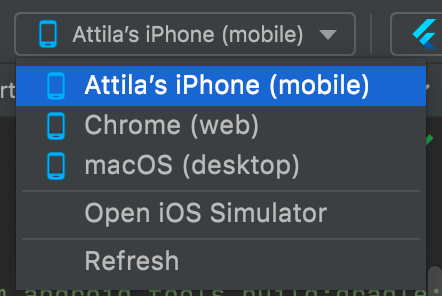
N.B., if at any point during the build you get weird permission issues like “iproxy cannot be opened because the developer cannot be verified,” this can be easily resolved by going to System Preferences > Security & Privacy and clicking Allow Anyway.
When it comes to running on a real Android device, just like for emulators, things do get a tad more involved. If you’re used to working with Apple, I recommend paying particular attention to the Android steps to save yourself unnecessary hair pulling and frustration.
On Android, you first need to allow a device to be used in developer mode.
In Android Studio’s Device Manager, you should see your device listed under Physical. For example, once I added my test Moto G10 device, it appeared as shown below.
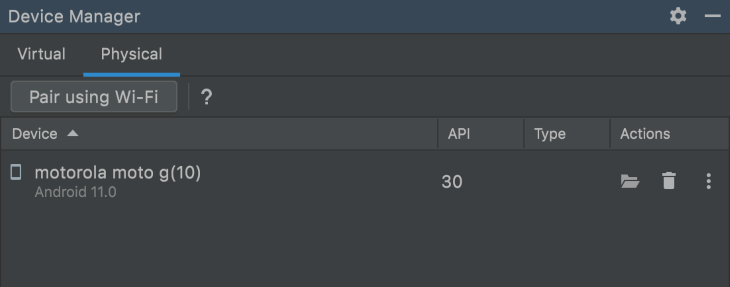
The good news is that you don’t have to mess around with developer provisioning profiles like you would on Xcode. You just need to run the app, and it will pop up on your device. Hot reload should also work and should be near instantaneous.
Simulators and emulators are amazing, and I would generally advise using them 90 percent of the time during development. The fact that they’re right there on the screen next to your code, require no additional devices to run, and require no cables to connect is a convenience that cannot be understated.
Combine all that with Flutter’s hot reload, and you have yourself a truly comfortable developer environment that is (in my opinion) a joy to use.
However, there comes a point when you want to see your app outside the dev environment and experience the UX in a more real life setup. This is when the real devices come into play.
There are several capabilities that you can only really test with a physical device, such as scanning a QR code off another device or testing NFC capabilities. Another example is making sure that your SQLite database is working as expected outside the development environment before rushing your app to Apple’s App Store or Google’s Play Store.
Testing Flutter apps on real devices is pretty much inevitable, but it will probably not be your main focus as you design and build your app. That being said, it is still crucial to make physical devices part of your development workflow. Failing to do so will result in catching bugs far too late, perhaps even in production. Given how process intensive it is to push new updates to mobile apps, preventing embarrassing bugs should be paramount for every software developer.
In this article, we reviewed how to check the health of your development environment, how to set up and run iOS simulators and Android emulators, and how to set up and run Flutter apps on real iOS and Android devices. We also discussed when and why to incorporate both simulation and real device testing into your Flutter app development.
I hope you found this article useful!
Install LogRocket via npm or script tag. LogRocket.init() must be called client-side, not
server-side
$ npm i --save logrocket

// Code:

import LogRocket from 'logrocket';
LogRocket.init('app/id');
// Add to your HTML:

<script src="https://cdn.lr-ingest.com/LogRocket.min.js"></script>
<script>window.LogRocket && window.LogRocket.init('app/id');</script>

React Server Components and the Next.js App Router enable streaming and smaller client bundles, but only when used correctly. This article explores six common mistakes that block streaming, bloat hydration, and create stale UI in production.

Gil Fink (SparXis CEO) joins PodRocket to break down today’s most common web rendering patterns: SSR, CSR, static rednering, and islands/resumability.

@container scroll-state: Replace JS scroll listeners nowCSS @container scroll-state lets you build sticky headers, snapping carousels, and scroll indicators without JavaScript. Here’s how to replace scroll listeners with clean, declarative state queries.

Explore 10 Web APIs that replace common JavaScript libraries and reduce npm dependencies, bundle size, and performance overhead.
Hey there, want to help make our blog better?
Join LogRocket’s Content Advisory Board. You’ll help inform the type of content we create and get access to exclusive meetups, social accreditation, and swag.
Sign up now
One Reply to "Simulation vs. real device testing for Flutter apps"
Also, a quick plus for Android Devices is the availability of wireless Debugging, where you can run multiple instances on different team members’ devices, which enables them to go through the app flow and you’d see their logs in real time without everyone requiring a cabled connection to your computer.