
Editor’s note: This article was updated on 8 April 2022 to reflect changes brought about by the introduction of React 18 and React Router 6.

In this article, we’ll cover the basics of RxJS and how to integrate it with React applications using React Hooks for state management. These include:
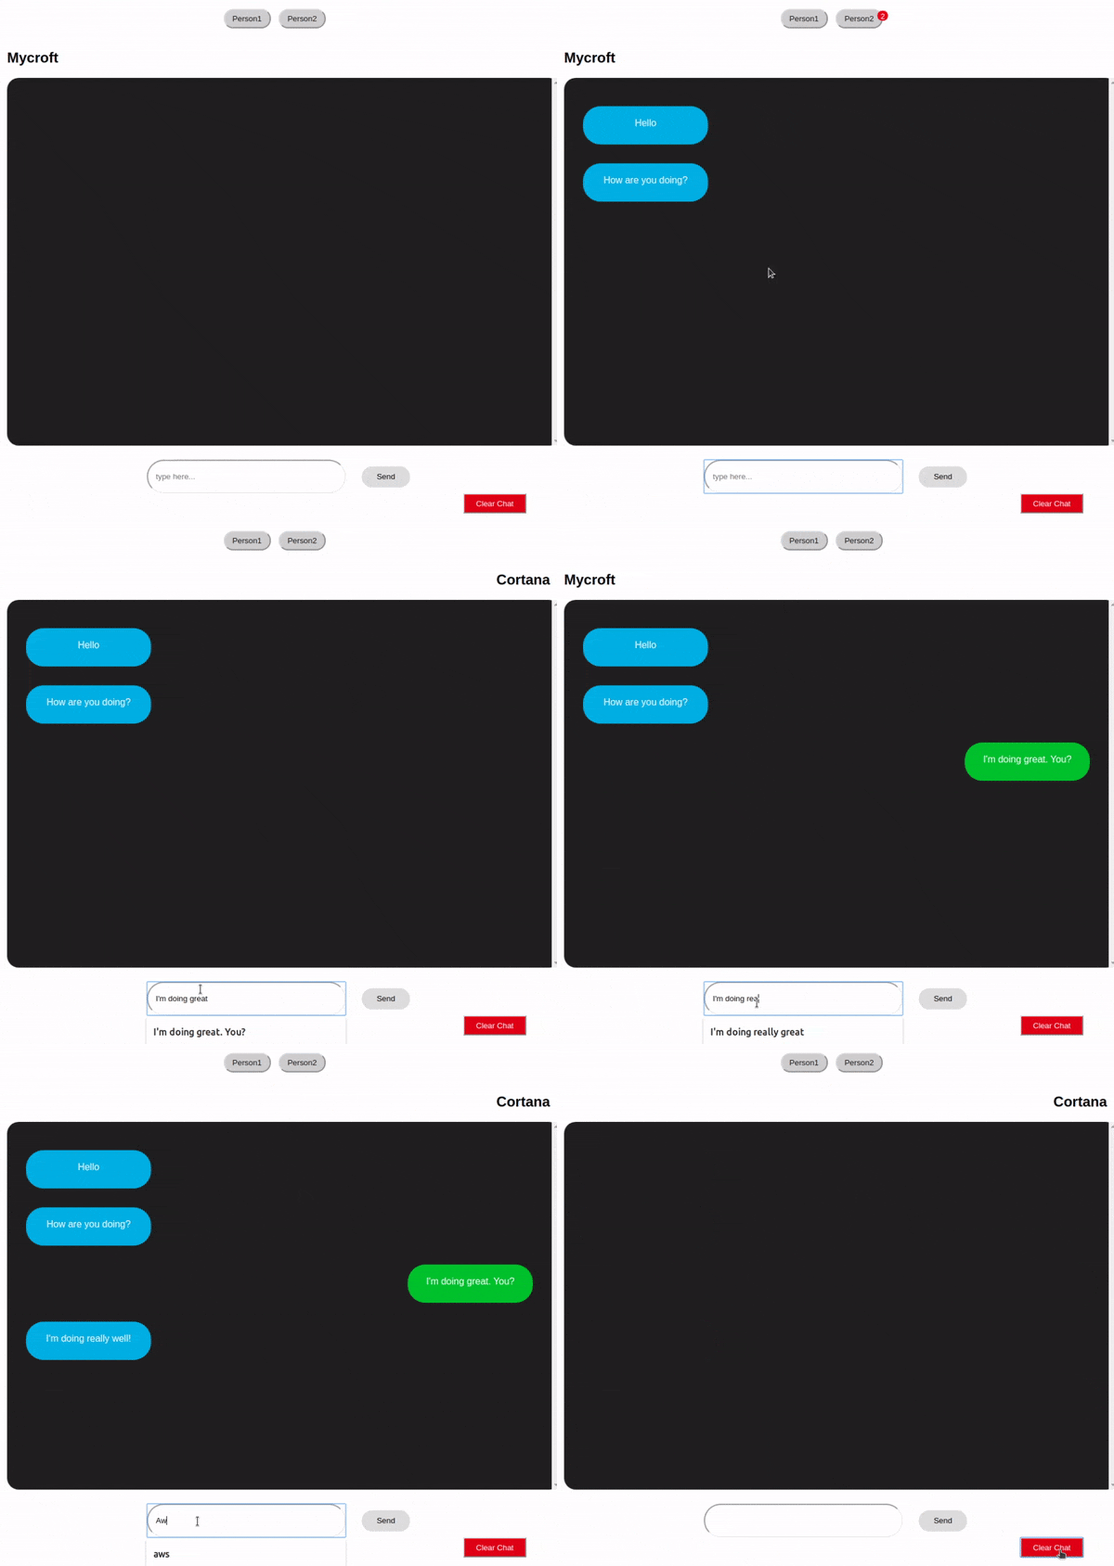
We’ll build a demo chat application to see these concepts in practice. Our chat application will have three components that will communicate with each other through RxJS.
Our final app will look like this:
The Replay is a weekly newsletter for dev and engineering leaders.
Delivered once a week, it's your curated guide to the most important conversations around frontend dev, emerging AI tools, and the state of modern software.
When this article was originally written, The React version was v16, React router version was v5, and the RxJS version was v6.
In React version 18, there are lots of changes — these are a few you’ll notice in this tutorial:
In React Router 6, the changes are massive. Here are the relevant updates:
RxJS (Reactive Extensions Library for JavaScript) is a useful library for reactive programming. The RxJS documentation uses this definition:
(Note: RxJS is a library for reactive programming using Observables, to make it easier to compose asynchronous or callback-based code)
Reactive programming is an event-based paradigm that allows us to run asynchronous sequences of events as soon as data is pushed to a consumer.
To be able to use RxJS for state management in React, it is important to understand the following key terms:
An Observable is a data stream that houses data that can be passed through different threads. In our demo app, we’ll be using an Observable to supply data to our different components.
An Observer consumes the data supplied by an Observable. In our demo app, we’ll be using our setState Hook to consume data from our Observable.
In order for our Observer to consume data from our Observable, we’ll have to subscribe it to the Observable. In our demo app, we’ll be using the subscribe() method to subscribe our setState Observer to our Observable.
The best way to understand RxJS is to use it. Let’s start by creating a new React application. If you don’t have Create React App installed on your terminal, run:
npm i -g create-react-app
Next:
create-react-app rxjs_react_chat
This will generate a new React application using CRA.
To start our application, let’s navigate to our new app directory and run the command npm start:
cd rxjs_react_chat
npm start
In our new generated app directory, let’s navigate to src/. Since we’ll be working with multiple components, let’s set up BrowserRouter for navigating through different routes.
Let’s install it by running the following command:
npm install react-router-dom@6
This will install React Router v6.
Next, we’ll edit our src/index.js file to look like this:
// src/index.js

import { createRoot } from 'react-dom/client'
import './index.css';
import App from './App';
import { Routes, Route, BrowserRouter } from 'react-router-dom';

const container = document.getElementById('root');
const root = createRoot(container);
root.render(
  <BrowserRouter>
  </BrowserRouter>
);
Then, we’ll edit our src/App.js file to look like this:
// src/App.js
import { Outlet } from 'react-router-dom';
import './App.css';
function App() {
  return (
        <div className="App">
          <Outlet />
        </div>
  );
}
export default App;
Here, we are using Outlet from React Router 6, which stands as a portal for a child route to be rendered if it matches.
Now, let’s install the RxJS package
npm install rxjs
In our src folder, let’s create a store directory, src/store, where we’ll house our store.
Next, let’s create a chat.js file for our chat operations, src/store/chat.js. In our chat.js file, we’ll import Subject from rxjs and create a new variable from the Subject class:
import { Subject } from 'rxjs';

const subject = new Subject();
An RxJS Subject can act as both an Observable and an Observer at the same time. In this way, values can be multicasted to many Observers, so that when a Subject receives any data, that data can be forwarded to every Observer subscribed to it.
In our application, we’ll be subscribing our different React Hooks setState functions to our RxJS Subject so that when it receives any data, it forwards that data to every state associated with our setState function.
Let’s create a subscribe method for this purpose:
import { Subject } from 'rxjs'

const subject = new Subject();

const chatStore = {
  subscribe: setState => subject.subscribe(setState)
}
Next, we’ll create an object for our initial chat state:
import { Subject } from 'rxjs'

const subject = new Subject();

const initialState = {
  data: [],
  newDataCount: 0,
};

let state = initialState;

const chatStore = {
  subscribe: setState => subject.subscribe(setState)
}
We’ll use the data key to hold our array of message objects. These message objects will contain the values person (to specify who a message is from) and text (to store the message text).
Here’s what our object will look like:
{
  person: 'first-person',
  text: 'How are you?'
}
In our initialState object, the newDataCount will be used by our notification functionality to tell when new data has been pushed to our state.
Now that we have our state object, let’s create an init() method that will initialize our component’s state whenever it’s mounted:
...
const chatStore = {
  init: () => subject.next(state),
  subscribe: setState => subject.subscribe(setState)
}
The Subject.next() method is used to feed a new value to the Subject. When we call the next() method with a value as its parameter, that value is multicasted to all Observers subscribed to the Subject.
In our application, we’ll call both the subscribe() and init() methods whenever our component mounts in order to set our state to what we have in our chat store.
Next, we’ll create a sendMessage() method. We’ll call this method whenever our users hit the “Send Message” button.
Our sendMessage() method will receive a message argument, which we will append to our state.data array. Remember that our message argument is an object with keys person and text.
Let’s create our object with the following code block:
...
const chatStore = {
  init: () => subject.next(state),
  subscribe: setState => subject.subscribe(setState),
  sendMessage: message => {
    state = {
      ...state,
      data: [...state.data, message],
      newDataCount: state.newDataCount + 1
     };
     subject.next(state);
  }
};
In our new block, we appended our message object to our state.data array, then we incremented our newDataCount.
Now that we have our newDataCount incrementing every time a new message is sent by a user, we’ll also add a functionality to reset our new data count each time the messages are viewed so that when person 1 sends a new message and person 2 reads the message, the data count resets to 0.
To do this, in our init() method, we’ll assign the newDataCount key in our state the value of 0 each time a new component that subscribes to our Subject is mounted:
...
const chatStore = {
  init: () => {
    state = {...state, newDataCount: 0},
    subject.next(state)
  },
  subscribe: setState => subject.subscribe(setState),
  sendMessage: message => {
    state = {
      ...state,
      data: [...state.data, message],
      newDataCount: state.newDataCount + 1
    };
    subject.next(state);
  }
};
Next, we’ll add a method for clearing all messages. We’ll call it clearChat():
...
const chatStore = {
  init: () => {
    <b>state = {...state, newDataCount: 0},</b>
    subject.next(state)
  },
  subscribe: setState => subject.subscribe(setState),
  sendMessage: message => {
    state = {
      ...state,
      data: [...state.data, message],
      newDataCount: state.newDataCount + 1
    };
    subject.next(state);
  },
  clearChat: () => {
    state = initialState;
    subject.next(state);
  },
  initialState
};
We’ve also added our initial state to the chatStore object. We’ll use this to set our initial state value when defining our chatState with the useState() Hook.
Finally, let’s export the chatStore object. Our src/store/chat.js file should now look like this:
// src/store/chat.js

import { Subject } from 'rxjs';

const subject = new Subject();
const initialState = {
  status: '',
  data: [],
  newDataCount: 0,
  error: ''
};

let state = initialState;

const chatStore = {
  init: () => {
    state = {...state, newDataCount: 0}
    subject.next(state)
  },
  subscribe: setState => subject.subscribe(setState),
  sendMessage: message => {
    state = {
      ...state,
      data: [...state.data, message],
      newDataCount: state.newDataCount + 1
    };
    subject.next(state);
  },
  clearChat: () => {
    state = {...state, data: []};
    subject.next(state);
  },
  initialState
};

export default chatStore;
Now that we’ve set up our chat store, we’ll be creating our components to utilize the store and its methods.
First, let’s modify our src/index.css file to look like this:
.container {
  font-family: Arial, Helvetica, sans-serif;
  padding: 1em;
}

.chat-box {
  background: #202020;
  margin: auto;
  padding: 2em;
  height: 35em;
  width: 95%;
  border-radius: 20px;
  overflow-y: scroll;
}

.first-person, .second-person {
  display: inline-block;
  color: #fff;
  height: 25px;
  min-width: 20%;
  max-width: 60%;
  padding: 20px;
  text-align: center;
  vertical-align: middle;
  border-radius: 30px;
}

.first-person {
  background: rgb(0, 173, 231);
}

.second-person {
  background: #06c406;
  float: right;
}

.clear{
  clear: both;
  display: block;
  content: "";
  width: 100%;
}

.switcher-div {
  padding-top: 1em;
  text-align: center;
}

#messageForm {
  text-align: center;
  margin-top: 1.5em;
}

#messageForm input {
  height: 2em;
  width: 23em;
  border-radius: 3em;
  padding: 1em;
}

#messageForm button {
  margin-left: 2em;
  height: 2.7em;
  width: 6.2em;
  border-radius: 25px;
  border: none;
  cursor: pointer;
}

.clear-button {
  background: #d40000;
  color: #fff;
  float: right;
  margin-right: 3em;
  text-align: center;
  height: 2.5em;
  width: 8em;
  cursor: pointer;
}

.switcher {
  background: #cecece;
  color: #141414;
  height: 2.5em;
  width: 6em;
  border-radius: 25px;
  border: 1 px solid black;
  margin-right: 1em;
  cursor: pointer;
}

.notify {
  position: absolute;
  background: #db0000;
  color: white;
  height: 1em;
  width: 1em;
  border-radius: 100%;
  padding: 0.15em;
  margin-left: 0.5em;
  margin-top: -0.5em;
}
In our src folder, create a components directory, src/components. This is where we’ll house all of our components. We’ll need three components for our application:
In our src/components directory, let’s create a new file, FirstPerson.js, for our first person component. Our new component should look like this:
// src/components/FirstPerson.js

import { useState } from  "react";
const FirstPerson = () => {
  const [chatState, setChatState] = useState({});
  return (
    <div className="container">
      <h2>Mycroft</h2>
      <div className="chat-box">
        {chatState.data.map(message => (
          <div>
            <p className={message.person}>{message.text}</p>
            <div className="clear"></div>
          </div>
        ))}
      </div>
      <form id="messageForm">
        <input
          type="text"
          id="messageInput"
          name="messageInput"
          placeholder="type here..."
          required
        />
        <button type="submit">Send</button> <br />
      </form>
    </div>
  );
}
export  default  FirstPerson;
In the next block, we’ll import our chatStore and use its initialState property as our default chatState value.
Then, in our useLayoutEffect() Hook, we’ll subscribe our setChatState function to our chat store using the chatStore.subscribe() method and, finally, use the chatStore.init() method to initialize our component’s chatState:
// src/components/FirstPerson.js
import React, { useState, useLayoutEffect } from "react";
import chatStore from '../store/chat';

const FirstPerson = () => {
  const [chatState, setChatState] = useState(chatStore.initialState);

  useLayoutEffect(()=> {
    chatStore.subscribe(setChatState);
    chatStore.init();
  },[]);

  return (...)
}
We are making use of the useLayoutEffect() hook to send data to our chatState before our component is rendered.
Next, we’ll import our FirstPerson component in our src/index.js file and add it to a route path:
// src/App.js
import { Outlet } from 'react-router-dom';
import './App.css';
import Switcher from './components/Switcher';
function App() {
  return (
        <div className="App">
          <Switcher/>
          <Outlet />
        </div>
  );
}
export default App;
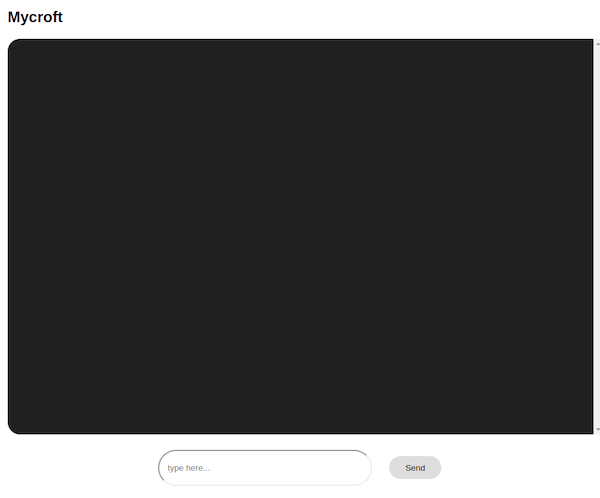
Now, when we run our app and navigate to the / or /first-person route, we should see:
Now, back to our src/components/FirstPerson.js file. Let’s add an onFormSubmit() method. We’ll call this method whenever our user clicks the send button.
...
const FirstPerson = () => {
  const [chatState, setChatState] = useState(chatStore.initialState);
  useLayoutEffect(()=> {
    chatStore.subscribe(setChatState);
    chatStore.init();
  },[]);
  const onFormSubmit = e => {
    e.preventDefault();
    const messageObject = {
      person: 'first-person',
      text: e.target.elements.messageInput.value.trim(),
    };
    chatStore.sendMessage(messageObject);
    document.getElementById('messageForm').reset();
  };
  return (
    ...
      <form id="messageForm" onSubmit={onFormSubmit}>
        <input
          type="text"
          id="messageInput"
          name="messageInput"
          placeholder="type here..."
          required
        />
        <button type="submit">Send</button> <br />
      </form>
    </div>
  );
}
export default FirstPerson;
Our onFormSubmit() function creates a message object with the person and text keys, then uses our chatStore.sendMessage() method to add our new message to the chat store.
Next, we’ll add a button that we’ll use to call our chatStore.clearChat() method. We’ll use this to clear our chat store whenever the clear button is clicked.
Let’s add the following block of code right after the </form> closing tag:
<button className="clear-button" onClick={() => chatStore.clearChat()}>
  Clear Chat
</button>
Our src/components/FirstPerson.js file should now look like this:
import React, { useState, useLayoutEffect } from "react";
import chatStore from '../store/chat';

const FirstPerson = () => {
  const [chatState, setChatState] = useState(chatStore.initialState);

  useLayoutEffect(()=> {
    chatStore.subscribe(setChatState);
    chatStore.init();
  },[]);

  const onFormSubmit = e => {
    e.preventDefault();
    const messageObject = {
      person: 'first-person',
      text: e.target.elements.messageInput.value.trim(),
    };
    chatStore.sendMessage(messageObject);
    document.getElementById('messageForm').reset();
  };

  return (
    <div className="container">
      <h2>Mycroft</h2>
      <div className="chat-box">
        {chatState.data.map(message => (
          <div>
            <p className={message.person}>{message.text}</p>
            <div className="clear"></div>
          </div>
        ))}
      </div>
      <form id="messageForm" onSubmit={onFormSubmit}>
        <input
          type="text"
          id="messageInput"
          name="messageInput"
          placeholder="type here..."
          required
        />
        <button type="submit">Send</button> <br />
      </form?
      <button className="clear-button" onClick={() => chatStore.clearChat()}>
        Clear Chat
      </button>
    </div>
  );
}
export default FirstPerson;
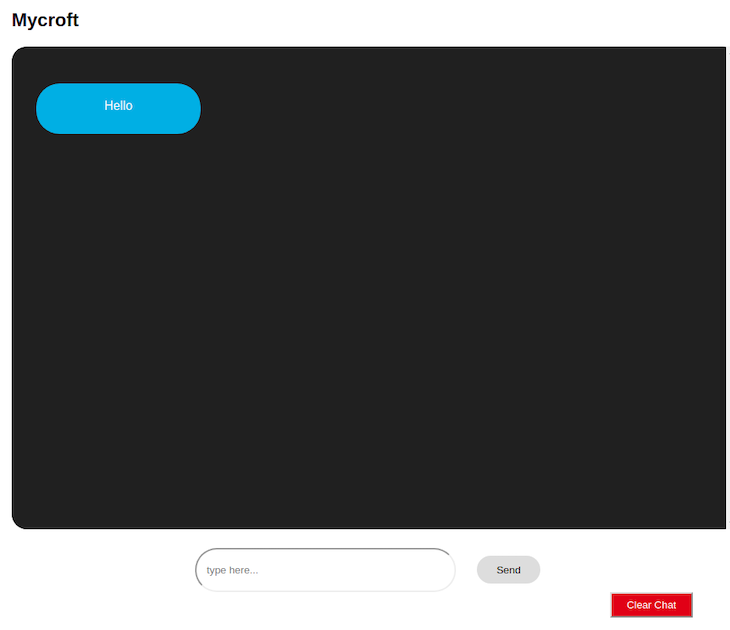
When we preview our app on our browser, we should now be able to send a message to our store and clear all messages:
Now that we’ve seen how to retrieve data from our store and add other data to it, let’s create our SecondPerson component to demonstrate how this data can be shared between different components.
The SecondPerson component has the same functionality as the FirstPerson component, so we’ll only change our person value in our messageObject to second-person and the name of our user from Mycroft to Cortana in the <h2> tag inside our container div.
To do this, let’s create a new file, src/components/SecondPerson.js, and paste the following code blocks:
// src/components/SecondPerson.js
import { useState, useLayoutEffect } from "react";
import chatStore from '../store/chat';

const SecondPerson = () => {
  const [chatState, setChatState] = useState(chatStore.initialState);

  useLayoutEffect(()=> {
    chatStore.subscribe(setChatState);
    chatStore.init();
  },[]);

  const onFormSubmit = e => {
    e.preventDefault();
    const messageObject = {
      person: 'second-person',
      text: e.target.elements.messageInput.value.trim(),
    };

    chatStore.sendMessage(messageObject);
    document.getElementById('messageForm').reset();
  };

  return (
    <div className="container">
      <h2 style={{float: 'right'}}>Cortana</h2>
      <div className="chat-box">
        {chatState.data.map(message => (
          <div>
            <p className={message.person}>{message.text}</p>
            <div className="clear"></div>
          </div>
        ))}
      </div>
      <form id="messageForm" onSubmit={onFormSubmit}>
        <input
          type="text"
          id="messageInput"
          name="messageInput"
          required
        />
        <button type="submit">Send</button> <br />
      </form>
      <button className="clear-button" onClick={() => chatStore.clearChat()}>
        Clear Chat
      </button>
    </div>
  );
}

export default SecondPerson;
Next, we’ll need to create our Switcher component to switch between our two components. In our src/components directory, let’s create a new file, Switcher.js and paste the following code blocks:
// src/components/Switcher.js
import { useState, useEffect } from 'react'
import { NavLink } from 'react-router-dom';
import chatStore from '../store/chat';

function Switcher() {
  const [chatState, setChatState] = useState(chatStore.initialState);
  const location = window.location.href.split('/')[3];

  useEffect(() => {
    chatStore.subscribe(setChatState);
    chatStore.init();
  }, []);

  const messageNotification = chatState.newDataCount > 0
  && (<span className="notify">{chatState.newDataCount}</span>);

  return (
      <div className="switcher-div">
          <NavLink
              style={({ isActive }) => ({
                  border: isActive ? "2px solid #00ade7" : "",
                  padding:0,
                  borderRadius:30
              })}
              to={"/first-person"}>
              <button className="switcher">
                  Person 1
                  {location !== 'first-person' && location.length > 1 && messageNotification}
              </button>
          </NavLink>
          <NavLink style={({ isActive }) => ({
                    border: isActive ? "2px solid #06c406" : "",
                    padding:0,
                    borderRadius:30
              })} to={"/second-person"}>
              <button className="switcher">
                  Person 2
                  {location !== 'second-person' && messageNotification}
              </button>
          </NavLink>
      </div>
  )
}
export default Switcher
Let’s update our src/App.js file, the Switcher will appear on every page so we add it to the App.js file that renders each Person component based on its routes match.
// src/App.js
import { Outlet } from 'react-router-dom';
import './App.css';
import Switcher from './components/Switcher';
function App() {
  return (
        <div className="App">
          <Switcher />
          <Outlet />
        </div>
  );
}
export default App;
Notice that we’ve also created a chatState for our component, which we’ve subscribed to our chatStore. We’ll need this to notify our component when a new message is added to our chat store. Note how we added a messageNotification variable that utilizes our newDataCount property from our chat store.
Now, our index.js file should look like this:
import React from 'react';
import FirstPerson from './components/FirstPerson';
import SecondPerson from './components/SecondPerson';
import { createRoot } from 'react-dom/client'
import './index.css';
import App from './App';
import { Routes, Route, BrowserRouter } from 'react-router-dom';

const container = document.getElementById('root');
const root = createRoot(container);
root.render(
  <BrowserRouter>
        <Routes>
          <Route path='/' element={<App />} >
            <Route index path='/' element={<FirstPerson />} />
            <Route index path='first-person' element={<FirstPerson />} />
            <Route path="second-person" element={<SecondPerson />} />
          </Route>
        </Routes>
  </BrowserRouter>
)
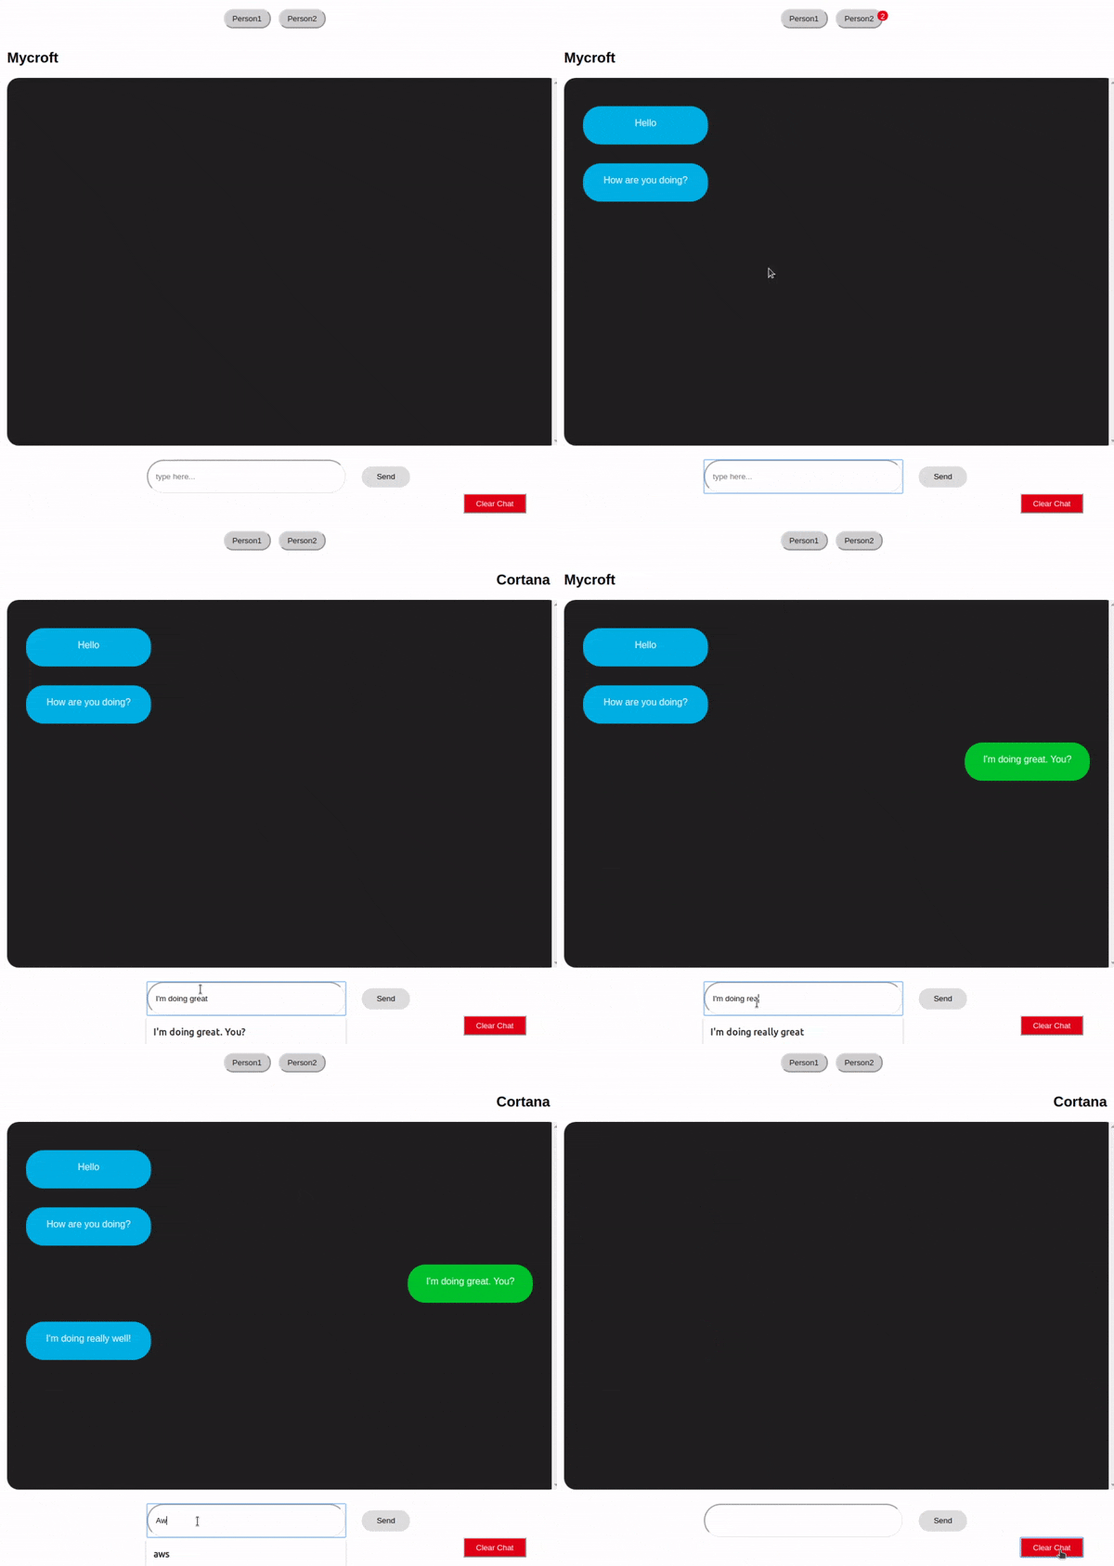
Now when we run our application, we’ll be able to switch between components, receive new message counts when we send a message, and clear all messages using the “Clear” button:
In this article, we’ve covered the basics of RxJS and have demonstrated how to use it for state management in React by building a component-based chat application. Here’s a link to the GitHub repo for the updated version of our demo app.
Compared to other alternatives like Redux, I’ve found the use of RxJS and Hooks to be a really effective and straightforward way to manage state in React applications.
To learn more about RxJS, I’d highly recommend reading the following articles:
Happy hacking!
Install LogRocket via npm or script tag. LogRocket.init() must be called client-side, not
server-side
$ npm i --save logrocket

// Code:

import LogRocket from 'logrocket';
LogRocket.init('app/id');
// Add to your HTML:

<script src="https://cdn.lr-ingest.com/LogRocket.min.js"></script>
<script>window.LogRocket && window.LogRocket.init('app/id');</script>

Learn how LLM routing works in production, when it’s worth the complexity, and how teams choose the right model for each request.

Compare key features of popular meta-frameworks Remix, Next.js, and SvelteKit, from project setup to styling.

Discover what’s new in The Replay, LogRocket’s newsletter for dev and engineering leaders, in the February 4th issue.

AI-first isn’t about tools; it’s about how teams think, build, and decide. Ken Pickering, CTO at Scripta Insights, shares how engineering leaders can adapt.
Hey there, want to help make our blog better?
Join LogRocket’s Content Advisory Board. You’ll help inform the type of content we create and get access to exclusive meetups, social accreditation, and swag.
Sign up now
16 Replies to "RxJS with React Hooks for state management"
You might find Hookstate (https://github.com/avkonst/hookstate) delivers similar benefits. It will make things even easier and faster. It is simple, but powerful and incredibly fast state management for React that is based on hooks.
It was a clear, straight to the point and easy to follow article, thanks.
One thing I’d like to suggest to improve the code is to handle the cleanup of the subscriptions inside the useLayoutEffect() hooks:
// src/components/{FirstPerson,SecondPerson}.js
useLayoutEffect(() => {
const subs = chatStore.subscribe(setChatState)
chatStore.init()
return function cleanup(){ subs.unsubscribe() }
}, [])
Thanks again
Hi Luciano, I’m glad you found the article helpful and thanks a lot for pointing out the cleanup function.
I’ll also update the GitHub repo with the changes.
Hookstate looks like a good alternative. I’ll definitely give it a try.
Nice idea! I actually use global context + useReducer (without rxjs) to get a similar global store.
Hi Aral, you might want to check this out: https://blog.logrocket.com/use-hooks-and-context-not-react-and-redux/
I work with Angular at my job where RxJs is used heavily. It’s great to see RxJs being adopted in the react community.
We have an upcoming project where we need to demo a tool. I’m going to give React + RxJS + Hooks a try. Thank you for this guide!
I’m glad you found this helpful, Alex!
Thanks Ebenezer for this tutorial. It did help me clear some doubts. Apparently I’m facing some problems/issues. This tutorial works like a charm when executed for the first time, but when you do a browser page refresh, I don’t the expected values/messages from chatStore. I always get the initialState values that we initialized earlier. Not understanding what silly mistake I’m doing here.
Any help would be highly appreciated. Thanks in advance.
If you refresh the browser you’ll lose everything because the data is never saved to any kind of storage, you’ll need to use a db or localStorage if you want to persist the data
great article. all is working as expected, but in the console getting warnings:
index.js:1 Warning: Can’t perform a React state update on an unmounted component. This is a no-op, but it indicates a memory leak in your application. To fix, cancel all subscriptions and asynchronous tasks in a useEffect cleanup function.
in SecondPerson (created by Context.Consumer)
Thanks for your helpful tutorial but i have a question, Why init the state inside useLayoutEffect while u can just init it in useState(chatStore.initialState)?
Separate things… this article is not about database. It shows an lightwight way to handle state. For big apps look at redux flux…you will see a lot of boilerplate.
Remember to unsubscribe when component is unmounted
I made this a little better
https://codesandbox.io/s/rxjs-with-react-hooks-for-state-management-7lsd9
Hi Don,
The best explanation so far on the internet about React and RxJs.
All the best to you,
Lyudmil