In this tutorial, we will work with Vue, Vue Router, Vuetify, and node-fetch to build the front end of an inventory management application. Vue is a JavaScript framework for building user interfaces on the web . Vue Router is the official router for the Vue framework. Vuetify is a Vue UI library with beautifully handcrafted Material Components. node-fetch is a module that allows you to make HTTP requests to API endpoints or any URL.

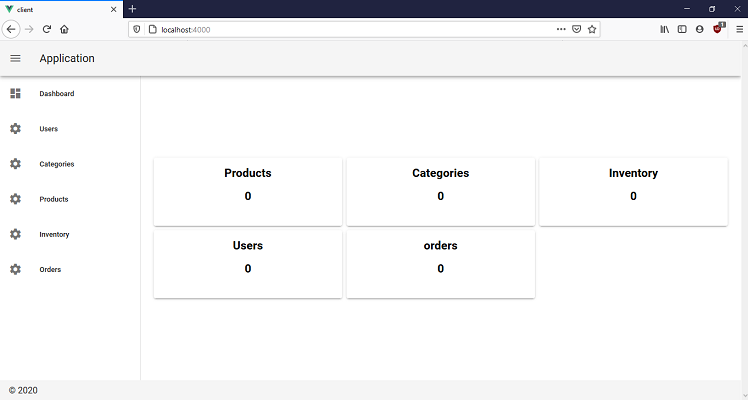
At the end of this tutorial you will have an application that looks like this:
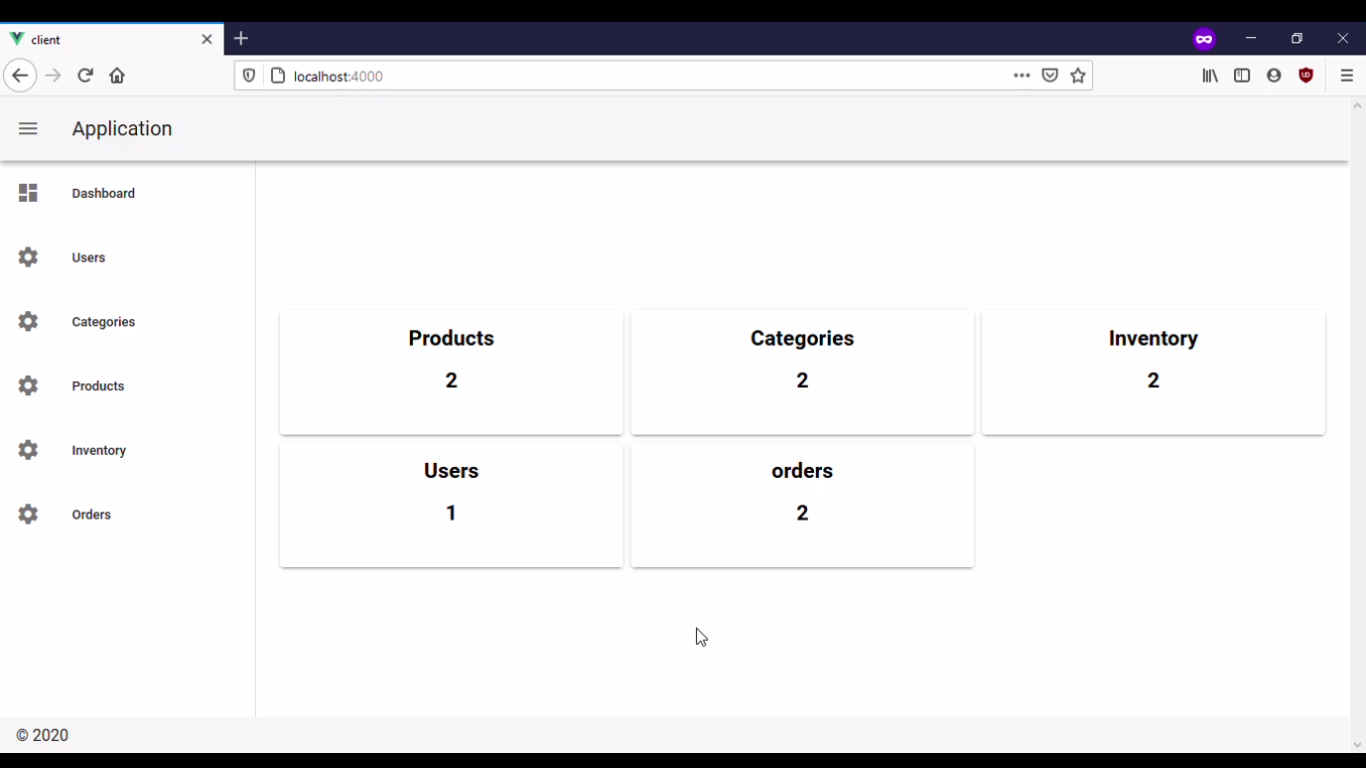
In order to follow this tutorial, you will need:
In this section, we will create your project’s directory structure. Then we will initialize a Node.js project for your application client.
Open a terminal window and clone the repository that contains the back end I created in advance for this tutorial from GitHub:
git clone https://github.com/CSFM93/inventory-management-system
After running the command above you will have a directory named inventory-management-system.
Navigate into this directory:
cd inventory-management-system
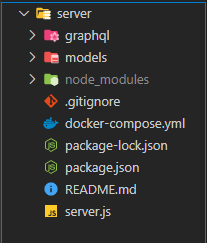
The folder structure should look like this:
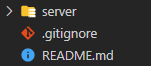
The server directory, contains the back end for your inventory management application. The back end consists of a GraphQL server connected to a MongoDB database. In order to build this GraphQL server, I used Node.js, Docker, MongoDB, graphql-yoga, mongoose, and connect-history-api-fallback.
Inside your database you will have the following collections:
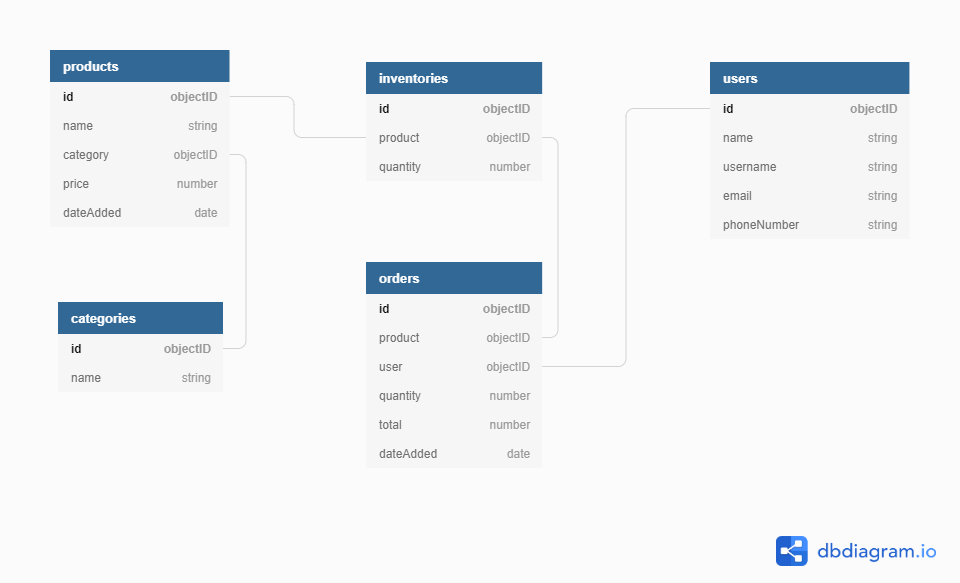
Now that you know what is happening in the back end it’s time to build the front end of your inventory management application.
Still in the inventory-management-system directory, create a subdirectory named client:
mkdir client
Navigate into the client directory:
cd client
Use the Vue CLI to create a new Vue project in the current directory:
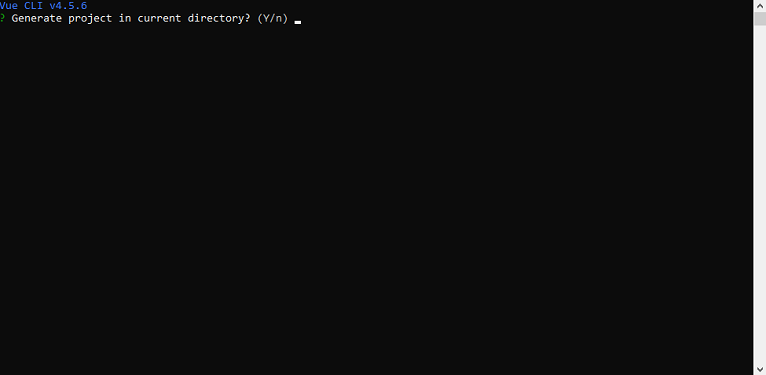
vue create .
When asked to create a new project in the current directory type y:
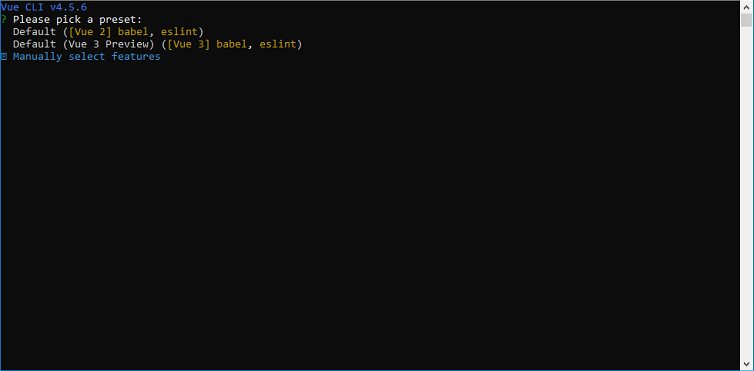
You will be prompted to pick a preset, select Manually select features:
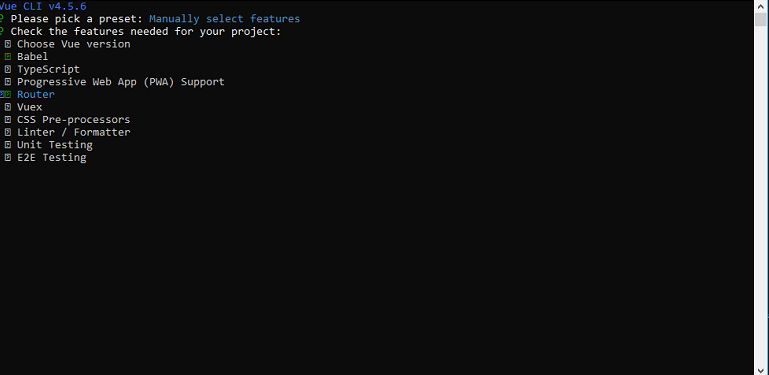
Select Babel and Router:
When asked if you want to use history mode for Router type y:

According to the Vue Router website, the default mode for Vue router is hash mode – it uses the URL hash to simulate a full URL so that the page won’t be reloaded when the URL changes. To get rid of the hash, you can use the router’s history mode, which leverages the history.
When asked where you want to place config, select In dedicated config files and when asked if you want to save these configurations for future projects type y or n.
After the Vue CLI finishes creating the project, install the missing dependencies.
First, install Vuetify using the Vue CLI by running the following command:
vue add vuetify
When asked to select a preset, choose default.
In this block of code, you have installed Vuetify . You will use this module to create the inventory management system UI without having to worry too much about CSS.
Lastly, use npm to install node-fetch:
npm install node-fetch --save
In this block of code, you have installed node-fetch.
node-fetch is a module that allows you to make HTTP requests to API endpoints, or any URL. You will use this module to consume the GraphQL API in the serverIn this section, you created a project directory and initialized a Node.js project for your application client. In the next section, you will start building the user interface for this application.
In this step, you are going to use Vuetify to create the layout and vue-router to handle the routes for the application client.
Navigate to thesrc directory:
cd src
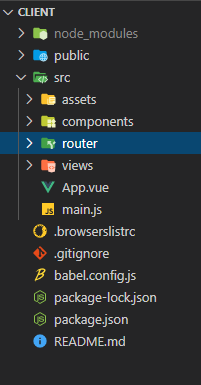
The folder structure should look something like this:
Open your App.vue file:
nano App.vue
Remove the <style> component and replace the contents in the <template> component with the following:
<template>
<v-app id="app">
<v-navigation-drawer v-model="drawer" app clipped>
<v-list dense v-for="route in routes" :key="route.title">
<v-list-item link @click="navigateTo(route.path)">
<v-list-item-action>
<v-icon>{{route.icon}}</v-icon>
</v-list-item-action>
<v-list-item-content>
<v-list-item-title>{{route.title}}</v-list-item-title>
</v-list-item-content>
</v-list-item>
</v-list>
</v-navigation-drawer>
<v-app-bar app clipped-left>
<v-app-bar-nav-icon @click.stop="drawer = !drawer"></v-app-bar-nav-icon>
<v-toolbar-title>Application</v-toolbar-title>
</v-app-bar>
<v-main>
<v-container class="fill-height" fluid>
<v-row align="center" justify="center">
<v-col>
<router-view :key="$route.fullPath"></router-view>
</v-col>
</v-row>
</v-container>
</v-main>
<v-footer app>
<span>© {{ new Date().getFullYear() }}</span>
</v-footer>
</v-app>
</template>
In the block of code above, you have added inside the <-app> component the following components, <v-navigation-drawer> , <v-app-bar>, <v-main>, and <v-footer>.
<v-navigation-drawer> is used in conjunction with the <v-app-bar> component to allow you to navigate through the routes of your application<v-main> component is where the views of your application will be displayed<v-footer> component is where the footer of your application will be displayedNow replace the contents inside your <script> component with the following:
<script>
export default {
  name: "App",
  data: () => ({
    drawer: null,
    routes: [
      { path: "home", title: "Dashboard", icon: "mdi-view-dashboard" },
      { path: "users", title: "Users", icon: "mdi-cog" },
      { path: "categories", title: "Categories", icon: "mdi-cog" },
      { path: "products", title: "Products", icon: "mdi-cog" },
      { path: "inventory", title: "Inventory", icon: "mdi-cog" },
      { path: "orders", title: "Orders", icon: "mdi-cog" },
    ],
  }),
  created() {
    this.$vuetify.theme.light = true;
  },
}
</script>
In the block of code above, you have created the data field and the created() field for the App.vue.
data field contains two subfields, drawer and routes. drawer will be used to control the application navigation drawer and routes contains the data that will be used to generate the items in the drawercreated() field will be used to change the application theme to light because by default it was set to darkAdd the following code below to the created() field:
<script>
export default {
 . . .

  methods: {
    navigateTo(route) {
      if (this.$route.name !== route) {
        this.$router.push({ name: route }).catch((error) => {
          console.log(error)
        });
      }
    },
  },
}
</script>
In the block of code above, you have added the methods field, and inside this method you added a method named navigateTo(). The navigateTo() method receives as an argument a string named route, using conditional logic this method checks if the current route is not equal to route and if that is the case it navigates to this received route. This method will be called whenever you click an item in the <v-navigation-drawer>.
Your App.vue should look something like this:
<template>
<v-app id="app">
<v-navigation-drawer v-model="drawer" app clipped>
<v-list dense v-for="route in routes" :key="route.title">
<v-list-item link @click="navigateTo(route.path)">
<v-list-item-action>
<v-icon>{{route.icon}}</v-icon>
</v-list-item-action>
<v-list-item-content>
<v-list-item-title>{{route.title}}</v-list-item-title>
</v-list-item-content>
</v-list-item>
</v-list>
</v-navigation-drawer>
<v-app-bar app clipped-left>
<v-app-bar-nav-icon @click.stop="drawer = !drawer"></v-app-bar-nav-icon>
<v-toolbar-title>Application</v-toolbar-title>
</v-app-bar>
<v-main>
<v-container class="fill-height" fluid>
<v-row align="center" justify="center">
<v-col>
<router-view :key="$route.fullPath"></router-view>
</v-col>
</v-row>
</v-container>
</v-main>
<v-footer app>
<span>© {{ new Date().getFullYear() }}</span>
</v-footer>
</v-app>
</template>
<script>
export default {
name: "App",
data: () => ({
drawer: null,
routes: [
{ path: "home", title: "Dashboard", icon: "mdi-view-dashboard" },
{ path: "users", title: "Users", icon: "mdi-cog" },
{ path: "categories", title: "Categories", icon: "mdi-cog" },
{ path: "products", title: "Products", icon: "mdi-cog" },
{ path: "inventory", title: "Inventory", icon: "mdi-cog" },
{ path: "orders", title: "Orders", icon: "mdi-cog" },
],
}),
created() {
this.$vuetify.theme.light = true;
},
methods: {
navigateTo(route) {
if (this.$route.name !== route) {
this.$router.push({ name: route }).catch((error) => {
console.log(error)
});
}
},
},
}
</script>
Navigate to the router directory:
cd router
Open the index.js file:
nano index.js
Remove the line where you import the Home view component:
import Home from '../views/Home.vue'
Replace the content of the routes array with the following:
. . .

const routes = const routes = [
  {
    path: '/',
    name: 'home',
    component: () => import(/* webpackChunkName: "home" */ '../views/Home.vue')
  },
  {
    path: '/users',
    name: 'users',
    component: () => import(/* webpackChunkName: "table" */ '../views/Table.vue')
  },
  {
    path: '/categories',
    name: 'categories',
    component: () => import(/* webpackChunkName: "table" */ '../views/Table.vue')
  },
  {
    path: '/inventory',
    name: 'inventory',
    component: () => import(/* webpackChunkName: "table" */ '../views/Table.vue')
  },
  {
    path: '/products',
    name: 'products',
    component: () => import(/* webpackChunkName: "table" */ '../views/Table.vue')
  },
  {
    path: '/orders',
    name: 'orders',
    component: () => import(/* webpackChunkName: "table" */ '../views/Table.vue')
  }
]
In the block of code above, you added the following routes to the routes array, home, users, categories, products, inventory, and orders.
home route will display a grid of cards, each card will display a collection name and the number of documents in it, and allow you to navigate to the route that contains the collection datausers, categories, products, inventory, and orders route will allow you to manage the documents in the users, categories, products, inventories, and orders collection respectivelyIn every route, you are lazily loading the view component. All routes contents will be displayed in the Table view component with the exception of the home route contents which will be displayed in the Home view component.
Your index.js file should look like the following:
import Vue from 'vue'
import VueRouter from 'vue-router'

Vue.use(VueRouter)

const routes = [
  {
    path: '/',
    name: 'home',
    component: () => import(/* webpackChunkName: "home" */ '../views/Home.vue')
  },
  {
    path: '/users',
    name: 'users',
    component: () => import(/* webpackChunkName: "table" */ '../views/Table.vue')
  },
  {
    path: '/categories',
    name: 'categories',
    component: () => import(/* webpackChunkName: "table" */ '../views/Table.vue')
  },
  {
    path: '/inventory',
    name: 'inventory',
    component: () => import(/* webpackChunkName: "table" */ '../views/Table.vue')
  },
  {
    path: '/products',
    name: 'products',
    component: () => import(/* webpackChunkName: "table" */ '../views/Table.vue')
  },
  {
    path: '/orders',
    name: 'orders',
    component: () => import(/* webpackChunkName: "table" */ '../views/Table.vue')
  }
]

const router = new VueRouter({
  mode: 'history',
  base: process.env.BASE_URL,
  routes
})

export default router
In this section, you have created the layout and the routes for your application client. In the next section, you will start creating views for your application client.
In this section, you are going to start creating the views for your application client. The application will have two views named Home and Table, which will reside in the Home.vue and Table.vue file respectively. In this section, you are going to create the Home view.
Navigate to the views directory:
cd ../views
Open the file named Home.vue:
nano Home.vue
Replace the content inside the <template> component with the following:
<template>
  <v-container fluid>
    <v-row dense>
      <v-col v-for="card in cards" :key="card.title" :cols="card.flex">
        <v-hover v-slot:default="{ hover }">
          <v-card :elevation="hover ? 16 : 2" :style="hover? 'cursor: pointer': '' ">
            <v-card-text @click="navigateTo(card.title.toLowerCase())">
              <h2 style="color:black" class="text-center">{{card.title}}</h2>
              <h2
                style="color:black; margin-top:20px; height: 50px"
                class="text-center"
              >{{card.quantity}}</h2>
            </v-card-text>
          </v-card>
        </v-hover>
      </v-col>
    </v-row>
  </v-container>
</template>
In the block of code above, you have added inside the <template> component a <v-container component. You will use this component to create a grid with five cards. Each card will display a collection name and the number of documents that this collection has. You also added a click listener to each card in order to navigate to a specific route whenever you click on it.
Replace the content inside the <script> component with the following:
<script>
import actions from "../components/actions"

export default {
  name: "Home",
  data: () => ({
    cards: [],
  }),
  created() {
    this.initialize();
  },
}
</script>
In the block of code above, you are importing an object named actions from the actions.js file in the components directory. Then you added the data and the created() field. Inside the data field you added a sub field named cards which holds an empty array. Inside the created() field you called a method named initialize(), you will create this method in a moment.
Please note that you haven’t created the actions.js yet, this file will be responsible for consuming the GraphQL API, it will allow you to query and mutate data in your MongoDB instance.
Add the following code below the created() field:
<script>
. . .
export default {
  . . .

  methods: {
    async initialize() {
      let categories = await actions.getCategories();
      let users = await actions.getUsers();
      let products = await actions.getProducts();
      let inventoryItems = await actions.getInventoryItems();
      let orders = await actions.getOrders();
      this.cards = [
        { title: "Products", quantity: products.length, flex: 4 },
        { title: "Categories", quantity: categories.length, flex: 4 },
        { title: "Inventory", quantity: inventoryItems.length, flex: 4 },
        { title: "Users", quantity: users.length, flex: 4 },
        { title: "orders", quantity: orders.length, flex: 4 },
      ]
    },
  },
}
</script>
In the block of code above, you have added the methods field, and inside this field, you created a method named initialize(). Inside the initialize() you used the methods provided by the actions object to retrieve data from all collections then you took this data and added to the cards array.
Add the following code below the initialize() method:
<script>
. . .

export default {
  . . .

  methods: {
  . . .

    navigateTo(route) {
      if (this.$route.name !== route) {
        this.$router.push({ name: route }).catch((error) => {
          console.log(error);
        })
      }
    },
  },
}
</script>
In the block of code above, you have added inside the methods field, a method named navigateTo(). The navigateTo() method receives as an argument a string named route, using conditional logic this method checks if the current route is not equal to route and if that is the case it navigates to this received route. This method will be called whenever you click a card in this view.
Your Home.vue file should look something like this:
<template>
  <v-container fluid>
    <v-row dense>
      <v-col v-for="card in cards" :key="card.title" :cols="card.flex">
        <v-hover v-slot:default="{ hover }">
          <v-card :elevation="hover ? 16 : 2" :style="hover? 'cursor: pointer': '' ">
            <v-card-text @click="navigateTo(card.title.toLowerCase())">
              <h2 style="color:black" class="text-center">{{card.title}}</h2>
              <h2
                style="color:black; margin-top:20px; height: 50px"
                class="text-center"
              >{{card.quantity}}</h2>
            </v-card-text>
          </v-card>
        </v-hover>
      </v-col>
    </v-row>
  </v-container>
</template>

<script>
import actions from "../components/actions"

export default {
  name: "Home",
  data: () => ({
    cards: [],
  }),
  created() {
    this.initialize();
  },
  methods: {
    async initialize() {
      let categories = await actions.getCategories();
      let users = await actions.getUsers();
      let products = await actions.getProducts();
      let inventoryItems = await actions.getInventoryItems();
      let orders = await actions.getOrders();
      this.cards = [
        { title: "Products", quantity: products.length, flex: 4 },
        { title: "Categories", quantity: categories.length, flex: 4 },
        { title: "Inventory", quantity: inventoryItems.length, flex: 4 },
        { title: "Users", quantity: users.length, flex: 4 },
        { title: "orders", quantity: orders.length, flex: 4 },
      ]
    },
    navigateTo(route) {
      if (this.$route.name !== route) {
        this.$router.push({ name: route }).catch((error) => {
          console.log(error);
        })
      }
    },
  },
}
</script>
In this section, you have created the Home view for your application client. In the next section, you will create the Table view.
In this section, you are going to create the table view which will display data for the users, products, categories, inventories, and orders route. You are going to use the v-data-table component provided by Vuetify to display the data.
Still in the views directory, create a file named Table.vue:
nano Table.vue
Add the following code inside the Table.vue file:
<template>
  <v-data-table :headers="headers" :items="rows" sort-by="name" class="elevation-2">
    <template v-slot:top>
      <v-toolbar flat color="white">
        <v-toolbar-title>{{$route.name.toUpperCase()}}</v-toolbar-title>
        <v-divider class="mx-4" inset vertical></v-divider>
        <v-spacer></v-spacer>
        <v-dialog v-model="dialog" max-width="500px">
          <template v-slot:activator="{ on, attrs }">
            <v-btn color="primary" dark class="mb-2" v-bind="attrs" v-on="on">New Item</v-btn>
          </template>
          <v-card>
            <v-card-title>
              <span class="headline">{{ formTitle }}</span>
            </v-card-title>
            <v-card-text>
              <v-container>
                <v-row v-for="(value, key) in editedItem " v-bind:key="key">
                  <v-col
                    cols="12" sm="6" md="4"
                    v-if=" key !== 'id' && key !=='category' && key !='dateAdded' && key !=='product' && key !=='user' ">
                    <v-text-field
                      :type =" key === 'quantity' || key === 'price' ? 'Number' : 'text' "
                      v-model="editedItem[key]"
                      :label="key"
                    ></v-text-field>
                  </v-col>
                </v-row>
                <v-row v-if="editedIndex === -1 && $route.name === 'inventory' ">
                  <v-col cols="12" sm="6" md="4">
                    <v-select
                      v-model="editedItem.product"
                      :items="options.products"
                      label="products"
                      item-text="name"
                      item-value="id"
                    ></v-select>
                  </v-col>
                </v-row>
                <v-row v-else-if="$route.name === 'products'">
                  <v-col cols="12" sm="6" md="4">
                    <v-select
                      v-model="editedItem.category"
                      :items="options.categories"
                      label="categories"
                      item-text="name"
                      item-value="id"
                    ></v-select>
                  </v-col>
                </v-row>
                <v-row v-else-if="editedIndex === -1 && $route.name === 'orders'">
                  <v-col cols="12" sm="6" md="4">
                    <v-select
                      v-model="editedItem.product"
                      :items="options.inventoryItems"
                      label="products"
                      item-text="product.name"
                      item-value="product.id"
                    ></v-select>
                  </v-col>
                  <v-col cols="12" sm="6" md="4">
                    <v-select
                      v-model="editedItem.user"
                      :items="options.users"
                      label="users"
                      item-text="username"
                      item-value="id"
                    ></v-select>
                  </v-col>
                </v-row>
              </v-container>
            </v-card-text>
            <v-card-actions>
              <v-spacer></v-spacer>
              <v-btn color="blue darken-1" text @click="close">Cancel</v-btn>
              <v-btn color="blue darken-1" text @click="save">Save</v-btn>
            </v-card-actions>
          </v-card>
        </v-dialog>
      </v-toolbar>
    </template>
    <template v-slot:[`item.actions`]="{ item }">
      <v-icon small class="mr-2" @click="editItem(item)">mdi-pencil</v-icon>
      <v-icon small @click="deleteItem(item)">mdi-delete</v-icon>
    </template>
    <template v-slot:no-data>
      <v-btn color="primary" @click="initialize">Reset</v-btn>
    </template>
  </v-data-table>
</template>
In the block of code above, you have created a <template> component, and inside it, you added a <v-data-table>. Inside the <v-data-table> component you have added the components needed in order to manage data in your collections. Most of the code above was provided by Vuetify and you only needed to make the <v-data-table> able to handle data from multiple collections instead of only one.
Add the following code below the <template>:
<script>
import actions from "../components/actions";

export default {
  name: "Table",
  data: () => ({
    dialog: false,
    headers: [],
    options: {},
    rows: [],
    editedIndex: -1,
    editedItem: {},
    defaultItem: {},
  }),
  computed: {
    formTitle() {
      return this.editedIndex === -1 ? "New Item" : "Edit Item";
    },
  },
}
</script>
In the block of code above, first, you created the <script> component, and inside it, you have imported an object named actions from the actions.js. Inside this component, you also created an object that will contain the information needed to create a <v-data-table> containing data from a collection in your MongoDB instance. Inside this object, you added the following fields: name, data,computed.
name field is where you set the name for your componentdata field is where you keep the information needed to create and manage your <v-data-table>. You have added inside the data field the following sub fields: dialog, headers, options, rows , editedIndex, editedItem, defaultItem:
dialog field is what you will use to display, or not, the <v-dialog> componentheaders field is where you set the headers for the <v-data-table>options field is where you store the array of key-value pairs objects needed in the <v-select> componentrows field is where you store the documents retrieved from a collection in your MongoDB instanceeditedIndex field is where you control if it’s an “add a new item” or “edit item” operationeditedItem field is where you store the model object that will be used when editing an itemdefaultItem field is where you store the model object that will be used when adding a new itemcomputed field is where you store any complex logic needed in the <template> component, inside this field you have added a method named formTitle which will be used to set the value in the title of the <v-dialog> componentAdd the following code below your computed field:
<script>
. . .

export default {
  . . .

  created() {
    this.initialize()
  },
  methods: {
    async initialize() {
      switch (this.$route.name) {
        case "users":
          break
        case "categories":
          break
        case "products":
          break
        case "inventory":
          break
        case "orders":
          break
      }
    }
  }
}
</script>
In the block of code above, you have added below the computed field the following fields, created() and methods.
created() field is a method that runs when this view is created, inside this method you called a method named initialize()methods field is the property where you store all the methods that you will need in the current view. Inside this property, you have added a method named initialize()The initialize() method will be where you retrieve information from your GraphQL server and store it in the fields of the data property. This method consists of a switch statement with the following cases, users, categories, products, inventory, and orders. Meaning, when you visit a route, one of the cases will be triggered and information needed to create a <v-data-table> for this route will be retrieved.
Replace the content of case "users": with the following code:
. . .

async initialize() {
  switch (this.$route.name) {
    case "users":
      this.headers = [
        { text: "ID", value: "id" },
        { text: "Name", value: "name" },
        { text: "username", value: "username" },
        { text: "Email", value: "email" },
        { text: "Phone number", value: "phoneNumber" },
        { text: "Actions", value: "actions", sortable: false },
      ]

      this.editedItem = { name: "", username: "", email: "", phoneNumber: ""}
      this.defaultItem = { name: "", username: "", email: "", phoneNumber: ""}

      const users = await actions.getUsers()
      this.rows = users
      break

    . . .
}
The code you added above will be triggered when you visit the users route. This block of code is responsible for adding the data needed in the headers, editedItem, defaultItem, and rows field in the data property. The data assigned to the rows object was retrieved by calling the getUsers() method provided by the actions object.
You are going to do the same thing you did in the block of code above to the remaining cases as well.
After replacing the content of the remaining cases, your initialize() will look like this :
. . .

async initialize() {
  switch (this.$route.name) {
    case "users":
      this.headers = [
        { text: "ID", value: "id" },
        { text: "Name", value: "name" },
        { text: "username", value: "username" },
        { text: "Email", value: "email" },
        { text: "Phone number", value: "phoneNumber" },
        { text: "Actions", value: "actions", sortable: false },
      ];
      this.editedItem = { name: "", username: "", email: "", phoneNumber: ""}
      this.defaultItem = { name: "", username: "", email: "", phoneNumber: ""}
      const users = await actions.getUsers()
      this.rows = users
      break
    case "categories":
      this.headers = [
        { text: "ID", value: "id" },
        { text: "Name", value: "name" },
        { text: "Actions", value: "actions", sortable: false },
      ]
      this.editedItem = { name: "" }
      this.defaultItem = { name: "" }
      const categories = await actions.getCategories()
      this.rows = categories
      break
    case "products":
      this.headers = [
        { text: "ID", value: "id" },
        { text: "Name", value: "name" },
        { text: "Category", value: "category" },
        { text: "Price", value: "price" },
        { text: "Date added", value: "dateAdded" },
        { text: "Actions", value: "actions", sortable: false },
      ]
      this.editedItem = { name: "", price: 0, category: ""}
      this.defaultItem = { name: "", price: 0, category: ""}
      this.options.categories = await actions.getCategories()
      const products = await actions.getProducts()
      for (let i = 0; i < products.length; i++) {
        products[i].category = products[i].category.name;
        products[i].dateAdded = new Date(products[i].dateAdded)
      }
      this.rows = products;
      break
    case "inventory":
      this.headers = [
        { text: "ID", value: "id" },
        { text: "Product", value: "product" },
        { text: "Quantity", value: "quantity" },
        { text: "Actions", value: "actions", sortable: false },
      ]
      this.editedItem = { quantity: 0 }
      this.defaultItem = { product: "", quantity: 0 }
      this.options.products = await actions.getProducts()
      const inventoryItems = await actions.getInventoryItems()
      for (let i = 0; i < inventoryItems.length; i++) {
        inventoryItems[i].product = inventoryItems[i].product.name
      }
      this.rows = inventoryItems
      break
    case "orders":
      this.headers = [
        { text: "ID", value: "id" },
        { text: "Product", value: "product" },
        { text: "Quantity", value: "quantity" },
        { text: "User", value: "user" },
        { text: "Total", value: "total" },
        { text: "Date added", value: "dateAdded" },
        { text: "Actions", value: "actions", sortable: false },
      ]
      this.editedItem = { quantity: 0 }
      this.defaultItem = { product: "", user: "", quantity: 0 }
      this.options.inventoryItems = await actions.getInventoryItems();
      this.options.users = await actions.getUsers()
      const orders = await actions.getOrders()
      for (let i = 0; i < orders.length; i++) {
        orders[i].product = orders[i].product.name
        orders[i].user = orders[i].user.username
        orders[i].dateAdded = new Date(orders[i].dateAdded)
      }
      this.rows = orders
      break;
  }
},
Add the following code below the initialize() method:
. . .

editItem(item) {
  this.editedIndex = this.rows.indexOf(item);
  this.editedItem = Object.assign({}, item);
  this.dialog = true;
},

close() {
  this.dialog = false;
  this.$nextTick(() => {
    this.editedItem = Object.assign({}, this.defaultItem);
    this.editedIndex = -1
  });
},
}

. . .
In the block of code above you have added the following methods inside the methods property, editItem() and close():
editItem() field is a method that receives as an argument an object named item , which is one of the objects in the rows array, changes the editedIndex to the index of the item in the rows array, assigns the item to the editedItem object and then opens the <v-dialog> component by setting the dialog value to trueclose() field is a method that closes the <v-dialog> component by setting the dialog value to false, assigns the defaultItem to the editedItem and then changes the editedIndex value to -1Add the following code below to your close() method:
. . .

async deleteItem(item) {
  const index = this.rows.indexOf(item)
  const message = "Are you sure you want to delete this item?"

  switch (this.$route.name) {
    case "users":
      confirm(message) && (await actions.deleteUser(item.id)) &&
      this.rows.splice(index,1)
      break
    case "categories":
      confirm(message) && (await actions.deleteCategory(item.id)) &&
      this.rows.splice(index, 1)
      break
    case "products":
      confirm(message) && (await actions.deleteProduct(item.id)) &&
      this.rows.splice(index, 1)
      break
    case "inventory":
      confirm(message) && (await actions.deleteInventoryItem(item.id)) &&
      this.rows.splice(index, 1)
      break
    case "orders":
      confirm(message) && (await actions.deleteOrder(item.id)) &&
      this.rows.splice(index, 1)
      break
  }
}

. . .
In the block of code above, you have added to the methods property a method named deleteItem(). The deleteItem() receives as an argument an object named item which is one of the objects in the rows array, finds the index of this item in the rows array and then stores it in a variable named index. After finding the index, you created a variable named message and inside it, you stored a string that asks if you want to delete this item. Lastly, you create a switch statement that will run whenever you want to delete an item in the users, categories, products, inventory, or orders route.
Add the following code below your deleteItem() method:
. . .

async save() {
      if (this.editedIndex > -1) {
        switch (this.$route.name) {
          case "users":
            break
          case "categories":
            break
          case "products":
            break
          case "inventory":
            break
          case "orders":
            break
        }
      } else {
        switch (this.$route.name) {
          case "users":
            break
          case "categories":
            break
          case "products":
            break
          case "inventory":
            break
          case "orders":
            break
        }
      }
      this.close()
    }
In the block of code above, you have added to the methods property a method named save(). You have used conditional logic to handle the new item and the edited item save operation. If the editedIndex is greater than -1 that means that you are trying to save an item that you edited, however, if that is not the case it means that you are trying to save a new item. Inside each condition, you created a switch statement in order to be able to save data when you are in the users, categories, products, inventory, or orders route. After running one of the conditions you called the close() method in order to close the <v-dialog> component.
Add the following code in each case "users"::
async save() {
  if (this.editedIndex > -1) {
    switch (this.$route.name) {
      case "users":
          await actions.updateUser(this.editedItem).then((user) => {
          Object.assign(this.rows[this.editedIndex], user);
        })
        break

      . . .
    }
  } else {
    switch (this.$route.name) {
      case "users":
          await actions.addUser(this.editedItem).then((user) => {
          this.rows.push(user)
        })
        break

      . . .
    }
  }
  this.close()
}
In the block of code above, you have added the logic for the two case "users":. In the first case "users": you use the updateUser() method provided by the actions object to update the values of an existing document in your users collection, then you take the object sent in the response and assign it to the object in the rows array whose index is equal to the editedIndex. In the second case "users": you use the addUser() method provided by the actions object to add a new document to the users collection, then you take the object in the response and add it to the rows array.
You are going to do the same thing you did in the block of code above to the remaining cases as well.
After replacing the content of the remaining cases, your save() method will look like this:
async save() {
  if (this.editedIndex > -1) {
    switch (this.$route.name) {
      case "users":
        await actions.updateUser(this.editedItem).then((user) => {
          Object.assign(this.rows[this.editedIndex], user);
        })
        break
      case "categories":
        await actions.updateCategory(this.editedItem).then((category) => {
          Object.assign(this.rows[this.editedIndex], category);
        })
        break
      case "products":
        this.editedItem.price = parseFloat(this.editedItem.price);
        for (let i = 0; i < this.options.categories.length; i++) {
          if (this.options.categories[i].name === this.editedItem.category) {
            this.editedItem.category = this.options.categories[i].id
          }
        }
        await actions.updateProduct(this.editedItem).then((product) => {
          product.category = product.category.name;
          Object.assign(this.rows[this.editedIndex], product)
        })
        break
      case "inventory":
        this.editedItem.quantity = parseInt(this.editedItem.quantity)
        await actions
          .updateInventoryItem(this.editedItem)
          .then((inventoryItem) => {
            inventoryItem.product = inventoryItem.product.name
            Object.assign(this.rows[this.editedIndex], inventoryItem)
          })
        break
      case "orders":
        this.editedItem.quantity = parseInt(this.editedItem.quantity);
        console.log("edited", this.editedItem);
        await actions.updateOrder(this.editedItem).then((order) => {
          order.product = order.product.name
          order.user = order.user.username
          Object.assign(this.rows[this.editedIndex], order)
        })
        break
    }
  } else {
    switch (this.$route.name) {
      case "users":
        await actions.addUser(this.editedItem).then((user) => {
          this.rows.push(user)
        })
        break
      case "categories":
        await actions.addCategory(this.editedItem).then((category) => {
          console.log("category", category)
          this.rows.push(category)
        })
        break
      case "products":
        this.editedItem.price = parseFloat(this.editedItem.price);
        await actions.addProduct(this.editedItem).then((product) => {
          product.category = product.category.name
          product.dateAdded = new Date(product.dateAdded)
          this.rows.push(product)
        })
        break
      case "inventory":
        this.editedItem.quantity = parseInt(this.editedItem.quantity)
        await actions
          .addInventoryItem(this.editedItem)
          .then((inventoryItem) => {
            inventoryItem.product = inventoryItem.product.name
            this.rows.push(inventoryItem)
          })
        break
      case "orders":
        this.editedItem.quantity = parseInt(this.editedItem.quantity);
        console.log("model", this.editedItem);
        let order = await actions
          .addOrder(this.editedItem)
          .then((order) => {
            order.product = order.product.name
            order.user = order.user.username
            order.dateAdded = new Date(order.dateAdded)
            this.rows.push(order)
          })
        break
    }
  }
  this.close()
}
Your Table.vue file should look like this:
<template>
  <v-data-table :headers="headers" :items="rows" sort-by="name" class="elevation-2">
    <template v-slot:top>
      <v-toolbar flat color="white">
        <v-toolbar-title>{{$route.name.toUpperCase()}}</v-toolbar-title>
        <v-divider class="mx-4" inset vertical></v-divider>
        <v-spacer></v-spacer>
        <v-dialog v-model="dialog" max-width="500px">
          <template v-slot:activator="{ on, attrs }">
            <v-btn color="primary" dark class="mb-2" v-bind="attrs" v-on="on">New Item</v-btn>
          </template>
          <v-card>
            <v-card-title>
              <span class="headline">{{ formTitle }}</span>
            </v-card-title>
            <v-card-text>
              <v-container>
                <v-row v-for="(value, key) in editedItem " v-bind:key="key">
                  <v-col
                    cols="12" sm="6" md="4"
                    v-if=" key !== 'id' && key !=='category' && key !='dateAdded' && key !=='product' && key !=='user' ">
                    <v-text-field
                      :type =" key === 'quantity' || key === 'price' ? 'Number' : 'text' "
                      v-model="editedItem[key]"
                      :label="key"
                    ></v-text-field>
                  </v-col>
                </v-row>
                <v-row v-if="editedIndex === -1 && $route.name === 'inventory' ">
                  <v-col cols="12" sm="6" md="4">
                    <v-select
                      v-model="editedItem.product"
                      :items="options.products"
                      label="products"
                      item-text="name"
                      item-value="id"
                    ></v-select>
                  </v-col>
                </v-row>

                <v-row v-else-if="$route.name === 'products'">
                  <v-col cols="12" sm="6" md="4">
                    <v-select
                      v-model="editedItem.category"
                      :items="options.categories"
                      label="categories"
                      item-text="name"
                      item-value="id"
                    ></v-select>
                  </v-col>
                </v-row>

                <v-row v-else-if="editedIndex === -1 && $route.name === 'orders'">
                  <v-col cols="12" sm="6" md="4">
                    <v-select
                      v-model="editedItem.product"
                      :items="options.inventoryItems"
                      label="products"
                      item-text="product.name"
                      item-value="product.id"
                    ></v-select>
                  </v-col>
                  <v-col cols="12" sm="6" md="4">
                    <v-select
                      v-model="editedItem.user"
                      :items="options.users"
                      label="users"
                      item-text="username"
                      item-value="id"
                    ></v-select>
                  </v-col>
                </v-row>
              </v-container>
            </v-card-text>

            <v-card-actions>
              <v-spacer></v-spacer>
              <v-btn color="blue darken-1" text @click="close">Cancel</v-btn>
              <v-btn color="blue darken-1" text @click="save">Save</v-btn>
            </v-card-actions>
          </v-card>
        </v-dialog>
      </v-toolbar>
    </template>
    <template v-slot:[`item.actions`]="{ item }">
      <v-icon small class="mr-2" @click="editItem(item)">mdi-pencil</v-icon>
      <v-icon small @click="deleteItem(item)">mdi-delete</v-icon>
    </template>
    <template v-slot:no-data>
      <v-btn color="primary" @click="initialize">Reset</v-btn>
    </template>
  </v-data-table>
</template>


<script>
import actions from "../components/actions";

export default {
  name: "Table",
  data: () => ({
    dialog: false,
    headers: [],
    options: [],
    rows: [],
    editedIndex: -1,
    editedItem: {},
    defaultItem: {},
  }),
  computed: {
    formTitle() {
      return this.editedIndex === -1 ? "New Item" : "Edit Item";
    },
  },
  created() {
    this.initialize()
  },
  methods: {
    async initialize() {
      switch (this.$route.name) {
        case "users":
          this.headers = [
            { text: "ID", value: "id" },
            { text: "Name", value: "name" },
            { text: "username", value: "username" },
            { text: "Email", value: "email" },
            { text: "Phone number", value: "phoneNumber" },
            { text: "Actions", value: "actions", sortable: false },
          ];

          this.editedItem = { name: "", username: "", email: "", phoneNumber: ""}
          this.defaultItem = { name: "", username: "", email: "", phoneNumber: ""}

          const users = await actions.getUsers()
          this.rows = users
          break

        case "categories":
          this.headers = [
            { text: "ID", value: "id" },
            { text: "Name", value: "name" },
            { text: "Actions", value: "actions", sortable: false },
          ]

          this.editedItem = { name: "" }
          this.defaultItem = { name: "" }

          const categories = await actions.getCategories()
          this.rows = categories

          break
        case "products":
          this.headers = [
            { text: "ID", value: "id" },
            { text: "Name", value: "name" },
            { text: "Category", value: "category" },
            { text: "Price", value: "price" },
            { text: "Date added", value: "dateAdded" },
            { text: "Actions", value: "actions", sortable: false },
          ]

          this.editedItem = { name: "", price: 0, category: ""}
          this.defaultItem = { name: "", price: 0, category: ""}

          this.options.categories = await actions.getCategories()
          const products = await actions.getProducts()
          for (let i = 0; i < products.length; i++) {
            products[i].category = products[i].category.name;
            products[i].dateAdded = new Date(products[i].dateAdded)
          }
          this.rows = products;

          break
        case "inventory":
          this.headers = [
            { text: "ID", value: "id" },
            { text: "Product", value: "product" },
            { text: "Quantity", value: "quantity" },
            { text: "Actions", value: "actions", sortable: false },
          ]

          this.editedItem = { quantity: 0 }
          this.defaultItem = { product: "", quantity: 0 }

          this.options.products = await actions.getProducts()
          const inventoryItems = await actions.getInventoryItems()

          for (let i = 0; i < inventoryItems.length; i++) {
            inventoryItems[i].product = inventoryItems[i].product.name
          }
          this.rows = inventoryItems
          break

        case "orders":
          this.headers = [
            { text: "ID", value: "id" },
            { text: "Product", value: "product" },
            { text: "Quantity", value: "quantity" },
            { text: "User", value: "user" },
            { text: "Total", value: "total" },
            { text: "Date added", value: "dateAdded" },
            { text: "Actions", value: "actions", sortable: false },
          ]

          this.editedItem = { quantity: 0 }
          this.defaultItem = { product: "", user: "", quantity: 0 }

          this.options.inventoryItems = await actions.getInventoryItems();
          this.options.users = await actions.getUsers()
          const orders = await actions.getOrders()

          for (let i = 0; i < orders.length; i++) {
            orders[i].product = orders[i].product.name
            orders[i].user = orders[i].user.username
            orders[i].dateAdded = new Date(orders[i].dateAdded)
          }
          this.rows = orders

          break;
      }
    },

    editItem(item) {
      console.log(item)
      this.editedIndex = this.rows.indexOf(item);
      this.editedItem = Object.assign({}, item);
      this.dialog = true;
    },

    close() {
      this.dialog = false;
      this.$nextTick(() => {
        this.editedItem = Object.assign({}, this.defaultItem);
        this.editedIndex = -1
      });
    },

    async deleteItem(item) {
      const index = this.rows.indexOf(item)
      const message = "Are you sure you want to delete this item?"

      switch (this.$route.name) {
        case "users":
          confirm(message) && (await actions.deleteUser(item.id)) &&
          this.rows.splice(index, 1)
          break
        case "categories":
          confirm(message) && (await actions.deleteCategory(item.id)) &&
          this.rows.splice(index, 1)
          break
        case "products":
          confirm(message) && (await actions.deleteProduct(item.id)) &&
          this.rows.splice(index, 1)
          break
        case "inventory":
          confirm(message) && (await actions.deleteInventoryItem(item.id)) &&
          this.rows.splice(index, 1)
          break
        case "orders":
          confirm(message) && (await actions.deleteOrder(item.id)) &&
          this.rows.splice(index, 1)
          break
      }
    },

    async save() {
      if (this.editedIndex > -1) {
        switch (this.$route.name) {
          case "users":
            await actions.updateUser(this.editedItem).then((user) => {
              Object.assign(this.rows[this.editedIndex], user);
            })
            break

          case "categories":
            await actions.updateCategory(this.editedItem).then((category) => {
              Object.assign(this.rows[this.editedIndex], category);
            })
            break

          case "products":
            this.editedItem.price = parseFloat(this.editedItem.price);
            for (let i = 0; i < this.options.categories.length; i++) {
              if (this.options.categories[i].name === this.editedItem.category) {
                this.editedItem.category = this.options.categories[i].id
              }
            }
            await actions.updateProduct(this.editedItem).then((product) => {
              product.category = product.category.name;
              Object.assign(this.rows[this.editedIndex], product)
            })
            break

          case "inventory":
            this.editedItem.quantity = parseInt(this.editedItem.quantity)
            await actions
              .updateInventoryItem(this.editedItem)
              .then((inventoryItem) => {
                inventoryItem.product = inventoryItem.product.name
                Object.assign(this.rows[this.editedIndex], inventoryItem)
              })
            break

          case "orders":
            this.editedItem.quantity = parseInt(this.editedItem.quantity);
            console.log("edited", this.editedItem);

            await actions.updateOrder(this.editedItem).then((order) => {
              order.product = order.product.name
              order.user = order.user.username
              Object.assign(this.rows[this.editedIndex], order)
            })
            break
        }
      } else {
        switch (this.$route.name) {
          case "users":
            await actions.addUser(this.editedItem).then((user) => {
              this.rows.push(user)
            })
            break

          case "categories":
            await actions.addCategory(this.editedItem).then((category) => {
              console.log("category", category)
              this.rows.push(category)
            })
            break

          case "products":
            this.editedItem.price = parseFloat(this.editedItem.price);
            await actions.addProduct(this.editedItem).then((product) => {
              product.category = product.category.name
              product.dateAdded = new Date(product.dateAdded)
              this.rows.push(product)
            })
            break

          case "inventory":
            this.editedItem.quantity = parseInt(this.editedItem.quantity)
            await actions
              .addInventoryItem(this.editedItem)
              .then((inventoryItem) => {
                inventoryItem.product = inventoryItem.product.name
                this.rows.push(inventoryItem)
              })
            break

          case "orders":
            this.editedItem.quantity = parseInt(this.editedItem.quantity);
            console.log("model", this.editedItem);
            let order = await actions
              .addOrder(this.editedItem)
              .then((order) => {
                order.product = order.product.name
                order.user = order.user.username
                order.dateAdded = new Date(order.dateAdded)
                this.rows.push(order)
              })
            break
        }
      }
      this.close()
    },
  },
}
</script>
In this section, you have created the Table view. In the next section, you will create a file named actions.js and inside it, you will create the actions object and the methods that you used in this view and in the Home view.
In this section, you will create a file named actions.js. This file will contain the methods needed in order to interact with your GraphQL server. These methods will reside in an object named actions.
Navigate to your components directory:
cd ../components
Create a file named actions.js:
nano actions.js
Add the following code to your actions.js file:
import fetch from "node-fetch"
const actions = {}

actions.sendOperation = async (operation) => {
  const fetchData = await fetch("http://localhost:4000/graphql", {
      method: 'POST',
      headers: { 'Content-Type': 'application/json' },
      body: JSON.stringify({
          query: operation,
      }),
  })

  const { data, error } = await fetchData.json();
  return data
}
In the block of code above, you have imported the node-fetch module and assigned it a variable called fetch, created an object named actions and added to this object a method named sendOperation(). The sendOperation() method receives as an argument a string containing a query or mutation operation named operation. It uses the node-fetch module to send the operation to the GraphQL server, stores the response data and error in the variables named data, error respectively, then it returns the data. This method will be used to send all queries and mutations to the GraphQL server.
Add the following code at the bottom of your actions.js file:
actions.getUsers = async () => {
  let query = `query{
  getUsers{
      id
      name
      username
      email
      phoneNumber
  }
  }
`
  const data = await actions.sendOperation(query)
  return data.getUsers
}
In the block of code above, you have added to the actions object a method named getUsers(). In this method, you create the query needed in order to retrieve all documents in the users collection. After creating the query, you call the sendOperation() method and pass this query as an argument. Lastly, you store the data retrieved in a variable named data and then you return the value of the getUsers property inside this data object.
Add the following code to the bottom of your actions.js file:
actions.addUser = async (item) => {
  let mutation = `mutation{
    addUser(input:{
      name:"${item.name}"
      username:"${item.username}"
      phoneNumber:"${item.phoneNumber}"
      email:"${item.email}"
    }){
      id
      name
      username
      email
      phoneNumber
    }
  }`
  const data = await actions.sendOperation(mutation)
  return data.addUser
}
In the block of code above, you have added to the actions object a method named addUser(). In this method, you create the mutation needed in order to add a new document in the users collection. After creating the mutation, you call the sendOperation() method and pass this mutation as an argument. Lastly, you store the data retrieved in a variable named data and then you return the value of the addUser property inside this data object.
Add the following code to the bottom of your actions.js file:
actions.updateUser = async (item) => {
  let mutation = `mutation {
      updateUser(id: "${item.id}", input: {
        name:"${item.name}",
        username:"${item.username}",
        email:"${item.email}",
        phoneNumber:"${item.phoneNumber}"
      }){
        id
        name
        username
        email
        phoneNumber
      }
    }`
  const data = await actions.sendOperation(mutation)
  return data.updateUser
}
In the block of code above, you have added to the actions object a method named updateUser(). In this method, you create the mutation needed in order to update an existing document in the users collection. After creating the mutation, you call the sendOperation() method and pass this mutation as an argument. Lastly, you store the data retrieved in a variable named data and then you return the value of the updateUser property inside this data object.
Add the following code to the bottom of your actions.js file:
actions.deleteUser = async (id) => {
  let mutation = `mutation{
      deleteUser(id:"${id}")
    }`
  const data = await actions.sendOperation(mutation)
  return data.deleteUser
}
In the block of code above, you have added to the actions object a method named deleteUser(). In this method, you create the mutation needed in order to delete a document in the users collection. After creating the mutation, you call the sendOperation method and pass this mutation as an argument. Lastly, you store the data retrieved in a variable named data and then you return the value of the deleteUse property inside this data object.
You are going to do the same thing you did for users collection in previous blocks of codes to the remaining collections as well, and then export the actions object.
After doing what was described above, your actions.js file should look like this:
import fetch from "node-fetch"
const actions = {}

actions.sendOperation = async (operation) => {
  const fetchData = await fetch("http://localhost:4000/graphql", {
    method: 'POST',
    headers: { 'Content-Type': 'application/json' },
    body: JSON.stringify({
      query: operation,
    }),
  })

  const { data, error } = await fetchData.json();
  return data
}

//////////////////////////      USERS      /////////////////////////////

actions.getUsers = async () => {
  let query = `query{
  getUsers{
      id
      name
      username
      email
      phoneNumber
  }
  }
`
  const data = await actions.sendOperation(query)
  return data.getUsers

}

actions.addUser = async (item) => {
  let mutation = `mutation{
    addUser(input:{
      name:"${item.name}"
      username:"${item.username}"
      phoneNumber:"${item.phoneNumber}"
      email:"${item.email}"
    }){
      id
      name
      username
      email
      phoneNumber
    }
  }`
  const data = await actions.sendOperation(mutation)
  return data.addUser
}

actions.updateUser = async (item) => {
  let mutation = `mutation {
      updateUser(id: "${item.id}", input: {
        name:"${item.name}",
        username:"${item.username}",
        email:"${item.email}",
        phoneNumber:"${item.phoneNumber}"
      }){
        id
        name
        username
        email
        phoneNumber
      }
    }`
  const data = await actions.sendOperation(mutation)
  return data.updateUser
}

actions.deleteUser = async (id) => {
  let mutation = `mutation{
      deleteUser(id:"${id}")
    }`
  const data = await actions.sendOperation(mutation)
  return data.deleteUser
}

/////////////////////        CATEGORIES       ///////////////////////////

actions.getCategories = async () => {
  let query = `query{
  getCategories{
      id
      name
  }
  }
`
  const data = await actions.sendOperation(query)
  return data.getCategories
}

actions.addCategory = async (item) => {
  let mutation = `mutation{
        addCategory(input:{
          name:"${item.name}"
        }){
          id
          name
        }
      }`
  const data = await actions.sendOperation(mutation)
  return data.addCategory
}

actions.updateCategory = async (item) => {
  let mutation = `mutation {
        updateCategory(id: "${item.id}", input: { name: "${item.name}" }) {
          id
          name
        }
      }`
  const data = await actions.sendOperation(mutation)
  return data.updateCategory
}

actions.deleteCategory = async (id) => {
  let mutation = `mutation{
        deleteCategory(id:"${id}")
      }`
  const data = await actions.sendOperation(mutation)
  return data.deleteCategory
}

///////////////////////////     PRODUCTS      ///////////////////////////

actions.getProducts = async () => {
  let query = `query{
        getProducts{
          id
          name
          price
          category{
            name
          }
          dateAdded
        }
      }
`
  const data = await actions.sendOperation(query)
  return data.getProducts
}

actions.addProduct = async (item) => {
  let mutation = `mutation{
        addProduct(input:{
          name:"${item.name}",
          price:${item.price},
          category:"${item.category}"
        }){
          id
          name
          price
          category{
            name
          }
          dateAdded
        }
      }`
  const data = await actions.sendOperation(mutation)
  return data.addProduct
}

actions.updateProduct = async (item) => {
  let mutation = `mutation {
        updateProduct(id:"${item.id}",input:{
          name:"${item.name}",
          price:${item.price},
          category:"${item.category}"
        }){
          id
          name
          price
          category{
            name
          }
          dateAdded
        }
      }`
  const data = await actions.sendOperation(mutation)
  return data.updateProduct
}

actions.deleteProduct = async (id) => {
  let mutation = `mutation{
        deleteProduct(id:"${id}")
      }
      `
  const data = await actions.sendOperation(mutation)
  return data.deleteProduct
}


///////////////////         INVENTORY           //////////////////////

actions.getInventoryItems = async () => {
  let query = `query{
        getInventoryItems{
          id
          quantity
          product{
            id
            name
          }
        }
      }
`
  const data = await actions.sendOperation(query)
  return data.getInventoryItems
}

actions.addInventoryItem = async (item) => {
  let mutation = `mutation {
        addInventoryItem(
          input: { quantity: ${item.quantity}, product: "${item.product}" }
        ) {
          id
          quantity
          product {
            name
          }
        }
      }`
  const data = await actions.sendOperation(mutation)
  return data.addInventoryItem
}

actions.updateInventoryItem = async (item) => {
  let mutation = `mutation{
        updateInventoryItem(id:"${item.id}",input:{quantity:${item.quantity}}){
         id
         quantity
         product{
           name
         }
       }
       }`
  const data = await actions.sendOperation(mutation)
  return data.updateInventoryItem
}

actions.deleteInventoryItem = async (id) => {
  let mutation = `mutation {
        deleteInventoryItem(id:"${id}")
      }
      `
  const data = await actions.sendOperation(mutation)
  return data.deleteInventoryItem
}

///////////////               ORDERS            ////////////////////////

actions.getOrders = async () => {
  let query = `query{
      getOrders{
        id
        quantity
        product{
          name
        }
        user{
          username
        }
        total
        dateAdded
      }
    }
`
  const data = await actions.sendOperation(query)
  return data.getOrders
}

actions.addOrder = async (item) => {
  let mutation = `mutation {
      addOrder(
        input: { quantity: ${item.quantity}, product: "${item.product}", user: "${item.user}" }
      ) {
        id
        quantity
        product{
          name
        }
        user{
          username
        }
        total
        dateAdded
      }
    }`
  const data = await actions.sendOperation(mutation)
  return data.addOrder
}

actions.updateOrder = async (item) => {
  let mutation = `mutation{
      updateOrder(id:"${item.id}",input:{quantity:${item.quantity}}){
        id
        quantity
        product{
          name
        }
        user{
          username
        }
        total
        dateAdded
     }
     }`
  const data = await actions.sendOperation(mutation)
  return data.updateOrder
}

actions.deleteOrder = async (id) => {
  let mutation = `mutation {
      deleteOrder(id:"${id}")
    }
    `
  const data = await actions.sendOperation(mutation)
  return data.deleteOrder
}

export default actions
In this section, you have created the file responsible for interacting with the GraphQL server and thus finishing building the application client. In the next section, you will run the application.
In this section, you will run your application, but before you do, you will create the static files for your application client.
Run the following command:
npm run build
After running this command, your application client static files will be stored in a directory named dist.
Navigate to the root directory of your application server:
cd ../../../server
The folder structure of your server directory should look like the following:
Before running the application server, create a new MongoDB instance by running the following command:
docker-compose up -d
The command above will use the information in the docker-yml file to create a new MongoDB instance that will be accessible in the following URI mongodb://localhost:27017/mongodb.
Install the node modules by running the following command:
npm install
Run the following command in order to start your GraphQL server and serve the application client:
npm start
In your browser, navigate to http://localhost:4000/ and you should see something similar to this:
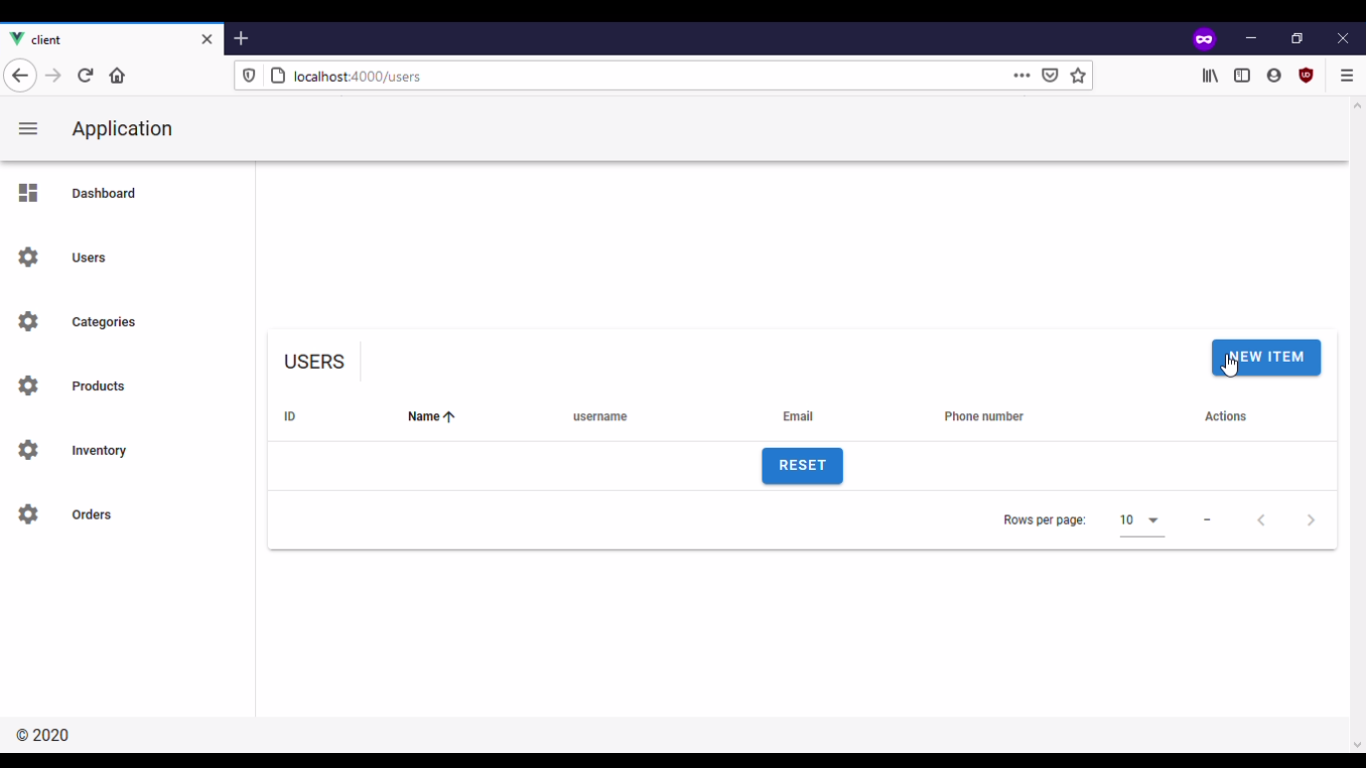
Navigate to the users route and create a new user:
Navigate to the categories route and create a new category:

Navigate to the products route and create a new product:

Navigate to the inventory route and create a new inventory item:

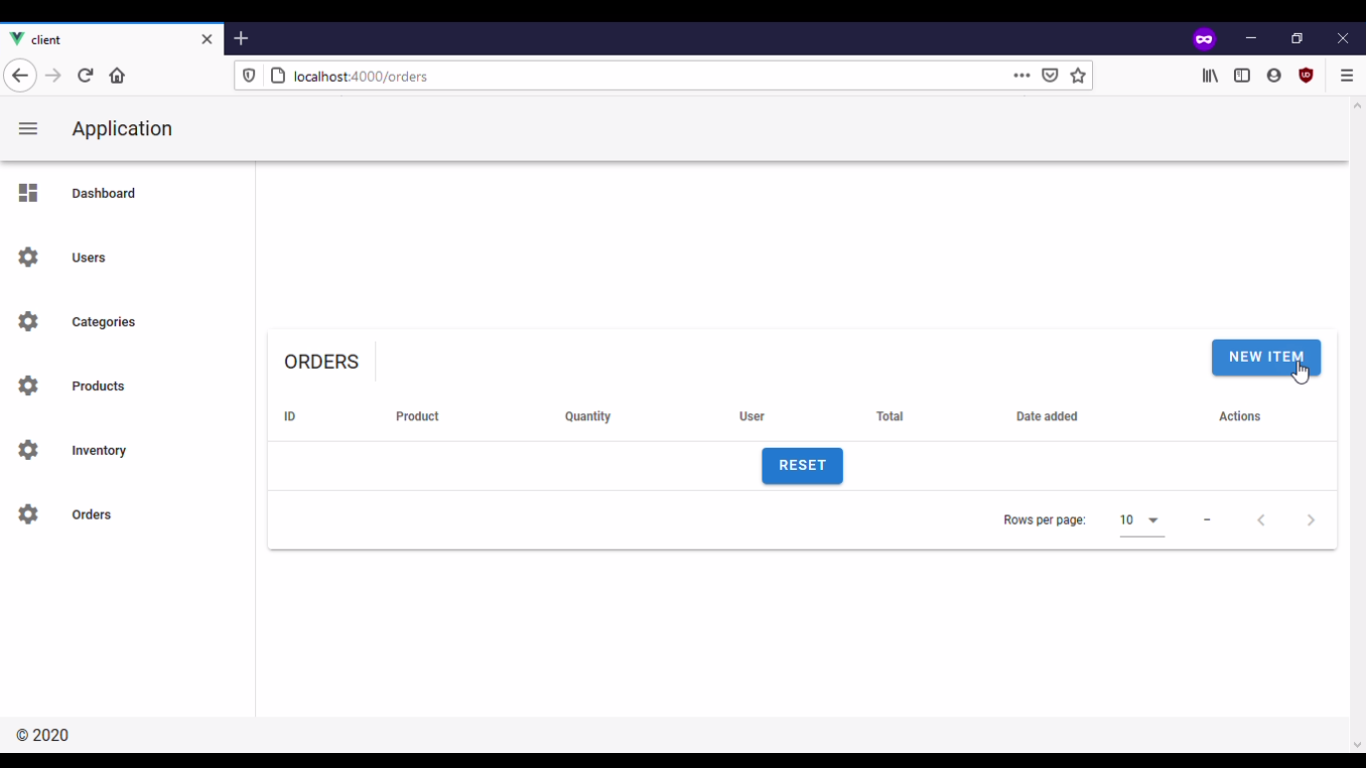
Navigate to the orders route and create a new order:
In this section, you have deployed your application client and started serving it using your GraphQL server.
In this tutorial, you created a frontend application for your inventory management application. First, you cloned the repository containing the application server. After cloning the repository, you created the user interface for the client using Vue and Vuetify and then you connected the client to the GraphQL API using node-fetch. Lastly, you started serving your client application using the GraphQL server.
Debugging Vue.js applications can be difficult, especially when there are dozens, if not hundreds of mutations during a user session. If you’re interested in monitoring and tracking Vue mutations for all of your users in production, try LogRocket.

LogRocket is like a DVR for web and mobile apps, recording literally everything that happens in your Vue apps, including network requests, JavaScript errors, performance problems, and much more. Instead of guessing why problems happen, you can aggregate and report on what state your application was in when an issue occurred.
The LogRocket Vuex plugin logs Vuex mutations to the LogRocket console, giving you context around what led to an error and what state the application was in when an issue occurred.
Modernize how you debug your Vue apps — start monitoring for free.
Would you be interested in joining LogRocket's developer community?
Join LogRocket’s Content Advisory Board. You’ll help inform the type of content we create and get access to exclusive meetups, social accreditation, and swag.
Sign up now
Get to know RxJS features, benefits, and more to help you understand what it is, how it works, and why you should use it.

Explore how to effectively break down a monolithic application into microservices using feature flags and Flagsmith.

Native dialog and popover elements have their own well-defined roles in modern-day frontend web development. Dialog elements are known to […]

LlamaIndex provides tools for ingesting, processing, and implementing complex query workflows that combine data access with LLM prompting.


