React Native app developers build various apps, some of which involve implementing music playlists. If you plan to build an audio player with React Native, you undoubtedly need a playlist implementation that includes a manageable music track queue that is visible to the user or runs as a background service for playing music tracks in a particular order.
A music playlist is usually connected to a music player implementation that players selected music tracks. From the user’s perspective, they should be able to add, remove, shuffle, and re-order music tracks in the playlist. From the developer’s perspective, they should also be able to programmatically update the playlist.
There are several potential approaches to creating and managing playlists in React Native. We can build a playlist and player from scratch without third-party libraries, but it’s time-consuming. We could alternatively use a library to play music tracks and develop a music queue from scratch based on music player events. We can further speed up the development process using a fully-featured music track player library.
The react-native-track-player library offers fully-featured APIs for creating playlist-based music apps in React Native. In this tutorial, I will explain react-native-track-player features by implementing a music player that consists of a visible playlist.
Jump ahead:
react-native-track-player
react-native-track-player tutorial
react-native-track-playerBefore we get started with the practical tutorial, let’s check out the library’s features.
This library comes with the following helpful features for building music apps:
The library consists of two logical modules:
The music player module plays the tracks that are present in the playlist. This library offers both functions and React Hooks to control the music player’s state and subscribe to player events. These developer-friendly player state management features make the track player-UI integration easy. Also, event-based React Hooks reduce the complexity of React state management requirements.
This library offers a simple API for developers to manage the music track queue. You can programmatically add, remove, repeat, and skip music tracks with self-explanatory functions. Creating your own playlist-based music player is easy with this library.
For playlist management and playback, this library uses two native modules:
The JavaScript react-native-track-player implementation calls the above native modules for music playback and playlist management, so this library strives to offer native performance for your music apps. The playlist is stored in optimal native data structures for better performance (i.e., LinkedList in Kotlin).
The library offers a developer-friendly, consistent, asynchronous API, so you can easily use the modern async/await pattern in your React Native app codebase.
This library works on Android, iOS, and Windows platforms. It uses the WinRT Media Playback API to play music content on Windows, so you can use this package to build modern Windows apps!
The track player library never limits developers by offering only generic cross-platform APIs — it provides platform-specific configurations to advanced use cases. For example, it lets you change the notification panel player icons on Android.
react-native-track-player tutorialNow, we’ll learn how to use the react-native-track-player library by developing a music player app with a playlist. While building the music player app, I will show you some additional sample code snippets to explain the library API functions further.
Get started by installing the react-native-track-player package. First, create a new React Native project for building the music player:
npx react-native init MusicTrackPlayer
cd MusicTrackPlayer
Next, run the newly created app to make sure that everything works:
npx react-native run-android
# --- or ---
npx react-native run-ios
Now, install the library:
npm install react-native-track-player
# --- or ---
yarn add react-native-track-player
I am developing this sample app on Android, so running the above command was enough to set up the library. But, on iOS, you need to install native dependencies manually:
cd ios && pod install
Build the app again and run it to verify the package installation status.
Note: On Android, if the :app:checkDebugAarMetadata Gradle build task fails, use compileSdkVersion = 33 in your android/build.gradle. See this reference for more information.
Let’s start playing music with the track player library. Before implementing a UI component for the playlist, we’ll create a playlist programmatically to understand the playlist management API.
First, create a new directory called assets within your app source directory and download these music tracks (three MP3 audio files from Pixabay Music) into it.
Before initializing a track player instance to play the MP3 files you’ve downloaded, we need to define several services to help us configure, initialize, and control the track player instance. Create a new file called trackPlayerServices.js and add the following code:
import TrackPlayer, {
  AppKilledPlaybackBehavior,
  Capability,
  RepeatMode,
  Event
} from 'react-native-track-player';

export async function setupPlayer() {
  let isSetup = false;
  try {
    await TrackPlayer.getCurrentTrack();
    isSetup = true;
  }
  catch {
    await TrackPlayer.setupPlayer();
    await TrackPlayer.updateOptions({
      android: {
        appKilledPlaybackBehavior:
          AppKilledPlaybackBehavior.StopPlaybackAndRemoveNotification,
      },
      capabilities: [
        Capability.Play,
        Capability.Pause,
        Capability.SkipToNext,
        Capability.SkipToPrevious,
        Capability.SeekTo,
      ],
      compactCapabilities: [
        Capability.Play,
        Capability.Pause,
        Capability.SkipToNext,
      ],
      progressUpdateEventInterval: 2,
    });

    isSetup = true;
  }
  finally {
    return isSetup;
  }
}

export async function addTracks() {
  await TrackPlayer.add([
    {
      id: '1',
      url: require('./assets/fluidity-100-ig-edit-4558.mp3'),
      title: 'Fluidity',
      artist: 'tobylane',
      duration: 60,
    }
  ]);
  await TrackPlayer.setRepeatMode(RepeatMode.Queue);
}

export async function playbackService() {
  // TODO: Attach remote event handlers
}
The above code implements three services:
setupPlayer: Initializes a track player instance only once with several player capabilities and default behaviors (i.e., the app-killed behavior)addTracks: Adds one track to the current playlist from bundle resourcesplaybackService: This service receives remote events. We’ll discuss playback service events in an upcoming section, so let’s keep this function empty for nowHere, we load an MP3 file from the app bundle via the require function. The library supports loading remote audio files via the http protocol and local audio files via the file protocol.
Next, we need to register the above playbackService function as the playback event handler. Use the following code in your index.js file:
import { AppRegistry } from 'react-native';
import TrackPlayer from 'react-native-track-player';
import App from './App';
import { name as appName } from './app.json';
import { playbackService } from './trackPlayerServices';

AppRegistry.registerComponent(appName, () => App);
TrackPlayer.registerPlaybackService(() => playbackService);
Now, we can start building the app UI because our track player services are ready. Add the following code to your App.js file:
import React, { useEffect, useState } from 'react';
import {
SafeAreaView,
StyleSheet,
View,
Button,
ActivityIndicator,
} from 'react-native';
import TrackPlayer from 'react-native-track-player';
import { setupPlayer, addTracks } from './trackPlayerServices';
function App() {
const [isPlayerReady, setIsPlayerReady] = useState(false);
useEffect(() => {
async function setup() {
let isSetup = await setupPlayer();
const queue = await TrackPlayer.getQueue();
if(isSetup && queue.length <= 0) {
await addTracks();
}
setIsPlayerReady(isSetup);
}
setup();
}, []);
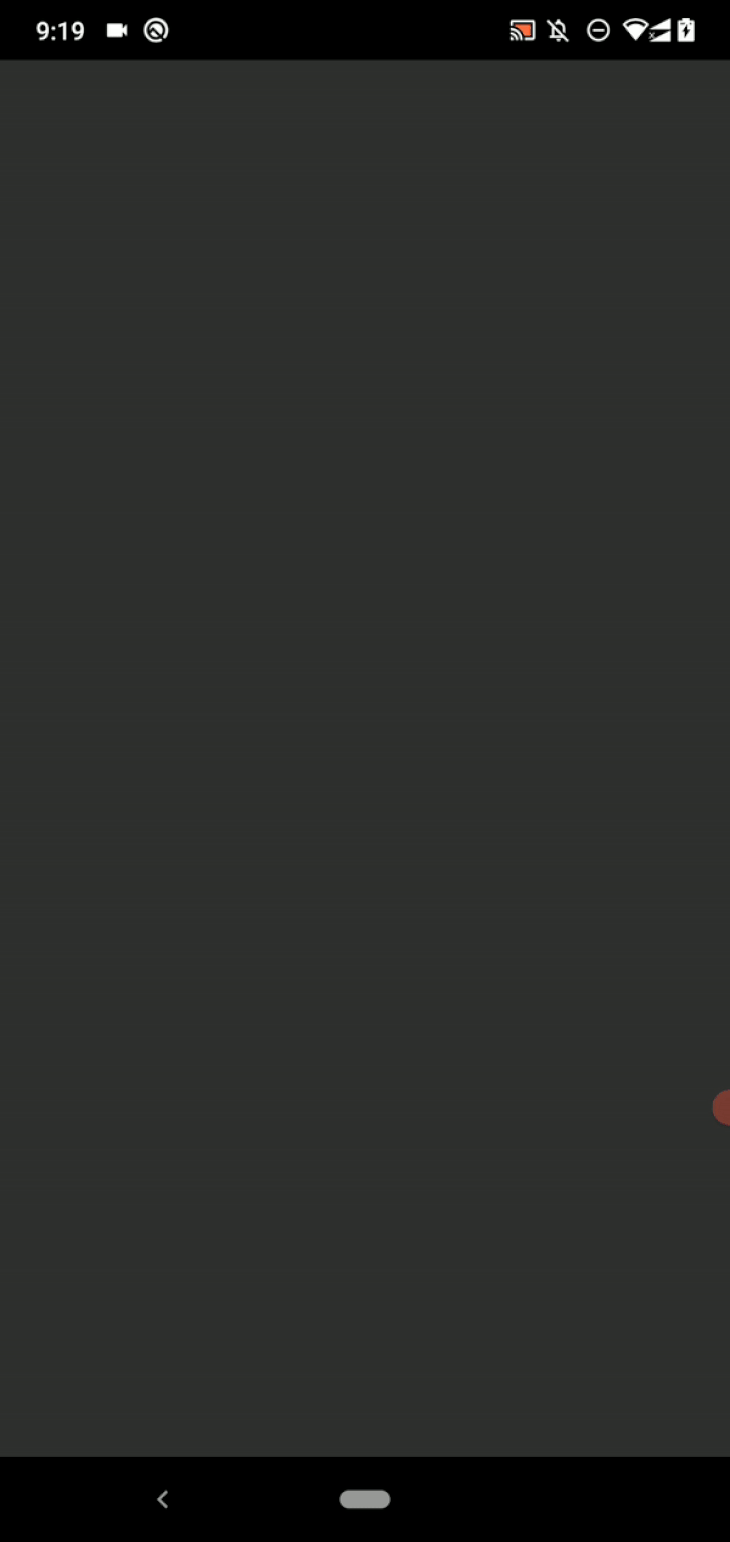
if(!isPlayerReady) {
return (
<SafeAreaView style={styles.container}>
<ActivityIndicator size="large" color="#bbb"/>
</SafeAreaView>
);
}
return (
<SafeAreaView style={styles.container}>
<Button title="Play" color="#777" onPress={() => TrackPlayer.play()}/>
</SafeAreaView>
);
}
const styles = StyleSheet.create({
container: {
flex: 1,
justifyContent: 'center',
padding: 20,
backgroundColor: '#112'
},
});
export default App;
The above App component invokes the setupPlayer service via useEffect to initialize the track player on the native side. Next, it calls the addTracks service to initialize the playlist if the current playlist is empty. This component uses a conditional rendering logic as follows:
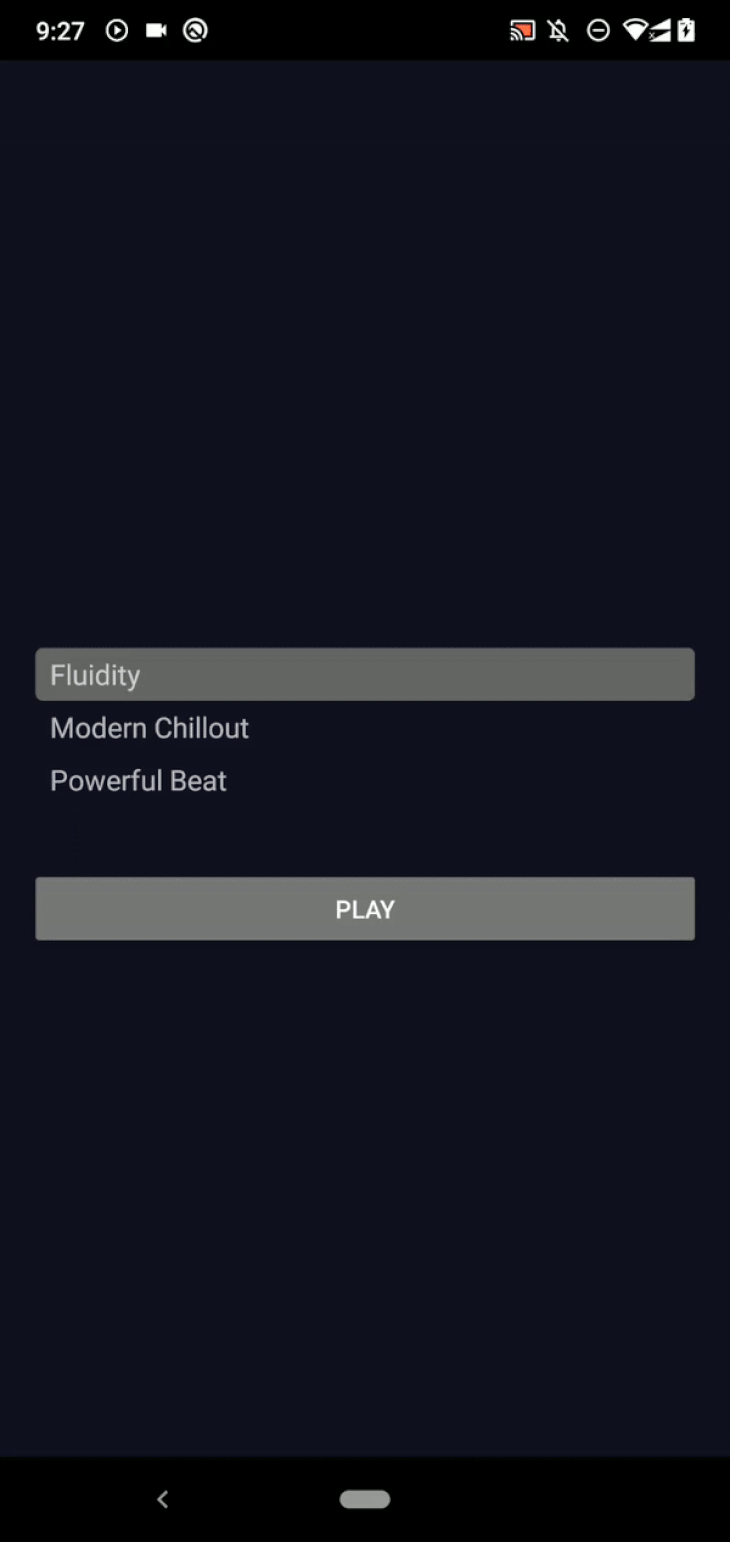
The Play button invokes the TrackPlayer.play function to start playing the track queue. Run the above app code and press the Play button. The playlist will start! Look at the following preview:
Use the following code for the addTracks service to play all downloaded music tracks:
export async function addTracks() {
  await TrackPlayer.add([
    {
      id: '1',
      url: require('./assets/fluidity-100-ig-edit-4558.mp3'),
      title: 'Fluidity',
      artist: 'tobylane',
      duration: 60,
    },
    {
      id: '2',
      url: require('./assets/penguinmusic-modern-chillout-future-calm-12641.mp3'),
      title: 'Modern Chillout',
      artist: 'penguinmusic',
      duration: 66,
    },
    {
      id: '3',
      url: require('./assets/powerful-beat-121791.mp3'),
      title: 'Powerful Beat',
      artist: 'penguinmusic',
      duration: 73,
    }
  ]);
  await TrackPlayer.setRepeatMode(RepeatMode.Queue);
}
The playlist will start again whenever it ends, thanks to the RepeatMode.Queue mode.
TrackPlayer.add function to add new music tracks to the playlist. Similarly, you can use the following functions to manage the current playlist:TrackPlayer.remove: Remove music tracks by track indicesTrackPlayer.skip: Jump to a music track by a given indexTrackPlayer.next: Go to the next music trackTrackPlayer.previous: Go to the previous music trackTrackPlayer.reset: Clear the current playlist and stop playing musicBrowse all supported playlist management functions in the official documentation.
Once you press the Play button, execute the following function calls one by one with the hot-reload feature to become familiar with playlist management functions:
TrackPlayer.remove(0)
TrackPlayer.skip(2)
TrackPlayer.next()
TrackPlayer.previous()
TrackPlayer.reset()
Let’s use the above playlist management functions in a practical scenario. We can start improving the sample app to turn it into a playlist-based music player.
As the first step, let’s create a React component to display the current playlist and let the user play a preferred music track. For simplicity, in this tutorial, we will develop all components within our App.js file, but make sure to properly decompose your app into separate source files when you develop production-grade apps.
First, add the following import lines to App.js:
import {
  SafeAreaView,
  StyleSheet,
  Text,
  View,
  Button,
  FlatList,
  ActivityIndicator,
  TouchableOpacity,
} from 'react-native';
import TrackPlayer, {
  useTrackPlayerEvents,
  Event,
  State
} from 'react-native-track-player';
Next, add the Playlist component implementation to the source file:
function Playlist() {
  const [queue, setQueue] = useState([]);
  const [currentTrack, setCurrentTrack] = useState(0);

  async function loadPlaylist() {
    const queue = await TrackPlayer.getQueue();
    setQueue(queue);
  }

  useEffect(() => {
    loadPlaylist();
  }, []);

  useTrackPlayerEvents([Event.PlaybackTrackChanged], async (event) => {
    if(event.state == State.nextTrack) {
      let index = await TrackPlayer.getCurrentTrack();
      setCurrentTrack(index);
    }
  });

  function PlaylistItem({index, title, isCurrent}) {

    function handleItemPress() {
      TrackPlayer.skip(index);
    }

    return (
      <TouchableOpacity onPress={handleItemPress}>
        <Text
          style={{...styles.playlistItem,
            ...{backgroundColor: isCurrent ? '#666' : 'transparent'}}}>
        {title}
        </Text>
      </TouchableOpacity>
    );
  }

  return(
    <View>
      <View style={styles.playlist}>
        <FlatList
          data={queue}
          renderItem={({item, index}) => <PlaylistItem
                                            index={index}
                                            title={item.title}
                                            isCurrent={currentTrack == index }/>
          }
        />
      </View>
    </View>
  );
}
Here, we render the current playlist with a FlatList component. The FlatList component uses the queue state variable to load the current playlist details. Meanwhile, useEffect invokes TrackPlayer.getQueue to capture the current playlist into the queue.
The playlist UI also highlights the current music track, so we store the current music track index in the currentTrack state variable. Once the user presses a list item, we ask the track player instance to play the selected track by invoking the TrackPlayer.skip function. We track the currentTrack changes via the useTrackPlayerEvents library Hook.
Next, add <Playlist/> within the App component, as shown in the following code snippet:
return (
  <SafeAreaView style={styles.container}>
    <Playlist/>
    <Button title="Play" color="#777" onPress={() => TrackPlayer.play()}/>
  </SafeAreaView>
);
Add the following styling definitions to your stylesheet:
playlist: {
  marginTop: 40,
  marginBottom: 40
},
playlistItem: {
  fontSize: 16,
  paddingTop: 4,
  paddingBottom: 4,
  paddingLeft: 8,
  paddingRight: 8,
  borderRadius: 4
},
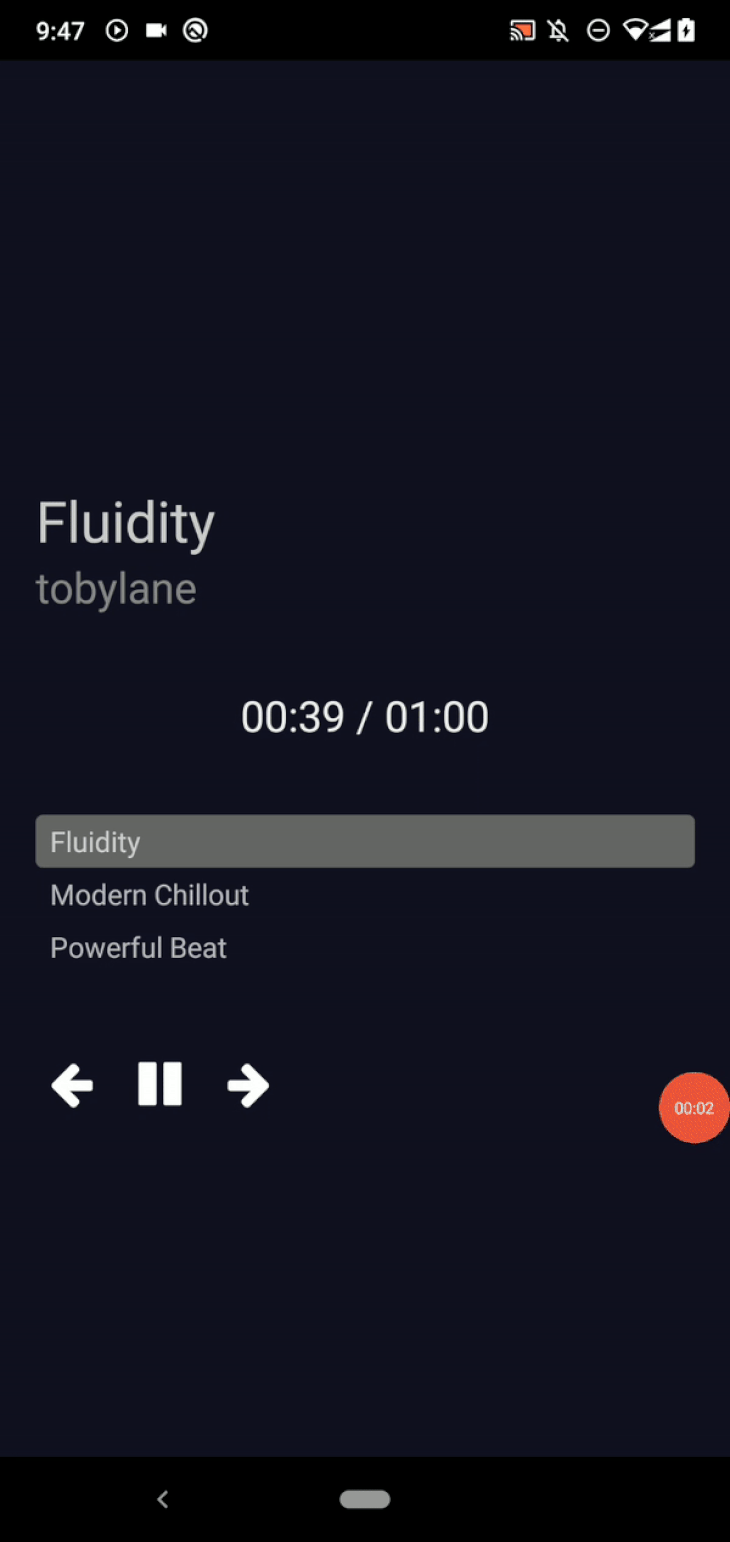
Run the app. Now, you can press and select a music track. Wait until a music track finishes — the playlist component will set the next current music track automatically, as shown in the following preview:
Earlier, we invoked the TrackPlayer.play function to start playing the track queue. We often need to pause, control the playback speed, adjust the music volume, and jump to a specific position of the current music track when building music apps. The react-native-track-player library lets you control the playback and player state with the following functions apart from the play action:
TrackPlayer.pause: Pauses the current playing track; you can play it again with the TrackPlayer.play functionTrackPlayer.seekTo: Jump to a specific position based on input secondsTrackPlayer.setRate: Changes the playback speedTrackPlayer.setVolume: Sets the music player volumeThe above functions affect the current playback/player state. You can also get the playback/player state before calling the above functions. Here are some getters that we often need:
TrackPlayer.getState: Returns the current playback stateTrackPlayer.getVolume: Returns the current volume levelNote: As mentioned before, the library offers an asynchronous API, so you have to use the await token to extract the returned data from the resolved promise. Browse all supported playback-state control functions from the official documentation.
Once you press the Play button, execute the following function calls one by one with hot reload to become familiar with player/playback state functions:
TrackPlayer.pause()
TrackPlayer.seekTo(10)
TrackPlayer.setRate(0.5)
TrackPlayer.setVolume(0.2)
Now, we’ll use the above functions to add a control box to our music player. Users can play/pause, go to the previous music track, and go to the next music track using the control box buttons. We’ll use the react-native-vector-icons package to build control box icon buttons.
First, install it and rebuild the project according to the official installation guide. Then, add the following imports in your App.js file:
import TrackPlayer, {
  useTrackPlayerEvents,
  usePlaybackState,
  Event,
  State
} from 'react-native-track-player';
import Icon from 'react-native-vector-icons/FontAwesome';
Now, update the existing Playlist component and add the new Controls component source:
function Playlist() {
  const [queue, setQueue] = useState([]);
  const [currentTrack, setCurrentTrack] = useState(0);

  async function loadPlaylist() {
    const queue = await TrackPlayer.getQueue();
    setQueue(queue);
  }

  useEffect(() => {
    loadPlaylist();
  }, []);

  useTrackPlayerEvents([Event.PlaybackTrackChanged], (event) => {
    if(event.state == State.nextTrack) {
      TrackPlayer.getCurrentTrack().then((index) => setCurrentTrack(index));
    }
  });

  function PlaylistItem({index, title, isCurrent}) {

    function handleItemPress() {
      TrackPlayer.skip(index);
    }

    return (
      <TouchableOpacity onPress={handleItemPress}>
        <Text
          style={{...styles.playlistItem,
            ...{backgroundColor: isCurrent ? '#666' : 'transparent'}}}>
        {title}
        </Text>
      </TouchableOpacity>
    );
  }

  return(
    <View>
      <View style={styles.playlist}>
        <FlatList
          data={queue}
          renderItem={({item, index}) => <PlaylistItem
                                            index={index}
                                            title={item.title}
                                            isCurrent={currentTrack == index }/>
          }
        />
      </View>
      <Controls/>
    </View>
  );
}

function Controls({ onShuffle }) {
  const playerState = usePlaybackState();

  async function handlePlayPress() {
    if(await TrackPlayer.getState() == State.Playing) {
      TrackPlayer.pause();
    }
    else {
      TrackPlayer.play();
    }
  }

  return(
    <View style={{flexDirection: 'row',
      flexWrap: 'wrap', alignItems: 'center'}}>
        <Icon.Button
          name="arrow-left"
          size={28}
          backgroundColor="transparent"
          onPress={() => TrackPlayer.skipToPrevious()}/>
        <Icon.Button
          name={playerState == State.Playing ? 'pause' : 'play'}
          size={28}
          backgroundColor="transparent"
          onPress={handlePlayPress}/>
        <Icon.Button
          name="arrow-right"
          size={28}
          backgroundColor="transparent"
          onPress={() => TrackPlayer.skipToNext()}/>
    </View>
  );
}
Here we use one icon button to toggle the play/pause state with the following condition:
await TrackPlayer.getState() == State.Playing
Remove the previous play button from the App component since it’s no longer needed:
return (
  <SafeAreaView style={styles.container}>
    <Playlist/>
  </SafeAreaView>
);
Run the app. Now, you can use the control box:
The library offers the useProgress Hook to track the music track progress. This Hook polls the track progress every second by default, but you can configure the interval as you wish (i.e., useProgress(200)).
Create a new component to display the music track progress with the useProgress Hook:
function TrackProgress() {
  const { position, duration } = useProgress(200);

  function format(seconds) {
    let mins = (parseInt(seconds / 60)).toString().padStart(2, '0');
    let secs = (Math.trunc(seconds) % 60).toString().padStart(2, '0');
    return `${mins}:${secs}`;
  }

  return(
    <View>
      <Text style={styles.trackProgress}>
        { format(position) } / { format(duration) }
      </Text>
    </View>
  );
}
The above TrackProgress component displays the current track progress in mm:ss format using the track duration.
Add another component to display the current music track information:
function Header() {
  const [info, setInfo] = useState({});
  useEffect(() => {
    setTrackInfo();
  }, []);

  useTrackPlayerEvents([Event.PlaybackTrackChanged], (event) => {
    if(event.state == State.nextTrack) {
      setTrackInfo();
    }
  });

  async function setTrackInfo() {
    const track = await TrackPlayer.getCurrentTrack();
    const info = await TrackPlayer.getTrack(track);
    setInfo(info);
  }

  return(
    <View>
        <Text style={styles.songTitle}>{info.title}</Text>
        <Text style={styles.artistName}>{info.artist}</Text>
    </View>
  );
}
Here, we used the useTrackPlayerEvents Hook to update the current track details whenever the current track changes. Next, add the useProgress Hook to the imports list:
import TrackPlayer, {
  useTrackPlayerEvents,
  usePlaybackState,
  useProgress,
  Event,
  State
} from 'react-native-track-player';
Now, render the above components in App:
return (
  <SafeAreaView style={styles.container}>
    <Header/>
    <TrackProgress/>
    <Playlist/>
  </SafeAreaView>
);
Add the following styling definitions to your stylesheet:
  trackProgress: {
    marginTop: 40,
    textAlign: 'center',
    fontSize: 24,
    color: '#eee'
  },
  songTitle: {
    fontSize: 32,
    marginTop: 50,
    color: '#ccc'
  },
  artistName: {
    fontSize: 24,
    color: '#888'
  },
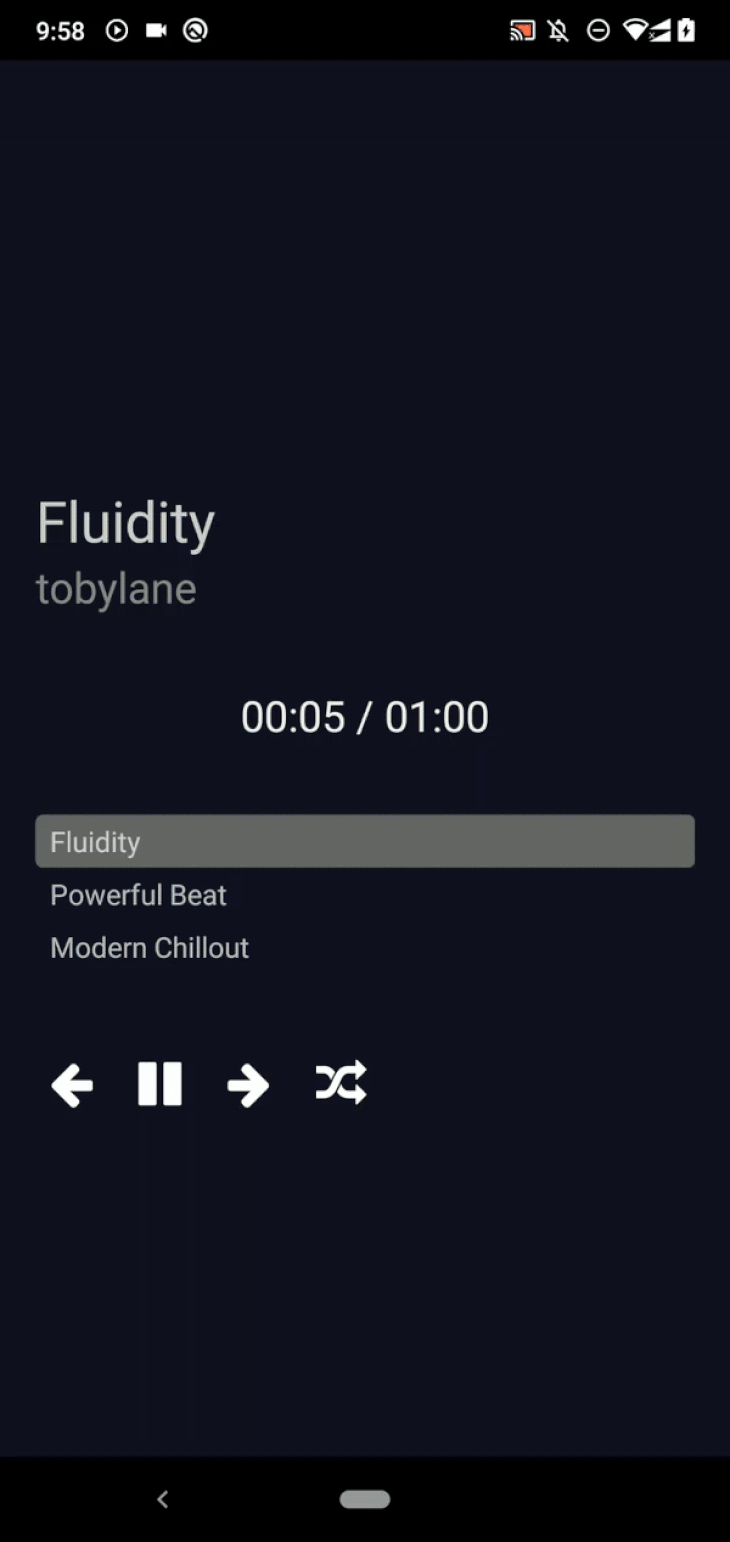
Run the app. Now, you will see the with music track details, track progress, a playlist, and a control box component:
You can improve the music track player by adding a seek bar with [react-native-slider](https://github.com/callstack/react-native-slider), but we won’t cover the react-native-slider integration in depth in this tutorial. Adding a seek bar is easy with the following steps:
useProgress HookTrackPlayer.seekTo to change the playback stateYou can go to the previous or next music tracks using the source code we tested previously. The playlist will start again (loop) whenever it ends since we used the RepeatMode.Queue mode in the addTracks service. You can use the RepeatMode.Track to loop the current track via the TrackPlayer.setRepeatMode function. Try to add a playlist-repeat mode selector button into the control box by yourself!
What if you need to shuffle the playlist? The native playlist shuffling feature is still an ongoing feature request (Issue #1711), but for now, we can implement playlist shuffling on the JavaScript side.
First, implement playlist shuffling in the Playlist component:
async function handleShuffle() {
  let queue = await TrackPlayer.getQueue();
  await TrackPlayer.reset();
  queue.sort(() => Math.random() - 0.5);
  await TrackPlayer.add(queue);

  loadPlaylist()
}

return(
  <View>
    <View style={styles.playlist}>
      <FlatList
        data={queue}
        renderItem={({item, index}) => <PlaylistItem
                                          index={index}
                                          title={item.title}
                                          isCurrent={currentTrack == index }/>
        }
      />
    </View>
    <Controls onShuffle={handleShuffle}/>
  </View>
);
Here, we extract the current queue, shuffle it, and reload it to the playlist via the handleShuffle function. Next, add a new icon button for shuffling:
function Controls({ onShuffle }) {
  const playerState = usePlaybackState();

  async function handlePlayPress() {
    if(await TrackPlayer.getState() == State.Playing) {
      TrackPlayer.pause();
    }
    else {
      TrackPlayer.play();
    }
  }

  return(
    <View style={{flexDirection: 'row',
      flexWrap: 'wrap', alignItems: 'center'}}>
        <Icon.Button
          name="arrow-left"
          size={28}
          backgroundColor="transparent"
          onPress={() => TrackPlayer.skipToPrevious()}/>
        <Icon.Button
          name={playerState == State.Playing ? 'pause' : 'play'}
          size={28}
          backgroundColor="transparent"
          onPress={handlePlayPress}/>
        <Icon.Button
          name="arrow-right"
          size={28}
          backgroundColor="transparent"
          onPress={() => TrackPlayer.skipToNext()}/>
        <Icon.Button
          name="random"
          size={28}
          backgroundColor="transparent"
          onPress={onShuffle}/>
    </View>
  );
}
Once you run the app, you can use the shuffle feature:
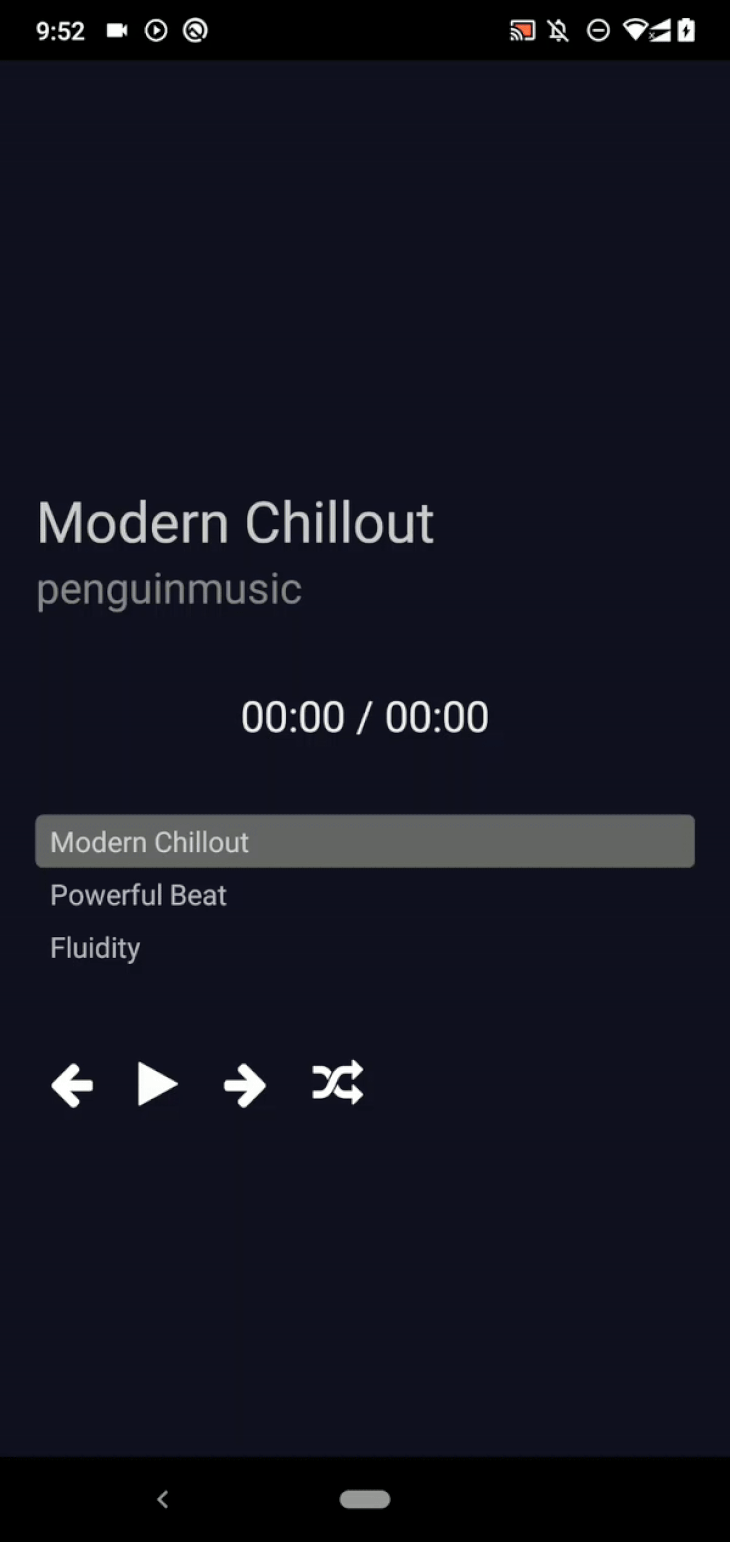
Add a button to play a random music track item by yourself! Similarly, you can re-order playlist items and create multiple playlists by manipulating the track player queue. Playlist management operations will work efficiently, since the library handles playlists on the native side with appropriate data structures.
We already used some track player events in the above components. For example, in the Header component, we used the useTrackPlayerEvents Hook to detect the music track change event.
The library lets you attach functions for two event types:
useTrackPlayerEvents and usePlaybackState Hooks to subscribe to these in-app eventsEvent.RemoteNext event when the user presses the notification area mini-player’s Play button. We’ll discuss handling remote events in the next sectionYou can browse all supported events details from the official documentation.
Users typically multi-task while using music apps. For example, a mobile user may use a messaging app while listening to music.
Music apps usually play the current playlist even in background mode, but what if the user wants to play the next song? The user may press the Next button from the notification panel rather than opening the music player app again.
Run the sample app and check the notifications bar. You’ll see a small, platform-specific player component as below:
But, you can’t control the playlist with this mini-player yet. The reason is that the library triggers remote event handlers instead of changing the track player state. This situation offers developers the flexibility to handle remote events as they wish.
Do you remember we had a TODO: comment somewhere in the demo app’s codebase? That’s where we attached the playbackService to the library — but we hadn’t implemented actions for remote events.
Use the following code in playbackService to control the track player based on remote events:
export async function playbackService() {
  TrackPlayer.addEventListener(Event.RemotePause, () => {
    console.log('Event.RemotePause');
    TrackPlayer.pause();
  });

  TrackPlayer.addEventListener(Event.RemotePlay, () => {
    console.log('Event.RemotePlay');
    TrackPlayer.play();
  });

  TrackPlayer.addEventListener(Event.RemoteNext, () => {
    console.log('Event.RemoteNext');
    TrackPlayer.skipToNext();
  });

  TrackPlayer.addEventListener(Event.RemotePrevious, () => {
    console.log('Event.RemotePrevious');
    TrackPlayer.skipToPrevious();
  });
}
The above service will be executed even when the app is playing in the background. Playback/player events should work as expected in the background mode — in other words, the react-native-track-player library supports background mode without custom tweaks!
Run the app, open another app over the music player, and use the notification area’s mini-player to play the next music track — everything will work fine.
On Android, the music player app removes the notification area’s mini-player and stops playing music when it gets terminated, but you can avoid this behavior by using the following setup in the setupPlayer service:
await TrackPlayer.updateOptions({
  android: {
    appKilledPlaybackBehavior:
      AppKilledPlaybackBehavior.ContinuePlayback,
  },
// ---
In this tutorial, we used a hard-coded playlist for demonstration purposes. But, in production music apps, you may need to store your playlists in a more manageable way. Consider the following options for storing playlist information:
react-native-fs), consider caching the playlist inside app preferences or temporary filesIn this tutorial, we developed a playlist-based music track player to learn the react-native-track-player library features. The react-native-track-player library lets you create and manage playable music playlists.
Alternatively, you can use the react-native-soundlibrary to play music and handle playlists yourself with JavaScript — then, you’ll have to write code for the entire playlist queue implementation based on react-native-sound events. Even though you can surely develop such an implementation, you may face problems with your app’s performance because you handle both the playback events and playlist state in JavaScript.
The react-native-track-player library handles everything on the native side and dispatches events to JavaScript for UI update usage. So, using react-native-track-player for playable music playlist management boosts your productivity and gives you a performance-first, production-ready solution.
Find the demo app’s source code from my GitHub repository.

LogRocket's Galileo AI watches sessions for you and and surfaces the technical and usability issues holding back your React Native apps.
LogRocket also helps you increase conversion rates and product usage by showing you exactly how users are interacting with your app. LogRocket's product analytics features surface the reasons why users don't complete a particular flow or don't adopt a new feature.
Start proactively monitoring your React Native apps — try LogRocket for free.

A guide for using JWT authentication to prevent basic security issues while understanding the shortcomings of JWTs.

Discover how to build, render, and automate product demo videos with Remotion, replacing traditional screen recordings with reusable React code.

Chrome’s Modern Web Guidance embeds modern web platform skills into AI coding agents, helping them choose native HTML, CSS, and browser APIs over legacy patterns.

Learn how to use Fallow to analyze AI-generated code, detect dead code, duplicate logic, and complexity issues, and integrate automated code quality checks into your AI-assisted development workflow.
Hey there, want to help make our blog better?
Join LogRocket’s Content Advisory Board. You’ll help inform the type of content we create and get access to exclusive meetups, social accreditation, and swag.
Sign up now

