Editor’s note: This tutorial was last updated on 17 March 2023 to reflect updates made in React Router v6.

A lot has changed since the introduction of React Hooks, and certain things that we didn’t previously have issues with have become cause for concern. The features and methods that come with Hooks have redefined how we approach certain concepts in React, and routing happens to be one of them.
This article isn’t intended to take shots at React Router or belittle its importance. Instead, we’ll explore other options and learn how to improve the routing experience in React apps using Hooks.
For demonstration purposes, we’ll make references to React Router as well as hookrouter. Note that at the time of this update, the hookrouter repo has been archived by the author. However, it still has over 5,000 weekly downloads and is still safe to use in production apps. Let’s get started!
How React Hooks can replace React Router
Looking to learn more about hookrouter and how it works? Follow along with this tutorial to learn more.
Jump ahead:
React Router provides a declarative way of managing routes in React applications, thereby reducing the stress that comes from manually setting routes for all of the pages and screens in your React application. React Router exports three major components that help to make routing possible: Route, Link, and BrowserRouter.
When you need only basic navigation and routing functionalities, React Router can be overkill. In this context, React Router isn’t necessary at all.
That said, React Router is rich with navigational components that compose declaratively with your application, which can be very useful for large and complex navigational requirements in React applications. It’s also great for React Native applications.
React Router is not built into React; it’s a separate routing library built on top of React specifically for providing routing and navigation functionalities in React applications.
When adding React Router to your React applications, you’ll import it from it’s own module:
import { Router, Route, Routes } from "react-router";
However, you shouldn’t install it directly in your project. If you’re writing an application that will run in the browser, you should instead install React Router DOM.
You don’t need React Router and React Router DOM together. By default, React Router DOM gives you access to React Router.
If you find yourself using both, it’s okay to get rid of React Router since you already have it installed as a dependency within React Router DOM. However, you should note that React Router DOM is only available on the browser, so you can only use it for web applications.
If you were building a React app with three pages, you could conventionally implement routing with React Router using the code below:
import Users from "./components/Users";
import Contact from "./components/Contact";
import About from "./components/About";
function App() {
  return (
    <div>
      <Router>
        <Routes>
          <Route path="/about" element={<About />} />
          <Route path="/users" element={<Users />} />
          <Route path="/contact" element={<Contact />} />
        </Routes>
      </Router>
    </div>
  );
}
The <Route/> component, which was imported from the React Router package, takes in two props, the path to direct the user to the specified path, and the element to define the content in the path.
To drive home these demonstrations, we’ll use the hookrouter tool from Chris Engel. The hookrouter module exports a useRoutes() Hook that evaluates a predefined routes object and returns a result.
In the routes object, you define your routes as keys with their values as functions that will be called when the routes match. The code below shows a practical demonstration:
import React from "react";
import Users from "./components/Users";
import Contact from "./components/Contact";
import About from "./components/About";
const routes = {
  "/": () => <Users />,
  "/about": () => <About />,
  "/contact": () => <Contact />
};
export default routes;
Personally, I like this method because we didn’t have to do too much work. With React Router, we just render the <Route/> component for all of the individual routes in our app, not to mention all of the props we passed to it.
Going back to Hooks, we can use the defined Routes in our app by simply passing it to the useRoutes() Hook:
import {useRoutes} from 'hookrouter';
import Routes from './router'

function App() {
  const routeResult = useRoutes(Routes)
  return routeResult
}
The code above gives us exactly the same result we’d get with the React Router routing demonstration but with a cleaner and lighter implementation. Feel free to check out this editable code example on CodeSandbox.
React Router also gives us access to the <Link/> component, which helps us customize route navigations and manage interactive routing in React apps.
We have a React app with three routes; let’s render the routes on the screen and navigate to them when they’re clicked:
import { Route, Routes, Link, BrowserRouter as Router } from "react-router-dom";
import Users from "./components/Users";
import Contact from "./components/Contact";
import About from "./components/About";

function App() {
  return (
    <div className="App">
      <Router>
        <div>
          <ul>
            <li>
              <Link to="/about">About</Link>
            </li>
            <li>
              <Link to="/users">Users</Link>
            </li>
            <li>
              <Link to="/contact">Contact</Link>
            </li>
          </ul>
          <Routes>
            <Route path="/about" element={<About />} />
            <Route path="/users" element={<Users />} />
            <Route path="/contact" element={<Contact />} />
          </Routes>
        </div>
      </Router>
    </div>
  );
}
The code above creates the navigations we’ll need to move from one page to another within the app. Below is a visual representation:
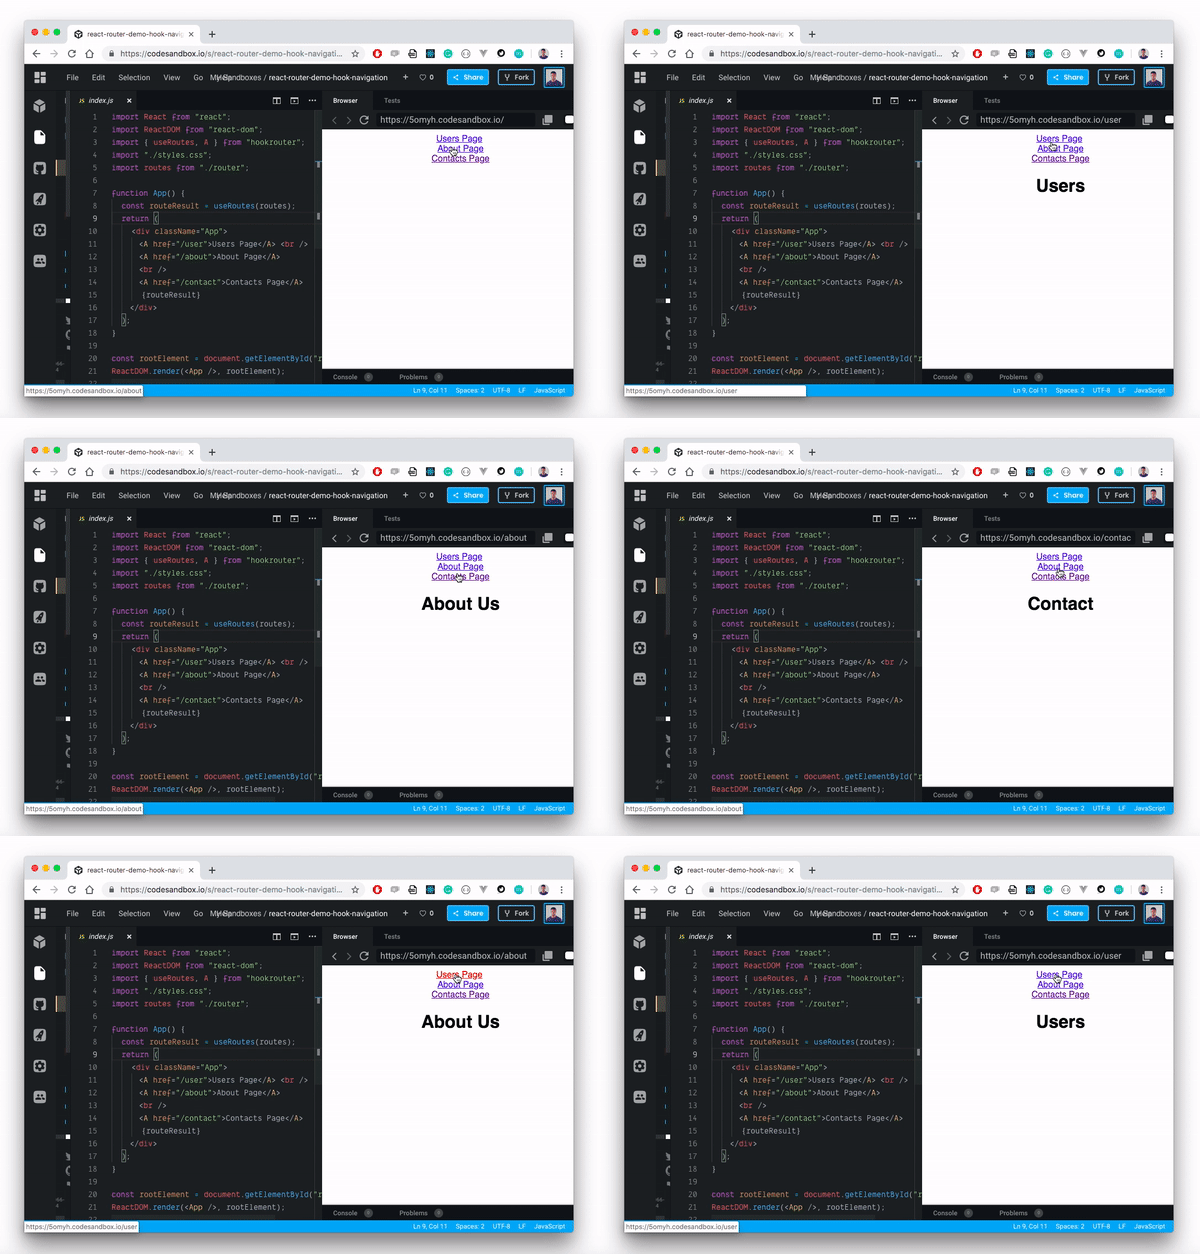
You can also check out the editable code example.
The hookrouter module provides a wrapper around the HTML anchor tag, <a/> as <A/>. It’s accessible as a React component and is 100 percent feature compatible to the native <a/> tag. The only difference is that it pushes navigations to the history stack instead of actually loading a new page:
const routes = {
  "/user": () => <Users />,
  "/about": () => <About />,
  "/contact": () => <Contact />
};

function App() {
  const routeResult = useRoutes(routes);
  return (
    <div className="App">
      <A href="/user">Users Page</A>
      <A href="/about">About Page</A>
      <A href="/contact">Contacts Page</A>
      {routeResult}
    </div>
  );
}
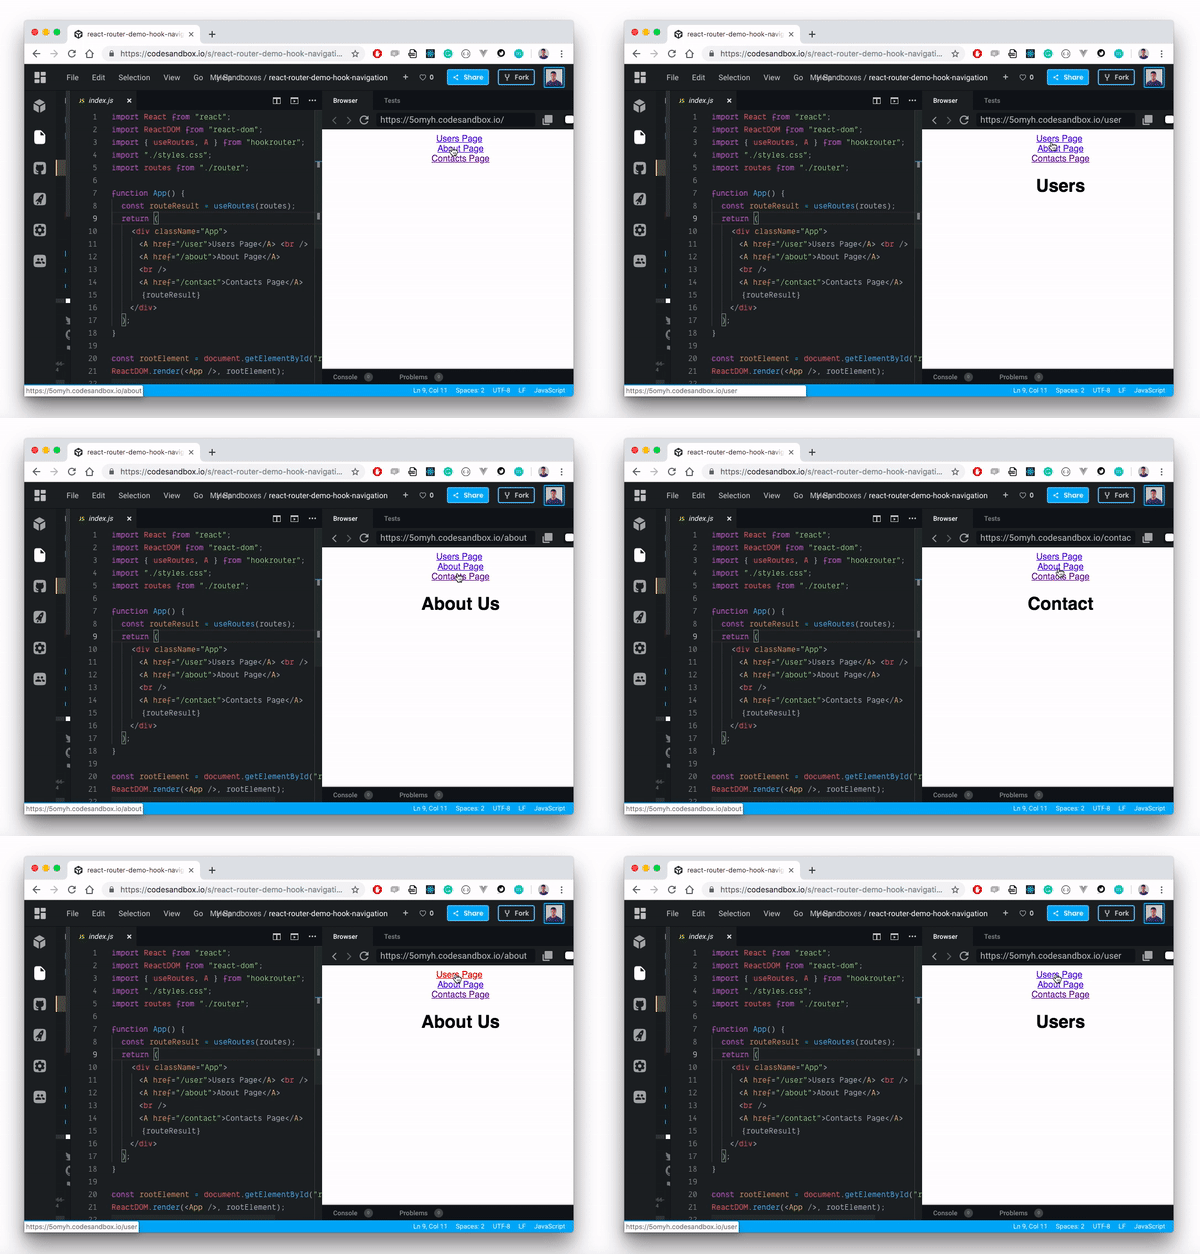
Check out this interactive demo.
The hookrouter module gives us access to a navigate() Hook function that we can pass a URL to, and it will navigate the user to that URL. Every call to the navigate() function is a forward navigation. As a result, users can click the browser’s back button to return to the previous URL:
navigate('/user/');
This happens by default. However, if you need a different behavior, you can do a replace navigation.
The navigation() Hook primarily takes-in three parameters, navigate(url, [replace], [queryParams]). The second parameter is used to effect the replace behavior. It erases the current history entry and replaces it with a new one. To achieve that effect, simply set its argument to true:
navigate('/user', true);
Usually, when the navigation routes aren’t matched, the app should render a 404 error page to let the user know that the selected route is not defined in the application. To do this, we use the * to match any value apart from the ones defined. Usually, we do so at the end of the other paths:
import { Route, Link, BrowserRouter as Router, Routes } from "react-router-dom";
import Users from "./components/Users";
import Contact from "./components/Contact";
import Home from "./components/About";
import NoPageFound from "./components/NoPageFound.js";

function App() {
  return (
    <div className="App">
      <Router>
        <div>
          <ul>
            <li>
              <Link to="/">Home</Link>
            </li>
            <li>
              <Link to="/users">Users</Link>
            </li>
            <li>
              <Link to="/contact">Contact</Link>
            </li>
          </ul>
          <Routes>
            <Route exact path="/" element={<Home />} />
            <Route path="/users" element={<Users />} />
            <Route path="/contact" element={<Contact />} />
            <Route path="*" element={<NoPageFound />} />
          </Routes>
        </div>
      </Router>
    </div>
  );
}
Therefore, whenever an undefined path is reached, React Router renders the NopageFound component. It’s a very keen way of letting users know where they are and what is going on at all times while navigating your React site. Check out the editable code example.
We define a routes object that holds all of our route paths and simply pass that object into the useRoutes() Hook, so it becomes really straightforward to conditionally render routes.
If we define a NoPageFound file to render by default when a selected route is not defined, we’ll only need to pass that file for rendering alongside our result function as follows:
import { useRoutes, A } from "hookrouter";
import routes from "./router";
import NoPageFound from "./components/NoPageFound";
function App() {
  const routeResult = useRoutes(routes);
  return (
    <div className="App">
      <A href="/user">Users Page</A> <br />
      <A href="/about">About Page</A>
      <br />
      <A href="/contact">Contacts Page</A> <br />
      {routeResult || <NoPageFound />}
    </div>
  );
}
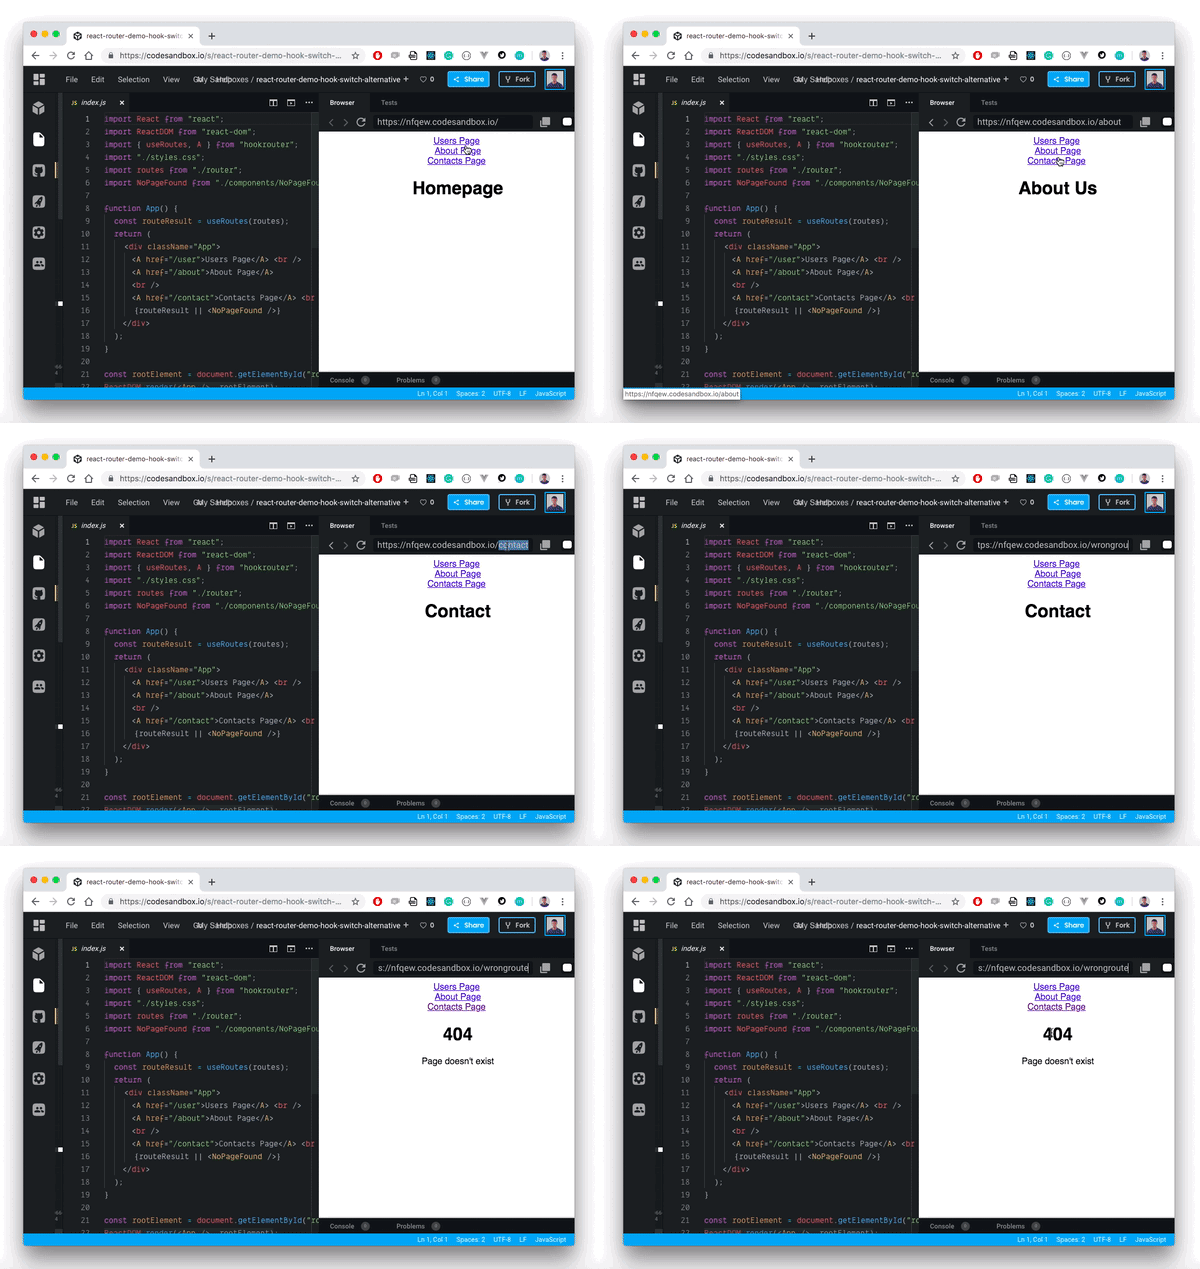
Compared to using the <Switch> component in React Router to render default pages, I think this is a bit cleaner and more readable. Check out this example.
Redirection happens when we want to dynamically direct a user from one route to another. For instance, during login, when a user successfully logs in, we would want to redirect them from the ('/login') route to the ('/dashboard') route.
With React Router, we can do this in a few ways, using either the useNavigate or the <Redirect/> component. For instance, if we have a login form, we can leverage the browser’s history object to push the user to the '/dashboard' route when we’re logged in:
import React from 'react'
import { useNavigate } from "react-router-dom";

function Login() {
  let navigate = useNavigate();
  function handleClick() {
    navigate("/home");
  }
  return (
    <form>
        <input type="name" />
        <input type="email" />
        <button onClick={handleClick}>go home</button>
    </form>
  );
}
export default Login
Consequently, we can also use the <Redirect/> component from React Router to dynamically redirect users.
The hookrouter module exports a useRedirect() Hook that can take a source route and a target route as parameters:
useRedirect('/user', '/dashboard');
This will automatically redirect users to the '/dashboard' route whenever the '/user' path is matched. For instance, if we didn’t want to show any users but instead redirect a user automatically to their '/dashboard', we’d define our app as follows:
import {useRoutes, useRedirect} from 'hookrouter';
import dashboard from "./components/Dashboard";
const routes = {
    '/home': () => <Users />,
    '/dashboard': () => <Dashboard />
};
const Users = () => {
    useRedirect('/user', '/dashboard');
    const routeResult = useRoutes(routes);
    return routeResult
}
Below is the visual output of this process:
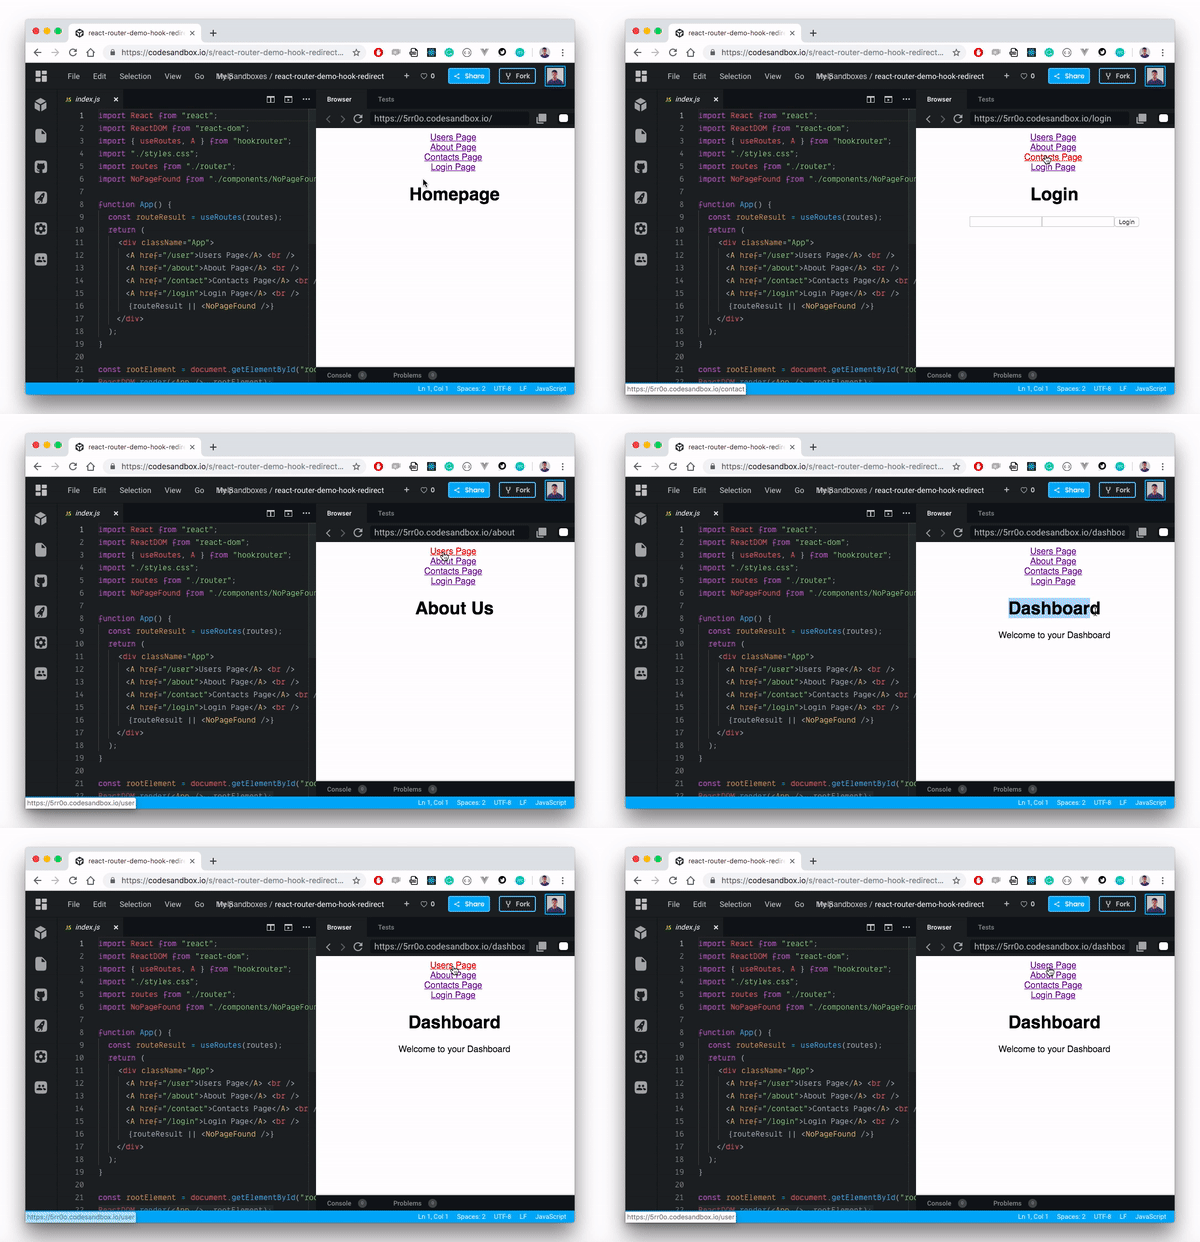
It’s worthy to note that the useRedirect() Hook triggers a replacement navigation intent. As a result, there will be only one entry in the navigation history. Therefore, if redirection happens from '/user' to '/dashboard', as we showed in the last snippet, the '/user' route will not appear in the browsing history. We’ll only have the '/dashboard' route.
URL parameters help us render components based on their dynamic URLs. It works in a similar fashion with nested routes, however, in this case, the routes aren’t changing. Rather, they’re updating.
For instance, if we had different users in our app, it would make sense to identify them separately with their individual routes like 'user/user1/' and 'users/user2/' etc. To do that, we’ll need to use URL parameters.
In React Router, we simply pass a placeholder, like id, starting with a colon to the path prop in the <Route/> component:
<Route path="users/:id" component={Users} />
Now, if you navigate to 'users/1' on the browser, this particular user will be available in your Users.js prop:
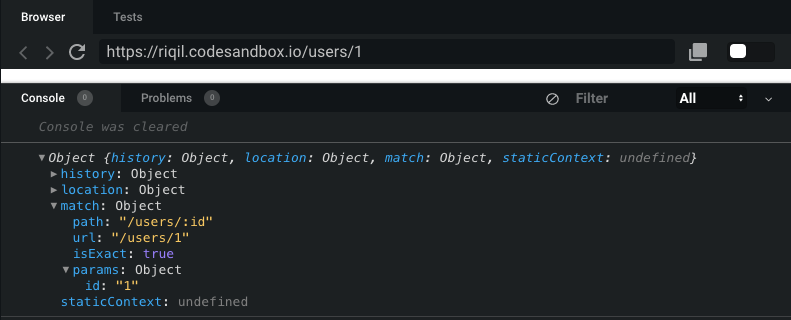
When compared to React Router, there’s not much difference in how hookrouter treats URL parameters. The construct is the same, meaning you can pass your URL parameters to your target routes using a colon and the parameter name.
However, there’s still a difference in the way the route Hook works. It reads all URL parameters and puts them into an object by using the keys you defined in the routes object. Then, all the named parameters will be forwarded to your route result function as a combined object:
const routes = {
  '/user/:id': ({id}) => <User userId={id} />
}
Using object destructuring, we simply take the id property from the props object and apply it to our component. By doing so, we achieve exactly the same result as we did with the React Router alternative.
In this article, we explored an alternative way of routing for your React projects. React Router is a great tool, however, with the arrival of Hooks, a lot of things have changed, including how routing works.
This Hooks-based module offers a cleaner and more flexible way of handling routes in smaller projects. If you like trying out new tools as much as I do, I encourage you to give it a shot. Thanks for reading, and happy coding!
Install LogRocket via npm or script tag. LogRocket.init() must be called client-side, not
server-side
$ npm i --save logrocket

// Code:

import LogRocket from 'logrocket';
LogRocket.init('app/id');
// Add to your HTML:

<script src="https://cdn.lr-ingest.com/LogRocket.min.js"></script>
<script>window.LogRocket && window.LogRocket.init('app/id');</script>
Would you be interested in joining LogRocket's developer community?
Join LogRocket’s Content Advisory Board. You’ll help inform the type of content we create and get access to exclusive meetups, social accreditation, and swag.
Sign up now
Set up real-time video streaming in Next.js using HLS.js and alternatives, exploring integration, adaptive streaming, and token-based authentication.

Not sure if low-code is right for your next project? This guide breaks down when to use it, when to avoid it, and how to make the right call.

Compare Firebase Studio, Lovable, and Replit for AI-powered app building. Find the best tool for your project needs.

Discover how to use Gemini CLI, Google’s new open-source AI agent that brings Gemini directly to your terminal.
8 Replies to "How React Hooks can replace React Router"
In your first hooks routing code sample, the o e for routes.js, you forgot to reference each individual component. You import them but they’re not in each of the functions for that Routes object. So the 3 functions return nothing.
How would you setup your hooks router to support modal side panels (which slides out when url starts from /modal/.. for example)? It this possible to describe multiple switches (one will return previous url component, and another one will return modal url component) within one rules object? Is this possible to forcibly pass desired url to router like <Switch location={previousUrl}?
This was a very helpful article thank you. I have encountered one issue with this though. My hook components keep getting called. using a components in a menu placing a break point in the export default function PaymentSettings(props) for example – will result in that breakpoint getting it continuously.
This is cleaner compared to Routes usage for sure. However an issue that keeps coming up in larger applications is the number of components imported for a “routes” file, as it needs each component to render for every path defined. So the more routes you have the more components need importing, I’ve seen 1000’s of lines before with no options outside creating smaller modules or a key based component directory. It would be nice to see this tackled in some other way, if you have any ideas how hooks might help here that would be great?
Thanks
JB
How do I turn the created link into a graphic appearance of a button?
You do not need to import all components in your routing file. You can use dynamic imports or “lazy loading” for your components. That means a components code will only be fetched, when you want to render it.
Its covered in the docs, here: https://github.com/Paratron/hookrouter/blob/master/src-docs/pages/en/02_routing.md#lazy-loading-components
how to use hash routing in hookRouter?
Very nice post.
But I will stay on react-router because I’m using typescript.
the documentation page states that future releases of hookrouter will not necessarily update the types/hookrouter module