Pagination, also called paging, divides the information on a webpage into different pages that are navigable using either buttons or a numbered list. Pagination can improve your website’s organization, benefitting UX and ultimately boosting overall ranking. You can add pagination to either a web, desktop, or mobile application and implement it on either the client side or the server side.

In this tutorial, we’ll use React and Tailwind CSS to create two different types of pagination components on the client side. One will use buttons for navigation and one will use a numbered list. Let’s get started!
First, set up a new React project on your local machine by running the following command:
npx create-react-app my-app
cd my-app
Next, we’ll install Tailwind CSS and a few other dependencies in our directory:
npm install -D tailwindcss@npm:@tailwindcss/postcss7-compat postcss@^7 autoprefixer@^9
We’ll need to install Create React App, however, it cannot natively override the PostCSS configuration. Therefore, we’ll install CRACO, a configuration layer for CRA, in addition to a few other scripts in our package.json:
npm install @craco/craco
The scripts section of your project should look like the code block below:
  "scripts": {
    "start": "craco start",
    "build": "craco build",
    "test": "craco test",
    "eject": "react-scripts eject"
  },
Now, let’s create a new file called craco.config.js and add Tailwind CSS and autoprefixer as PostCSS plugins:
module.exports = {
  style: {
    postcss: {
      plugins: [require("tailwindcss"), require("autoprefixer")],
    },
  },
};
Next, we’ll create a file called tailwind.config.js with the following command:
npx tailwindcss-cli@latest init
To finish configuring Tailwind CSS, add the following code in your default index.css file:
@tailwind base;
@tailwind components;
@tailwind utilities;
Now that our project is fully set up, we can start building our pagination components!
Our project will follow the structure in the image below. Let’s take an in-depth look at some of these files and folders:
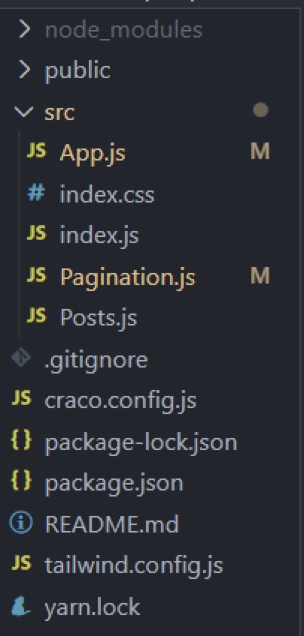
Pagination.js will hold the logic for handling and displaying the pagination component. The code in this folder will differ for each of the two types of pagination, so we’ll look at it again later.
Posts.js is a static POST element that will fetch random data from an API. The data and structure of Posts.js, as seen in the code block below, will be the same for both types of pagination:
import React from "react";

const Posts = ({ posts, loading }) => {
  if (loading) {
    return <h2>Loading...</h2>;
  }

  return (
    <div>
      <ul>
        {posts.map((post) => (
          <li
            key={post.id}
            className='text-gray-700 font-semibold text-xl mb-2 border p-2'
          >
            {post.title}
          </li>
        ))}
      </ul>
    </div>
  );
};

export default Posts;
The first type of pagination component we’ll create uses Next and Previous buttons to navigate through the data on a webpage. Our App.js file will look like the code block below:
import React, { useState, useEffect } from "react";
import Posts from "./Posts";
import Pagination from "./Pagination";
import axios from "axios";

const App = () => {
  const [posts, setPosts] = useState([]);
  const [loading, setLoading] = useState(false);
  const [currentPage, setCurrentPage] = useState(1);
  const [postsPerPage] = useState(10);

  useEffect(() => {
    const fetchPosts = async () => {
      setLoading(true);
      const res = await axios.get("https://jsonplaceholder.typicode.com/posts");
      setPosts(res.data);
      setLoading(false);
    };

    fetchPosts();
  }, []);

  // Get current posts
  const indexOfLastPost = currentPage * postsPerPage;
  const indexOfFirstPost = indexOfLastPost - postsPerPage;
  const currentPosts = posts.slice(indexOfFirstPost, indexOfLastPost);

  // Change page
  const paginateFront = () => setCurrentPage(currentPage + 1);
  const paginateBack = () => setCurrentPage(currentPage - 1);

  return (
    <div>
      <Posts posts={currentPosts} />
      <Pagination
        postsPerPage={postsPerPage}
        totalPosts={posts.length}
        paginateBack={paginateBack}
        paginateFront={paginateFront}
        currentPage={currentPage}
      />
    </div>
  );
};

export default App;
In our App.js file, the data in posts comes from the backend. Let’s review some of the functions in our pagination component that use this data:
currentPage: indicates to the user what page they are currently onpostsPerPage: the total number of posts that will be rendered per pagecurrentPosts: the array of posts for the current pageTo get the currentPosts, we need to pass the indexOfFirstPost and indexOfLastPostto the slice() function.
To move back and forth between pages, we’ll use paginateFront and paginateBack. These functions simply increment or decrement currentPage, and currentPosts is calculated as a result.
Pagination.js fileNow, let’s take a look at our Pagination.js file:
import React from "react";

export default function Pagination({
  postsPerPage,
  totalPosts,
  paginateFront,
  paginateBack,
  currentPage,
}) {


  return (
    <div className='py-2'>
      <div>
        <p className='text-sm text-gray-700'>
          Showing
          <span className='font-medium'>{currentPage * postsPerPage - 10}</span>
          to
          <span className='font-medium'> {currentPage * postsPerPage} </span>
          of
          <span className='font-medium'> {totalPosts} </span>
          results
        </p>
      </div>
      <nav className='block'></nav>
      <div>
        <nav
          className='relative z-0 inline-flex rounded-md shadow-sm -space-x-px'
          aria-label='Pagination'
        >
          <a
            onClick={() => {
              paginateBack();
            }}
            href='#'
            className='relative inline-flex items-center px-2 py-2 rounded-l-md border border-gray-300 bg-white text-sm font-medium text-gray-500 hover:bg-gray-50'
          >
            <span>Previous</span>
          </a>

          <a
            onClick={() => {
              paginateFront();
            }}
            href='#'
            className='relative inline-flex items-center px-2 py-2 rounded-r-md border border-gray-300 bg-white text-sm font-medium text-gray-500 hover:bg-gray-50'
          >
            <span>Next</span>
          </a>
        </nav>
      </div>
    </div>
  );
}
The pagination component takes props that render the current information about our page, and the Tailwind CSS utility classes remove the need for external CSS.
When we run the code above, we’ll receive the following result:
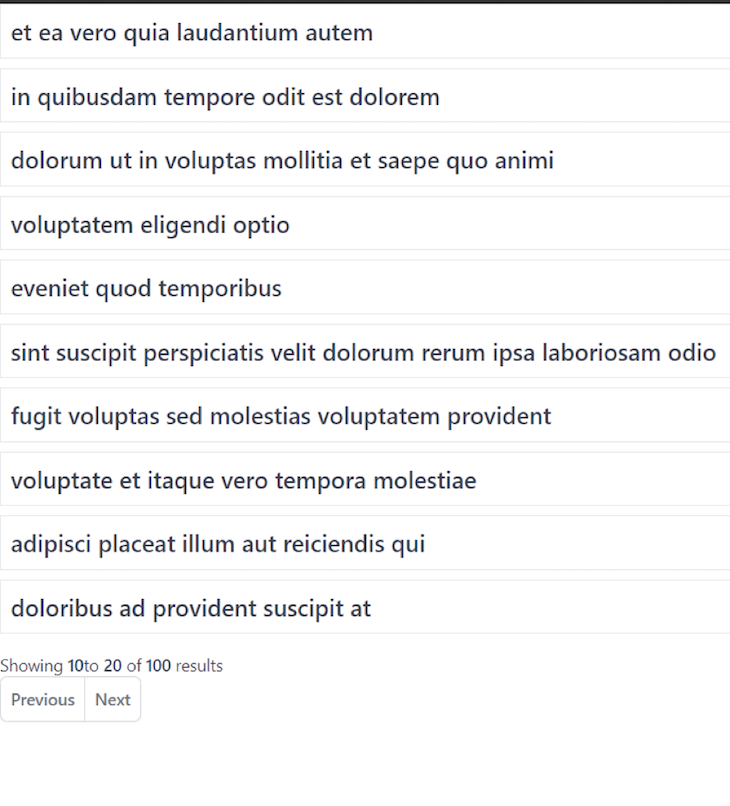
In the image above, our pagination component displays 10 to 20 out of 100 results. Let’s hit the Next button to see what happens:
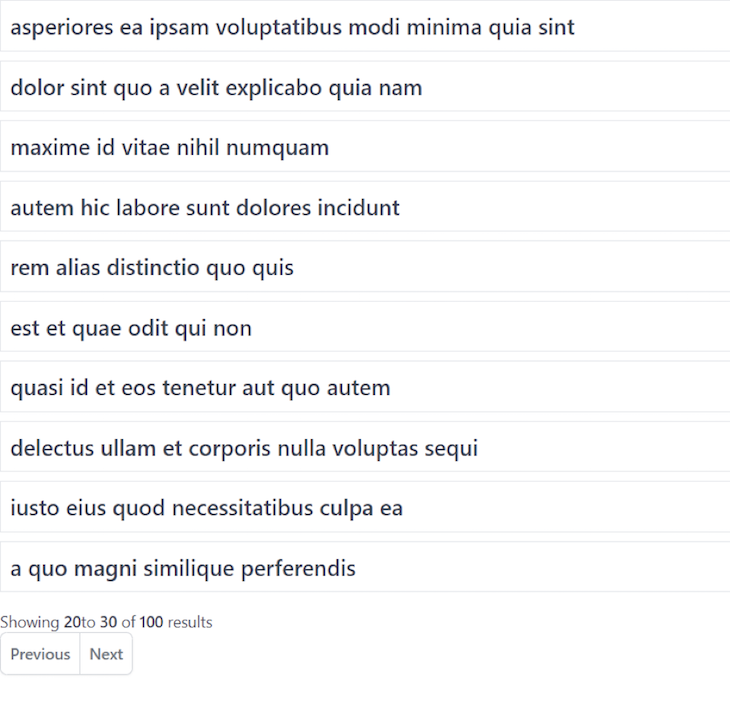
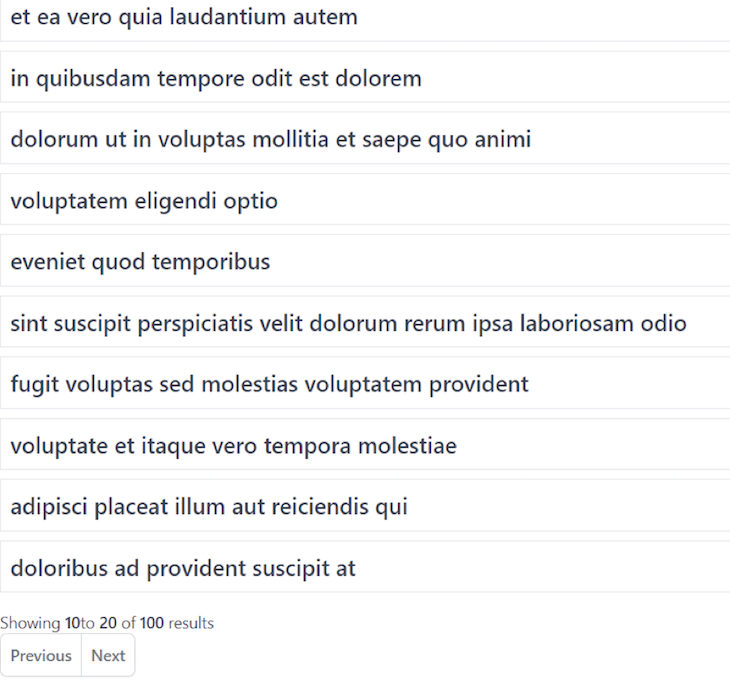
Now, we can see results 20 through 30. When we hit the Previous button, we’ll return to results 10 to 20:
The second pagination component we’ll build uses a numbered list for navigation instead of Next and Previous buttons. We’ll have to make a few changes to our App.js file and the props that are sent to the pagination component.
Update your App.js file to look like the code block below:
  import React, { useState, useEffect } from "react";
import Posts from "./Posts";
import Pagination from "./Pagination";
import axios from "axios";

const App = () => {
  const [posts, setPosts] = useState([]);
  const [loading, setLoading] = useState(false);
  const [currentPage, setCurrentPage] = useState(1);
  const [postsPerPage] = useState(10);

  useEffect(() => {
    const fetchPosts = async () => {
      setLoading(true);
      const res = await axios.get("https://jsonplaceholder.typicode.com/posts");
      setPosts(res.data);
      setLoading(false);
    };

    fetchPosts();
  }, []);

  // Get current posts
  const indexOfLastPost = currentPage * postsPerPage;
  const indexOfFirstPost = indexOfLastPost - postsPerPage;
  const currentPosts = posts.slice(indexOfFirstPost, indexOfLastPost);

  // Change page
  const paginate = (pageNumber) => setCurrentPage(pageNumber);
  return (
    <div>
      <Posts posts={currentPosts} />
      <Pagination
        postsPerPage={postsPerPage}
        totalPosts={posts.length}
        paginate={paginate}
        currentPage={currentPage}
      />
    </div>
  );
};

export default App;
Now, we have a single paginate function that only updates currentPage to set currentPosts, as opposed to passing indexOfFirstPost and indexOfLastPost like we did for our previous pagination component.
Let’s check out the code for our pagination component that uses a numbered list:
import React from "react";

export default function Pagination({
  postsPerPage,
  totalPosts,
  paginate,
  currentPage,
}) {
  const pageNumbers = [];

  for (let i = 1; i <= Math.ceil(totalPosts / postsPerPage); i++) {
    pageNumbers.push(i);
  }

  return (
    <div className='py-2'>
      <div>
        <p className='text-sm text-gray-700'>
          Showing
          <span className='font-medium'>
            {" "}
            {currentPage * postsPerPage - 10}{" "}
          </span>
          to
          <span className='font-medium'> {currentPage * postsPerPage} </span>
          of
          <span className='font-medium'> {totalPosts} </span>
          results
        </p>
      </div>
      <nav className='block'>
        <ul className='flex pl-0 rounded list-none flex-wrap'>
          <li>
            {pageNumbers.map((number) => (
              <a
                onClick={() => {
                  paginate(number);
                }}
                href='#'
                className={
                  currentPage === number
                    ? "bg-blue border-red-300 text-red-500 hover:bg-blue-200 relative inline-flex items-center px-4 py-2 border text-sm font-medium"
                    : "bg-white border-gray-300 text-gray-500 hover:bg-blue-200 relative inline-flex items-center px-4 py-2 border text-sm font-medium"
                }
              >
                {number}
              </a>
            ))}
          </li>
        </ul>
      </nav>
    </div>
  );
}
We’ve created an array that dynamically calculates the number of pages needed for the given amount of data. Then, it appends the data inside of the pageNumbers array.
Now, we’ll create an unordered list that renders list items by looping through our pageNumbers array. Creating an unordered list will generate a navigation component for the pages that will look like the following image:

Inside of the map function, we have attached a click handler to each of the page numbers. When clicked, each button will paginate to its specific page. The currentPage will be set in our App.js file, and we will get an updated currentPosts array that will render the required content on the frontend.
Let’s highlight the active page inside of our page navigation component:
  <a
    onClick={() => {
      paginate(number);
    }}
    href='#'
    className={
      currentPage === number
        ? "bg-blue border-red-300 text-red-500 hover:bg-blue-200 relative inline-flex items-center px-4 py-2 border text-sm font-medium"
        : "bg-white border-gray-300 text-gray-500 hover:bg-blue-200 relative inline-flex items-center px-4 py-2 border text-sm font-medium"
    }
  >
  {number}
</a>
For the <a> tag, we set different Tailwind CSS classes based on a check. If the pageNumber for our <a> tag is equal to the currentPage, we’ll differentiate it from the other <a> tags by giving it a red border and font color.
Let’s run the project again to see the output. On page one, we’ll see the following:
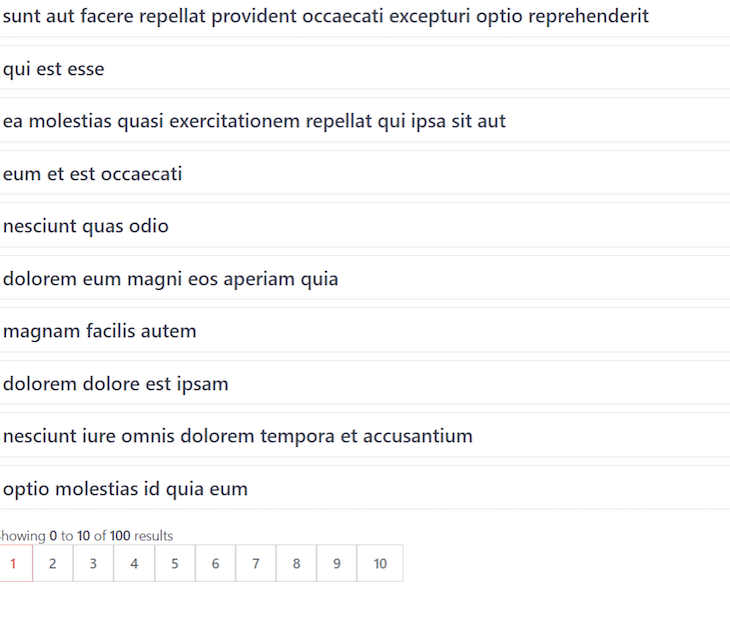
When we navigate to page ten, we’ll see the following:
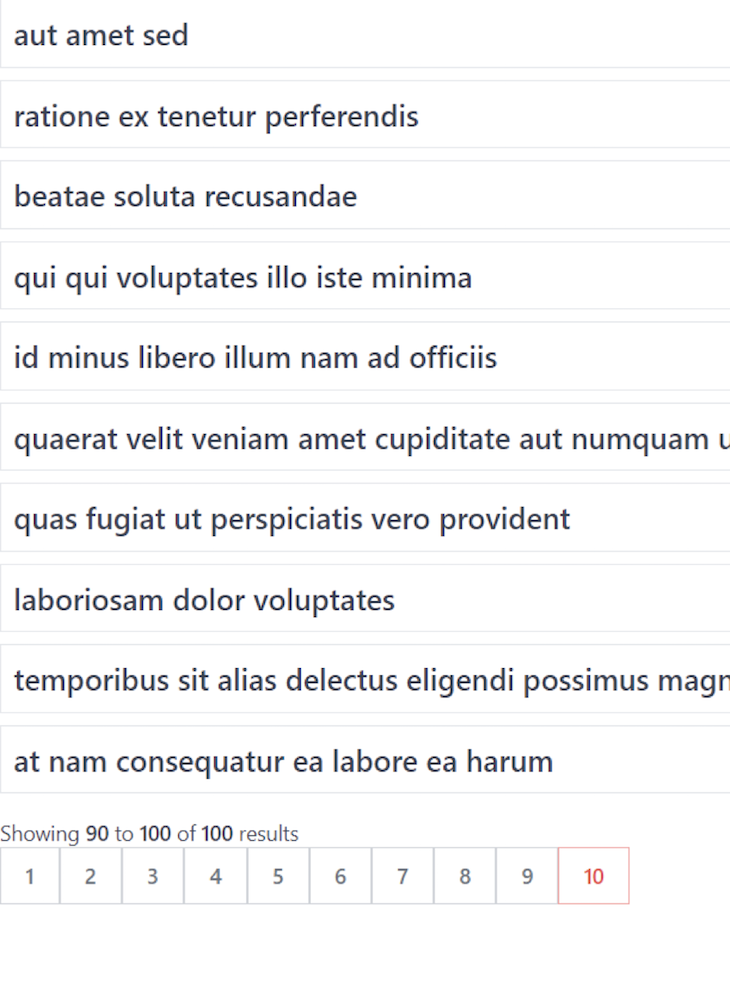
Now, you should have a thorough understanding of pagination! Pagination is a great feature for improving the UX of your application. We reviewed two methods for implementing pagination in your React application using Tailwind CSS, navigation buttons, and a numbered list. The best choice will depend on the nature of your application and your data.
Install LogRocket via npm or script tag. LogRocket.init() must be called client-side, not
server-side
$ npm i --save logrocket

// Code:

import LogRocket from 'logrocket';
LogRocket.init('app/id');
// Add to your HTML:

<script src="https://cdn.lr-ingest.com/LogRocket.min.js"></script>
<script>window.LogRocket && window.LogRocket.init('app/id');</script>
Would you be interested in joining LogRocket's developer community?
Join LogRocket’s Content Advisory Board. You’ll help inform the type of content we create and get access to exclusive meetups, social accreditation, and swag.
Sign up now
Get to know RxJS features, benefits, and more to help you understand what it is, how it works, and why you should use it.

Explore how to effectively break down a monolithic application into microservices using feature flags and Flagsmith.

Native dialog and popover elements have their own well-defined roles in modern-day frontend web development. Dialog elements are known to […]

LlamaIndex provides tools for ingesting, processing, and implementing complex query workflows that combine data access with LLM prompting.
2 Replies to "Pagination components with React and Tailwind CSS"
Thanks
Hi, thanks you ! You help it me lot ! 🙂