Swift, a programming language released by Apple in 2014, has quickly become one of the fastest growing languages in history. If you are interested in building apps for macOS or iOS, Swift is the best language choice in my opinion.

In this tutorial, we’ll become familiar with Swift by learning its basic operations and practicing with some relevant examples. Let’s get started!
The Replay is a weekly newsletter for dev and engineering leaders.
Delivered once a week, it's your curated guide to the most important conversations around frontend dev, emerging AI tools, and the state of modern software.
Swift is available on Mac, Windows, and Linux in version 5.4.1. Installing Swift is easy using Xcode, Apple’s free workflow for desktop and native iOS development.

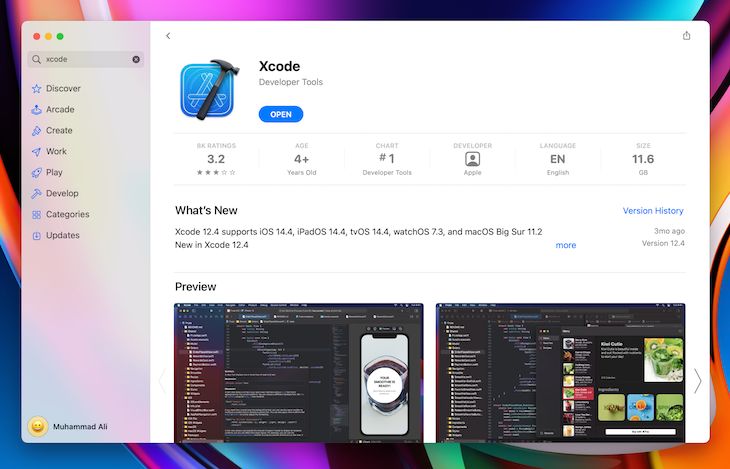
You can download Xcode either from the App Store inside macOS or on the official Swift website. If you’re using Windows or Linux, download and install Swift from its official site.
If you don’t want to install Swift on your computer, you can try an online Playground for Swift.
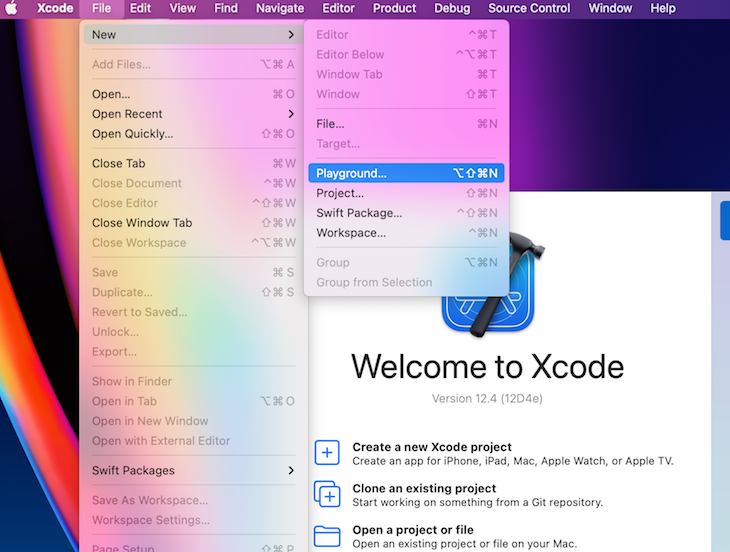
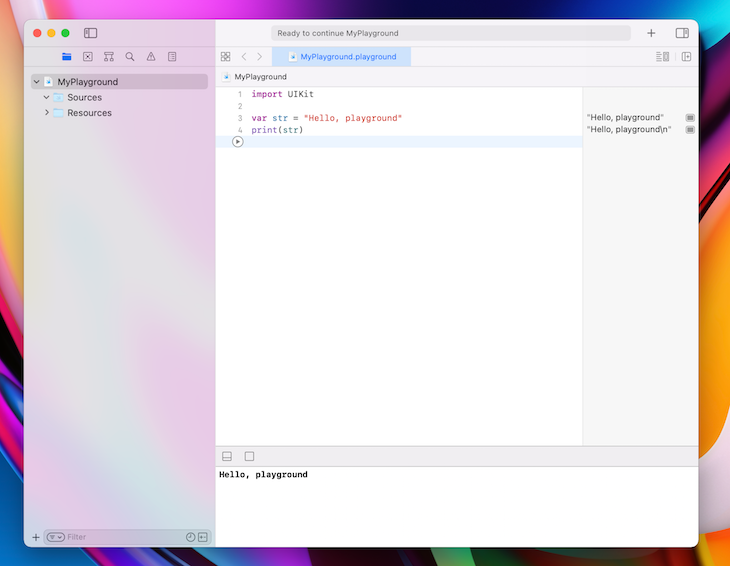
Once you’ve installed Swift on your computer, open a Playground using Xcode, where you can begin writing your code.


We need to know what data types are supported in Swift to understand what we can accomplish. We’ll use the following six data types:
| Data type | Example | Represents | Purpose |
|---|---|---|---|
| Character | s, w |
A 16-bit Unicode character | Single character editing |
| String | swift language |
Text data | Saving, updating, modifying a text/message |
| Int | 5, -5 |
An integer number | Represents any integer number |
| Float | 5.5, -5.5 |
32-bit floating-point number | Represents a 32-bit floating-point number |
| Double | 5.5, -5.5 |
64-bit floating-point number | Represents a 64-bit floating-point number |
| Bool | true, false |
Represent states (true/false) | Provides true/false value to use in our program |
Writing a program requires a lot of data. Variables provide a way to label data, making it easier to modify and reference.
We’ll use the following structure to format a variable: Keyword variableName:dataType. You can see the structure used in the code block below:
var name:String
When we define a variable using the structure above, we don’t put any data in the variable initially. Let’s add data in the variable to modify it from a null, which represents an empty value in programming, to a string:
var name:String = "nerdjfpb"
Later, we can reference the code above as needed to access the data. For example, print(name) will show nerdjfpb on the Playground console. You can think of printing something as displaying the result. We can see what value is inside the name.
We can change the variable value easily:
name = "Nerd Jfpb"
When writing in Swift, we don’t need to specify the data type when we begin with its value. For example, in the following code, Swift understands the name is a string:
var name = "nerdjfpb"
If we write the code block below, we’ll receive an error. Because Swift is a typed language, we can’t change the data type of a variable:
name = 5
Imagine that you want to reference a variable through your programming but don’t want to change its value. Swift provides a specific method for referencing variables.
To reference a variable, we’ll use the following structure: Keyword(let) variableName dataType = Value, which can be seen in the example below:
let ownerName = "Nerdjfpb"
We can only define the value of ownerName once, and we can’t change it. The value will remain constant throughout the entire program.
To use Swift, we need to understand these basic operators:
| Operator | Example | Explanation |
|---|---|---|
== (Equalto) |
variable1 == variable2 |
Returns true if the variables are equal |
!= (Notequal to) |
variable1 != variable2 |
Returns true if the variables are not equal |
> (Greaterthan) |
variable1 > variable2 |
Returns true if variable1 is greater than variable 2 |
>= (Greaterthan or equal to) |
variable1 >= variable2 |
Returns true if variable1 is greater than or equal variable 2 |
< (Lessthan) |
variable1 < variable2 |
Returns true if variable1 is less than variable 2 |
<= (Lessthan or equal to) |
variable1 <= variable2 |
Returns true if variable1 is less than or equal variable 2 |
| Operator | Example | Explanation |
|---|---|---|
+ (Addition) |
print(variable1 + variable2) |
print the addition of variable1 and variable2 |
- (Subtraction) |
print(variable1 - variable2) |
print the subtraction of variable2 from variable1 |
* (Multiplication) |
print(variable1 * variable2) |
print the multiplication of variable1 and variable2 |
/ (Division) |
print(variable1 / variable2) |
print the division of variable1 by variable2 |
% (Remainder) |
print(variable1 % variable2) |
print the remainder of variable1 and variable2 |
Programming involves making complex decisions. We need to learn how to make decisions in Swift. Suppose that we are trying to determine whether a number is even or odd. To do so, we need to check whether a given number can be divided by two without leaving a remainder.
In Swift, we use % to find the remainder and determine whether or not it equals zero. Say we have a var num = 15. Let’s write conditions to find out whether the number is even or odd.
To find the remainder, follow the structure below:
Keyword (conditions) {
    // code for execution here
}
The keyword we’ll use is if. The condition will be num % 2 == 0, and code for execution will be print reading Given number is an even number:
var num = 5
if (num%2 == 0) {
print("Given number is an even number")
}
Let’s say that we also want to inform the user if the number is not even. This part is quite easy! For every if statement, we can write an else statement.
If/else statement structureOur code will use the structure below:
if (conditions) {
    // Run the code inside if block
} else {
    // Run the code inside else block
}
You’ll see both the structure and the conditions in the code block below:
var num = 5
if (num%2 == 0) {
print("Given number is a even number")
} else {
print("Given number is a odd number")
}
Due to the num value, either the if statement will work, or the else statement will work. You can only satisfy one at a time.
Let’s extend the problem. Suppose that we want to ignore all the negative numbers. We’ll run an if/else statement that excludes numbers below zero.
Follow the structure below to solve the problem:
if (conditions) {
    // Run the code inside if block
} else if(conditions) {
    // Run the code inside else if block
} else {
    // Run the code inside else block
}


if (num < 0) {
    print("Given number is a negative number")
}
else if (num%2 == 0) {
    print("Given number is an even number")
}
else {
    print("Given number is an odd number")
}
Pretty easy, right?
Now, suppose that you want to show whether a number is positive or negative and whether the number is even or odd:
var num = 3

if (num == 0) {
    print("Given number is a zero")
} else if (num < 0) {
    print("Given number is a negative number")
} else {
    print("Given number is a positive number")
}

if (num%2 == 0) {
    print("Given number is an even number")
}
else {
    print("Given number is an odd number")
}
You’ll receive the following output:
Given number is a positive number
Given number is an odd number
Imagine that you want to write out every number from zero to 100. It should be fairly easy, right? What if I told you to write out every number from zero to 1,000? Or zero to 10,000? It would be difficult, boring, and time-consuming.
In this situation, computer programming comes to the rescue. You can program your computer to perform a certain task for a certain amount of time, and you can tell it what to do. We’ll ask the computer to write zero to 100 in the Swift Playground using a loop.
In a loop, we can provide sequential tasks and break conditions. There are several loops available in Swift, including for-in, while, and repeat-while.
We’ll cover each loop and perform the same task using each. Suppose that we need to count from zero to 100.
for-in structureUse the following layout to construct a for-in loop:
keyword counterVariable in lowerLimit .. upperLimit {
// code for execution
}
We’ll use for as the keyword and count index as the counterVariable. The lowerLimit is the smallest number at which we start counting, and the upperLimit is the highest number at which we stop counting:
for count in 1...100 {
    print(count) // for printing
}
Now, let’s perform the same task with the while loop.
while loop structureSet up your while loop by following the order below:
keyword condition {
// code for execution
}
The keyword we’ll use is while, and the condition we’ll specify is for stopping the loop. In our case, we stop when the count equals 100.
var count = 1
while (count <= 100) {
    print(count) // for printing
    count = count + 1 // for increment value
}
If we don’t increment the value using count = count + 1 , then the while loop will continue indefinitely, eventually crashing the program. A slow computer can be difficult to reset, so be sure to read the code again before running your while loop to make sure you include a stopping point.
repeat-while structureIn the while loop above, we check the condition first, then we run the code inside. Consider the same code example seen above with 101 as the input:
var count = 101
while (count <= 100) {
    print(count) // for printing
    count = count + 1 // for increment value
}
In this case, we’ll receive no output because the condition was not satisfied.
Let’s try our example again using repeat-while. A repeat-while loop first executes the task, then checks the conditions, essentially operating in the reverse order of the while loop:
var count = 101
repeat {
    print(count)
    count = count + 1
}
while (count <= 100)
The output of the repeat-while code is 101.
Hopefully, now you are familiar with Swift loops!
Here’s a question for you to solve: find all the even numbers in between one and 100 and print them in the console. Your finished code will look like the code block below:
for count in 1...100 {
    if (count%2 == 0) {
        print(count)
    }
}
Try performing the same task using a while and repeat-while by yourself.
To understand functions, we’ll revisit loops. Loops allow us to write programs that can repeat the same task again and again.
A function allows us to reuse a chunk of code when needed. We can either write an if/else statement or a loop inside of a function. Generally, a function takes some parameters and returns a result using those parameters.
Let’s run an example. Using a function, we receive a sum result of two numbers, and we can change the input values as much as we want. Note that a function only works when you call it, and you can call it as often as needed.
We’ll use the following structure to complete this example:
keyword functionName (parameters: parameters type) → returnType {
    // block of code here
}
Below, you’ll find the complete code with the keyword, function name, parameters, and return type:
func sumOfTwo(num1: Int, num2: Int) -> Int {
  return num1 + num2
}
var total = sumOfTwo(num1: 10, num2: 20)
print(total)
The code block below demonstrates the flexibility of functions. Note that each line includes different numeric values:
func sumOfTwo(num1: Int, num2: Int) -> Int {
    return num1 + num2
}

var firstFunc = sumOfTwo(num1: 10, num2: 20)
print(firstFunc)

var secondFunc = sumOfTwo(num1: 5, num2: 7)
print(secondFunc)

var thirdFunc = sumOfTwo(num1: 12, num2: 51)
print(thirdFunc)
We can call the function again and again with new values, receiving new results each time!
However, we can simplify our code a lot. If we are just printing the result, then we can improve the code by shortening it:
func sumOfTwo(num1: Int, num2: Int) -> Void {
    print(num1 + num2)
}

sumOfTwo(num1: 10, num2: 20)
sumOfTwo(num1: 5, num2: 7)
sumOfTwo(num1: 12, num2: 51)
The code used here will give us the same result as the code written above. We can directly print from the function because we are not using that value anywhere else.
You may have noticed we put a Void instead of Int in place of returnType. Void means we are not returning anything and only performing the task inside. You can do the same by running the following code:
func emptyReturn() {}
func emptyReturn() -> Void {}
func emptyReturn() -> () {}
You can also write a function without any parameters:
func goodMorning() {
    print("Good morning")
}

goodMorning()
See that we write a log without passing any value inside.
Let’s use what we’ve learned and try a tough example! Suppose that we are building a mini calculator using a function that can add two numbers and subtract two numbers:
func sumOfTwo(num1: Int, num2: Int) -> Int {
    return num1 + num2
}

func substractOfTwo(num1: Int, num2: Int) -> Int {
    return num1 - num2
}

func miniCalculator(num1:Int, num2: Int, work: String) {
    if (work == "+") {
        print(sumOfTwo(num1: num1, num2: num2))
    }
    else if (work == "-") {
       print(substractOfTwo(num1: num1, num2: num2))
    } else {
        print("This operator function is not available yet.")
    }
}

miniCalculator(num1: 12, num2: 21, work: "+")
miniCalculator(num1: 12, num2: 5, work: "-")
The final task is to print all the even and odd numbers on a given array using the following function:
func oddOrEven(lowerLimit:Int, upperLimit: Int) {
    for index in lowerLimit...upperLimit {
        if(index%2 == 0){
            print("\(index) is an even number")
        } else {
            print("\(index) is an odd number")
        }
    }
}

oddOrEven(lowerLimit: 1, upperLimit: 100)
There are many different ways to write the code above, but I chose to keep it simple.
Now, you should have a clear understanding of how the Swift programming language works. If you understand the basics properly, then you are ready to write more complicated code in Swift.
Remember this is a marathon, not a sprint. Improving your coding abilities requires you to practice daily. Make sure to check out the official Swift docs to learn more about Swift.
Install LogRocket via npm or script tag. LogRocket.init() must be called client-side, not
server-side
$ npm i --save logrocket

// Code:

import LogRocket from 'logrocket';
LogRocket.init('app/id');
// Add to your HTML:

<script src="https://cdn.lr-ingest.com/LogRocket.min.js"></script>
<script>window.LogRocket && window.LogRocket.init('app/id');</script>

@container scroll-state: Replace JS scroll listeners nowCSS @container scroll-state lets you build sticky headers, snapping carousels, and scroll indicators without JavaScript. Here’s how to replace scroll listeners with clean, declarative state queries.

Explore 10 Web APIs that replace common JavaScript libraries and reduce npm dependencies, bundle size, and performance overhead.

Russ Miles, a software development expert and educator, joins the show to unpack why “developer productivity” platforms so often disappoint.

Discover what’s new in The Replay, LogRocket’s newsletter for dev and engineering leaders, in the February 18th issue.
Hey there, want to help make our blog better?
Join LogRocket’s Content Advisory Board. You’ll help inform the type of content we create and get access to exclusive meetups, social accreditation, and swag.
Sign up now