
Are you looking for a coding buddy? AI’s got your back — more specifically, Cody does 🙂

Cody is Sourcegraph’s AI-enabled code editing assistant. Fundamentally, it is an AI pair programming tool designed to help developers build better and more efficient software. Think of it like a fellow developer helping you every step of the way to write, review, or even refactor your code.
By analyzing your codebase, Cody gets the context it needs to support you with code explanations, writing test cases, or anything else you need help with. In addition, since it’s an AI pair programming buddy, Cody is always available. That means you can deliver your best code on time.
In this article, we’ll explore some of the ways Cody can help you code more efficiently. We will cover:
Depending on your operating system, there are several ways to set up Cody on your machine. Let’s go over them quickly so we can get started on using Cody to solve our coding problems faster.
The Replay is a weekly newsletter for dev and engineering leaders.
Delivered once a week, it's your curated guide to the most important conversations around frontend dev, emerging AI tools, and the state of modern software.
The Cody desktop app and IDE extension work together to let you get the context of all your local repositories. Without the app, Cody only gets context for the repository you currently have open in your IDE.
In some cases, where related projects are hosted in different repositories, you might need Cody to have basic knowledge of all those projects. It can then use this information to improve the solutions and suggestions it provides.
Navigate to the Cody download page and download the version that corresponds to your OS:
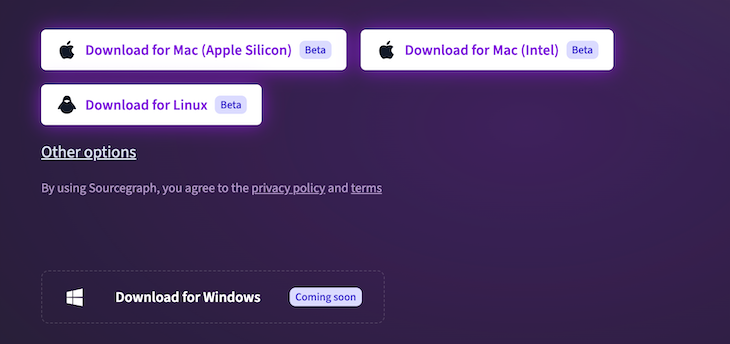
As of the time of this writing, Cody Desktop is only available to MacOS and Linux users. The version for Windows OS was marked as coming soon at the time of this writing.
Next, when Cody is done installing, launch the app. You’ll see a popup asking you to authenticate with Sourcegraph, Cody’s parent company:
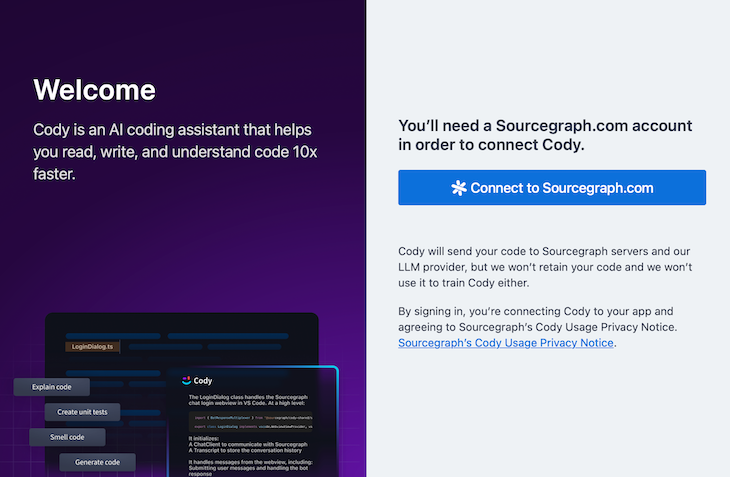
Connecting Cody to Sourcegraph means that you’ll give Sourcegraph access to your code and permission to send it to a large language model. Although they claim they won’t keep your code or use it to train Cody, you should definitely check their privacy policy to see how your data will be used.
Once you are done connecting your account, we can go ahead and include our repository in the code graph. This will allow Cody to learn more about your project and produce more contextually accurate answers. Here is an example of how I’ve added two repositories to Cody:
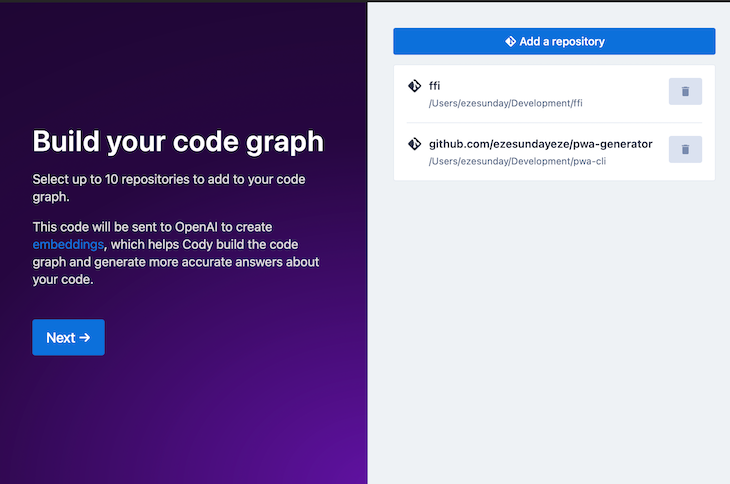
Once you’ve added all the repositories that will make up your code graph, click on the Next button to integrate Cody into your development environment.
At the moment, Cody only supports VS Code and IntelliJ Idea, with upcoming support planned for NeoVim:
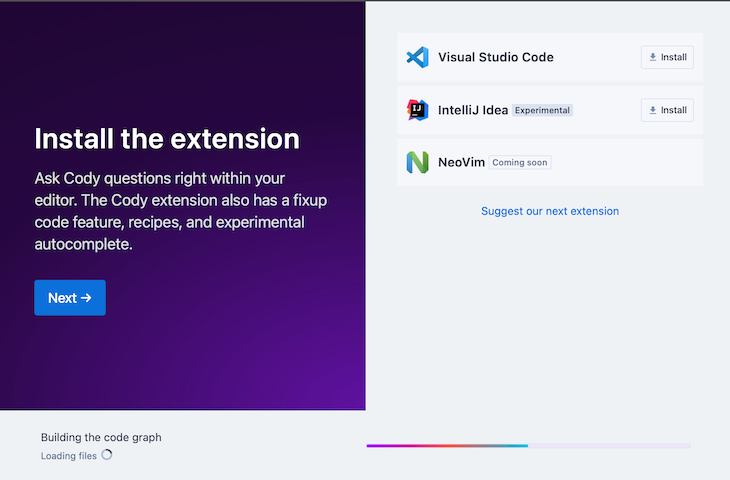
Other code editors are not yet supported at the moment. Cody is now open source, so hopefully, with increased community support, more editors will be supported soon.
Now, go ahead and install the extension in your preferred code editor. In the example below and throughout this tutorial, we’ll use VS Code:
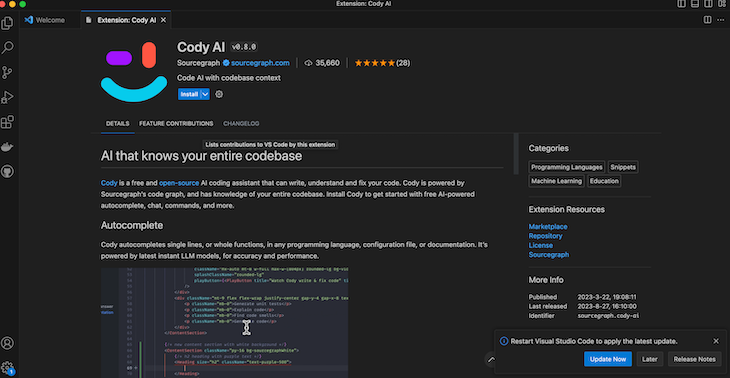
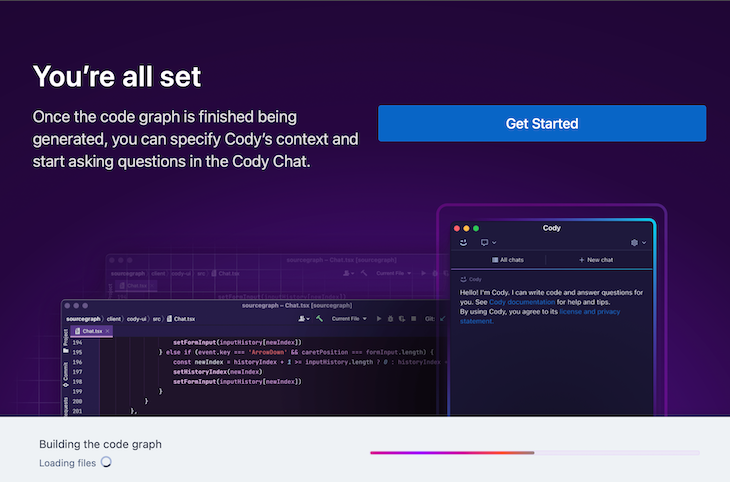
When your installation is complete, go ahead and click on Next to complete the installation process. You can start using Cody even while the code graph is still building:
If you want to remove your installation of Cody for any reason, it’s pretty simple. Just run the command below:
rm -rf ~/.sourcegraph-psql ~/Library/Application\ Support/com.sourcegraph.cody ~/Library/Caches/com.sourcegraph.cody ~/Library/WebKit/com.sourcegraph.cody
The code above will remove everything related to Cody from your system. You can also just uninstall the VS Code plugin easily from the VS Code app.
Now that we have Cody fully integrated into our workflow, let’s start using it.
There is a growing list of ways that Cody enables you to optimize your code. Let’s take a look at each of them.
There are usually many parts to a codebase that all connect together. You can’t write efficient code if you don’t understand the complete codebase, especially if you are new to the organization or project.
However, Cody has the necessary context for all the connecting parts, since you gave it access to work with your codebase when you added the repository to your code graph.
To use Cody to better understand your codebase, you simply need to highlight the selection of code you want to optimize and right-click. This will open a pop-up with Cody as a menu item and several sub-options related to Cody’s functionalities:
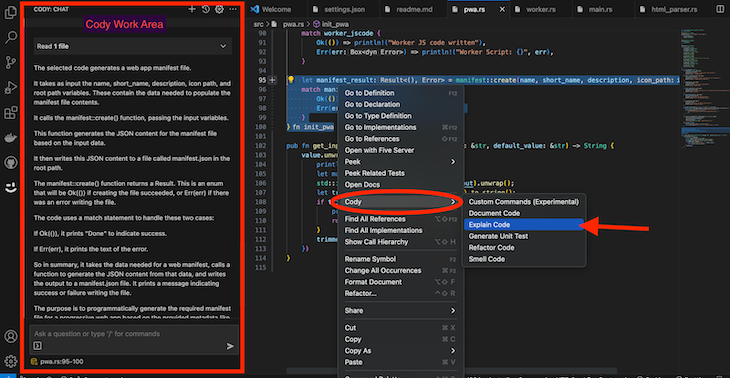
Clicking on the option you want — in this case, Explain Code — will open a work area on the left side with the result. You can also add more prompts in the chatbox open at the bottom left.
If you are like me, when you take a look at the code you wrote a few months ago, you may often wonder if you actually did write it 🙂 This is because as developers, we are continually learning. What used to seem like great code to you might no longer be your best work over time.
As a result, refactoring is something we do very often as developers. You definitely want to make the code better whenever you can. In fact, this is just one scenario — there are other reasons to want to refactor your code, like performance improvement or even readability.
Cody can help you refactor your code even faster so you can save time and start with code that has been refactored by an LLM. Essentially, you can use Cody to refactor code, after which you just need to review the code for correctness, readability, and anything else, then adjust it as you see fit.
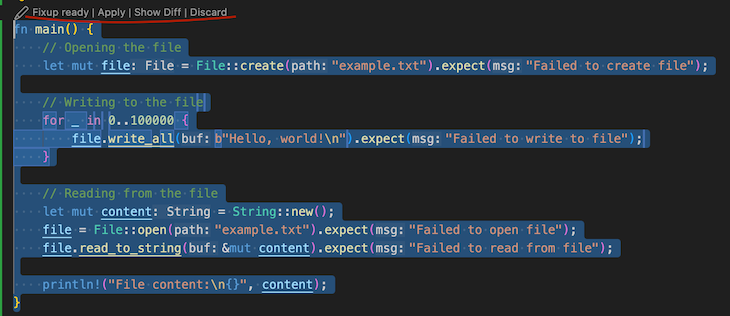
As before, highlight the code block you want to optimize. This time, we’ll select the Refactor Code option. The input box will pop up at the top for you to enter your refactoring instructions:
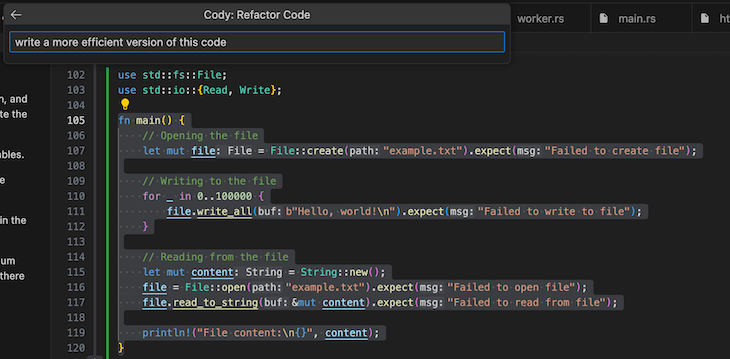
This is where you can go into detail to explain everything you’d really like your refactored code to look like. In the example above, I kept it simple and just asked it to make the code more efficient.
Once Cody is done processing your request, you’ll be able to review the difference by clicking on the Show Diff option. You can then apply the changes or discard them if it doesn’t make sense to you:
You can use the same refactoring technique to capture code smells. Simply provide an additional prompt asking Cody to catch code smells. However, Cody also provides a specific Smell Code option. Let’s see how to use it now.
Code smells are signs in a software’s source code that indicate the presence of deeper problems or design issues. Just like a bad odor can indicate that something is wrong with food, code smells suggest that there might be problems with the code’s structure, design, or maintainability.
While code smells don’t necessarily indicate bugs or errors, they often point to areas that could potentially cause problems in the future, often as a result of not following coding standards. Recognizing and addressing code smells can lead to cleaner, more maintainable, and easier-to-understand code.
While you can fix code smells by adopting a coding standard and committing to it, you might not always know that the code you have written smells. Cody can also help you detect and fix code smells even faster or catch code smells you may not notice otherwise.
You can ask Cody to detect code smells via the Smell Code option. It will explain the areas of your code that need improvement and suggest some ideas for improvement in the left pane of your VS Code window:
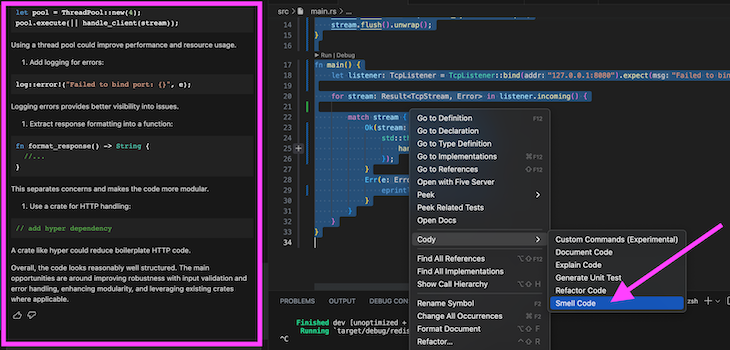
As you can see, all the available features of Cody are straightforward and easy to implement. In each case, you simply right-click and choose the option that best describes your needs. Let’s explore the rest of the available features a little more now.
If you are looking to build maintainable software, writing documentation isn’t optional. However, it can be tedious, especially if you write the code before writing the documentation.
When your code works, you may be reluctant to document it and want to move on to other work instead. You could make an argument for using descriptive variable names, but that doesn’t take away the value of documenting your code for your future self or another developer who might work on that codebase.
Cody makes it a lot easier to document your code. You can easily document your code by highlighting the code, right-clicking, and selecting Document Code as shown in the screenshot below:
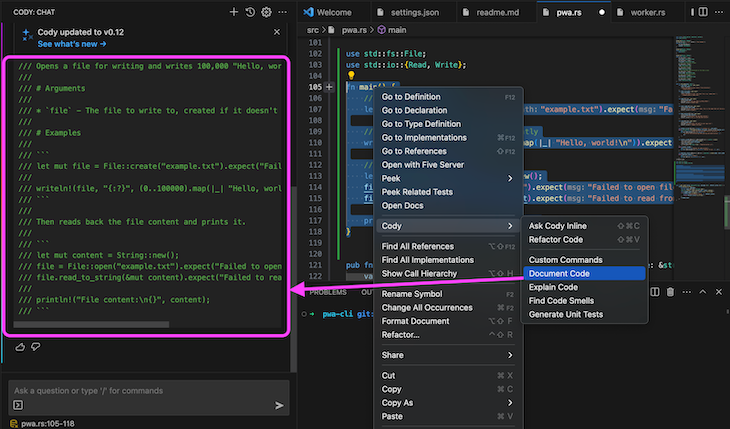
The documentation will be generated by the left side of your VS Code window. You can then copy it into your code or use the insert at Cursor feature to insert the generated documentation into your code as shown in the screenshot below:

Writing unit tests is another crucial aspect of software development that sometimes gets overlooked because it’s tedious.
However, thanks to Cody AI, you can easily generate unit tests for your code and review it for correctness and of course, improve it if needed. This could boost your productivity and allow you to cover more tests and even edge cases.
After generating the initial test, you can further prompt Cody to make the tests more all-encompassing of potential scenarios. Here is an example of how you can use Cody to generate unit tests in the screenshot below:
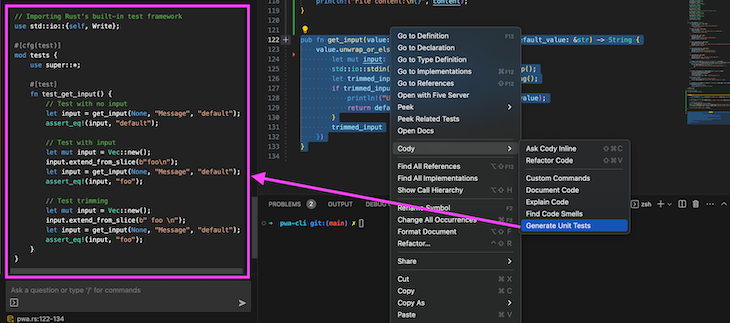
You can then run the tests you generated with Cody to check and enhance your code.
Cody uses commands to understand what to do. The commands we’ve discussed so far are simple ones that tell Cody what parts of your code to analyze and how. However, Cody also gives you the ability to create your own commands.
You can create a custom command by right-clicking inside VS Code, selecting Cody, and clicking on the Custom Command option. This will open up an input box to enter the command name and the instructions as shown below:
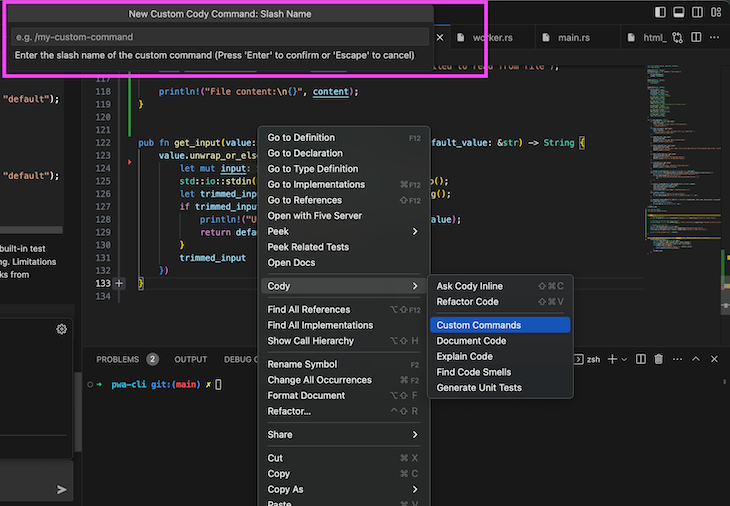
You can use this command while interacting with Cody in the interactive chat section.
Similar tools to Cody include ChatGPT, GitHub Copilot, and Replit’s Ghostwriter:
There are many other AI tools that can help boost your productivity as a developer with different functionalities. As the world of AI continues to evolve, it’s a good idea to stay on top of the options available to help you become a better and more efficient developer.
Will Cody replace your analytical thinking? No, and it shouldn’t. The best way to use Cody is as an assistant for writing more efficient and maintainable code.
There is just a lot you can do with Cody. You should explore all the possibilities by trying out different things. I like how Cody is specifically good at solving common developer problems like code smells, refactoring, documentation, code generation, and a lot more.
Happy hacking.
Install LogRocket via npm or script tag. LogRocket.init() must be called client-side, not
server-side
$ npm i --save logrocket

// Code:

import LogRocket from 'logrocket';
LogRocket.init('app/id');
// Add to your HTML:

<script src="https://cdn.lr-ingest.com/LogRocket.min.js"></script>
<script>window.LogRocket && window.LogRocket.init('app/id');</script>

React Server Components and the Next.js App Router enable streaming and smaller client bundles, but only when used correctly. This article explores six common mistakes that block streaming, bloat hydration, and create stale UI in production.

Gil Fink (SparXis CEO) joins PodRocket to break down today’s most common web rendering patterns: SSR, CSR, static rednering, and islands/resumability.

@container scroll-state: Replace JS scroll listeners nowCSS @container scroll-state lets you build sticky headers, snapping carousels, and scroll indicators without JavaScript. Here’s how to replace scroll listeners with clean, declarative state queries.

Explore 10 Web APIs that replace common JavaScript libraries and reduce npm dependencies, bundle size, and performance overhead.
Hey there, want to help make our blog better?
Join LogRocket’s Content Advisory Board. You’ll help inform the type of content we create and get access to exclusive meetups, social accreditation, and swag.
Sign up now