In this tutorial, we’ll introduce Crank.js by understanding what it is and why it was created. We’ll then put that knowledge to use by building a blogging application, which will use the JSONPlaceholder API.

Crank.js is a new framework for creating JSX-driven components with functions, promises, and generators. It’s heavily inspired by the React library.
While Vue and Svelte provided a solution for the problems that developers faced with React, they mainly used HTML template languages as the main way to use them. While there are other frameworks that use JSX (like Preact), they also followed React to convert from “a view layer” into “a UI runtime.”
Crank.js is a framework that validates the idea that “JSX-based components could be written not just with sync functions, but also with async functions, and with sync and async generator functions.” More about why Crank was created can be found here.
The code for the application built as a part of this tutorial is available on GitHub and is hosted on Vercel.
Let’s create the directory in which our application will reside:
mkdir introduction-to-crank.js && cd introduction-to-crank.js
Then initialize our application with npm:
npm init -y
This will create a package.json file with the following content:
Add Crank.js as a dependency in our project:
yarn add @bikeshaving/crank
And add Parcel as our bundler:
yarn add parcel-bundler --dev
The above command will add parcel as a dev dependency.
Now let’s create an i``ndex.html file with the following content:
// index.html

<!DOCTYPE html>
<html>
  <head>
    <title>Introduction to Crank.js</title>
    <meta charset="UTF-8" />
  </head>
  <body>
    <script src="src/index.js"></script>
  </body>
</html>
Next, we’ll create an index.js file inside a new src directory with the following content:
// src/index.js

import { renderer } from "@bikeshaving/crank/dom";

renderer.render(<div id="hello">Hello world</div>, document.body);
And add the following two scripts in our package.json file:
// package.json

..
"scripts": {
  "dev": "parcel index.html",
  "build": "parcel build index.html",
  ..
},
..
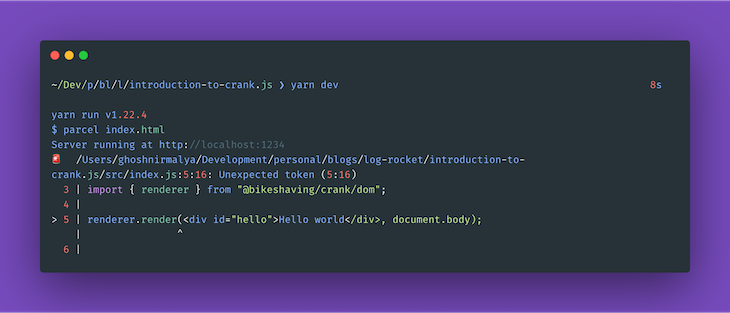
Now, if we run yarn dev, we’ll get the following output:
Let’s fix that in the next steps. Add babel-preset-crank to our list of dev dependencies:
yarn add babel-preset-crank --dev
And, finally, create a .babelrc file with the following content:
// .babelrc

{
  "presets": [
    "crank"
  ]
}
Now, if we start our development server, we’ll be able to view our app on http://localhost:1234/:
yarn dev
We should be able to view the following screen:

To add some styles to our application, we’ll be using TailwindCSS. We can add Tailwind CSS to our application by adding the following line to our index.html file:
// index.html

<link href="https://unpkg.com/tailwindcss@^1.0/dist/tailwind.min.css" rel="stylesheet">
Please note that this isn’t the recommended way to add Tailwind CSS to a project. However, in the interest of keeping our tutorial short, we’re adding the CDN version of it. More information on how to properly install Tailwind CSS can be found in its docs.
Now we can use Tailwind in out project. To verify that, we can create a Navbar component inside src/components/navbar directory, which should contain the following:
// src/components/navbar/index.js

import { createElement } from "@bikeshaving/crank";

const Navbar = () => {
  return (
    <div className="bg-gray-100">
      <div className="max-w-2xl mx-auto p-8 flex justify-between">
        <div>
          <ul class="flex">
            <li class="mr-6">
              <a class="text-blue-500 hover:text-blue-800" href="#">
                Home
              </a>
            </li>
          </ul>
        </div>
        <div>
          <ul class="flex">
            <li class="mr-6">
              <a class="text-blue-500 hover:text-blue-800" href="#">
                About
              </a>
            </li>
            <li class="mr-6">
              <a class="text-blue-500 hover:text-blue-800" href="#">
                Contact
              </a>
            </li>
          </ul>
        </div>
      </div>
    </div>
  );
};

export default Navbar;
We can now import that component in our src/index.js file and use it:
// src/index.js

import { createElement } from "@bikeshaving/crank";
import { renderer } from "@bikeshaving/crank/dom";
import Navbar from "./components/navbar";

const App = () => {
  return (
    <div>
      <section>
        <Navbar />
      </section>
    </div>
  );
};

renderer.render(<App />, document.body);
Now, if we visit http://localhost:1234/, we should see the following screen:
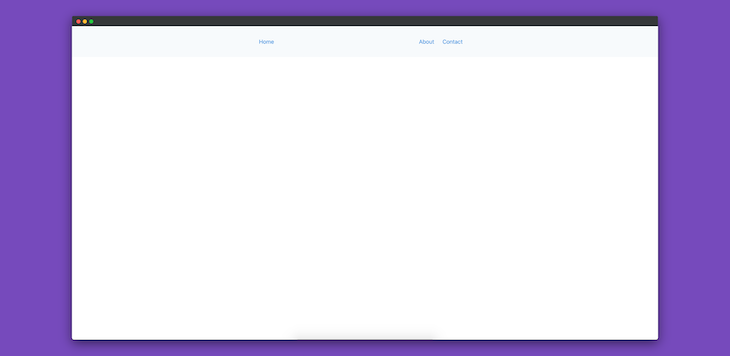
So, using Tailwind CSS, we’ve created our first Crank.js component.
JSONPlaceholder is a free service that provides a fake online REST API for testing and prototyping. Using this service, we’ll be fetching a list of blog posts.
We’ll be showing posts in a separate component called Posts:
// src/components/posts/index.js

import { createElement } from "@bikeshaving/crank";

const Posts = async () => {
  const response = await fetch("https://jsonplaceholder.typicode.com/posts");
  const data = await response.json();

  return (
    <div className="bg-gray-100">
      <div className="max-w-2xl mx-auto p-8 flex justify-between">
        <div>
          <ul class="flex">
            <li class="mr-6">
              <a class="text-blue-500 hover:text-blue-800" href="#">
                Home
              </a>
            </li>
          </ul>
        </div>
        <div></div>
      </div>
    </div>
  );
};

export default Posts;
Let’s also import and add that component to our src/index.js file:
// src/index.js

const App = () => {
  return (
    <div>
      ..
      <section>
        <Posts />
      </section>
    </div>
  );
};
Now, if we visit http://localhost:1234/, we’ll see an error on our browser’s console:
index.js:3 Uncaught ReferenceError: regeneratorRuntime is not defined
More information regarding this issue can be found in this GitHub issue, but we can solve it by adding the regenerator-runtime package:
yarn add regenerator-runtime
Now we need to import that package in our src/index.js file:
// src/index.js

import "regenerator-runtime/runtime";
..
Now, if we visit http://localhost:1234/ again, we won’t see that issue any more.
Let’s show all the posts below the Navbar component. To do so, we need to update our Posts component with the following:
// src/components/posts/index.js

import { createElement } from "@bikeshaving/crank";

const Posts = async () => {
  const response = await fetch("https://jsonplaceholder.typicode.com/posts");
  const data = await response.json();

  return (
    <div className="bg-gray-100">
      <div className="max-w-2xl mx-auto p-8">
        {data.map((post) => {
          return (
            <div className="mb-16">
              <h2 className="font-bold text-xl mb-2">{post.title}</h2>
              <p className="font-light">{post.body}</p>
            </div>
          );
        })}
      </div>
    </div>
  );
};

export default Posts;
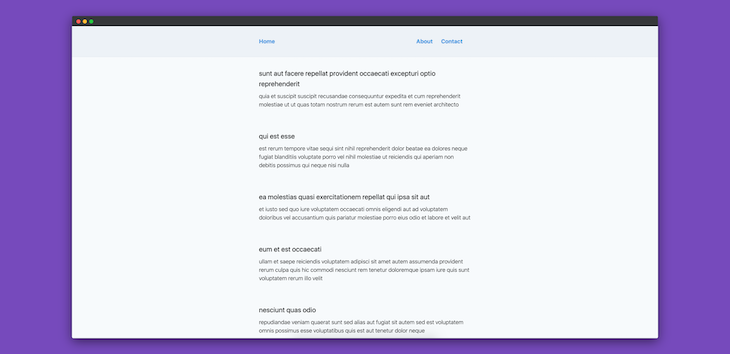
Now, if we visit http://localhost:1234/, we should be able to view all the posts.
Up until now, we’re showing all the posts once all the API requests are complete. However, there could be an API request that might take some time to complete. As a result, we need to show a loader while the API request is pending. Let’s implement that next.
To do so, we’ll need to modify our src/components/posts/index.js file:
// src/components/posts/index.js

import { createElement, Fragment } from "@bikeshaving/crank";
import Spinner from "../spinner";
import Button from "../button";

const BlogPosts = async ({ postCount }) => {
  const res = await fetch(
    `https://jsonplaceholder.typicode.com/posts/${postCount}`
  );
  const post = await res.json();

  return (
    <Fragment>
      <h2 className="font-bold text-xl mb-2">{post.title}</h2>
      <p className="font-light">{post.body}</p>
    </Fragment>
  );
};

async function* PostsLoader({ isLoading, postCount }) {
  for await ({ isLoading, postCount } of this) {
    yield <Spinner />;
    yield <BlogPosts postCount={postCount} />;
  }
}

function* Posts() {
  let isLoading = false;
  let postCount = 1;

  this.addEventListener("click", (e) => {
    if (e.target.tagName === "BUTTON") {
      isLoading = !isLoading;
      postCount++;
      this.refresh();
    }
  });

  while (true) {
    yield (
      <div className="bg-white">
        <div className="max-w-2xl mx-auto p-8">
          <div className="mb-8">
            <PostsLoader isLoading={isLoading} postCount={postCount} />
          </div>
          <Fragment>
            <Button text={`Fetch post #${postCount + 1}`} />
          </Fragment>
        </div>
      </div>
    );
  }
}

export default Posts;
In the above code snippet, we’re fetching the first post by default and then incrementing the value of postCount by one. That count is incremented every time we click on the button. The API request to JSONPlaceholder is made, and it depends on the value of the postCount variable.
Crank.js uses generator components for fetching async components. More information regarding that can be found in its docs.
If we visit http://localhost:1234/ now, we should be able to see the following screen:
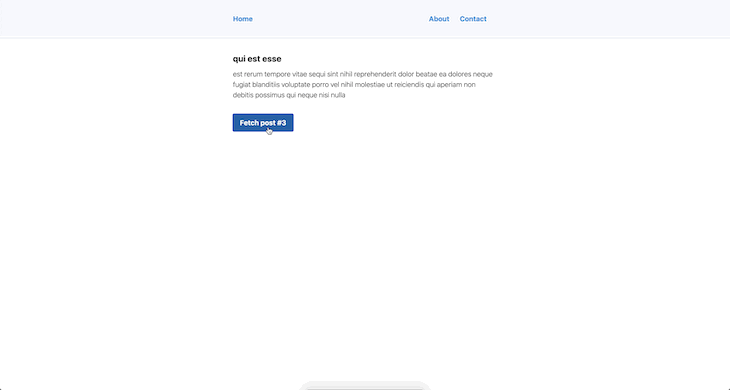
We can now see that a loader is shown every time we fetch a new post.
In this tutorial, we’ve learned what Crank is and how we can build an application using it. The source code for the application built as a part of this tutorial is available on Github and is hosted on Vercel.
Personally, I feel that, while pretty new, it has some powerful features. Like the author of Crank, I also prefer the JSX syntax instead of HTML templates. However, I think Crank has a lot of potential if used in the proper use cases.
There’s no doubt that frontends are getting more complex. As you add new JavaScript libraries and other dependencies to your app, you’ll need more visibility to ensure your users don’t run into unknown issues.
LogRocket is a frontend application monitoring solution that lets you replay JavaScript errors as if they happened in your own browser so you can react to bugs more effectively.

LogRocket works perfectly with any app, regardless of framework, and has plugins to log additional context from Redux, Vuex, and @ngrx/store. Instead of guessing why problems happen, you can aggregate and report on what state your application was in when an issue occurred. LogRocket also monitors your app’s performance, reporting metrics like client CPU load, client memory usage, and more.
Build confidently — start monitoring for free.

Explore 15 essential MCP servers for web developers to enhance AI workflows with tools, data, and automation.

Learn how contrast-color() automatically picks accessible text colors using native CSS, without JavaScript.

Learn how to build a harness-style AI workflow using Claude Code with specialized Dev, QE, and Ops subagents, gated handoffs, MCP telemetry, and LEARNING.md.

Learn how to build smooth staggered animations in CSS using modern features like sibling-index(), complete with practical examples, fallbacks, and accessibility tips.
Would you be interested in joining LogRocket's developer community?
Join LogRocket’s Content Advisory Board. You’ll help inform the type of content we create and get access to exclusive meetups, social accreditation, and swag.
Sign up now
