The Replay is a weekly newsletter for dev and engineering leaders.
Delivered once a week, it's your curated guide to the most important conversations around frontend dev, emerging AI tools, and the state of modern software.
MobX is an open source state management tool. When creating a web application, developers often seek an effective way of managing state within their applications. One solution is to use a unidirectional data flow pattern named Flux, introduced by the React team, and later implemented in a package called React-Redux, which made the use of the Flux pattern even easier.

MobX, a simple, scalable, and standalone state management library, follows functional reactive programming (FRP) implementation and prevents inconsistent state by ensuring that all derivations are performed automatically. According to the MobX getting started page, “MobX makes state management simple again by addressing the root issue: it makes it impossible to produce an inconsistent state.”
MobX is standalone and does not depend on any frontend library or framework to work. There are implementations of the MobX in popular front-end frameworks like React, Vue, and Angular.
In this tutorial, we will discuss how to use MobX with React, but first, we will begin by getting to understand MobX a little better.
In addition to being a library, MobX also introduces a few concepts: state, actions, and derivations (including reactions and computed values).
Application state refers to the entire model of an application, and can contain different data types including array, numbers, and objects. In MobX, actions are methods that manipulate and update the state. These methods can be bound to a JavaScript event handler to ensure a UI event triggers them.
Anything (not just a value) that is derived from the application state without further interaction is referred to as a derivation. Derivations will listen to any particular state and then perform some computation to produce a distinct value from that state. A derivation can return any data type, including objects. In MobX, the two types of derivations are reactions and computed values.
Sometimes, when a state changes, there may be automatic side effects needed to update the state. MobX refers to this as a reaction, and differentiates reactions from event handlers in the DOM. Reactions can make a remote network request, call the local storage, or even append a new DOM element on the fly.
Unlike reactions, which do not necessarily return a value, computed value derivations always return a value derived from the current state.
To demonstrate how MobX works, we will create an example implementing a pet owner store. To begin, we will create a basic representation of the store using a class that includes pets and owners as instance properties and initialized to an empty array.
class PetOwnerStore {
  pets = [];
  owners = [];
}
Ideally, we want our store to be able to create a new pet and new owner. For this, we will introduce two methods to the store: createPet, which accepts a pet object and pushes it into the pet array of the current instance, and createOwner, which takes an owner object and pushes it to the end of the owner array of the current instance:
class PetOwnerStore {
  pets = [];
  owners = [];

  createPet(pet = { id: 0, name: "", type: "", breed: "", owner: null }) {
    this.pets.push(pet);
  }

  createOwner(owner = { id: 0, firstName: "", lastName: "" }) {
    this.owners.push(owner);
  }
}
We also want to be able to automatically update store items. To do this, we will introduce two more methods: updateOwner to update an owner using an id, and updatePet to update a pet using an id.
class PetOwnerStore {
  pets = [];
  owners = [];

    // ...create pet

    // ...create owner

    // update owner
  updateOwner(ownerId, update) {
    const ownerIndexAtId = this.owners.findIndex((owner) => owner.id === ownerId);
    if (ownerIndexAtId > -1 && update) {
      this.owners[ownerIndexAtId] = update;
    }
  }

    // update pet
  updatePet(petId, update) {
    const petIndexAtId = this.pets.findIndex((pet) => pet.id === petId);
    if (petIndexAtId > -1 && update) {
      this.pets[petIndexAtId] = update;
    }
  }
}
Similarly, we want to be able to remove owners or pets from our store:
class PetOwnerStore {
  pets = [];
  owners = [];

  // ...create pet

    // ...create owner

  // ...update pet

    // ...update owner

  // delete pet by user id
  deletePet(petId) {
    const petIndexAtId = this.pets.findIndex((pet) => pet.id === petId);
    if (petIndexAtId > -1) {
      this.pets.splice(petIndexAtId, 1)
    }
  }

    // delete owner by owner id
  deleteOwner(ownerId) {
    const ownerIndexAtId = this.owners.findIndex((owner) => owner.id === ownerId);
    if (ownerIndexAtId > -1) {
      this.owners.splice(ownerIndexAtId, 1)
    }
  }
}
getWe will also need to grant access to get totalOwners ,totalPets, and getPetsByOwner:
class PetOwnerStore {

  pets = [];
  owners = [];

    // total number owners
  get totalOwners() {
    return this.owners.length;
  }

    // total number of pets
  get totalPets() {
    return this.pets.length;
  }

    // Get pets using ownerId
  getPetsByOwner(ownerId) {
    return this.pets.filter((pet) => {
      return pet.owner && pet.owner.id === ownerId;
    });
  }

    // ...create pet

    // ...create owner

  // ...update pet

    // ...update owner

  // ...delete pet by user id

    // ...delete owner by owner id
}
idFinally, we want to assign an owner to a pet using ownerId and petId, and keep some details about our store updated using ${this.totalPets()} total pets and ${this.totalOwners()}as a string:
class PetOwnerStore {

  pets = [];
  owners = [];

  // ... total number owners

  // ... total number of pets

  // ... Get pets using ownerId

    // ...create pet

    // ...create owner

  // ...update pet

    // ...update owner

  // ...delete pet by user id

    // ...delete owner by owner id

  // assign an owner using ownerId to a pet using petId
  assignOwnerToPet(ownerId, petId) {
    const petIndexAtId = this.pets.findIndex((pet) => pet.id === petId);
    const ownerIndexAtId = this.owners.findIndex((pet) => pet.id === ownerId);
    if (petIndexAtId > -1 && ownerIndexAtId > -1) {
      this.pets[petIndexAtId].owner = this.owners[petIndexAtId];
    }
  }

    // get store details
    get storeDetails () {
    return `We have ${this.totalPets()} total pets and ${this.totalOwners()} total owners, so far!!!`
  }

    // Log the store details to the console
  logStoreDetails() {
    console.log(this.storeDetails);
  }
}
When completed, the final implementation of the store should look like this:
class PetOwnerStore {

  pets = [];
  owners = [];

    // total number owners
  get totalOwners() {
    return this.owners.length;
  }

    // total number of pets
  get totalPets() {
    return this.pets.length;
  }

    // Get pets using ownerId
  getPetsByOwner(ownerId) {
    return this.pets.filter((pet) => {
      return pet.owner && pet.owner.id === ownerId;
    });
  }

  createPet(pet = { id: 0, name: "", type: "", breed: "", owner: null }) {
    this.pets.push(pet);
  }

  createOwner(owner = { id: 0, firstName: "", lastName: "" }) {
    this.owners.push(owner);
  }

  updateOwner(ownerId, update) {
    const ownerIndexAtId = this.owners.findIndex((pet) => owner.id === ownerId);
    if (ownerIndexAtId > -1 && update) {
      this.owners[ownerIndexAtId] = update;
    }
  }

  updatePet(petId, update) {
    const petIndexAtId = this.pets.findIndex((pet) => pet.id === petId);
    if (petIndexAtId > -1 && update) {
      this.pets[petIndexAtId] = update;
    }
  }

  deletePet(petId) {
    const petIndexAtId = this.pets.findIndex((pet) => pet.id === petId);
    if (petIndexAtId > -1) {
      this.pets.splice(petIndexAtId, 1)
    }
  }

  deleteOwner(ownerId) {
    const ownerIndexAtId = this.owners.findIndex((owner) => owner.id === ownerId);
    if (ownerIndexAtId > -1) {
      this.owners.splice(ownerIndexAtId, 1)
    }
  }

  // assign an owner using ownerId to a pet using petId
  assignOwnerToPet(ownerId, petId) {
    const petIndexAtId = this.pets.findIndex((pet) => pet.id === petId);
    const ownerIndexAtId = this.owners.findIndex((pet) => pet.id === ownerId);
    if (petIndexAtId > -1 && ownerIndexAtId > -1) {
      this.pets[petIndexAtId].owner = this.owners[petIndexAtId];
    }
  }

    get storeDetails () {
    return `We have ${this.totalPets()} total pets and ${this.totalOwners()} total owners, so far!!!`
  }

  logStoreDetails() {
    console.log(this.storeDetails);
  }
}
To see the store in action, we will initialize it just as we would initialize regular JavaScript classes. After the initialization, we can interface with the store using the methods indicated.
For our example, we will add new pets and owners to the store and log the details we have so far:
const petOwnerStore = new PetOwnerStore();

  petOwnerStore.createPet({
    id: 1,
    name: "Bingo",
    type: "Dog",
    breed: "alsertian",
  });
  petOwnerStore.createPet({
    id: 2,
    name: "Lloyd",
    type: "Cat",
    breed: "winky",
  });
  petOwnerStore.createOwner({ id: 1, firstName: "Aleem", lastName: "Isiaka" });

  petOwnerStore.logStoreDetails(); // -> We have 2 pets and 1 owners, so far!!!
As discussed earlier, the MobX store should be reactive, and therefore respond to changes. We can test this by implementing the makeObservable function provided by the MobX library:
import { makeObservable } from "mobx";
The makeObservable function turns a class into an observable state, which refreshes and updates itself whenever parts of its fields change. The makeObservable export from MobX library accepts two parameters: a reference to a class instance, and an object configuration of the class instance methods and fields.
To assist in making a store observable, here are some MobX config options:
observable, with different ways of creating an observable based on the type of the value.action to be imported as a named export from the MobX library, using import {action} from "mobx". MobX also ships with other action types.computed .autorun. View other options for reactions here.To make our PetOwnerStore class observable, we will begin by introducing a constructor to our store that will hold the configuration that makes the store reactive:
class PetOwnerStore {
  pets = [];
  owners = [];

  constructor () {
    makeObservable(this, {
      pets: observable,
      owners: observable,
      totalOwners: computed,
      totalPets: computed,
      storeDetails: computed,
      getPetsByOwner: action,
      createPet: action,
      createOwner: action,
      updatePet: action,
      updateOwner: action,
      deletePet: action,
      deleteOwner: action,
      assignOwnerToPet: action
    });
    autorun(logStoreDetails);
  }

    // ... remaining store implementation
}
As you will notice, we have marked pets and owners as observable to keep our store interface updated as values are changed.
We have also marked totalOwners, totalPets, and storeDetails as computed to allow for caching when these values are updated and returned. Additionally, we have marked createPet, createOwner, updatePet, updateOwner, deletePet, deleteOwner and assignownerToPet as action to account for state modifications.
Note, logStoreDetails will be run as a reaction since it logs the store details, but returns no value.
We can apply the reactive store by creating a new instance of the store using the new operator just as we did with the non-reactive store.
const petOwnerStore = new PetOwnerStore();
// -> We have 0 pets and 0 owners, so far!!!
MobX invokes reactions during initialization and whenever there is an update to the store, which means the logStoreDetails reaction function will rub after every initialization.
Now, we can interact with the store by creating new pets and owners. Notice that the reactions are getting logged:
const petOwnerStore = new PetOwnerStore();
// -> We have 0 pets and 0 owners, so far!!!

petOwnerStore.createPet({
  id: 1,
  name: "Bingo",
  type: "Dog",
  breed: "alsertian",
});
// -> We have 1 pets and 0 owners, so far!!!

petOwnerStore.createPet({
  id: 2,
  name: "Lloyd",
  type: "Cat",
  breed: "winky",
});
// -> We have 2 pets and 0 owners, so far!!!
petOwnerStore.createOwner({ id: 1, firstName: "Aleem", lastName: "Isiaka" });
// -> We have 2 pets and 1 owners, so far!!!
Now it’s time to add some frontend to our store with React!
First, we will use the create-react-app library to create a new React application. From the terminal, we will run:
npx create-react-app mobx-react
The above command will bootstrap the application and install the dependencies. We can use cd mobx-react to go into the folder.
To make it easier to access the PetOwner store, we will create a new file i, PetOwnerStore.js, in the src folder and load it with the content of our PetOwner MobX store. Because we developed the PetOwner MobX separately, we will now make it accessible by copying the PetOwnerStore that we created earlier to the src folder in the frontend project:
# inside of /path/to/mobx-react
cp path/to/PetOwnerStore.js ./src/PetOwnerStore.js
Now, inside of the src folder, we can create a folder for our components, create a PetList component inside the folder, and open the file in your favorite editor.
cd src
mkdir components
touch components/PetList.jsx
First, let’s make the PetList component show the details of the store:
import React from "react";

function PetList({ store }) {
  return <div>{store.storeDetails}</div>;
}

export default PetList;
Inside of App.jsx, we will import the PetList component and pass the store object to it as a prop, after which our App.jsx component will look like this:
import PetOwnerStore from "./PetOwnerStore";
import PetList from "./components/PetList";

function App() {
  const store = new PetOwnerStore();
  return (
    <div className="App">
      <PetList store={store} />
    </div>
  );
}

export default App;
The result is something looking like this:
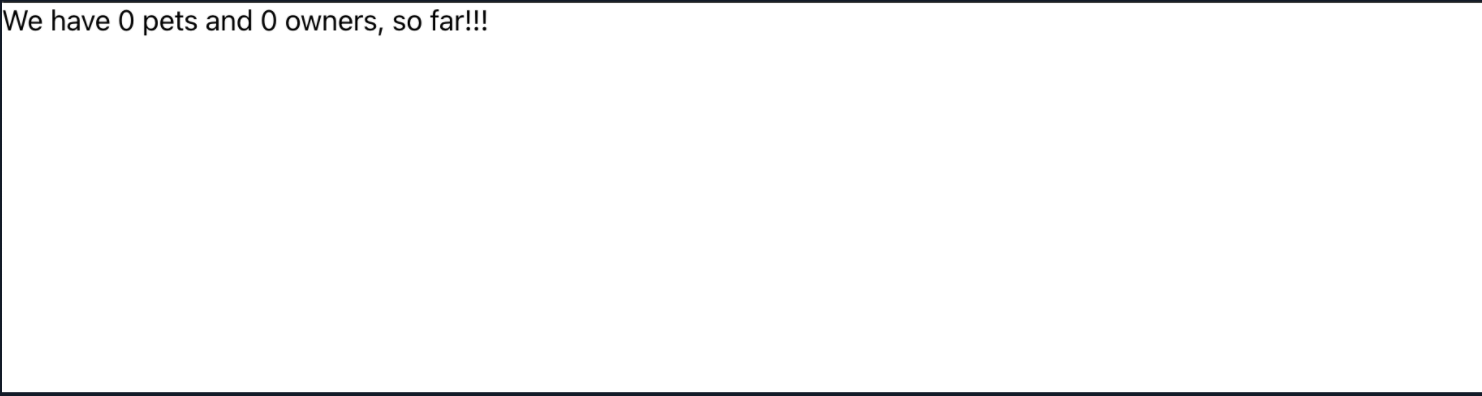
Next, we will modify the PetList.jsx component to add a new pet to our list. For this, we will add a button and and assign it to the onClick event:
function PetList({ store }) {
  const handleAddPet = () => {};

  return (
    <div>
      {store.storeDetails}
      <button onClick={handleAddPet}>+ New pet</button>
    </div>
  );
}
We can now update the handleAddPet function to collect details from the user and call the store’s createPet method to add the pet to the pets array inside the store:
const handleAddPet = () => {
  const name = prompt("Name of the pet");
  const type = prompt("Type of the pet");
  const breed = prompt("Breed of the pet");
  const ownerId = prompt("Owner's Id of the pet");

  const pet = store.createPet({ id: Date.now(), name, breed, type });
  store.assignOwnerToPet(ownerId, pet.id);
};
At this point, you should notice that when we try to run this with our console in view, the store is updated, but the component did not receive the new data. We will address this in the following section.
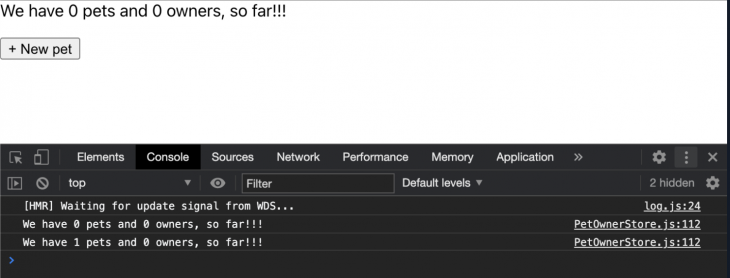
We can solve the above issue by making React components aware of updates in the store to trigger a rerender of components. The PetList component can become observable with the help mobx-react-lite package.
mobx-react-liteTo start, we will install mobx-react-lite using npm/yarn:
npm install mobx-react-lite --save
# or
yarn add mobx-react-lite
Please note, the mobx-state-tree package can also be used to set up MobX in React applications.
observerInside of the PetList component, import observer from mobx-react-lite; then wrap the PetList component with it:
import React from "react";
import { observer } from "mobx-react-lite";

function PetList({ store }) {
  const handleAddPet = () => {
    const name = prompt("Name of the pet");
    const type = prompt("Type of the pet");
    const breed = prompt("Breed of the pet");
    const ownerId = prompt("Owner's Id of the pet");

    const pet = store.createPet({ id: Date.now(), name, breed, type });
    store.assignOwnerToPet(ownerId, pet.id);
  };

  return (
    <div>
      {store.storeDetails}
      <p>
        <button onClick={handleAddPet}>+ New pet</button>
      </p>
    </div>
  );
}

export default observer(PetList);
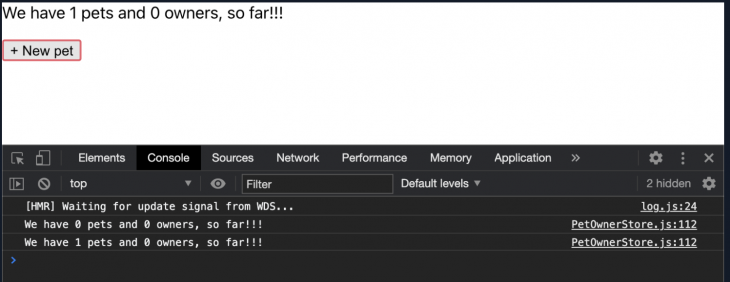
By wrapping the component with an observer, it will now automatically become aware of changes in the store. Now, we can create a new pet and have the component rerendered:
Now that MobX can interact with our application, in the following sections, we will discuss how to list a pet item, update an item, and delete an item.
Using MobX and React, we can create a table to list the items in the pets state and buttons to update and delete pet items from the store:
<p>{store.storeDetails}</p>
<table>
  <thead>
    <tr>
      <th>##</th>
      <th>Pet Name</th>
      <th>Pet Type</th>
      <th>Pet Breed</th>
      <th>Owner</th>
      <th></th>
    </tr>
  </thead>
  <tbody>
    {store.pets.map((pet) => {
      return (
        <tr key={pet.id}>
          <td>{pet.id}</td>
          <td>{pet.name}</td>
          <td>{pet.type}</td>
          <td>{pet.breed}</td>
          <td>
            {pet.owner
              ? `${pet.owner?.firstName} ${pet.owner?.lastName}`
              : "---"}
          </td>
          <td>
            <button
              onClick={() => handleDeletePet(pet)}
              style={{ marginRight: "1rem" }}
            >
              Delete {pet.name}
            </button>
            <button onClick={() => handleUpdatePet(pet)}>
              Update {pet.name}
            </button>
          </td>
        </tr>
      );
    })}
  </tbody>
</table>
<button onClick={handleAddPet}>+ New pet</button>

We can edit items, such as a pet, by implementing the handleUpdate function that we have provided when listing pets.
At the top of the PetList component, we will add the below handleUpdatePet function:
const handleUpdatePet = (pet) => {
  pet.name = prompt("Name of the pet", pet.name);
  pet.type = prompt("Type of the pet", pet.type);
  pet.breed = prompt("Breed of the pet", pet.breed);
  const ownerId = prompt("Owner's Id of the pet", pet.owner?.id);
  store.updatePet(pet.id, pet);
  if (ownerId !== pet.owner?.id) {
    store.assignOwnerToPet(ownerId, pet.id);
  }
};
The function accepts a pet and uses a prompt to get the name, type, breed, and ownerId, before it calls the updatePet function on the store, passing the modified pet object. If we have a new ownerId, we will be assigning the pet to the owner by calling the assignOwnerToPet method on the store instance.
To delete an item, we can implement the handleDelete function on a pet item on the list. The function will accept a pet object and call store.deletePet to complete the process:
const handleDeletePet = (pet) => {
  store.deletePet(pet.id);
};
Below is the full code for the PetList component that makes it possible to create, update, and delete a store item:
import React from "react";
import { observer } from "mobx-react-lite";

function PetList({ store }) {
  const handleAddPet = () => {
    const name = prompt("Name of the pet");
    const type = prompt("Type of the pet");
    const breed = prompt("Breed of the pet");
    const ownerId = prompt("Owner's Id of the pet");

    const pet = store.createPet({ id: Date.now(), name, breed, type });
    store.assignOwnerToPet(ownerId, pet.id);
  };

  const handleUpdatePet = (pet) => {
    pet.name = prompt("Name of the pet", pet.name);
    pet.type = prompt("Type of the pet", pet.type);
    pet.breed = prompt("Breed of the pet", pet.breed);
    const ownerId = prompt("Owner's Id of the pet", pet.owner?.id);
    store.updatePet(pet.id, pet);
    if (ownerId !== pet.owner?.id) {
      store.assignOwnerToPet(ownerId, pet.id);
    }
  };

  const handleDeletePet = (pet) => {
    store.deletePet(pet.id);
  };

  return (
    <div>
      <p>{store.storeDetails}</p>
      <table>
        <thead>
          <tr>
            <th>##</th>
            <th>Pet Name</th>
            <th>Pet Type</th>
            <th>Pet Breed</th>
            <th>Owner</th>
            <th></th>
          </tr>
        </thead>
        <tbody>
          {store.pets.map((pet) => {
            return (
              <tr key={pet.id}>
                <td>{pet.id}</td>
                <td>{pet.name}</td>
                <td>{pet.type}</td>
                <td>{pet.breed}</td>
                <td>
                  {pet.owner
                    ? `${pet.owner?.firstName} ${pet.owner?.lastName}`
                    : "---"}
                </td>
                <td>
                  <button
                    onClick={() => handleDeletePet(pet)}
                    style={{ marginRight: "1rem" }}
                  >
                    Delete {pet.name}
                  </button>
                  <button onClick={() => handleUpdatePet(pet)}>
                    Update {pet.name}
                  </button>
                </td>
              </tr>
            );
          })}
        </tbody>
      </table>
      <button onClick={handleAddPet}>+ New pet</button>
    </div>
  );
}

export default observer(PetList);
For our application to be complete, we need to create, update, and delete owners. To start, we will create a new component, OwnerList, inside of the component folder:
touch ./src/components/OwnerList.jsx
Then, we will import the component inside of App.jsx in the application, passing it to the store as we have done for the PetList component:
import PetOwnerStore from "./PetOwnerStore";
import PetList from "./components/PetList";
import OwnerList from "./components/OwnerList";
import "./App.css";

function App() {
  const store = new PetOwnerStore();
  return (
    <div className="App">
      <h3>Pets List</h3>
      <PetList store={store} />
      <hr />
      <h3>Owners List</h3>
      <OwnerList store={store} />
    </div>
  );
}

export default App;
Next, we will update the OwnerList component with the following code:
import { observer } from "mobx-react-lite";
import React from "react";

function OwnerList({ store }) {
  const handleAddOwner = () => {
    const firstName = prompt("Firstname?");
    const lastName = prompt("Lastname?");
    store.createOwner({ id: Date.now(), firstName, lastName });
  };

  const handleUpdateOwner = (owner) => {
    owner.firstName = prompt("Firstname?", owner.firstName);
    owner.lastName = prompt("Lastname?", owner.lastName);
    store.updateOwner(owner.id, owner);
  };

  const handleDeleteOwner = (owner) => {
    store.deleteOwner(owner.id);
  };

  return (
    <div className="pet-owner-app">
      <table>
        <thead>
          <tr>
            <th>##</th>
            <th>First Name</th>
            <th>last Name</th>
            <th>Owner</th>
            <th></th>
          </tr>
        </thead>
        <tbody>
          {store.owners.map((owner) => {
            return (
              <tr key={owner.id}>
                <td>{owner.id}</td>
                <td>{owner.firstName}</td>
                <td>{owner.lastName}</td>
                <td>
                  <button
                    onClick={() => handleDeleteOwner(owner)}
                    style={{ marginRight: "1rem" }}
                  >
                    Delete {owner.firstName}
                  </button>
                  <button onClick={() => handleUpdateOwner(owner)}>
                    Update {owner.firstName}
                  </button>
                </td>
              </tr>
            );
          })}
        </tbody>
      </table>
      <button onClick={handleAddOwner}>+ New owner</button>
    </div>
  );
}

export default observer(OwnerList);
Note that the OwnerList component functions in the same way as the PetList component; the only difference here is that we are not assigning owners to pets as we have done with the PetList component:
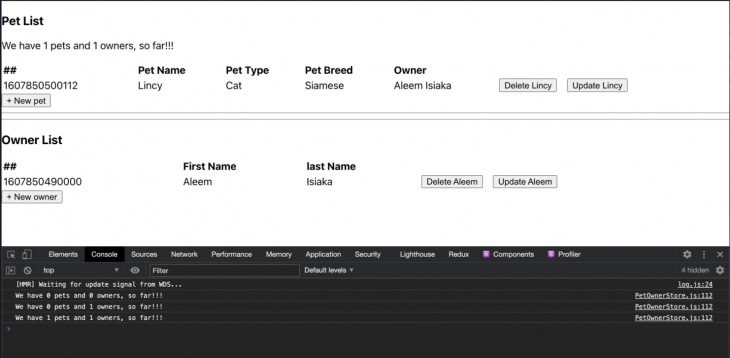
Many times, data needs to be loaded from a remote server. We can simulate this by modifying PetOwnerStore and adding a prefetchData method at the end of the class. We will use a setTimeout to simulate a network request, then call the create methods on the class to add the newly available data into the store:
class PetOwnerStore {
  // Other implemetations

  prefetchData = () => {
    const owners = [{ firstName: "Aleem", lastName: "Isiaka", id: 1 }];
    const pets = [
      {
        id: 1,
        name: "Lincy",
        breed: "Siamese",
        type: "Cat",
        ownerId: 1,
      },
    ];

    setTimeout(() => {
      console.log("Fetch complete update store");
      owners.map((pet) => this.createOwner(pet));
      pets.map((pet) => {
        this.createPet(pet);
        this.assignOwnerToPet(pet.ownerId, pet.id);
        return pet;
      });
    }, 3000);
  };
}
In the constructor, we will register this method as an action for MobX to manage for us. Since we will need to fetch data as soon as we begin loading the app, we will call the method during the store’s initialization. To do this, we will use runInAction as follows:
import {
  action,
  computed,
  makeObservable,
  observable,
  autorun,
  runInAction,
} from "mobx";

class PetOwnerStore {
  pets = [];
  owners = [];

  constructor() {
    makeObservable(this, {
      pets: observable,
      owners: observable,
      totalOwners: computed,
      totalPets: computed,
      storeDetails: computed,
      getPetsByOwner: action,
      createPet: action,
      createOwner: action,
      updatePet: action,
      updateOwner: action,
      deletePet: action,
      deleteOwner: action,
      assignOwnerToPet: action,
    });
    autorun(this.logStoreDetails);
    // A reaction that runs just once!
    runInAction(this.prefetchData);
  }

  logStoreDetails = () => {
    console.log(this.storeDetails);
  };

  prefetchData = () => {
    const owners = [{ firstName: "Aleem", lastName: "Isiaka", id: 1 }];
    const pets = [
      {
        id: 1,
        name: "Lincy",
        breed: "Siamese",
        type: "Cat",
        ownerId: 1,
      },
    ];

    setTimeout(() => {
      console.log("Fetch complete update store");
      owners.map((pet) => this.createOwner(pet));
      pets.map((pet) => {
        this.createPet(pet);
        this.assignOwnerToPet(pet.ownerId, pet.id);
        return pet;
      });
    }, 3000);
  };
}

export default PetOwnerStore;
And that’s it! We have now created a complete PetOwner React/MobX app with CRUD functionalities. For future clarification, I recommend reviewing the final application and code.
In this article, we have explored how to used the reactivity of MobX to manage the state of an application, and specifically how to use MobX to manage the state of a React application.
Please note that for our example, we endeavored to separate the logic of our store from the UI for instructional purposes, which is a personal preference by the author of the article. MobX does not claim a particular structure for any project, and in fact, encourages setup that matches an application’s structure.
Install LogRocket via npm or script tag. LogRocket.init() must be called client-side, not
server-side
$ npm i --save logrocket

// Code:

import LogRocket from 'logrocket';
LogRocket.init('app/id');
// Add to your HTML:

<script src="https://cdn.lr-ingest.com/LogRocket.min.js"></script>
<script>window.LogRocket && window.LogRocket.init('app/id');</script>

When should you move API logic out of Next.js? Learn when Route Handlers stop scaling and how ElysiaJS helps.

Explore how Dokploy streamlines app deployment with Docker, automated builds, and simpler infrastructure compared to traditional CI/CD workflows.

A side-by-side look at Astro and Next.js for content-heavy sites, breaking down performance, JavaScript payload, and when each framework actually makes sense.

AI-generated tests can speed up React testing, but they also create hidden risks. Here’s what broke in a real app.re
Hey there, want to help make our blog better?
Join LogRocket’s Content Advisory Board. You’ll help inform the type of content we create and get access to exclusive meetups, social accreditation, and swag.
Sign up now

