Verifying the identity of your users is paramount for most applications. Spinning up your own authentication system can be simple at first, but when you consider security bridges and ease of integration with third parties such Google or Facebook, you can see how building and maintaining your own authentication system can quickly become tedious and complex.

A good approach would be to use a solution dedicated to handling authentication, such as Okta. Okta gives you access to a dedicated team of security experts so you don’t have to worry about the hassle of tending to your user data.
In this tutorial, we’ll show you how to implement Okta authentication in React. To follow along, you should be familiar with JavaScript and React Hooks.
The Replay is a weekly newsletter for dev and engineering leaders.
Delivered once a week, it's your curated guide to the most important conversations around frontend dev, emerging AI tools, and the state of modern software.
The first requirement is to sign up for the developer edition of Okta. This gives us access to the admin dashboard where we will create the sign-in method and our application type — in our case, a single-page application (SPA).
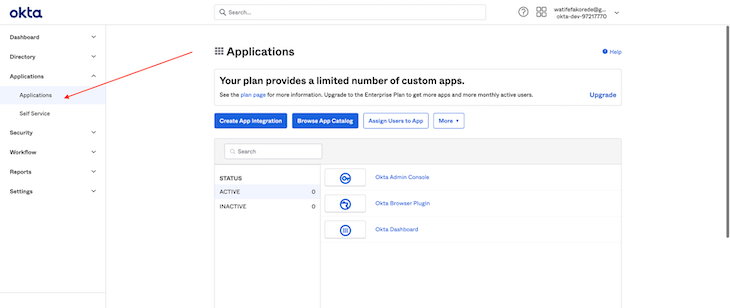
Under the application route, we can generate an app integration (our sign-in method).
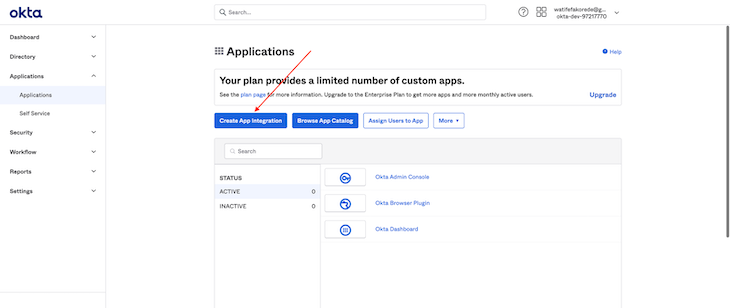
Clicking the Create App Integration button generates a dialog with sign-in methods. Since our application is an SPA and we are not connected to a backend, we’ll use the OpenID Connect sign-in method, which provides a sign-in widget for us (we will also build our own custom login form later on).
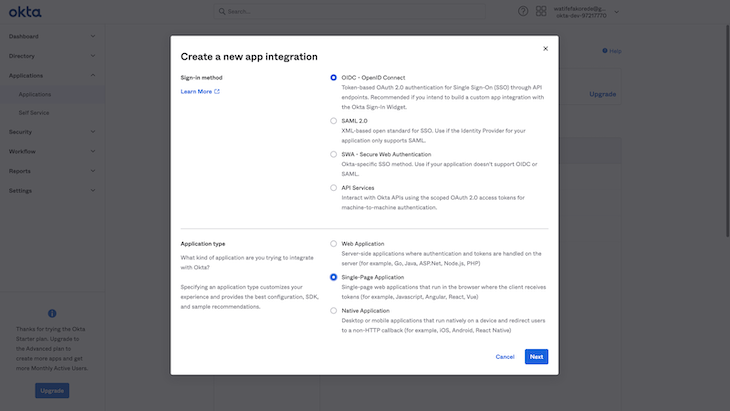
After selecting the application integration, we want to select Single-page Application and proceed.
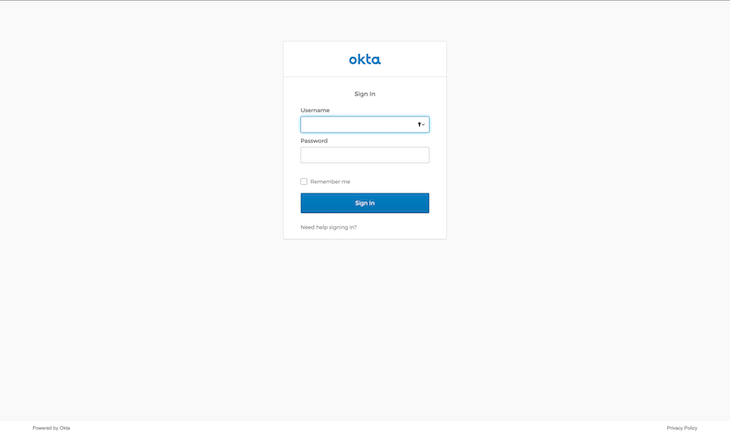
The next step is to specify a sign-in redirect URI (a callback URI). This is very important because when using the OpenID Connect sign-in method, we are redirected to an Okta-hosted sign-in widget (a different endpoint from our application) and need a callback URL where Okta returns back to our application with the user’s details.
You can also specify other routes, such as the sign-out redirect URI, which is the page to whichthe application should be redirected when we log out of the application. For our use case, we can specify the base URL/login route as our logout endpoint, meaning the user is redirected to the landing page or the login page, depending on endpoint we specify. If you don’t specify an endpoint, the user is redirected to the Okta sign-in widget
Base URI is optional. This is useful if you plan to self-host the Okta Sign-in widget, but outside the scope of this tutorial.
Now that we have our application integration with Okta ready, let’s integrate it with our React application.
When handling this integration, pay extra close attention to the client ID and the Okta domain, both of which can be found in the Application tab.
The first step is to install the Okta SDK and the Okta Auth JavaScript SDK:
# yarn
yarn add @okta/okta-auth-js @okta/okta-react

# npm
npm install --save @okta/okta-auth-js @okta/okta-react
Let’s create environmental variables (in he form of a .env file) for our Okta configuration data.
OKTA_DOMAIN=<YOUR_OKTA_DOMAIN>
CLIENT_ID=<YOUR_CLIENT_ID>
CALLBACK_PATH='/login/callback'
ISSUER='https://<YOUR_OKTA_DOMAIN>/oauth2/default'
HOST='window.location.host'
SCOPES='openid profile email'
Now we can configure our application to use Okta.
import React from "react";
import { BrowserRouter as Router, Route, useHistory } from "react-router-dom";
import { Security, SecureRoute } from "@okta/okta-react";
import { OktaAuth, toRelativeUrl } from "@okta/okta-auth-js";
import { LandingPage } from "./LandingPage";
import { Dashboard } from "./Dashboard";
import { Header } from "./Header";
const CLIENT_ID = process.env.CLIENT_ID;
const CALLBACK_PATH = process.env.CALLBACK_PATH;
const ISSUER = process.env.ISSUER;
const HOST = process.env.HOST;
const REDIRECT_URI = `http://${HOST}${CALLBACK_PATH}`;
const SCOPES = process.env.SCOPES;

if (!SCOPES || !CLIENT_ID || !CALLBACK_PATH || !ISSUER || !HOST) {
  throw new Error("All environmental variables must be set");
}

const config = {
  issuer: ISSUER,
  clientId: CLIENT_ID,
  redirectUri: REDIRECT_URI,
  scopes: SCOPES.split(/\s+/),
};

const oktaAuth = new OktaAuth(config);

const App = () => {
  const history = useHistory();
  const restoreOriginalUri = async (_oktaAuth: any, originalUri: any) => {
    history.replace(toRelativeUrl(originalUri || "/", window.location.origin));
  };
  return (
    <Router>
      <Security restoreOriginalUri={restoreOriginalUri} oktaAuth={oktaAuth}>
        <Header />
        <Route path="/" exact={true} component={LandingPage} />
        <SecureRoute path="/dashboard" exact={true} component={Dashboard} />
      </Security>
    </Router>
  );
};

export default App;
A new oktaAuth instance is created with the config object. This is passed into the security component, which wraps all the routes of our application and provides the oktaAuth and authState objects to all of its children (the components in the routes).
The oktaAuth object can be used to change or read information about the authentication state.
The authState object contains:
isAuthenticated, a boolean that indicates whether the user is authenticated. The value is true if idToken and an accessToken are present in the tokenManageraccessToken, a JWT access token that is assigned to the current authenticated useridToken, a JWT ID token that is assigned to the current authenticated usererror, which is returned if the authentication process failsNotice also that we don’t need to handle a SecureRoute ourselves; Okta provides a route out of the box for that, which protects the path specified.
Lets implement a login button to trigger the sign-in widget. It’s common to have this in the header component, so we’ll handle it there.
We are provided with a useOktaAuth hook, which gives us access to the oktaAuth and authState objects.
import React from "react";
import { useOktaAuth } from "@okta/okta-react";

function Header() {
  const { authState, oktaAuth } = useOktaAuth();
  const loginWithRedirect = () =>
    oktaAuth.signInWithRedirect({ originalUri: "/dashboard" });
  const logOut = () => oktaAuth.signOut();

  const buttonText = authState.isAuthenticated ? "Logout" : "Login";
  const btnLogic = authState.isAuthenticated ? logOut : loginWithRedirect;

  return (
    <>
      <div>Okta React</div>
      <button onClick={btnLogic}>{buttonText}</button>
    </>
  );
}

export { Header };
We’re using the authState to determine whether we want to log into or sign out of our application.
The loginWithRedirect function handles the login trigger with a redirect back to the dashboard route on successful login, as shown below:
Upon login, the user is redirected to the dashboard route immediately.
For the logout function to work in localhost, we need to add localhost to the list of our trusted routes. This will allow cross-origin in our application.
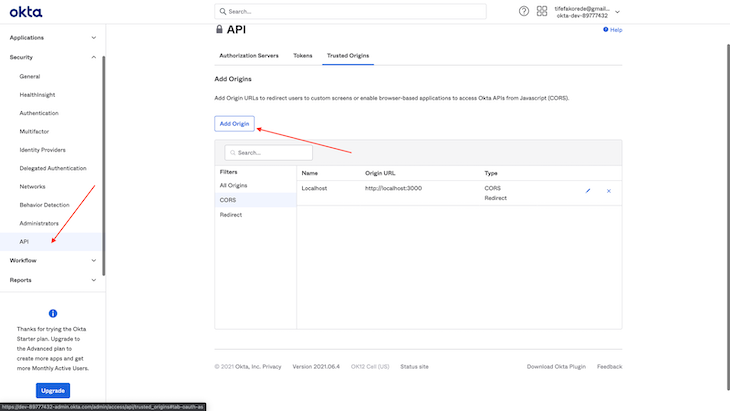
Now if we click on the logout button in the header, it successfully logs our user out and redirects them to the landing page.
We made it! We’ve successfully implemented Okta authentication in a React application.
The Okta login interface is good and easy to get started with, but let’s say we want to implement a custom sign-in form with a unique design and also keep our users on the page without redirecting to Okta.
We can implement this with the oktaAuth provided when we call the useOktaAuth hook.
Let’s implement a custom sign-in form:
import React from "react";
import { useOktaAuth } from "@okta/okta-react/bundles/types";

function SignIn() {
  const { oktaAuth } = useOktaAuth();
  const [sessionToken, setSessionToken] = React.useState<string | null>(null);

  const onSubmit = (event: React.SyntheticEvent<HTMLFormElement>) => {
    event.preventDefault();

    const username = event.currentTarget.elements.namedItem(
      "username"
    ) as HTMLInputElement;
    const password = event.currentTarget.elements.namedItem(
      "password"
    ) as HTMLInputElement;

    const data = {
      username: username.value,
      password: password.value,
    };

    oktaAuth
      .signInWithCredentials(data)
      .then((res) => {
        const sessionToken = res.sessionToken;
        if (!sessionToken) {
          throw new Error("authentication process failed");
        }
        setSessionToken(sessionToken);
        oktaAuth.signInWithRedirect({
          originalUri: "/dashboard",
          // @ts-ignore
          sessionToken: sessionToken,
        });
      })
      .catch((err) => console.log("handle error here": err));
  };

  if (sessionToken) return <div />;

  return (
    <div>
      <form onSubmit={onSubmit}>
        <label htmlFor="username">Username</label>
        <input type="text" id="username" />
        <label htmlFor="password">Password</label>
        <input type="password" id="password" />
        <button type="submit">SignIn</button>
      </form>
    </div>
  );
}
export { SignIn };
We have our own form and we are making use of the signInWithCredentials option in oktaAuth to handle a custom form submission. The sessionToken, a single-use token, is the value received upon successful authentication. The details are still available to us via the ID or access tokens provided in the authState object when the useOktaAuth hook is called.
Upon successful login, we can use the signInWithRedirect function to send the user to the original URI (mainly the protected dashboard route) and also include the sessionToken.
Let’s run our application and wire the login button to redirect to this login form endpoint and also update our routes:
import React from "react";
import { useOktaAuth } from "@okta/okta-react";
import { Link } from "react-router-dom";

function Header() {
  const { authState, oktaAuth } = useOktaAuth();

  if (!authState) return null;

  const logOutRedirect = async () => await oktaAuth.signOut();

  function btnToRender() {
    return authState.isAuthenticated ? (
      <button onClick={logOutRedirect}>LogOut</button>
    ) : (
      <button>
        <Link to="/login">Login</Link>
      </button>
    );
  }

  return (
    <>
      <div>Okta React</div>
      {btnToRender()}
    </>
  );
}
export { Header };
The routes update as shown below:
<Security restoreOriginalUri={restoreOriginalUri} oktaAuth={oktaAuth}>
  <Header />
  <Route path="/" exact={true} component={LandingPage} />
  <Route path="/login" component={SignIn} />
  <SecureRoute path="/dashboard" exact={true} component={Dashboard} />
  <Route path={CALLBACK_PATH} component={LoginCallback} />
</Security>
Now, when we click on our login button, we are redirected to the login page.
Congratulations! You’ve successfully implemented a custom login screen in your React app with Okta.
User data is very delicate information that, if compromised, can lead to serious privacy issues. In this tutorial, we showed you how to implement a much more secure way to handle the authentication in a React app with Okta.
For frontend developers who don’t build backend services — and considering the rise of frameworks such as Jamstack and serverless that enable you to build applications without an actual API server — Okta provides a great way to implement authentication in your React applications without undue complexity.
Install LogRocket via npm or script tag. LogRocket.init() must be called client-side, not
server-side
$ npm i --save logrocket

// Code:

import LogRocket from 'logrocket';
LogRocket.init('app/id');
// Add to your HTML:

<script src="https://cdn.lr-ingest.com/LogRocket.min.js"></script>
<script>window.LogRocket && window.LogRocket.init('app/id');</script>

A step-by-step guide to building your first MCP server using Node.js, covering core concepts, tool design, and upgrading from file storage to MySQL.

Using security headers in your Next.js apps is a highly effective way to secure websites from common security threats.

A deep dive into April 2026’s AI model and tool rankings. We break down performance, usability, pricing, and real-world capabilities across 50+ features to help you pick the right tools for your development workflow.

A practical guide to Agent Browser CLI. Learn how AI agents navigate, snapshot, and interact with web pages using stable references, enabling efficient automation and exploratory testing.
Hey there, want to help make our blog better?
Join LogRocket’s Content Advisory Board. You’ll help inform the type of content we create and get access to exclusive meetups, social accreditation, and swag.
Sign up now

