Testing is a fundamental building block that is often overlooked when developing applications. It gives the user a measure of assurance as to the quality of the finished product and usually helps uncover errors.

In this tutorial, we’ll go over how to test RESTful APIs built with Strapi, which is an open-source headless JavaScript CMS. It’s used to build customizable API’s quickly and without worrying much about the details of the underlying architecture.
We will use the Mocha testing framework and the Chai assertion library to test the endpoints built on Strapi.
This tutorial assumes the you have the following:
To get started using Strapi, open your terminal and run the following to install.
npx create-strapi-app strapi-mocha-chai --quickstart
The above command will initialize a Strapi project called strapi-mocha-chai. The --quicktart flag will initialize Strapi with an Sqlite database. If you want to be able to select a database of your choice, omit the flag.
After installation, the app should start automatically. If it doesn’t, run npm develop to start it.
Navigate to http://localhost:1337/ on your browser to view the application. You should see a screen like the one below.
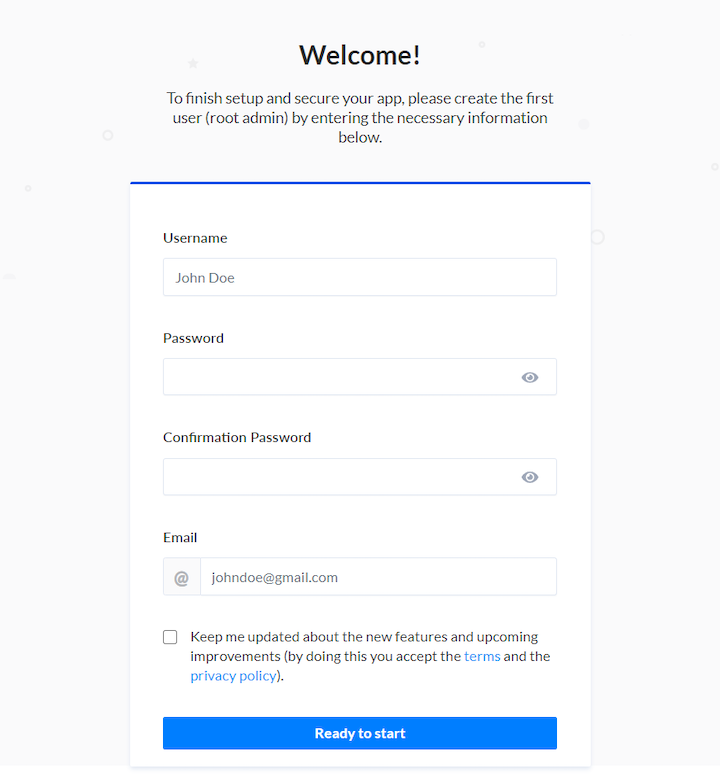
Fill the form and submit it. After submitting, it takes you to the dashboard, where you can start creating API endpoints.
We’ll be create a to-do application with the following endpoints.
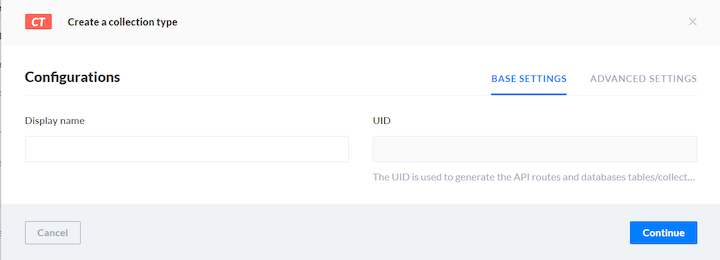
/todos — an endpoint to create a new todo/todos — an endpoint to get a list of all todos/todos/:id — anendpoint to get a single todo/todos/:id — an endpoint to update an existing todo/todos/:id — an endpoint to delete an existing todoTo create these RESTful API endpoints, we have to create a content type, which is similar to a database definition. Go to “Plugins” on the sidebar and click “Content Types Builder” on the page that opens.
Finally, let’s create our endpoints.

createdeletefindfindoneFinally, open Postman to check whether the endpoints are working as desired. I’ve created docs for the collection. Open it and click “Run in Postman” to test in your Postman client.
To get started with testing, you must first install the necessary libraries.
Open your terminal and run the code below.
yarn add mocha chai chai-http cross-env
After installation, go to package.json and add a test command to the script section.
"scripts": {
  "develop": "strapi develop",
  "start": "strapi start",
  "build": "strapi build",
  "strapi": "strapi",
  "test": "cross-env NODE_ENV=test mocha --timeout 10000"
}
Mocha is a simple and flexible JavaScript testing framework for Node.js applications. It allows for serial and asynchronous testing. Chai is a BDD/TDD assertion library that can be paired with Mocha. The chai-http plugin allows you to create integration tests and test HTTP, APIs, or external services.
To separate your test environment from the dev environment, use cross-env to set the NODE_ENV to test before you run any test.
Before you begin writing tests, you need to create a separate database config for your tests so it doesn’t interfere with the development database.
Open your terminal in the root directory and run the following.
cd config
mkdir env && cd env
mkdir test && cd test
touch database.json
This creates a database.json in the following path ./config/env/test/. Open the database.json in your editor and paste the following.
{
  "defaultConnection": "default",
  "connections": {
    "default": {
      "connector": "bookshelf",
      "settings": {
        "client": "sqlite",
        "filename": ".tmp/test.db"
      },
      "options": {
        "useNullAsDefault": true,
        "pool": {
          "min": 0,
          "max": 15
        }
      }
    }
  }
}
The "filename": ".tmp/test.db" property is the location of the temporary database, which will regenerate each time you run the tests. You also need to create an instance of the Strapi server before you run the test.
Paste the following in your terminal.
mkdir tests
cd tests and mkdir helpers
touch strapi.js
This creates a strapi.js file in the following path /tests/helpers/. Open the file and paste the following.
const Strapi = require('strapi');
const http = require('http');
let instance;
async function setupStrapi() {
  if (!instance) {
    /** the following code in copied from `./node_modules/strapi/lib/Strapi.js` */
    await Strapi().load();
    instance = strapi; // strapi is global now
    await instance.app
      .use(instance.router.routes()) // populate KOA routes
      .use(instance.router.allowedMethods()); // populate KOA methods
    instance.server = http.createServer(instance.app.callback());
  }
  return instance;
}
module.exports = { setupStrapi };
We’ll create our tests in the test directory. Navigate to /tests/ and create a file called app.test.js. Open the file and paste the code below.
const fs = require('fs');
const { setupStrapi } = require('./helpers/strapi');
const chai = require('chai');
const expect = chai.expect;

before((done) => {
  setupStrapi();
  done();
});

after((done) => {
  const dbSettings = strapi.config.get('database.connections.default.settings');
  if (dbSettings && dbSettings.filename) {
    const tmpDbFile = `${__dirname}/../${dbSettings.filename}`;
    if (fs.existsSync(tmpDbFile)) {
      fs.unlinkSync(tmpDbFile);
    }
  }
  done();
});

it('strapi is defined', (done) => {
  expect(strapi).to.exist;
  done()
});
The above tests the Strapi instance to see if it is initialized. The Strapi instance was initialized in the before hook, which runs before any test runs.
After testing, delete the test database in the after hook so that a fresh database can be generated before you run the tests again.
To begin testing the endpoints, create a file called index.test.js in this path ./tests/todo/ and paste the code below.
const fs = require('fs');
const { setupStrapi } = require('../helpers/strapi');
const chai = require('chai');
const chaiHttp = require('chai-http');
const expect = chai.expect;
chai.use(chaiHttp);

let app;

before(async () => {
  app = await setupStrapi();
});

after((done) => {
  const dbSettings = app.config.get('database.connections.default.settings');
  if (dbSettings && dbSettings.filename) {
    const tmpDbFile = `${__dirname}/../${dbSettings.filename}`;
    if (fs.existsSync(tmpDbFile)) {
      fs.unlinkSync(tmpDbFile);
    }
  }
  done();
});

it('creates a todo item', (done) => {
  chai
    .request(app.server)
    .post('/todos/')
    .send({
      "title": "Sample 2",
      "completed": true
    }).end((error, response) => {
      expect(response).to.have.status(200);
      expect(response).to.have.property('body');
      expect(response.body).to.have.property('title');
      done();
    })
});

it('updates a todo item', (done) => {
  chai
    .request(app.server)
    .put('/todos/1')
    .send({
      "title": "Updated todo",
      "completed": true
    }).end((error, response) => {
      expect(response).to.have.status(200);
      expect(response).to.have.property('body');
      expect(response.body.title).to.equal('Updated todo');
      done();
    })
});

it('gets the list of all todos', (done) => {
  chai
    .request(app.server)
    .get('/todos')
    .end((error, response) => {
      expect(response).to.have.status(200);
      expect(response.body).to.be.an('array');
      done();
    })
});

it('gets a todo item', (done) => {
  chai
    .request(app.server)
    .get('/todos/1')
    .end((error, response) => {
      expect(response).to.have.status(200);
      expect(response.body).to.be.an('object');
      done();
    })
});

it('deletes a todo item', (done) => {
  chai
    .request(app.server)
    .delete('/todos/1')
    .end((error, response) => {
      expect(response).to.have.status(200);
      expect(response.body).to.be.an('object');
      done();
    })
});
As mentioned earlier, you’ll want to set up an instance of the Strapi connection before you carry out the tests and regenerate the test database after each test is done. Then, proceed to create a test for each of the endpoints to be sure they work as expected.
To run the tests, open up terminal and run yarn test. You should get results similar to the screenshot belo.

In this tutorial, we walked through how to test Strapi applications with the Mocha testing framework and the Chai assertion Library.
Testing will always an integral part of the software development lifecycle and you shouldn’t overlook it.
The repository for this tutorial is available on GitHub.
There’s no doubt that frontends are getting more complex. As you add new JavaScript libraries and other dependencies to your app, you’ll need more visibility to ensure your users don’t run into unknown issues.
LogRocket is a frontend application monitoring solution that lets you replay JavaScript errors as if they happened in your own browser so you can react to bugs more effectively.

LogRocket works perfectly with any app, regardless of framework, and has plugins to log additional context from Redux, Vuex, and @ngrx/store. Instead of guessing why problems happen, you can aggregate and report on what state your application was in when an issue occurred. LogRocket also monitors your app’s performance, reporting metrics like client CPU load, client memory usage, and more.
Build confidently — start monitoring for free.
Hey there, want to help make our blog better?
Join LogRocket’s Content Advisory Board. You’ll help inform the type of content we create and get access to exclusive meetups, social accreditation, and swag.
Sign up now
This guide walks you through creating a web UI for an AI agent that browses, clicks, and extracts info from websites powered by Stagehand and Gemini.

This guide explores how to use Anthropic’s Claude 4 models, including Opus 4 and Sonnet 4, to build AI-powered applications.

Which AI frontend dev tool reigns supreme in July 2025? Check out our power rankings and use our interactive comparison tool to find out.

Learn how OpenAPI can automate API client generation to save time, reduce bugs, and streamline how your frontend app talks to backend APIs.


One Reply to "How to test Strapi endpoints with Mocha and Chai"
this was awesome. love unit/integration testing stuff. mocha & chai are heaven sent.