There are several ways to create a single page application (SPA) using libraries like React. There are many serverless options to choose from when picking a tech stack for a SPA. One popular option is to integrate FaunaDB into React apps.

FaunaDB is a database as a service (DBaaS) that helps to save time by using a preexisting infrastructure to build web applications without setting up a custom API server.
In this post, we’ll take a look at how to get started using FaunaDB to create APIs that can be used directly in React applications.
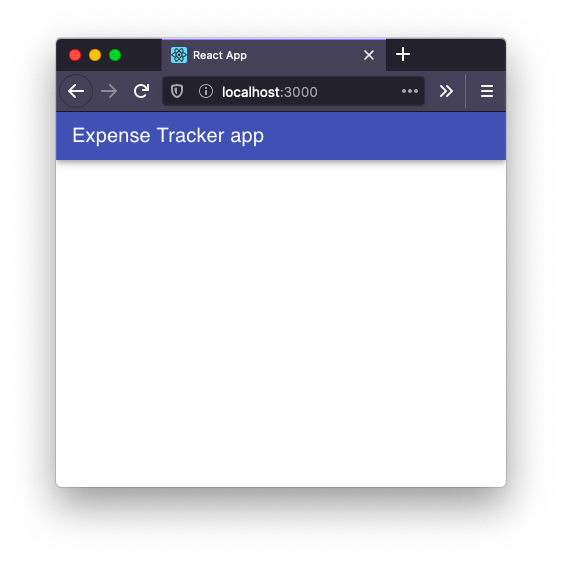
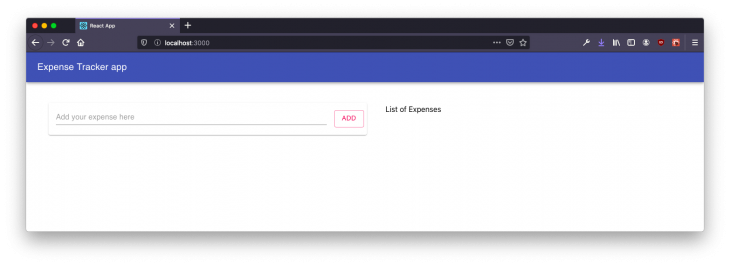
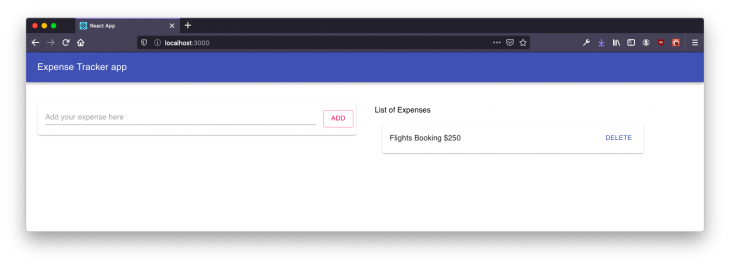
Here is what the final app is going to look like:
![]()
For learning purposes, I am going to keep the UI minimal.
To take full advantage of this tutorial, make sure you have the following installed on your local development environment:
12.x.x installednpm or yarncreate-react-app CLI installed as a global package or use npxHere are some points to consider when using FaunaDB:
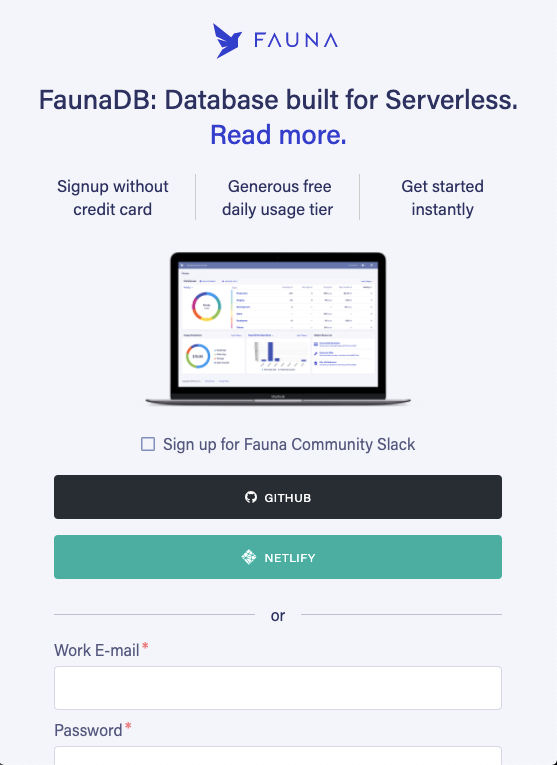
Start by registering a new account either using email credentials or using a GitHub account. You can register a new account here:
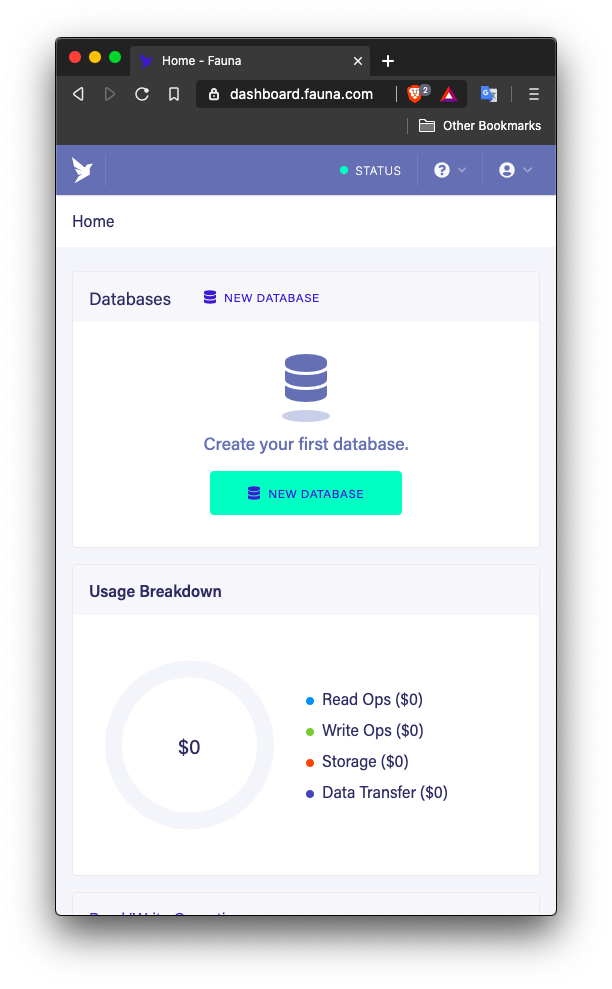
Once you have created a new account or signed in, you are going to be welcomed by the dashboard screen:
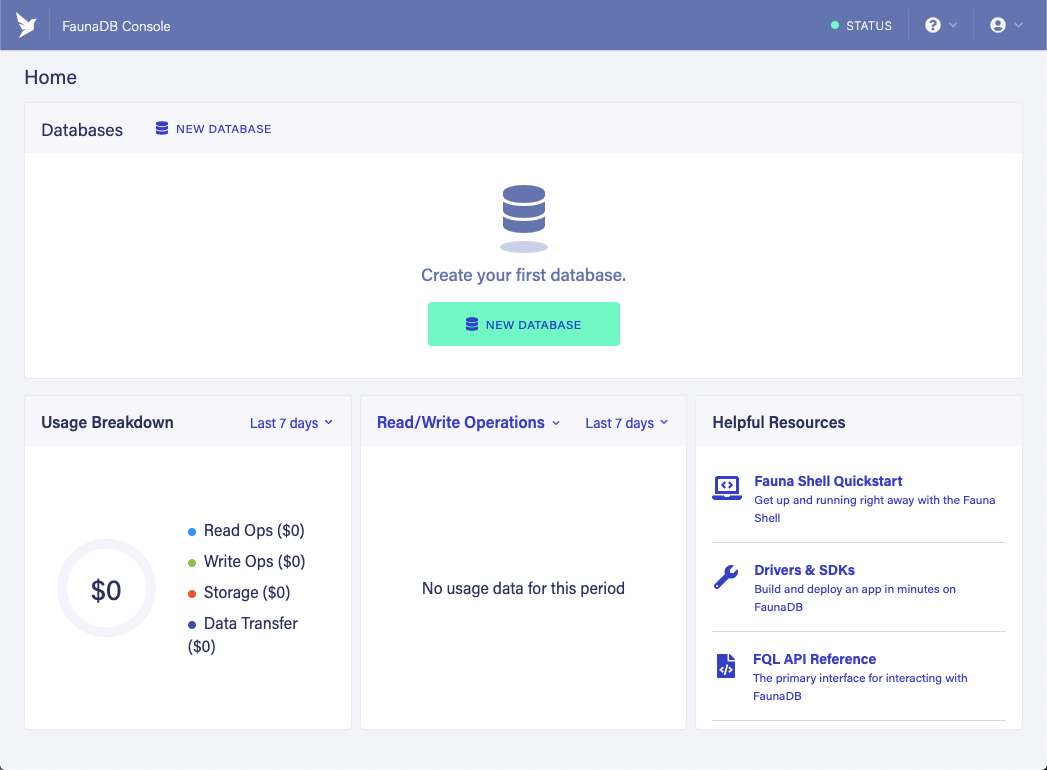
That’s it! Now we have our account set up.
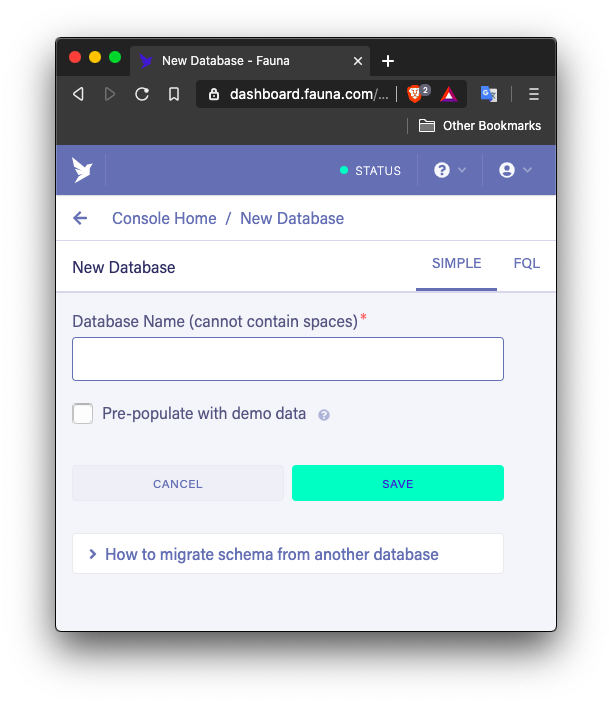
To create a new database instance using FaunaDB services, you have to follow some simple steps. On the dashboard screen, press the button New Database:
Then, enter the name of the database and press the button Save:
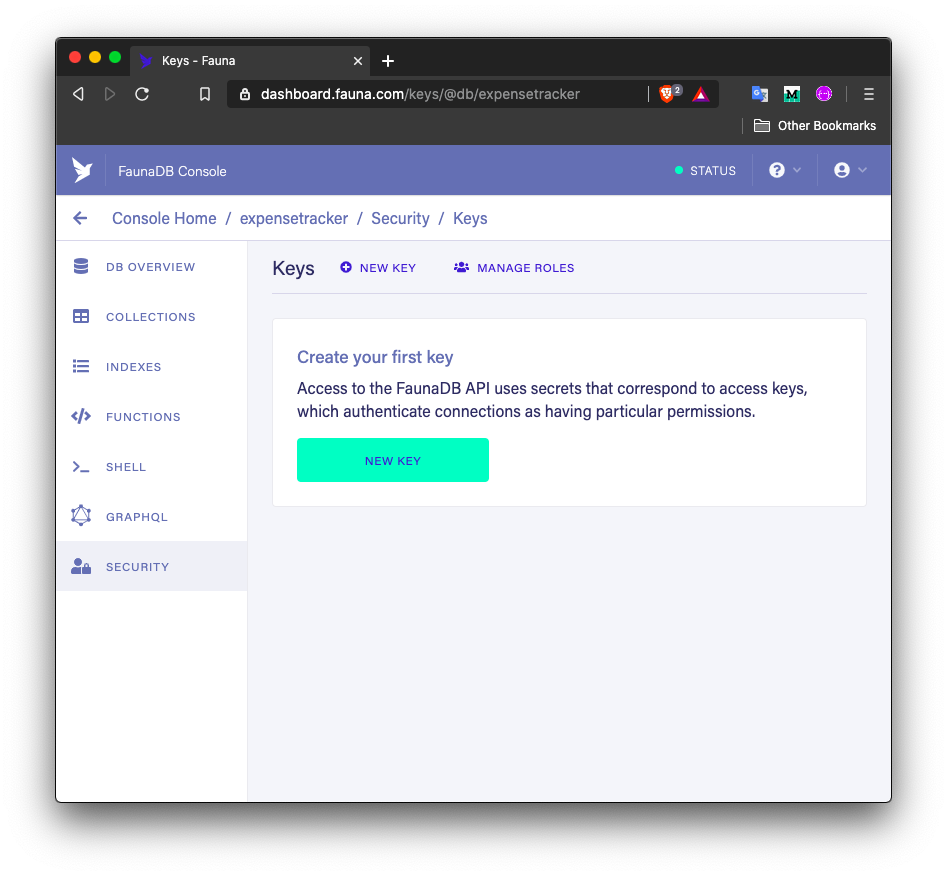
Once the database instance is set up, you are ready to create an access key. The access key is to connect authorization and a connection to the database from the React app. This key allows you to control who has the read and write operations to the database.
To create the first access key, from the side menu, go to the Security tab and click on the button New Key:
Once you press Save on the below screen, a new key will be generated:
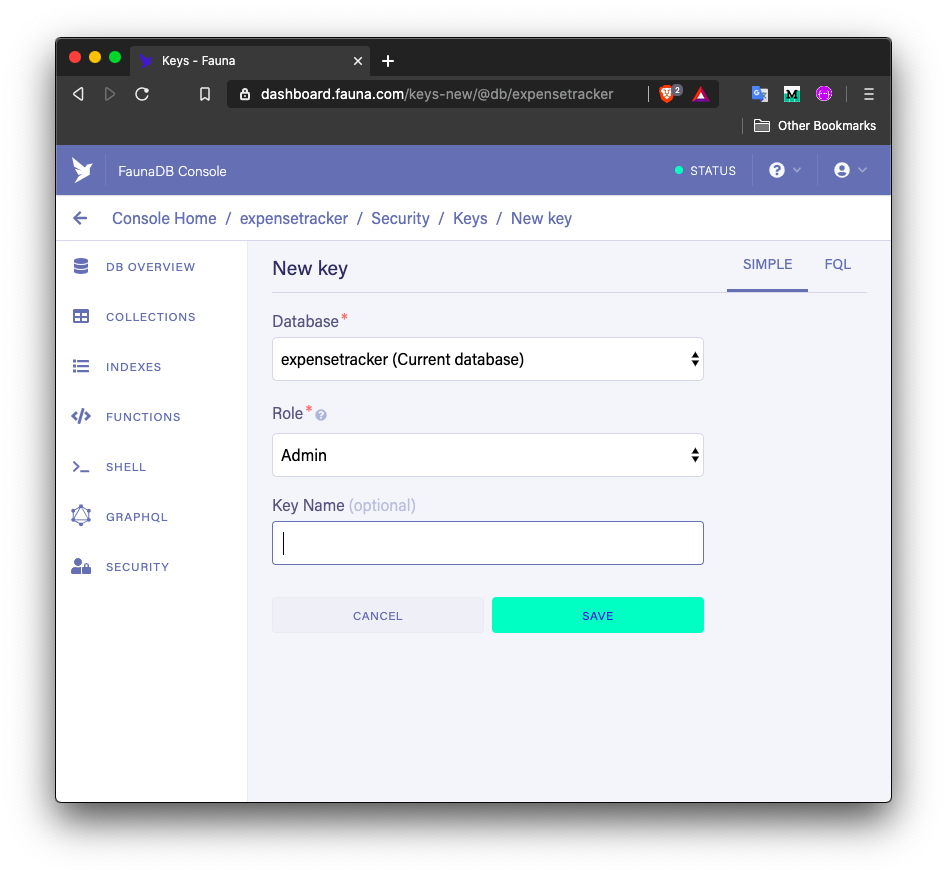
Do note that the key you are creating right now gives privileges to anyone who has access to it. This means someone who has this key will have access to the database instance. You might want to reconsider this role when creating access keys for production-level apps. (You can choose the other option called server that provides less access):
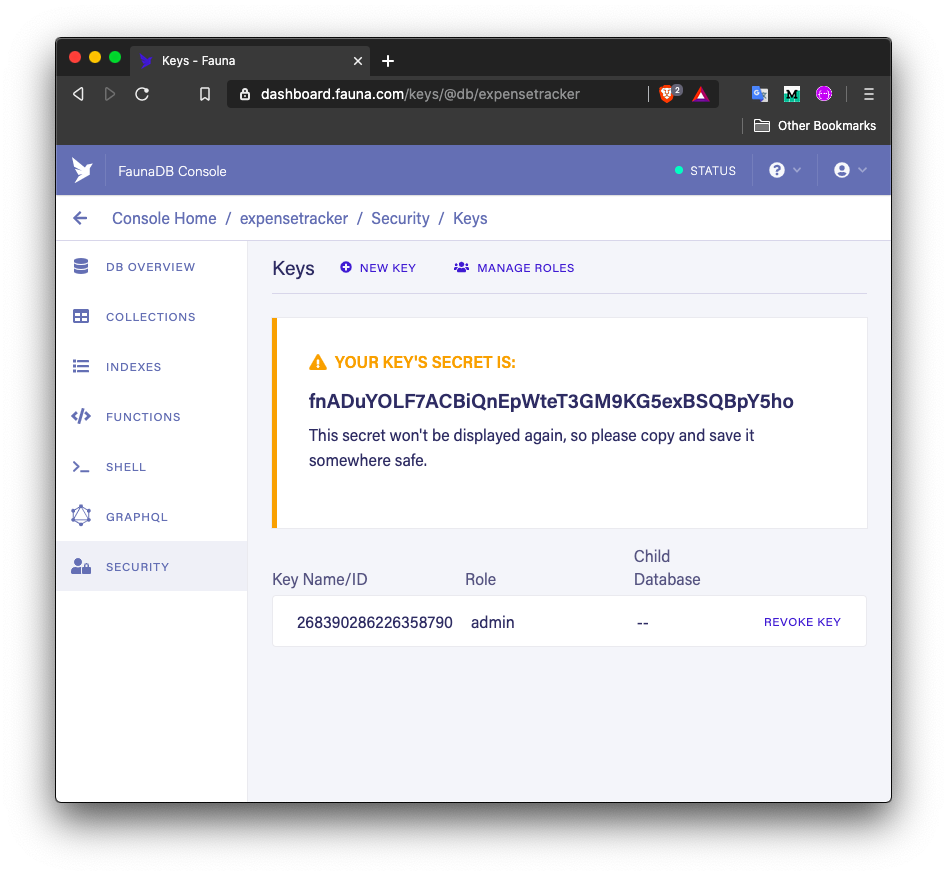
To avoid tokens being leaked from the React app when storing the project over GitHub, create a .env file inside the root of the React project and paste the access key at the place of YOUR_KEY_HERE in the below snippet:
DB_KEY=YOUR_KEY_HERE
Make sure to add this file in .gitignore. Now, let’s create a new data collection from the FaunaDB dashboard. Go to the Collections tab from the side menu and press the button New Collection:

Enter the name of the collection and press the Save button:

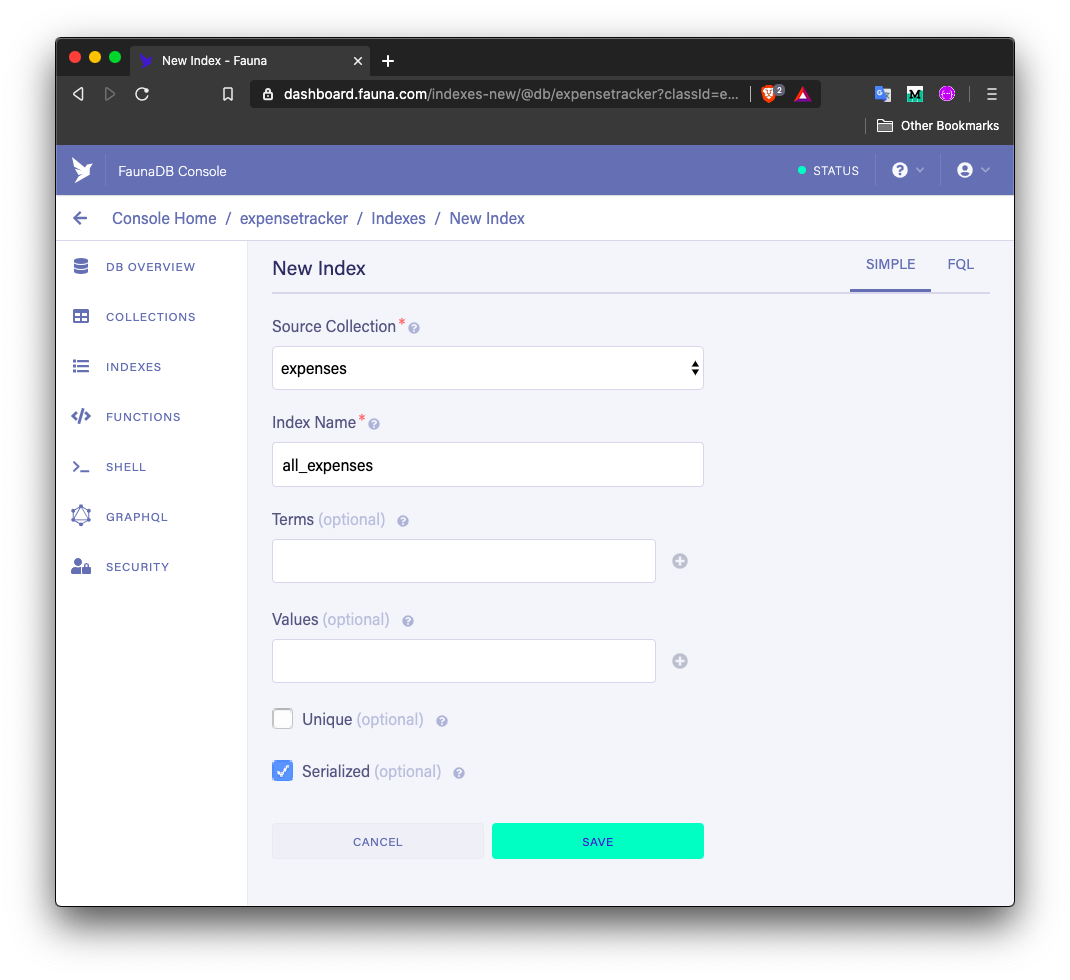
The last step is to create a new index. Go to the Indexes tab to create an index. Searching documents in FaunaDB can be done by using indexes, specifically by matching inputs against an index’s terms field. This will be helpful if you are looking forward to having features like searching on a particular screen:
That’s it. Now let’s begin the process of connecting the React app to Fauna DB and start building it.
To integrate FaunaDB SDK in a React app, first, let us create a new React project. Then, install the required dependencies. To quickly set up a UI, let’s use the Material UI library for React apps. You can replace the UI components library of your own choice:
npx create-react-app expense-tracker-FaunaDB
# after the project directory is created
cd expense-tracker-FaunaDB
# install dependencies
yarn add faunadb @material-ui/core
The faunadb package is FaunaDB JavaScript driver for FaunaDB. The @material-ui/core is the UI library based on the Material design system that has built-in React components that can be used directly in React apps.
To integrate @material-ui/core package in the React app, make sure you follow the instructions guide from the official docs here. After this step, the package.json file is going to be updated with the following dependencies:
{
  "faunadb": "2.14.2",
  "@material-ui/core": "4.10.2"
}
To integrate the faunadb client with the React app, you have to make an initial connection from the app. Create a new file db.js at the directory path src/config/. Then import the faunadb driver and define a new client.
The secret passed as the argument to the faunadb.Client() method is going to hold the access key from .env file:
import faunadb from 'faunadb';
const client = new faunadb.Client({
  secret: process.env.DB_KEY
});
const q = faunadb.query;
export { client, q };
And that’s it for the initial integration.
Start by creating a new components/ directory inside the src/ directory. This directory is going to contain most of the components that are going to be used in the demo React app in this tutorial. Create a file inside the directory and let’s call it Navigation.js.
import { React } from 'react';
export default function Navigation() {
  // ...
}
This component file is going to be responsible for displaying a navigation bar with the title of the app. The title of the app is going to be passed as a prop to this component from the parent component (the App component in the current case).
To build a navigation bar let’s use some pre-defined UI components from the Material UI library:
// other import statements
import { AppBar, Toolbar, Typography } from '@material-ui/core';
The AppBar component is used to display branding, screen titles, and navigation of the web app. That is what we are going to use it for. The ToolBar component is wrapper where you can place your components horizontally. The Typography component applies the Material UI theme that is available by default.
The title prop is going to be the title of the app or the name of the app:
export default function Navigation({ title }) {
  return (
    <AppBar>
      <Toolbar>
        <Typography variant="h6">{title}</Typography>
      </Toolbar>
    </AppBar>
  );
}
In the code snippet above, notice the variant attribute on the Typography component. It uses the variant mapping to properly associate a UI element with an HTML semantic element (such as h6 in the code snippet).
To see it in action, import the Navbar component in the App.js file:
import React from 'react';
import Navigation from './components/Navigation';
function App() {
  return <Navigation title="Expense Tracker app" />;
}
export default App;
From the terminal window, start the development server and open the URL http://localhost:3000 in a browser window. Here is the result:
To layout React components when using the Material UI library, a common approach to take is to use the Grid component. To start, import this component inside the App component as shown below:
import { Grid } from '@material-ui/core';
This component provides control over the size of the custom components that it wraps around as well as their spacing. Material Design’s responsive UI is based on a 12-column grid layout. The Grid component helps you implement this layout system and then provide the values or the number of grids you want to display. Material UI uses CSS’s Flexbox to manage layout alignments and sizing of the grid columns. A basic grid might look like this:
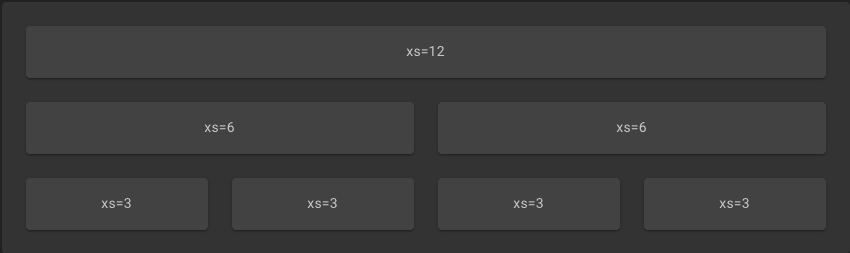
How does this Grid component work though? Well, you start by defining a parent Grid component that has an attribute called container which behaves like a flex container. Inside it, you can define other Grid components that are going to have another attribute called item. The basic column width breakpoints such as xs, md, and so on can be applied at each item.
The breakpoints are used internally in various components to make them responsive. You can read more about them in the official documentation here.
Look at the example of how to set two paragraphs aligned adjacent to each other using Grid components. Each item component has some dummy text to display. The makeStyles comes from the Material UI API. It links a style sheet with a function component and returns a Hook that you use inside the component by using the object names as the value to a className attribute.
import React from 'react';
import { Grid, Typography, makeStyles } from '@material-ui/core';
import Navigation from './components/Navigation';
const useStyles = makeStyles({
  root: {
    marginTop: 80,
    margin: 20,
    flexGrow: 1
  }
});
function App() {
  const classes = useStyles();
  return (
    <>
      <Navigation title="Expense Tracker app" />
      <Grid container className={classes.root}>
        <Grid item xs={12} md={6}>
          <Typography variant="p">
            Lorem ipsum dolor sit, amet consectetur adipisicing elit.
            Reprehenderit itaque iusto perferendis consectetur culpa
            accusantium! Dolor, nemo natus ducimus esse minus, ut laborum
            excepturi deserunt recusandae praesentium eligendi consectetur
            labore.
          </Typography>
        </Grid>
      </Grid>
    </>
  );
}
export default App;
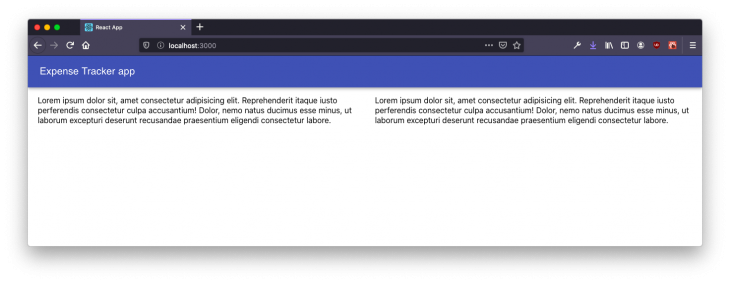
On a wider screen, this is how the breakpoint md is going to display the content:
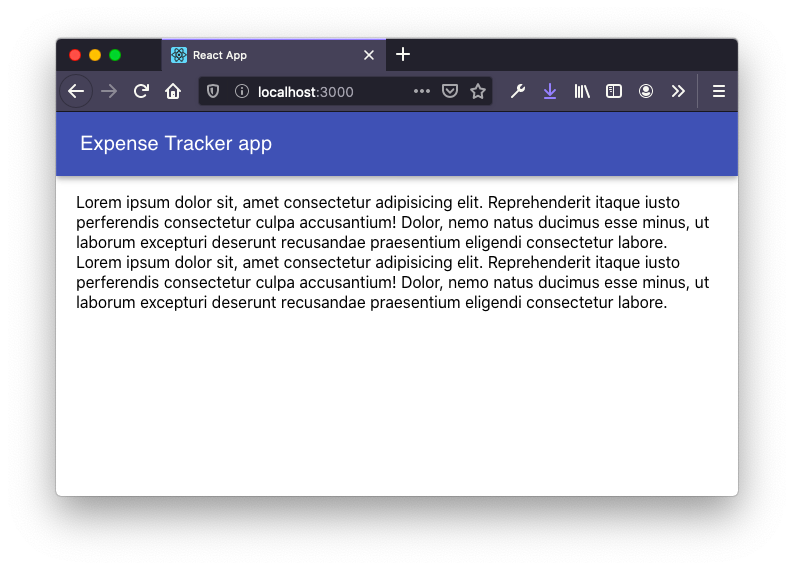
On a smaller screen, the breakpoint xs is going to display the content as shown below:
Now that you have the basic idea of how Material UI works, let’s set up the core UI of the React app.
In this section, let us first add some UI using the Material UI library components to display an input field where the user input will go to add a new expense. Also, add a button next to the input field to trigger the action when adding the expense to the Expense Tracker list. Inside App.js file, import the following statements:
import React, { useState } from 'react';
import {
  Paper,
  Grid,
  Button,
  Typography,
  TextField,
  makeStyles
} from '@material-ui/core';
Inside the App component create a state variable called expenseName using useState React Hooks with a default value of an empty string. It is going to store the value of the user input, that is, the details of the expense.
Then define a second state variable with a default value of an array, called expenses that is going to store all the expense detail items:
function App() {
  const classes = useStyles();
  const [expenseDetail, setExpenseDetail] = useState('');
  const [expenses, setExpenses] = useState([]);
  // ...
}
Then, define three handler functions: handleExpenseDetailChange, handleSubmit, resetInputField.
The first handler function is going to update the value of the user input in the state variable expenseDetail.
The second function is going to make a request to the database to store values in the database. Let’s define the contents of this function in a later section.
The third handler method is going to reset the input field back to the empty and shows placeholder value on the UI:
function App() {
  // ...
  function handleExpenseDetailChange(event) {
    console.log(event.target.value);
    setExpenseDetail(event.target.value);
  }
  function handleSubmit(event) {
    event.preventDefault();
  }
  function resetInputField() {
    setExpenseDetail('');
  }
  // ...
}
Lastly, define the input field as well as the button to add the expense detail using visual components from Material UI. Also, add some styling for the list of expenses:
const useStyles = makeStyles({
  root: {
    marginTop: 80,
    margin: 20,
    flexGrow: 1
  },
  list: {
    marginTop: 20
  }
});
function App() {
  // ...
  return (
    <>
      <Navigation title="Expense Tracker app" />
      <Grid container className={classes.root} spacing={3}>
        <Grid item xs={12} md={6}>
          <Paper style={{ margin: 16, padding: 16 }}>
            <Grid container>
              <Grid xs={10} md={11} item style={{ paddingRight: 16 }}>
                <TextField
                  type="text"
                  name={expenseDetail}
                  value={expenseDetail}
                  placeholder="Add your expense here"
                  fullWidth
                  onChange={handleExpenseDetailChange}
                />
              </Grid>
              <Grid xs={2} md={1} item>
                <Button
                  fullWidth
                  color="secondary"
                  variant="outlined"
                  onClick={handleSubmit}
                >
                  Add
                </Button>
              </Grid>
            </Grid>
          </Paper>
        </Grid>
        <Grid item xs={12} md={5} className={classes.list}>
          <Typography>List of Expenses</Typography>
        </Grid>
      </Grid>
    </>
  );
}
Here is the result you are going to get in the browser window after this step:
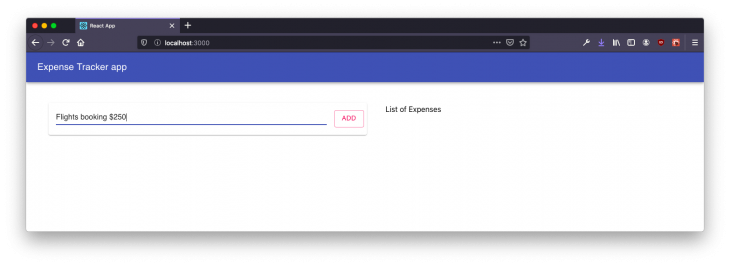
To make sure the value of the user input is getting logged, let us go to the browser window and test it out. Make sure to have Developer Tools -> Console tab open.

Since our expense list app is going to have some basic CRUD operations, let us create a new directory called src/api/ and inside a new file called index.js. Make sure to import the client and the query instance from the config/db.js file:
import { client, q } from '../config/db';
export const getAllExpenses;
export const createExpenseItem;
export const deleteExpenseItem;
All the three variables that are being exported in from this file are the queries. Let us define them. The first query is to read all the items from the database collection.
To query the list of expenses in the database collection, you need to use the all_expenses index. The query below is going to return a ref that can be mapped over to get the results. Make sure to add the catch such that if there is an error while running the query, it can be logged out:
export const getAllExpenses = client
  .query(q.Paginate(q.Match(q.Ref('indexes/all_expenses'))))
  .then(response => {
    const expenseRef = response.data;
    const getAllDataQuery = expenseRef.map(ref => {
      return q.Get(ref);
    });
    return client.query(getAllDataQuery).then(data => data);
  })
  .catch(error => console.error('Error: ', error.message));
The next query is to create a new item (document) in the expenses collection:
export const createExpenseItem = name =>
  client
    .query(
      q.Create(q.Collection('expenses'), {
        data: {
          name
        }
      })
    )
    .then(ret => ret)
    .catch(error => console.error('Error: ', error.message));
To delete an item from the database collection, all you have to do is refer to the expense ID you want to delete:
export const deleteExpenseItem = expenseId =>
  client
    .query(q.Delete(q.Ref(q.Collection('expenses'), expenseId)))
    .then(ret => ret)
    .catch(error => console.error('Error: ', error.message));
To add the expense details into the FaunaDB collection, import the API function createExpenseItem in the App.js file:
import { createExpenseItem } from './api';
Then, modify the handleSubmit method and invoke the API function createExpenseItem and pass the expenseDetail state variable as the only argument.
function handleSubmit(event) {
  event.preventDefault();
  createExpenseItem(expenseDetail).then(res => {
    console.log('Expense details added to the database');
  });
  resetInputField();
}
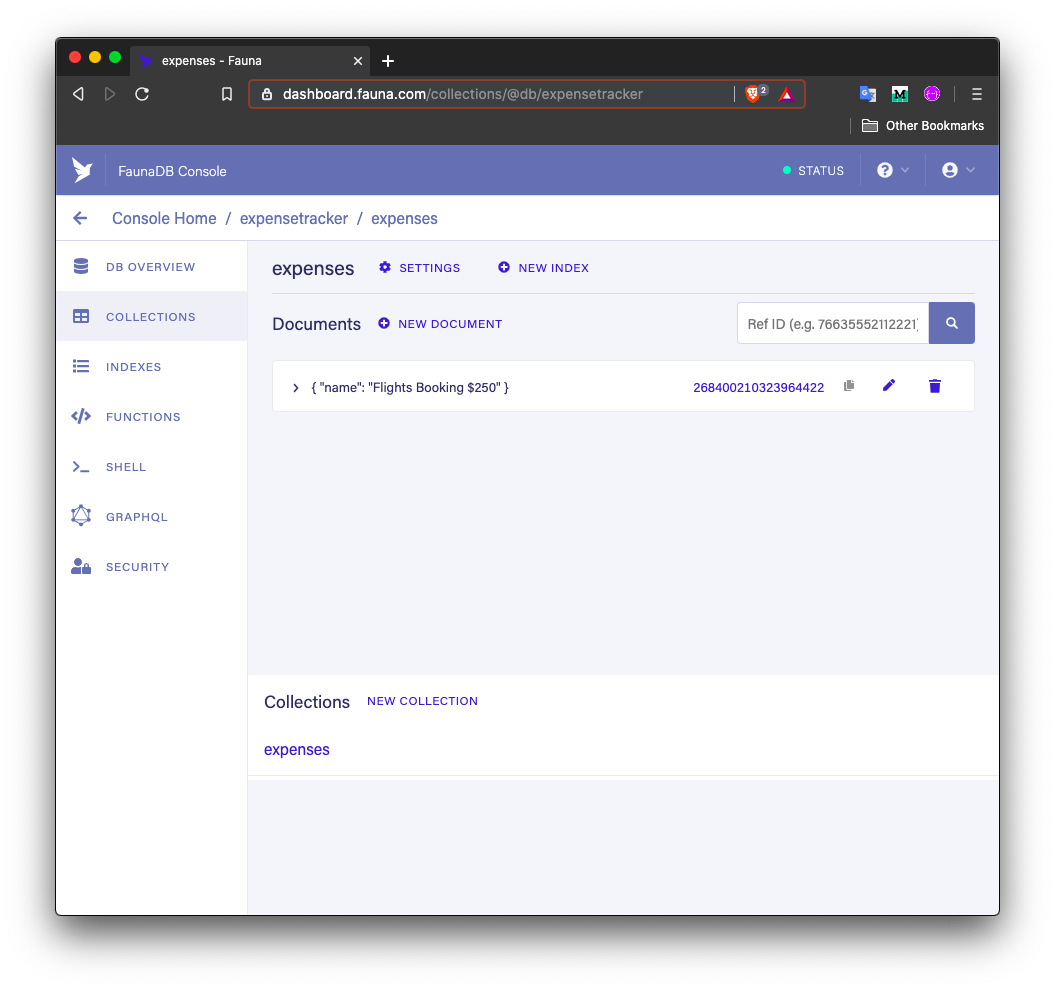
Now, when you try to add a new expense, the database collection is going to get an update too:
Here is the up to date database collection. The FaunaDB database takes care of creating a unique id for each document:
To display a list of expenses from the FaunaDB collection, all you have to do is invoke the query getAllExpenses from the ./api/index.js the file inside useEffect Hook. This is because when the App component renders for the first time, it displays the data as a list of items if there are any in the database:
import { getAllExpenses, createExpenseItem, deleteExpenseItem } from './api';
Since the data from the collection is going to be displayed in a list format, let us import all the necessary components to display a list of items as well as update other import statements:
import React, { useState, useEffect } from 'react';
import {
  Paper,
  Grid,
  Button,
  Typography,
  TextField,
  makeStyles,
  List,
  ListItem,
  ListItemText,
  ListItemSecondaryAction
} from '@material-ui/core';
Inside the App component, define the useEffect Hook before all the handler functions, to fetch the data on the initial render:
function App() {
  // ...
  useEffect(() => {
    getAllExpenses.then(res => {
      setExpenses(res);
      console.log(res);
    });
  }, []);
  // ...
}
Here is how the structure of the data array fetched from the database looks like:
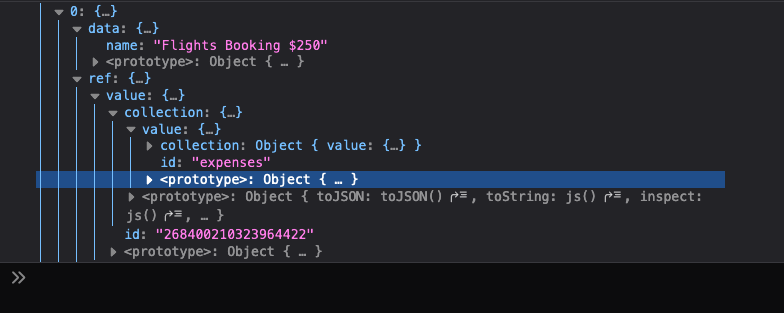
You can see that the ID is presented by ref.id.
Now, add the following JSX after the input field to display a list of items. To display these expenses in a list, let us map the expenses array using JavaScript map function only when the expenses array is not empty:
<Grid item xs={12} md={5} className={classes.list}>
  <Typography>List of Expenses</Typography>
  {expenses &&
    expenses.map(expense => (
      <div key={expense.ref.id}>
        <Paper style={{ margin: 16 }}>
          <List style={{ overflow: 'scroll' }}>
            <ListItem>
              <ListItemText primary={expense.data.name} />
              <ListItemSecondaryAction>
                <Button
                  color="primary"
                  // onClick={}
                >
                  Delete
                </Button>
              </ListItemSecondaryAction>
            </ListItem>
          </List>
        </Paper>
      </div>
    ))}
</Grid>
Here is the output you are going to get after this step:
To delete an expense item, let’s add the handler function handleDeleteItem to delete the item from the database as well as the UI:
function App() {
  // ...
  function handleDeleteItem(event, id) {
    event.preventDefault();
    deleteExpenseItem(id).then(res => res);
    const newExpenses = expenses.filter(expense => expense.ref.id !== id);
    setExpenses(newExpenses);
  }
  // ...
}
Also, to trigger this method, add it to the <Button> inside the <List> component:
<Button
  color="primary"
  onClick={event => handleDeleteItem(event, expense.ref.id)}>
  Delete
</Button>
Now, go back to the browser window and try deleting an item. You will notice that the database collection is updated too:
Congratulations!
I hope by reading this post, you learned something new. The combination of FaunaDB and React is great for SPAs. You can extend this app by using subscriptions to update the UI as soon as the database gets an update with a new piece of information in real-time.
👉 Here is a list of some resources that you might like after reading this post:
Install LogRocket via npm or script tag. LogRocket.init() must be called client-side, not
server-side
$ npm i --save logrocket

// Code:

import LogRocket from 'logrocket';
LogRocket.init('app/id');
// Add to your HTML:

<script src="https://cdn.lr-ingest.com/LogRocket.min.js"></script>
<script>window.LogRocket && window.LogRocket.init('app/id');</script>
Would you be interested in joining LogRocket's developer community?
Join LogRocket’s Content Advisory Board. You’ll help inform the type of content we create and get access to exclusive meetups, social accreditation, and swag.
Sign up now
This guide explores how to use Anthropic’s Claude 4 models, including Opus 4 and Sonnet 4, to build AI-powered applications.

Which AI frontend dev tool reigns supreme in July 2025? Check out our power rankings and use our interactive comparison tool to find out.

Learn how OpenAPI can automate API client generation to save time, reduce bugs, and streamline how your frontend app talks to backend APIs.

Discover how the Interface Segregation Principle (ISP) keeps your code lean, modular, and maintainable using real-world analogies and practical examples.


