Developers can make desktop applications using several approaches: platform-specific APIs, native widget toolkits, hybrid desktop app development frameworks. If we plan to use platform-specific APIs, we usually either need to maintain multiple codebases for each operating system or use a native widget toolkit, like Qt or GTK, which are typically cross-platform libraries. The latter options are popular among developers because they’re easy to use in cross-platform desktop application development.

However, native widget toolkits are limited, and it’s hard for developers to make custom GUI elements quickly when using them. This is why hybrid desktop application frameworks and libraries are so popular these days — they allow developers to make cross-platform desktop apps using JavaScript.
This tutorial will explain how you can develop cross-platform desktop applications with a JavaScript frontend and Go backend.
The Go programming language is a blazingly fast, memory-safe, concurrency-first, and statically-typed language. The Go syntax is similar to C but comes with a garbage collector and many of the improvements we’ve seen in modern programming languages, which makes it a good choice when programming GUI elements for desktop apps. It’s possible to use any frontend framework to create the GUI if we choose the hybrid approach, but there are a few different ways developers can do this with Go:
syscall module and CIn this tutorial, we’ll focus on the third option. Lorca and Go webview are two of the most popular Go libraries for building lightweight, JavaScript-based cross-platform desktop apps because they allow us to actually use our web development knowledge.
Lorca is a Go library that helps developers create lightweight cross-platform desktop apps with a Go backend and JavaScript frontend.
Lorca doesn’t bundle apps with a web browser the way Electron does — it uses the installed Google Chrome browser to render the web frontend of applications and implements a messaging channel between JavaScript and Go via the WebSocket protocol. (If you don’t have Chrome installed on your machine, it will prompt you to download it; the same goes for users.)
This bi-directional messaging channel helps Lorca to call native code from a web frontend. This concept was initially implemented by Google with their Carlo library, except Carlo used Node for the backend, instead of Go. (The Carlo project is no longer actively maintained.)
Now, let’s create a simple Lorca app. Our sample application will display “Hello, [username],” on launch, using a native call to fetch the current username of your operating system.
Lorca has no special dependencies, so you only need to install the Go language tools on your computer to make Lorca apps. You can download and install the Go language tools directly from the official website.
After the installation process, run the following command to make sure that the Go CLI works.
$ go version
Let’s get familiar with Lorca. Create a new directory, and then create a main.go file inside the newly-created directory. After that, add the following code into the main.go file:
package main
import (
  "log"
  "net/url"
  "github.com/zserge/lorca"
)
func main() {
  // Pass HTML from data URI.
  ui, err := lorca.New("data:text/html,"+url.PathEscape(`
  <html>
    <head>
      <title>Lorca App</title>
    </head>
    <body>
      <h1 style="padding-top: 40vh; text-align: center;">Hello, Lorca!</h1>
    </body>
  </html>
  `), "", 600, 400)
  if err != nil {
    log.Fatal(err)
  }
  defer ui.Close()
  <-ui.Done()
}
The lorca.New method creates a minimal Chrome window by sending the required configuration, such as window size and URL, as command-line arguments to the Google Chrome binary. For example, width and height values are sent to the Google Chrome binary as --window-size=600,400.
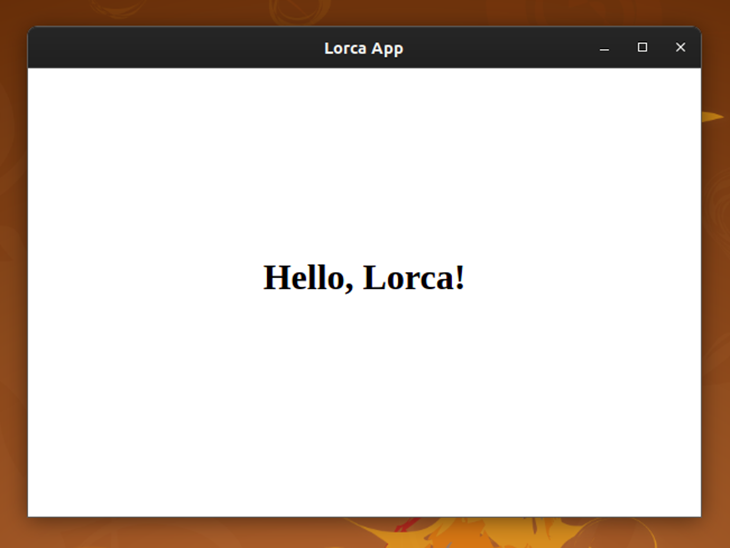
Run the following commands to execute your application. Note that you need to run $ go get only the first time you use Lorca because the Go language compiler needs to download the Lorca code from GitHub. Later, Go will read it from the hard disk.
$ go get
$ go run main.go

This application loads the frontend from an HTML data URI, but web frontends usually contain several resources. In the next part, we’ll extend this application to support common web frontends by implementing a static file server to serve our web resources.
Now, we’re going to implement a static file server to serve our web frontend. We will also expose a new Go function to the web frontend to get the current username of the operating system. Modify your main.go file by adding the following code:
package main
import (
  "log"
  "net"
  "net/http"
  "fmt"
  "runtime"
  "os"
  "github.com/zserge/lorca"
)
func getUserName() string {
    var envKey string
    if runtime.GOOS == "windows" {
      envKey = "USERNAME"
    } else {
      envKey = "USER"
    }
    return os.Getenv(envKey)
}
func main() {
  // Pass HTML from data URI.
  ui, err := lorca.New("", "", 600, 400)

  ui.Bind("getUserName", getUserName)

  if err != nil {
    log.Fatal(err)
  }

  ln, err := net.Listen("tcp", "127.0.0.1:0")
  if err != nil {
    log.Fatal(err)
  }
  defer ln.Close()

  go http.Serve(ln, http.FileServer(http.Dir("./www")))
  ui.Load(fmt.Sprintf("http://%s", ln.Addr()))

  defer ui.Close()
  <-ui.Done()
}
The above Go code has a static file server that serves all resources inside the www directory, which means it’s possible to place any web resource inside the www directory. Place a file named index.html inside the www directory with the following code:
<!doctype html>
<html>
<head>
  <title>Lorca App</title>
  <link rel="shortcut icon" href="favicon.png">
  <style>
    #textField {
      padding-top: 40vh;
      text-align: center;
    }
  </style>
</head>
<body>
  <h1 id="textField"></h1>
  <script>
    (async () => {
      try {
        let userName = await getUserName();
        document.getElementById("textField").innerText = `Hello, ${userName}`;
      }
      catch (e) {
        console.error(e);
      }
    })();
  </script>
</body>
</html>
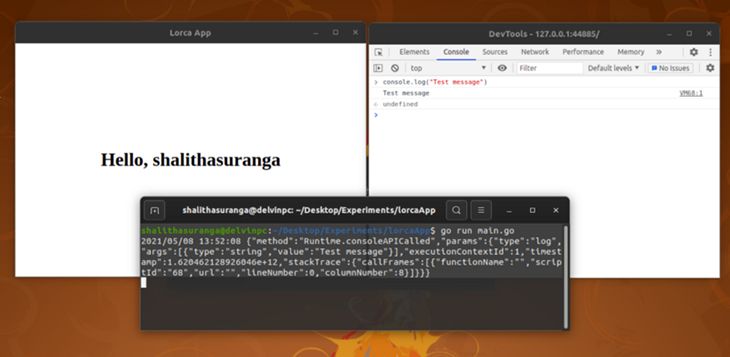
Lorca exposes the getUserName Go function as an asynchronous function to the frontend. Likewise, you can expose any Go method to the frontend in Lorca. Run the main.go file to test your application.
You can also see the web console output from the terminal where you executed the go run command.

You can compile the Go source files to get an executable version of your Lorca app. The following command will make an optimized executable for your current operating system.
$ go build -ldflags "-s -w" main.go
After running the above command, you’ll notice a new binary file named main inside your project directory. Double-click and open the binary file to open your Lorca application. The binary file size is around 7MB — notably smaller than the bundle sizes that Electron and NW.js produce.
Feel free to use UPX compression to reduce the binary size further. If you would like to keep your JavaScript source files hidden, embed your resources into the Go source file as described in the first example.
You can make installers or packages for your application by using your binaries. For example, it is possible to make an AppImage for Linux users, an MSIX package for Windows users, and a DMG installation package for MacOS users.
Lorca uses the installed Google Chrome browser as the UI layer. Google Chrome is executed in a separate process, so we cannot customize the native window. In other words, Lorca apps cannot have custom window icons, window styles, etc.
With Lorca, you need Google Chrome to run apps, but the Go webview library uses the built-in browser component of the operating system to do this, and creates a native window using the platform-specific APIs.
If you are planning to build a native-like hybrid desktop application for multiple operating systems, the Go webview library is a great alternative to the Lorca library. The Go webview library uses the webview C++ library made by the same developer. Both Tauri and Neutralinojs frameworks are developed with the webview C++ library.
The Go webview library offers a similar API as Lorca, and the developer environment setup is the same. Let’s move along and build a small app with the Go webview library.
Add the following code into the main.go file, similar to what we did in the first example.
package main
import (
    "net/url"
    "github.com/webview/webview"
)
func main() {
  debug := true
  w := webview.New(debug)
  defer w.Destroy()
  w.SetTitle("Go webview app")
  w.SetSize(600, 400, webview.HintNone)
  w.Navigate("data:text/html," + url.PathEscape(`
  <html>
    <body>
      <h1 style="padding-top: 40vh; text-align: center;">Hello, Go webview!</h1>
    </body>
  </html>
  `))
  w.Run()
}
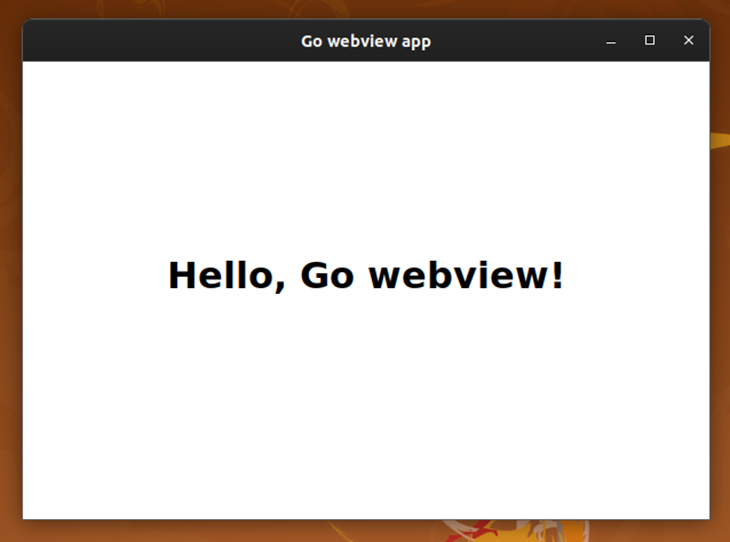
The following terminal commands will run your application; the same note about $ go get applies here, too:
$ go get
$ go run main.go

The building and releasing process is the same as I described in the Lorca tutorial. The binary file size for the Go webview example should be around 2MB, but note that it can vary according to the Go libraries you use.
Lorca and Go webview are both libraries, not frameworks. In other words, both libraries only offer a minimal solution for JavaScript-based cross-platform desktop application development. There are also Go frameworks for building JavaScript-based desktop apps, such as Wails, a Go webview-based framework for building cross-platform desktop apps with JavaScript. Choosing a library over a framework will help you to make lightweight and very customizable desktop apps.
While there is no full-featured native API like Electron, the great advantage here is that you can be more selective and include only what you need in the final application bundle. As we discussed, Lorca’s native window customization is limited because it directly uses the Google Chrome process, while Go webview exposes the window instance’s handler for native window customization. Despite these limitations, this approach really works when you want to avoid loading your app with excess unused code, and when need your final application to be much smaller than what Electron could produce.
Install LogRocket via npm or script tag. LogRocket.init() must be called client-side, not
server-side
$ npm i --save logrocket

// Code:

import LogRocket from 'logrocket';
LogRocket.init('app/id');
// Add to your HTML:

<script src="https://cdn.lr-ingest.com/LogRocket.min.js"></script>
<script>window.LogRocket && window.LogRocket.init('app/id');</script>
Would you be interested in joining LogRocket's developer community?
Join LogRocket’s Content Advisory Board. You’ll help inform the type of content we create and get access to exclusive meetups, social accreditation, and swag.
Sign up now
Which AI frontend dev tool reigns supreme in July 2025? Check out our power rankings and use our interactive comparison tool to find out.

Learn how OpenAPI can automate API client generation to save time, reduce bugs, and streamline how your frontend app talks to backend APIs.

Discover how the Interface Segregation Principle (ISP) keeps your code lean, modular, and maintainable using real-world analogies and practical examples.

<selectedcontent> element improves dropdowns
2 Replies to "How to develop cross-platform desktop apps with JavaScript and Go"
The command “go get” throws an error because it does not find “go.mod” file.
Thanks a lot, this was really helpful.
I’ve always underated Go as a language that’s not even worth studying until I saw this.