
Frameworks are great for modularizing your code, breaking down reusable components into a separate bundle of code.
For example, consider an app that provides the functionality of recording the screen. We move the methods and classes related to recording into a different framework, naming it RecordingKit. This framework is created with reusability in mind and can be used in other scenarios as well. Also, other engineers can work in it independently.
In this article, we’ll learn these steps:
To follow along, you should have basic knowledge of the Swift language and experience working with Xcode.
The Replay is a weekly newsletter for dev and engineering leaders.
Delivered once a week, it's your curated guide to the most important conversations around frontend dev, emerging AI tools, and the state of modern software.
With the recent craze over the stock market and cryptocurrency, we want an investment tracker app. These will track the prices of stocks on a stock exchange and a few cryptocurrencies, respectively.
The app needs a settings screen, and to maintain consistency, we don’t want to duplicate the code. So, we’ll create a framework called SettingsKit to reuse across our app (or maybe more in the future).
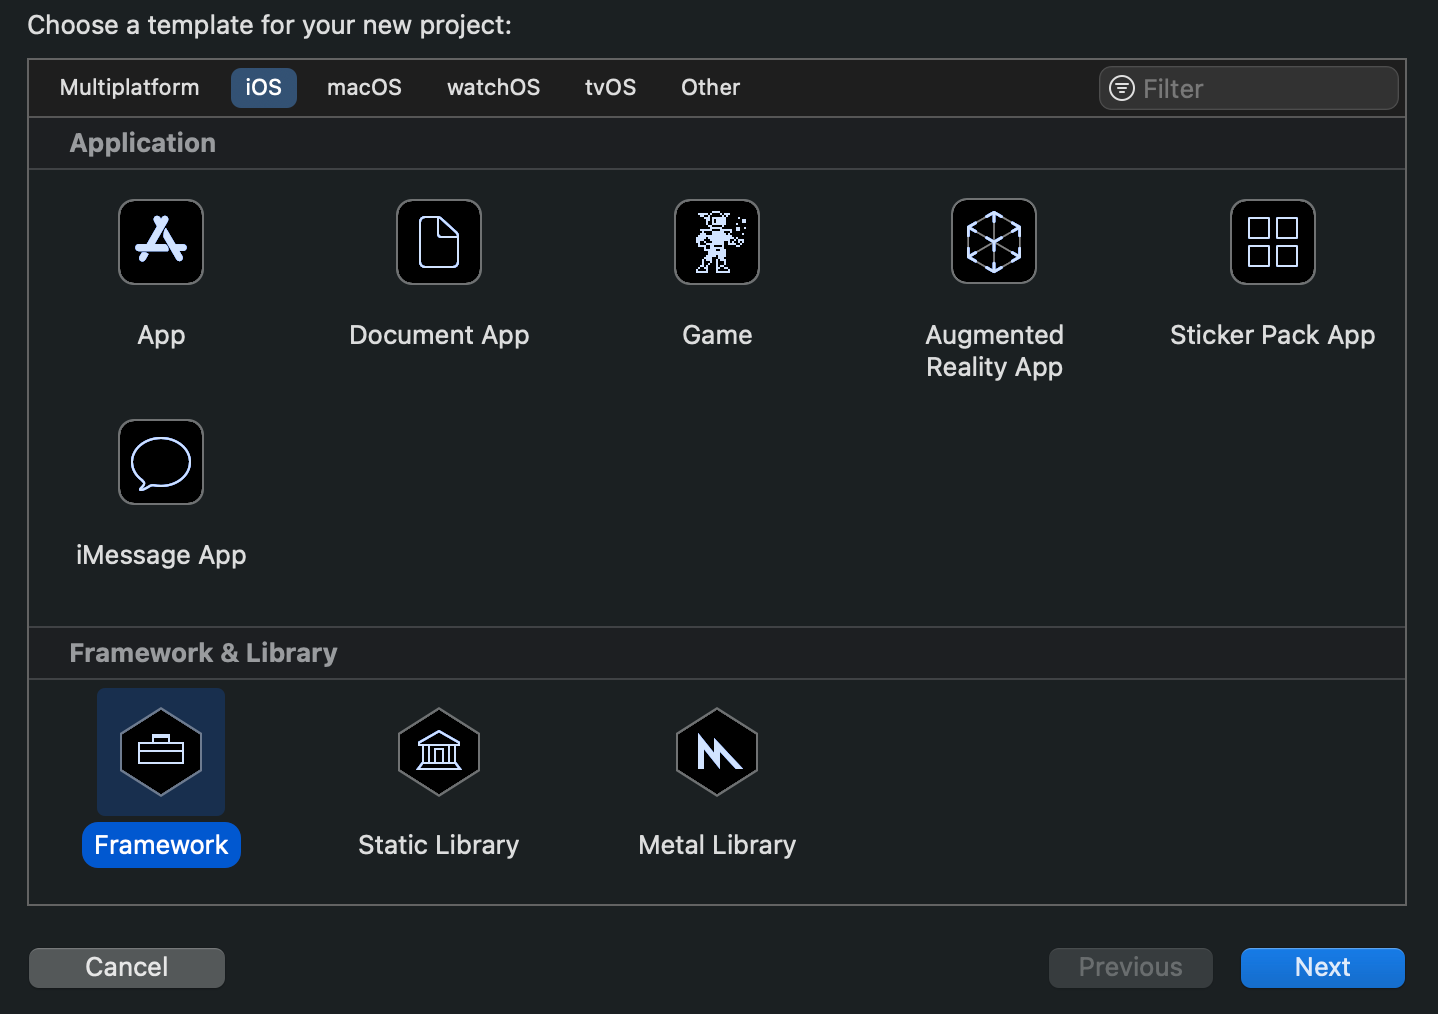
Open Xcode and create a new project. Select Framework under the iOS section.
Fill in the template options as follows, then click Next:
com.rudrankriyam.SettingsKit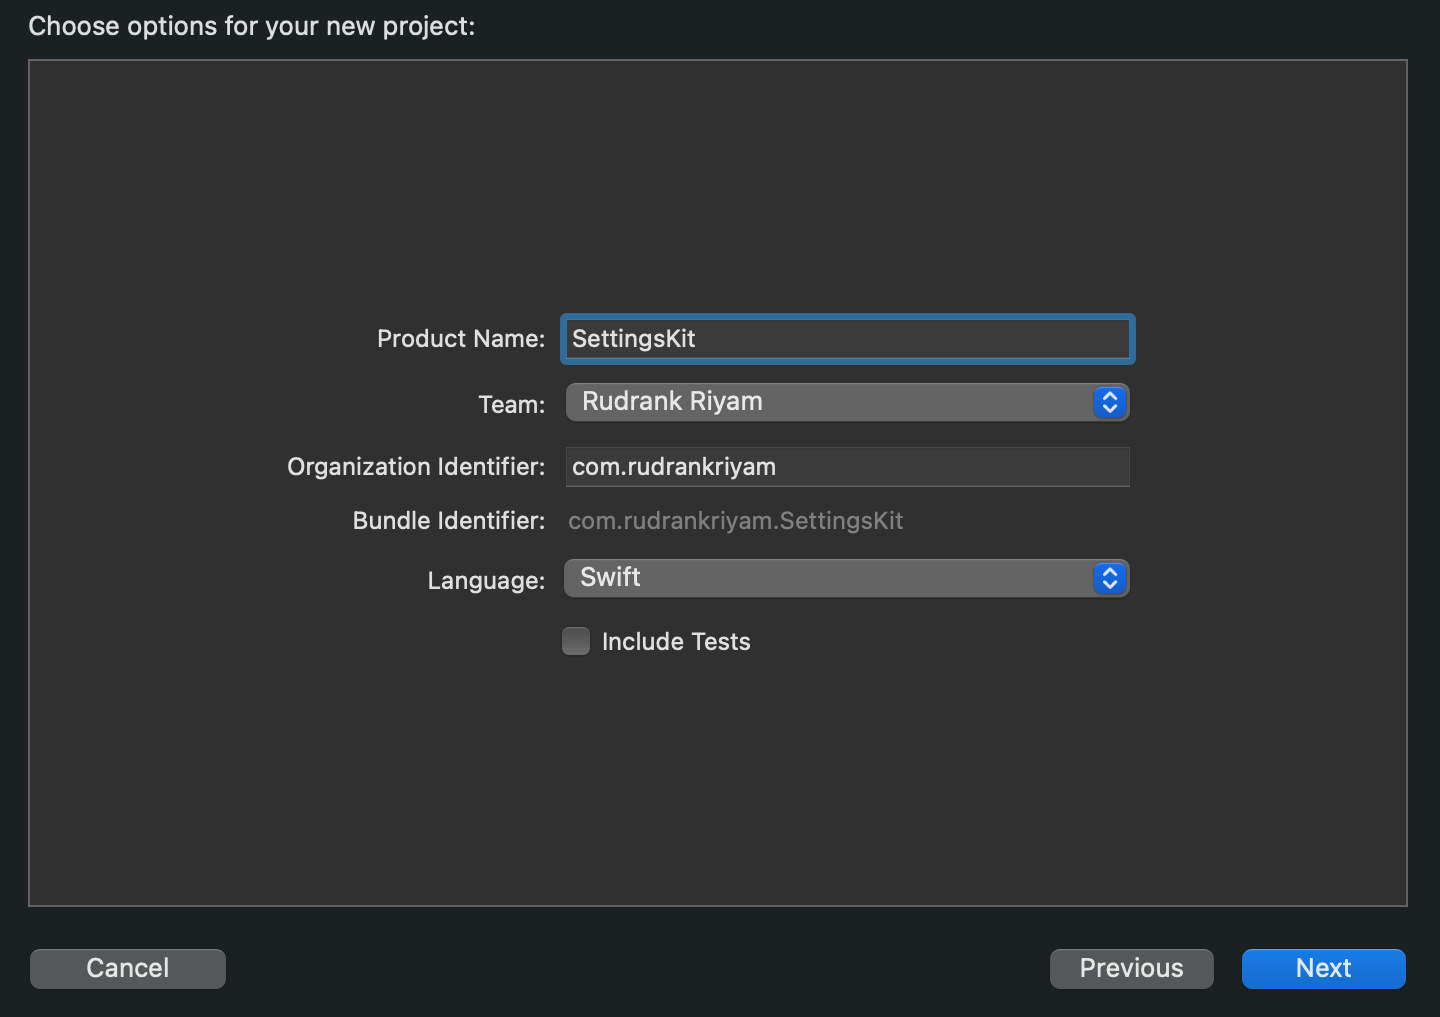
Choose a directory to save the framework, and click Create.
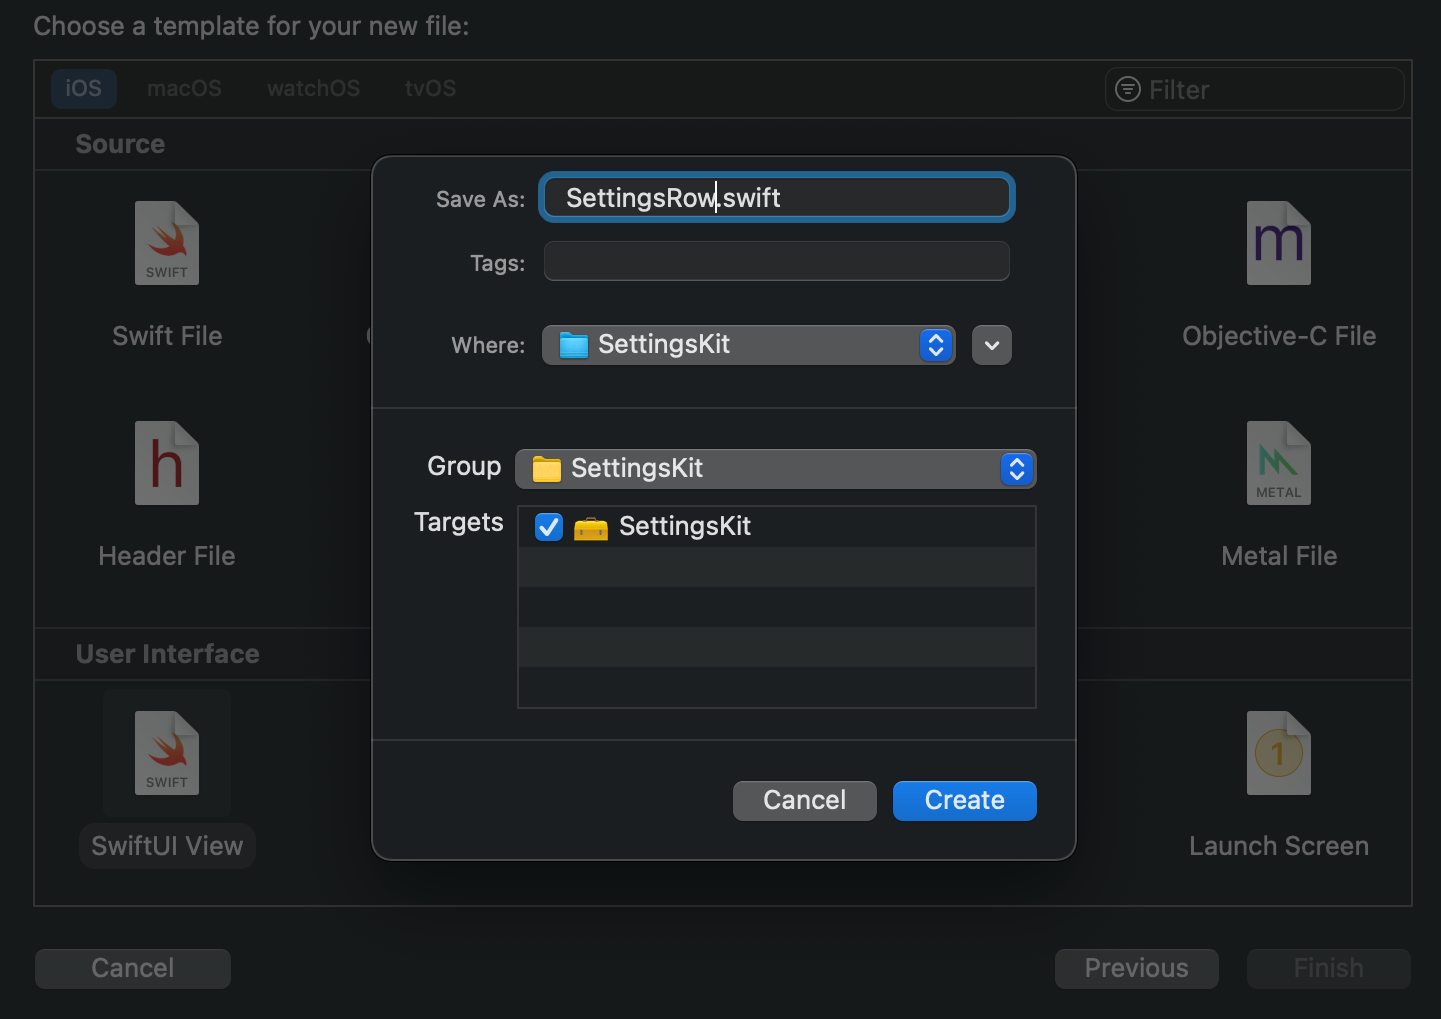
Now, create a new SwiftUI view, and name it as SettingsRow.swift. This is a generic row with a name and image, with a disclosure indicator. Make sure to check the framework in the targets.
Copy the following code for SettingsRow inside the file:
public struct SettingsRow: View {
  private var title: String
  private var image: String
  private var showDisclosure: Bool

  /// A generic settings row which can be customised according to your needs.
  /// - Parameters:
  ///   - title: The title of the row.
  ///   - image: The SF symbol for the row.
  ///   - showDisclosure: Show disclosure icon for action or navigation.
  public init(_ title: String, image: String, showDisclosure: Bool = false) {
    self.image = image
    self.title = title
    self.showDisclosure = showDisclosure
  }

  public var body: some View {
    HStack(spacing: 8) {
      Image(systemName: image)
        .font(.headline)
        .frame(minWidth: 25, alignment: .leading)
        .accessibility(hidden: true)

      Text(title)

      Spacer()

      if showDisclosure {
        Image(systemName: "chevron.right")
          .accessibility(hidden: true)
      }
    }
    .padding(.vertical
    .foregroundColor(.accentColor)
  }
}
This view can be used in places for showing the app version or copyright. In this case, we have the disclosure icon hidden by default. As we want to access the view outside the framework itself and use it in our own apps, we change the access level of the struct as public.
Another use case is an action to perform on a row. Create SettingsActionRow file, and add the following:
public struct SettingsActionRow: View {
  private var image: String
  private var title: String
  private var action: () -> ()

  /// A generic settings row which can be customised according to your needs.
  /// - Parameters:
  ///   - title: The title of the row.
  ///   - image: The SF symbol for the row.
  ///   - action: The custom action that you want to perform on tapping the row.
  public init(_ title: String, image: String, action: @escaping () -> ()) {
    self.image = image
    self.title = title
    self.action = action
  }

  public var body: some View {
    Button(action: action) {
      SettingsRow(title, image: image, showDisclosure: true)
    }
    .buttonStyle(PlainButtonStyle())
  }
}
The client code provides it with an action; for example, reviewing the app on the store or opening the app’s social accounts.
To navigate to another view, we create another view called SettingsNavigationRow:
public struct SettingsNavigationRow<Destination: View>: View {
  private var title: String
  private var image: String
  private var destination: Destination

  /// A generic settings row which can be customised according to your needs.
  /// - Parameters:
  ///   - title: The title of the row.
  ///   - image: The SF symbol for the row.
  ///   - destination: The view to navigate to, after tapping the row.
  public init(_ title: String, image: String, destination: Destination) {
    self.image = image
    self.title = title
    self.destination = destination
  }

  public var body: some View {
    NavigationLink(destination: destination) {
      SettingsRow(title, image: image, showDisclosure: true)
    }
    .buttonStyle(PlainButtonStyle())
  }
}
After a few similar rows, we group them using a secondary background color, like in the iOS settings screen. Add the following modifier:
public extension View {
  func settingsBackground(cornerRadius: CGFloat = 16,
                          innerPadding: CGFloat = 8,
                          outerPadding: CGFloat = 16) -> some View {
    self
      .padding(.horizontal, 16)
      .padding(.vertical, innerPadding)
      .background(RoundedRectangle(cornerRadius: cornerRadius,
                                   style: .continuous)
                    .fill(Color(.secondarySystemBackground)))
      .padding(outerPadding)
  }
}
With this, we’ve created our first framework ready to be utilized in our apps!
Open Xcode, select Create a new Xcode project, and select the App template under the iOS header.
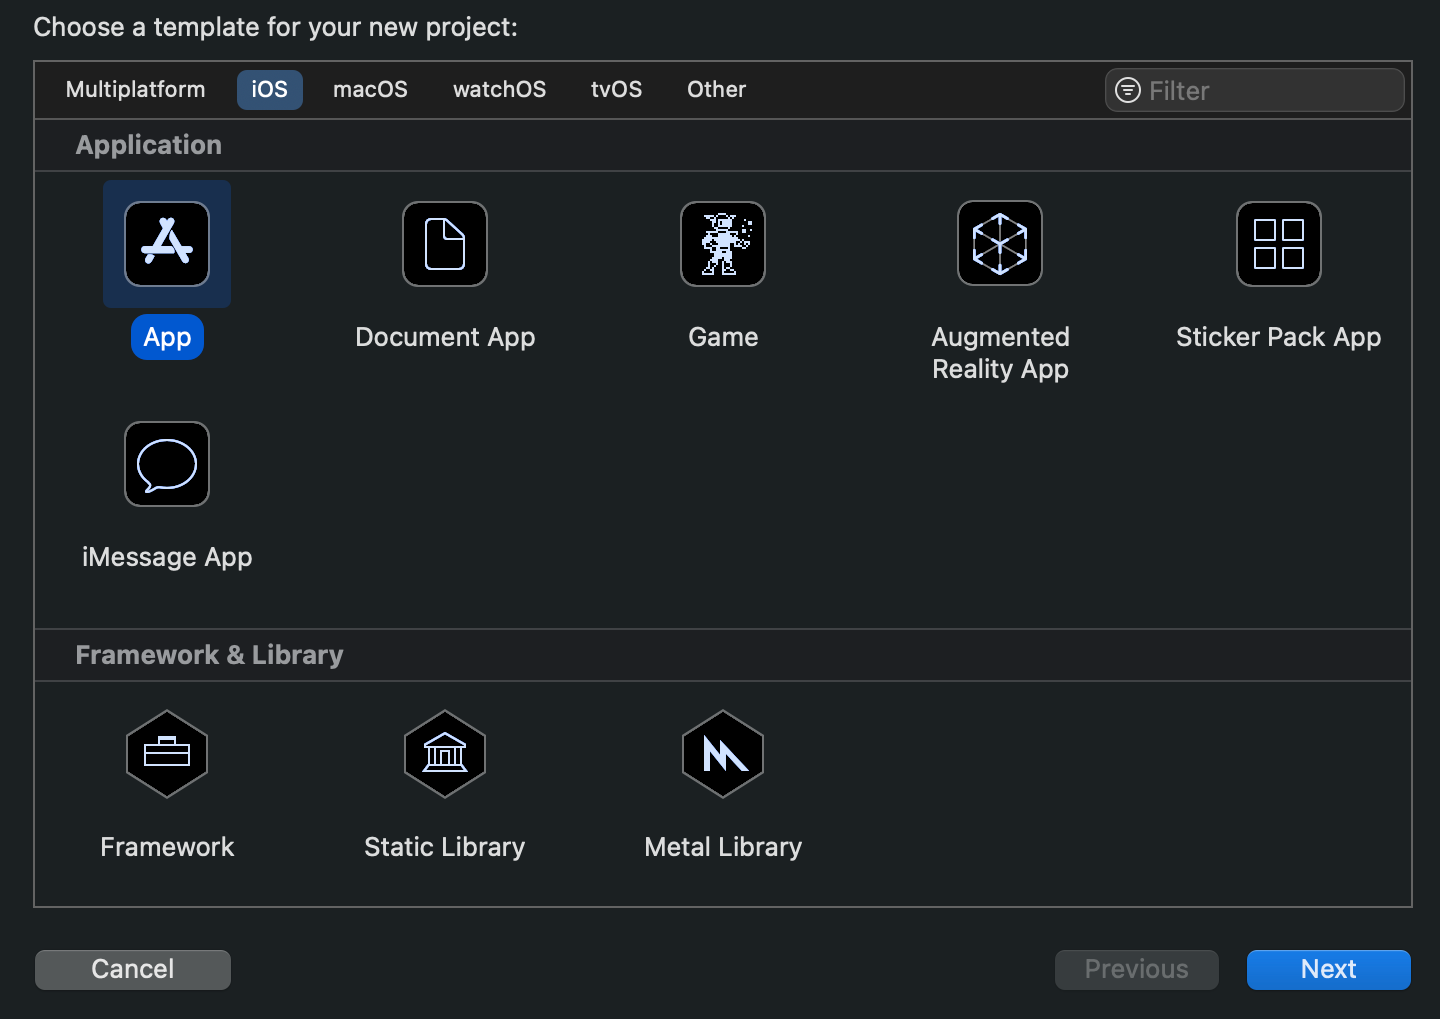
Fill in the template options as follows, then click Next:
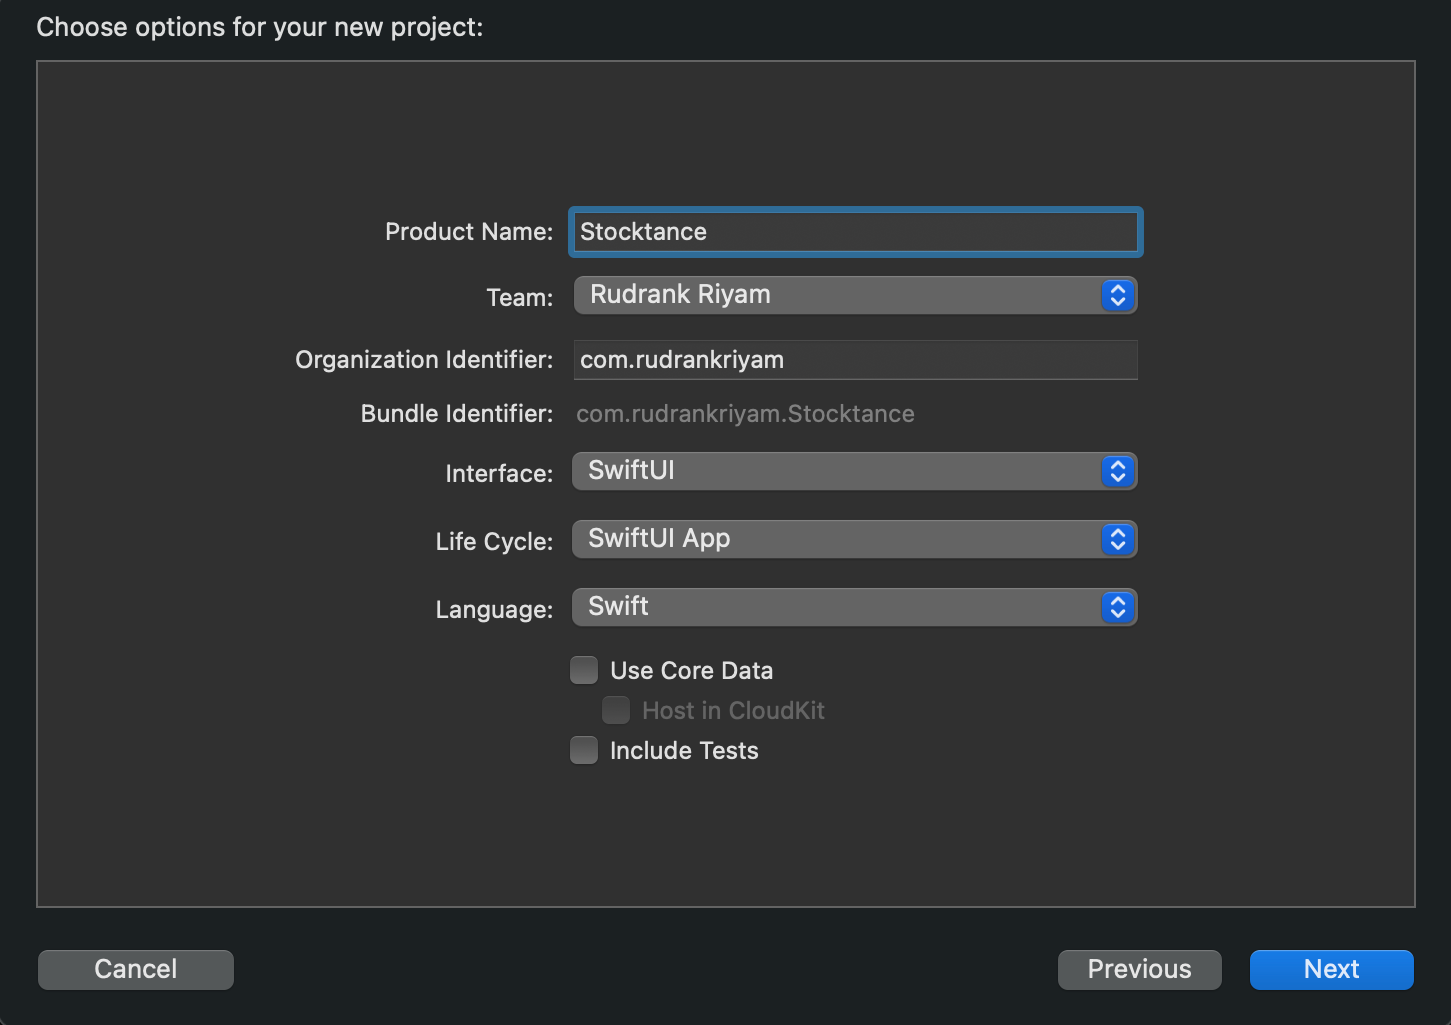
Choose a directory to save our project and click Create.
Now that we have our project ready, we import the framework into our app.
There are two ways to add the project to your app:
Both are of a similar type, so we’ll prefer the latter option. In the app, select the project from the project navigator, select the Stocktance target, and scroll to Frameworks, Libraries, and Embedded Content.
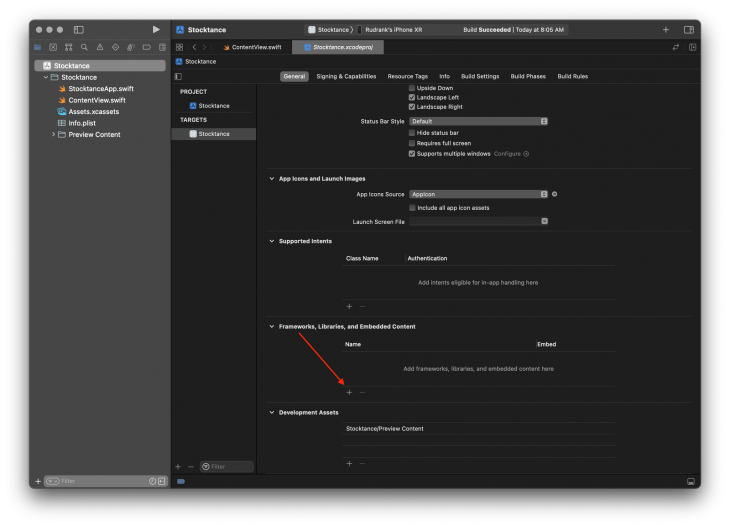
Click on the plus button, click Add Other… and select Add Files…
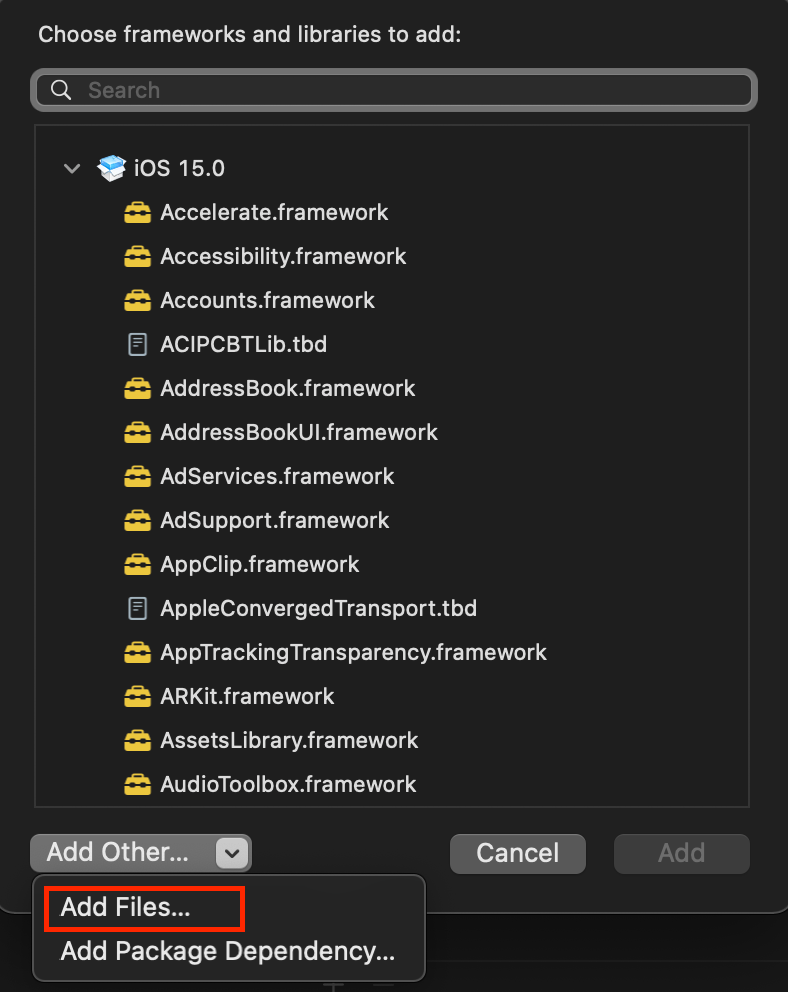
Navigate to the SettingsKit folder and select it. We’ve added the framework to the project. To add it to our target, click the plus button again, and you’ll find SettingsKit.framework on the top. Select it to add it to our target.
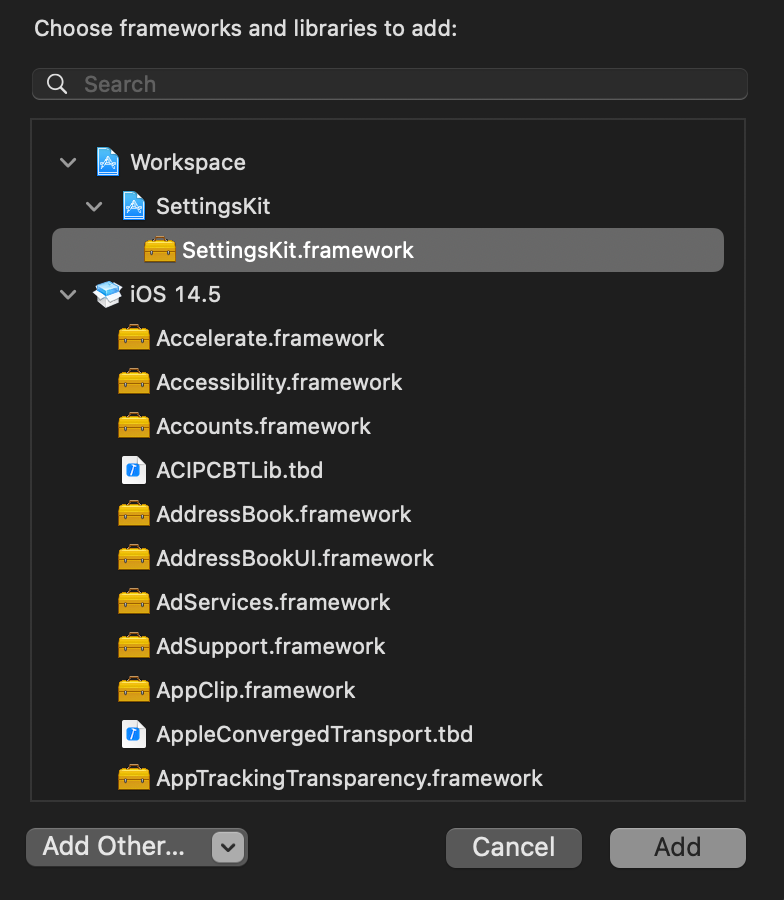
Now, we’ve successfully added the framework to our app! Time to use it!
Create a new SwiftUI file called SettingsView in Stocktance, and at the top of the file, import our framework:
import SettingsKit
Just like we import Apple’s SwiftUI framework to take advantage of all they have to offer, we import our framework to create the settings view.
Add the following to the SettingsView:
struct SettingsView: View {
  let appVersion = Bundle.main.infoDictionary?["CFBundleShortVersionString"] as! String

  var body: some View {
    NavigationView {
      ScrollView {
        VStack {
          SettingsNavigationRow("Account", image: "person.crop.circle",
                                destination: Text("Accounts Screen"))

          SettingsNavigationRow("Phone Numbers", image: "number.circle",
                                destination: Text("Phone Screen"))

          SettingsNavigationRow("Notifications", image: "bell.circle",
                                destination: Text("Notifications Screen"))
        }
        .settingsBackground()

        VStack {
          SettingsRow("App Version \(appVersion)", image: "doc.append")
        }
        .settingsBackground()
      }
      .navigationTitle("Settings")
    }
  }
}
With few lines of code, thanks to the framework we created earlier, we created simple views for our settings screen. You can use this framework in any other app as well to maintain the consistency of your settings.
To add the SettingsView in the app, copy the following in ContentView.swift:
struct Stock {
  var name: String
  var price: Double
}

extension Stock {
  static let testStocks = [Stock(name: "Banana", price: 125),
                           Stock(name: "TapeBook", price: 320),
                           Stock(name: "Ramalon", price: 3200)]
}

struct ContentView: View {
  var body: some View {
    NavigationView {
      List(Stock.testStocks, id: \.name, rowContent: WatchlistRow.init)
        .navigationTitle("Stocktance")
        .toolbar {
          NavigationLink(destination: SettingsView()) {
            Image(systemName: "gear")
          }
        }
    }
    .accentColor(.purple)
  }
}

struct WatchlistRow: View {
  var stock: Stock

  var body: some View {
    HStack {
      Text(stock.name)

      Spacer()

      Text("$" + String(format: "%.2f", stock.price))
        .foregroundColor(.white)
        .padding(8)
        .background(RoundedRectangle(cornerRadius: 8).fill(Color(.systemGreen)))
    }
    .padding(.vertical)
  }
}
Run the app to see your framework code in action!
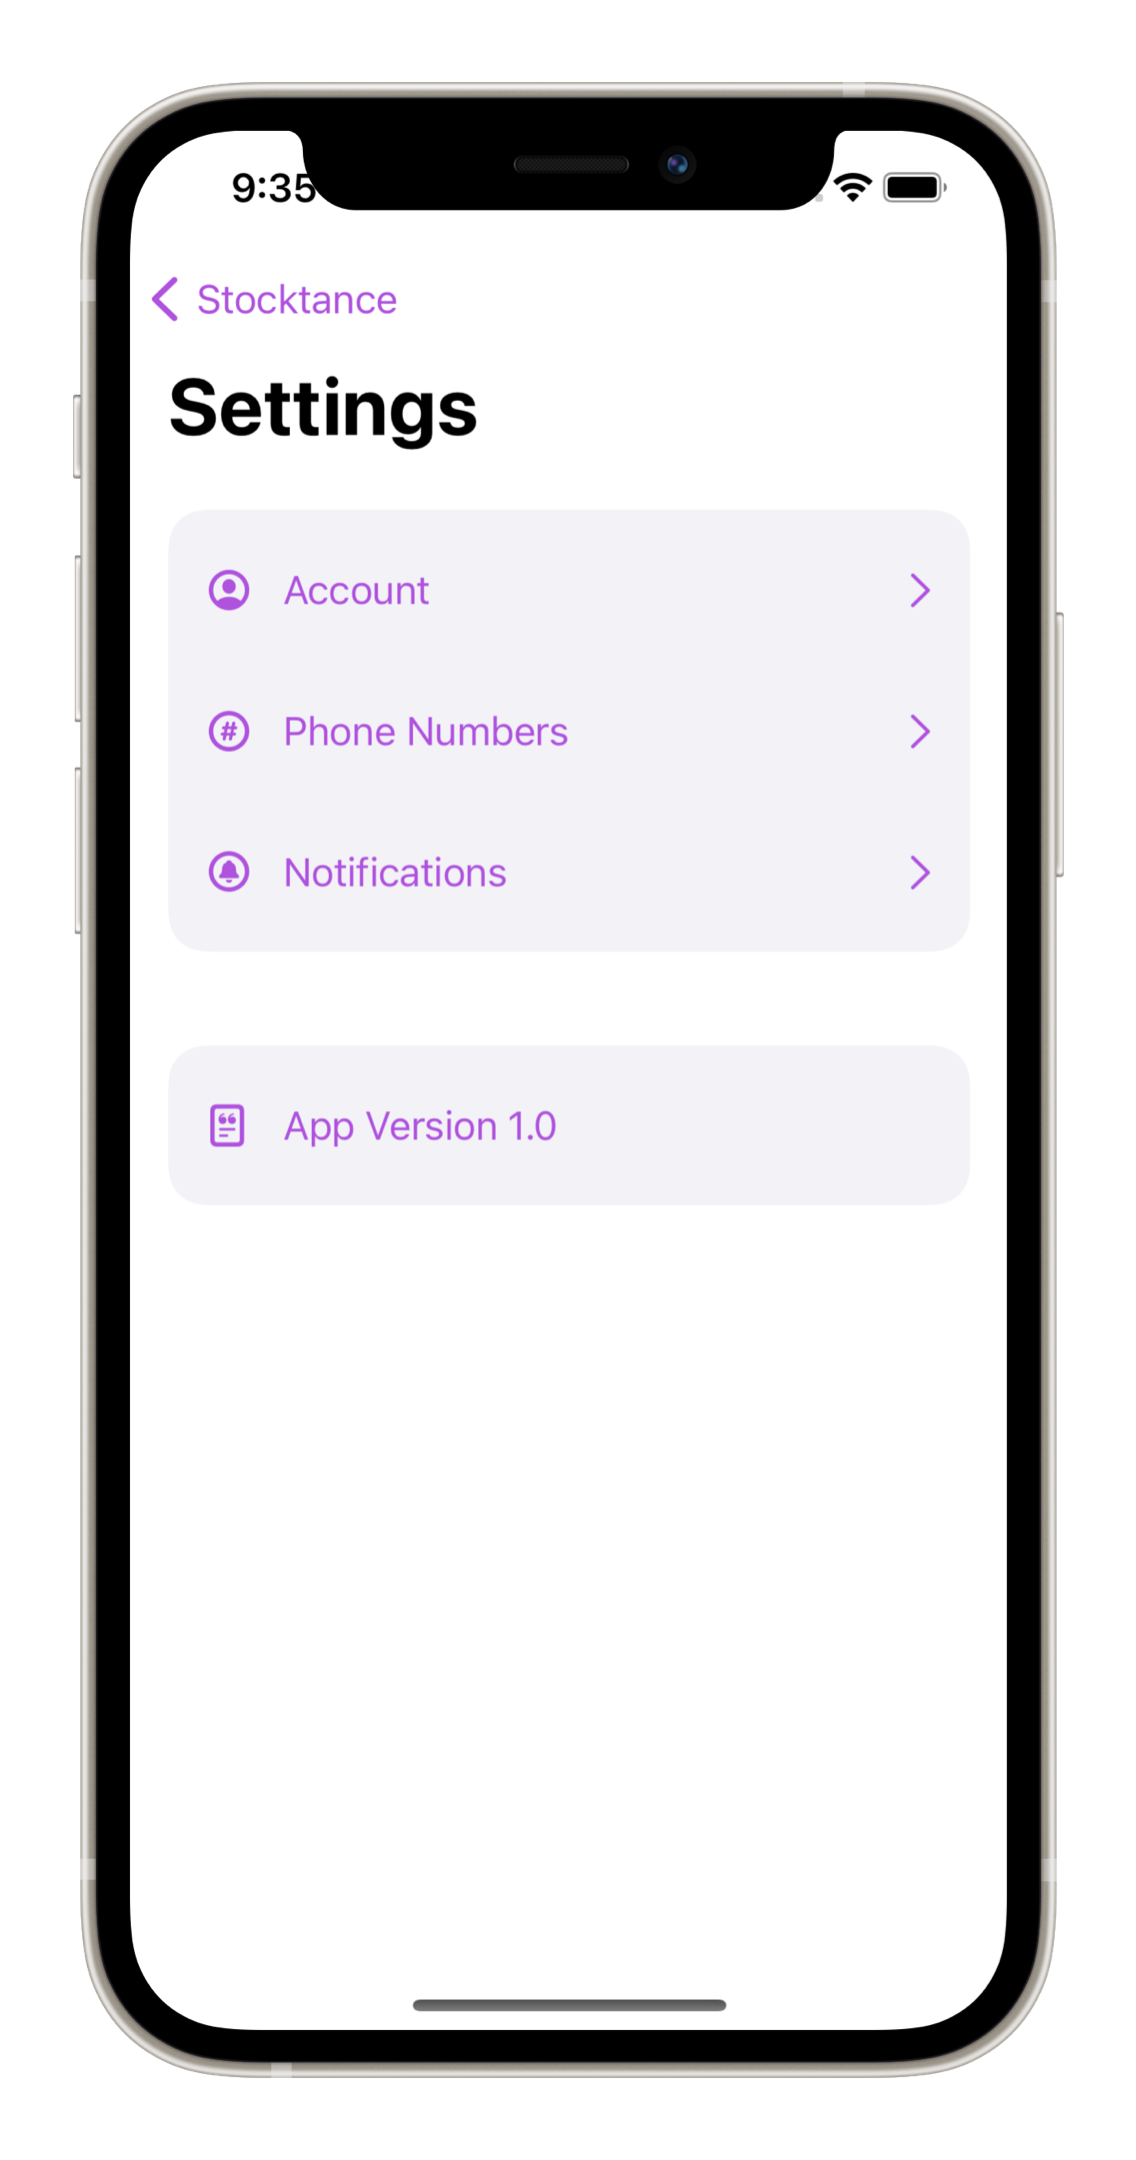
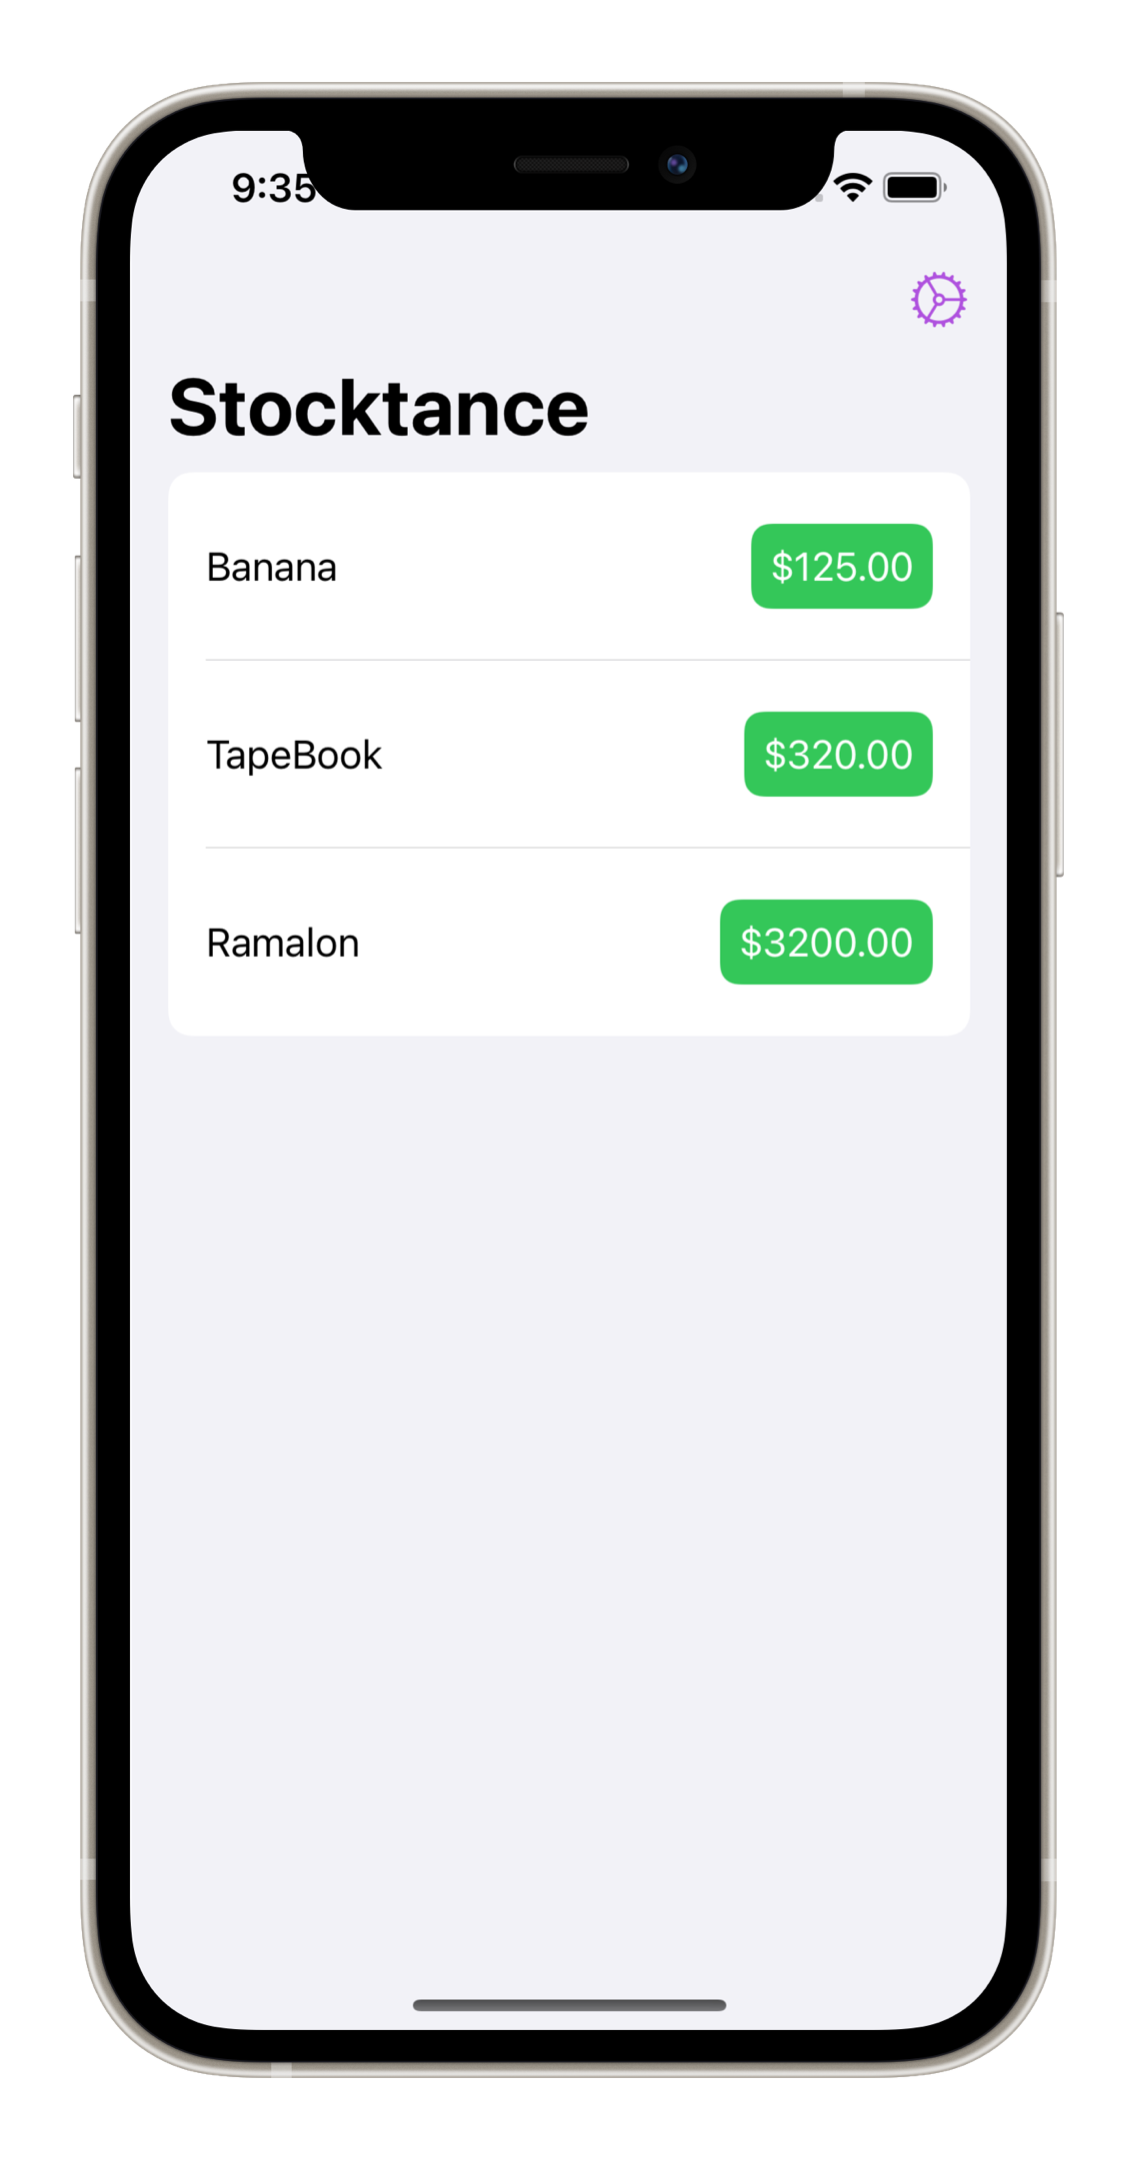
As your app scales, it is an excellent plan to break the code into individual components and reusable chunks into frameworks. For example, you can have the networking layer as a framework, isolated from the main app. Or an AnalyticsKit for handling the analytics. If the provider changes, you only have to make changes in the framework, as the primary implementation is separated from the app.
For sharing your framework as an open-source library or sharing it internally with the team, you can use Swift Package Manager to manage the code’s distribution.
Install LogRocket via npm or script tag. LogRocket.init() must be called client-side, not
server-side
$ npm i --save logrocket

// Code:

import LogRocket from 'logrocket';
LogRocket.init('app/id');
// Add to your HTML:

<script src="https://cdn.lr-ingest.com/LogRocket.min.js"></script>
<script>window.LogRocket && window.LogRocket.init('app/id');</script>

@container scroll-state: Replace JS scroll listeners nowCSS @container scroll-state lets you build sticky headers, snapping carousels, and scroll indicators without JavaScript. Here’s how to replace scroll listeners with clean, declarative state queries.

Explore 10 Web APIs that replace common JavaScript libraries and reduce npm dependencies, bundle size, and performance overhead.

Russ Miles, a software development expert and educator, joins the show to unpack why “developer productivity” platforms so often disappoint.

Discover what’s new in The Replay, LogRocket’s newsletter for dev and engineering leaders, in the February 18th issue.
Hey there, want to help make our blog better?
Join LogRocket’s Content Advisory Board. You’ll help inform the type of content we create and get access to exclusive meetups, social accreditation, and swag.
Sign up now
One Reply to "How to create a framework in Swift"
Thank you for sharing!