
React is very simple and efficient for creating large applications. React Native enables you to use React to build mobile apps that work on both Android and iOS.

In this tutorial, we’ll demonstrate how to build iOS apps using React Native.
The Replay is a weekly newsletter for dev and engineering leaders.
Delivered once a week, it's your curated guide to the most important conversations around frontend dev, emerging AI tools, and the state of modern software.
React Native enables you to write Android and iOS apps using JavaScript. It uses React’s virtual DOM concept to manipulate native platform UI components, providing a familiar experience to users.
There are two ways to build iOS apps:
In this guide, we will use both methods.
The React Native CLI is available as an npm package. Before installing it, make sure Xcode is installed on your system. This is where you build the native iOS code for React Native to use. As a first step, install Xcode from the App Store.
Once Xcode is installed, we can start building our app. We’ll use CocoaPods as a dependency manager and Watchman to run our project:
brew install watchman #watches file changes and runs the project automatically
sudo gem install cocoapods #manages dependencies for Xcode projects
We’re done! To create a new React Native project, run the following command:
npx react-native init myproject
A new myproject folder should be created in your current working directory with the following structure:
├── App.js
├── __tests__
├── android
├── app.json
├── babel.config.js
├── index.js
├── ios
├── metro.config.js
├── node_modules
├── package.json
└── yarn.lock
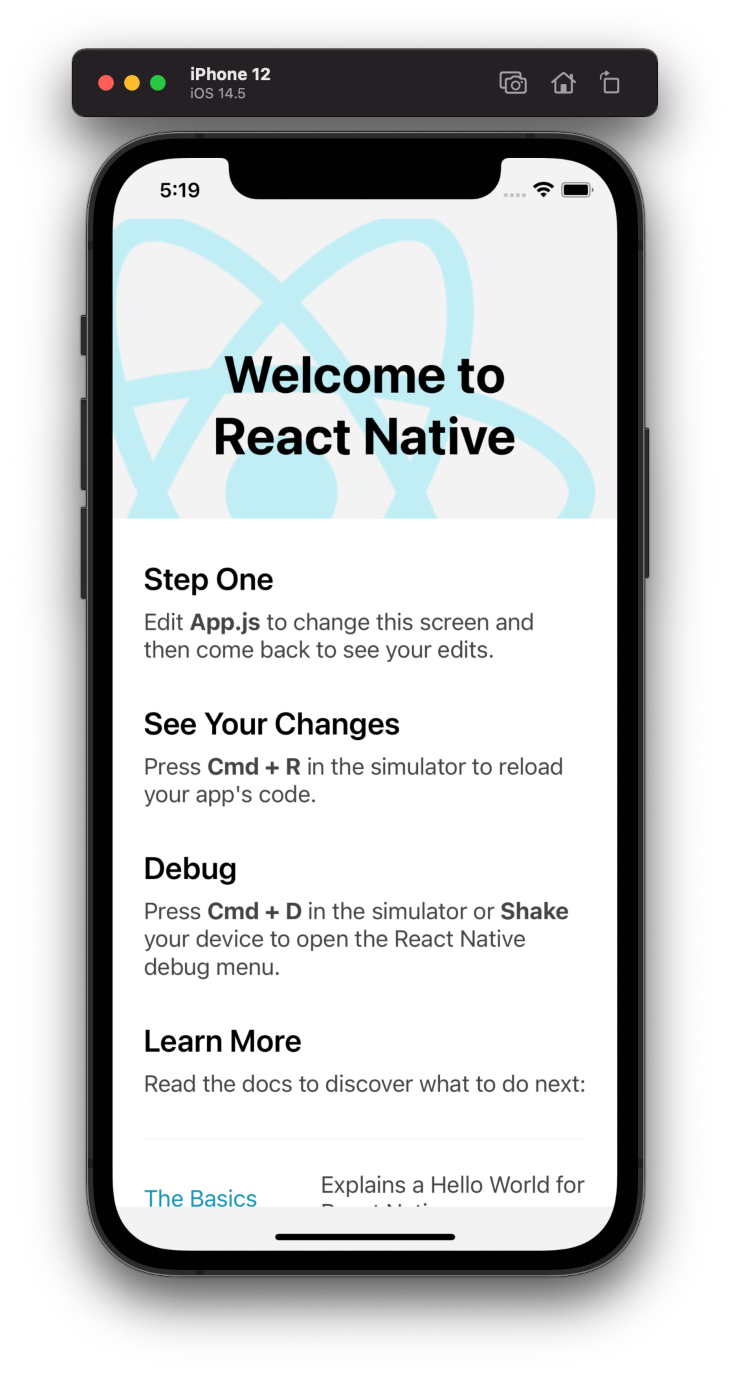
Start the project by running npm run ios. This will start the app on the iOS simulator.
Don’t have a MacOSX machine? No problem! We can use the Expo CLI. To install Expo, run the following terminal command:
npm install -g expo-cli
Now that we have downloaded expo-cli, initialize an Expo repository like so:
expo init myproject
This will build a project wizard that will allow you to create a project from a template. Here, select the minimal option.

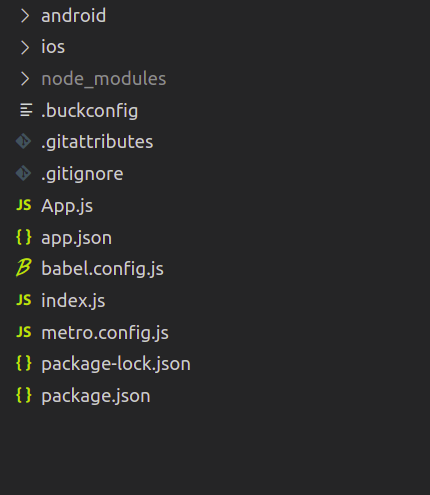
As a result, this will create a folder called myproject on your computer with the following structure:
To run your Expo app:
expo start
This will then generate a QR code that will run the program on your iOS device.

The processes for building React Native apps for iOS and Android are similar until you start dealing with platform-specific APIs. Most of the UI elements available work for both Android and iOS platforms.
React Native provides basic building block elements that are used to build complex UIs. Among the most important are:
Text is used to display text in the application — e.g., <Text>Some Text</Text>View is a container with support for layout and style — e.g., <View><Text>Some Text</Text></View>You can find the full list of core components and APIs for buttons, lists, images, styles, user inputs, and more in the React Native docs.
The entry point for a React Native application is index.js. This contains the main component to render the application.
import {AppRegistry} from 'react-native';
import App from './App';
import {name as appName} from './app.json';
// registering the component to be rendered.
AppRegistry.registerComponent(appName, () => App);
A React Native component is very similar to a React component. All React APIs are also available in React Native.
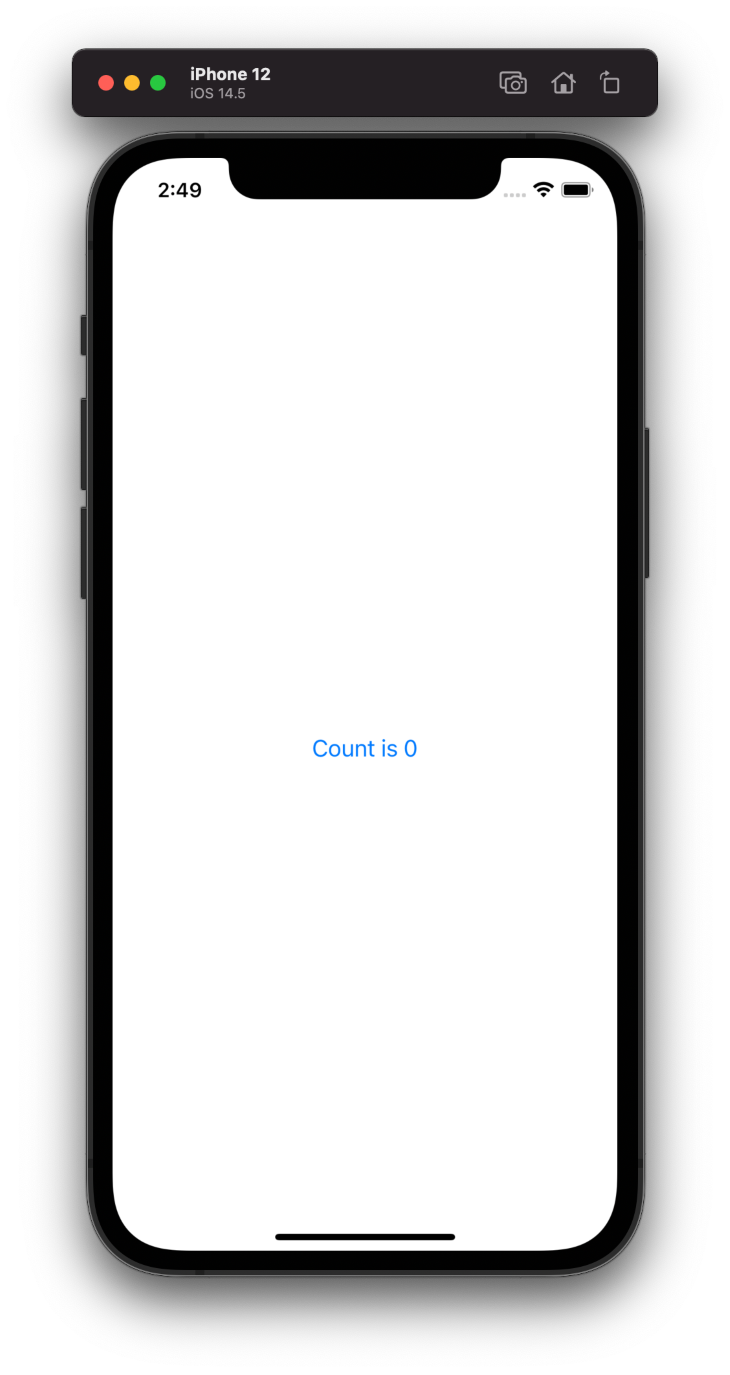
Let’s create a simple increment button to better understand React Native APIs:
import React, { useState } from 'react';

/* Import basic components from react native */
import {
  Button,
  SafeAreaView,
  StatusBar,
  View,
  Text,
  StyleSheet
} from 'react-native';


const App = () => {
/* using useState Hook for creating state*/
  const [count,setCount]=useState(0);
  return (
   /* using state in button and updating on click*/
    <SafeAreaView>
      <StatusBar/>
      <View style={styles.view}>
      {/* using state in button and updating on click*/}
        <Button onPress={()=>setCount(count+1)} title={`Count is ${count}`} />
      </View>
    </SafeAreaView>
  );
};

const styles = StyleSheet.create({
  view: {
    marginTop: "100%",
  },
});

export default App;
All the React Hooks are usable in React Native.
Communication with external services is very important for any application. React Native provides a uniform abstraction over platform APIs. This example demonstrates the usage of fetch very effectively with Image provided by React Native:
import React, { useEffect, useState } from "react";
import {
  ActivityIndicator,
  SafeAreaView,
  Text,
  View,
  Image,
} from "react-native";
function App() {
  // state for loading
  const [isLoading, setLoading] = useState(true);
  // state to hold fetched data
  const [data, setData] = useState(null);
  // use effect to fire up on component load
  useEffect(() => {
    fetch("https://random.dog/woof.json")
      .then((response) => response.json())
      // set the data
      .then((json) => setData(json.url))
      // if error log the error
      .catch((error) => console.error(error))
      // stop loading(by setting the isLoading false)
      .finally(() => setLoading(false));
  }, []);
  return (
    <View style={{ flex: 1, padding: 24 }}>
      <SafeAreaView />
      {/*Check if the photo is loading..*/}
      {isLoading ? <ActivityIndicator /> : <Photo data={data} />}
      <Text>{data}</Text>
    </View>
  );
}
//create our Photo component.
function Photo({ data }) {
  return (
    <View>
    {/*If the data prop is not undefined, display the image*/}
      {data ? (
        <Image
          style={{
            width: 350,
            height: 400,
          }}
          source={{
            uri: data,
          }}
        />
      ) : (
        <Text>No Image</Text>
      )}
    </View>
  );
}
export default App;

React Native has a large community of developers who’re constantly churning out high-quality libraries to help with various tasks.
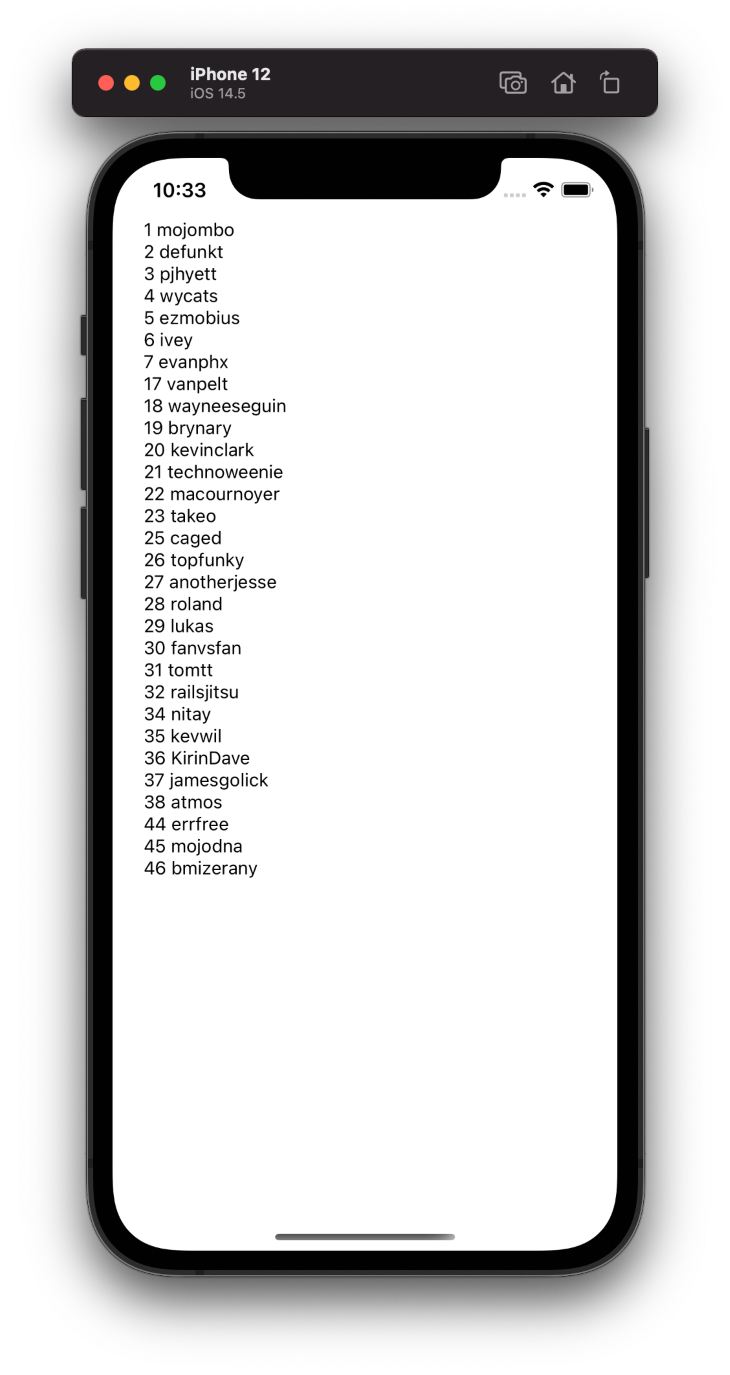
To demonstrate how to integrate third-party libraries in your React Native iOS app, let’s add cache to our app using a popular storage library. react-native-mmkv-storage is written in C++.
Since react-native-mmkv-storage uses native code, the installation process is slightly different from that of pure JavaScript modules.
First, install react-native-mmkv-storage using npm:
npm install react-native-mmkv-storage
pod install #for iOS only
Now install the native part of the module using the pod install command in the ios directory. Installation varies depending on the module.
Use the library in code to store data returned from the API:
// App.js
import React, { useEffect, useState } from 'react';
import { ActivityIndicator, FlatList, SafeAreaView, Text, View } from 'react-native';
import { MMKV } from './storage';
export default App = () => {
  // state for loading
  const [isLoading, setLoading] = useState(true);
  // state to hold fetched data
  const [data, setData] = useState([]);
  // use effect to fire up on component load
  useEffect(() => {
    MMKV.getArrayAsync("data_val").then((cachedValue) => {
      if (cachedValue && cachedValue.length) {
        setData(cachedValue)
        return
      }
      fetch('https://api.github.com/users')
        .then((response) => response.json())
        // set the data
        .then(async (json) => {
          await MMKV.setArrayAsync("data_val", json)
          setData(json)
        })
        // if error log the error
        .catch((error) => console.error(error))
      // stop loading(by setting the isLoading false)
    }).finally(() => setLoading(false));
  }, [])
  return (
    <View style={{ flex: 1, padding: 24 }}>
      <SafeAreaView>
      </SafeAreaView>
      {/*Check if */}
      {isLoading ? <ActivityIndicator /> : (
        <FlatList
          data={data}
          keyExtractor={({ id }, index) => id}
          renderItem={({ item }) => (
            <Text>{item.id} {item.login}</Text>
          )}
        />
      )}
    </View>
  );
};


// storage.js
import MMKVStorage from "react-native-mmkv-storage"
export const MMKV = new MMKVStorage.Loader().initialize();
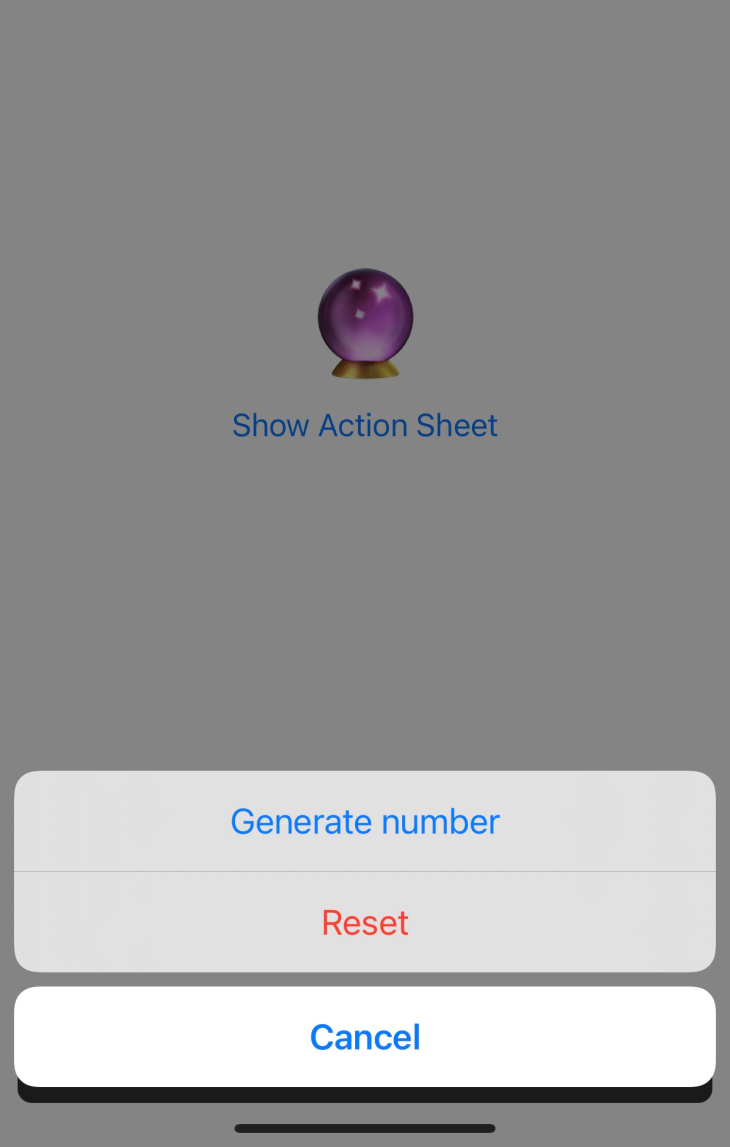
React Native provides a thin wrapper JavaScript around a few native APIs, including ActionSheetIOS, DynamicColorIOS, and Settings.
Settings is used for storing key-value pairs on the device. ActionSheetIOS opens the action bottom sheet and shares the bottom sheet with the iOS device. DynamicColorIOS is used to define the colors based on the device theme (i.e., dark or light theme).
The example below from the React Native docs uses ActionSheetIOS. These APIs are used as if normal JavaScript objects or functions are used. If you’re using Expo, opt for the ActionSheet API instead:
import React, { useState } from "react";
import { ActionSheetIOS, Button, StyleSheet, Text, View } from "react-native";

const App = () => {
  const [result, setResult] = useState("🔮");

  const onPress = () =>
 // open sheet
    ActionSheetIOS.showActionSheetWithOptions(
      {
        options: ["Cancel", "Generate number", "Reset"],
        destructiveButtonIndex: 2,
        cancelButtonIndex: 0,
        userInterfaceStyle: 'dark'
      },
      buttonIndex => {
 // handle button press on the sheet
        if (buttonIndex === 0) {
          // cancel action
        } else if (buttonIndex === 1) {
          setResult(Math.floor(Math.random() * 100) + 1);
        } else if (buttonIndex === 2) {
          setResult("🔮");
        }
      }
    );

  return (
    <View style={styles.container}>
      <Text style={styles.result}>{result}</Text>
      <Button onPress={onPress} title="Show Action Sheet" />
    </View>
  );
};

const styles = StyleSheet.create({
  container: {
    flex: 1,
    justifyContent: "center"
  },
  result: {
    fontSize: 64,
    textAlign: "center"
  }
});

export default App;
Building iOS apps is very easy using React Native. In this tutorial, we demonstrated how to install React Native using the React concept in React Native. We covered the basic components provided out of the box by React Native, showed how to install libraries, and introduced you to some wrappers around native APIs provided by React Native.

LogRocket's Galileo AI watches sessions for you and and surfaces the technical and usability issues holding back your React Native apps.
LogRocket also helps you increase conversion rates and product usage by showing you exactly how users are interacting with your app. LogRocket's product analytics features surface the reasons why users don't complete a particular flow or don't adopt a new feature.
Start proactively monitoring your React Native apps — try LogRocket for free.

Russ Miles, a software development expert and educator, joins the show to unpack why “developer productivity” platforms so often disappoint.

Discover what’s new in The Replay, LogRocket’s newsletter for dev and engineering leaders, in the February 18th issue.

Learn how to recreate Claude Skills–style workflows in GitHub Copilot using custom instruction files and smarter context management.

Claude Code is deceptively capable. Point it at a codebase, describe what you need, and it’ll autonomously navigate files, write […]
Would you be interested in joining LogRocket's developer community?
Join LogRocket’s Content Advisory Board. You’ll help inform the type of content we create and get access to exclusive meetups, social accreditation, and swag.
Sign up now
One Reply to "How to build iOS apps using React Native"
Thanks for an awesome tutorial. Loved the fetch example shown.
I recently started react native app development and facing an issue.
Current testing on android, I am unable to remove the header bottom line from a page.
Read lots of stackoverflow solution but didn’t worked for me.
Here is my expo project- exp://exp.host/@letstacle/letstacle
Let me know if you have a solution, thanks