Hash functions are often used to produce digital fingerprints of data.

Hashing is used most notably in the blockchain, which uses transaction information such as the amount being sent, transaction timestamps, and the sending and receiving address to generate a transaction ID. This information is combined and run through to a hash function to produce the ID, which is used to identify if the transaction has happened. Thus, this ID should be immutable, unique, secure, and free from collisions.
Hashing is also used to produce secure password algorithms. Storing plain text in any database can pose a major security threat. Whenever a user signs up using a plain text password, the password is run against a hash algorithm, and the hashed value is saved in a server.
When the user tries to log in using the password they used to sign up, the password is again passed through the same hash algorithm. The newly generated hash value is then compared against the previously saved hashed value on the server. If the newly calculated hash is the same as the one stored on the server, the password must be correct, and the user is granted login access.
This concept is based on the hash function terminology, which states same inputs will always provide the same outputs. This ensures no plain text passwords are stored in the database, thus ensuring no user data breaches between the user, application owner, or a hacker.
In this article, we will implement a hash generator application using React. React provides interactive user interface designs that allow you to create the necessary components that users can use to generate hashed values from texts and files. Our implementation will involve the SHA-1, SHA-256, SHA-384, and SHA-512 hashing algorithms.
Hashing is the processing of converting a given random input value to generate completely unique keys. Hashing uses special mathematical functions called hashing algorithms, also known as hash functions, which are computations that converts an input value into a fixed-length, unique, and immutable hashed string. The input value can be a large number, a long string of text, or a combination of both. The function will always create a fixed-sized output, regardless of the length of the input value.
There are different hash algorithms that can be used to hash a given input. This includes SHA-1, SHA-256, SHA-384, and SHA-512 algorithms. A good hash algorithm needs to have certain qualities to be considered useful:
First, each hashed value has to be unique, which means different inputs should never produce the same value at any given time. This concept is called free collision, and states that it should be practically impossible to produce duplicate hashed value.
A hash should also have a fixed size. Using a given hash technique, you should always obtain fixed size hashes, regardless of how long the original input is. The size of the hashed value remains the same whether the data set is short or lengthy.
Next, a hash function should be fast to generate a hash value, and should always be random – any slightest change to the input value should always generate a completely different unique value.
Finally, hash algorithms should be secure; determining the input value based on the hash value should be nearly impossible.
Hashing differs from the concept of data encryption. The hashing process is always non-reversible, while encrypted data can be. Encryption is intended to function in two ways: you can encrypt data to keep it safe, and you can also decrypt the same data to reveal the original input.
This means that if attackers manage to steal the encryption key, they can unlock encrypted data. This is why encryption cannot generate values such as blockchain transaction IDs.
To follow along with this guide, it is essential to have the following:
To set up our application, we will use Create React App, a command-line tool provided by React for conveniently bootstrapping your application. This creates a ready-to-use React application template.
To execute a Create React App template, navigate to your desired folder where you want your project to live. Then run the following command to initialize the application:
npx create-react-app hashing-app
Once the setup process is complete, you can test the template application by launching the development server. First, change your command line to point to the newly created application directory:
cd hashing-app
Then start the server using this npm command:
npm run start
Open http://localhost:3000 on your browser, and you should be able to access the default Create React App landing page.

In React, a component represents a part of the user interface. A component can be a page, header, footer, sidebar, or the main component that wraps other components. To create a hashing app with React, you need to set up a component that will let the user interact with different hashing functions.
To do this, navigate to your src folder, create a new directory, and name it components. Inside the components directory, create a hashing.js file for rendering the React component and hashing.css for styling the component.
Head over to the hashing.js create your component as shown in the following steps:
First, set up imports and a rendering function:
import React,{useState} from 'react';
import './hashing.css';

export default function HashingForm(){

}
Here, we import the useState Hook. In React, you can have a state in your component that allows you to construct others. Then, we can use the state of that component to display information inside the render function.
From this step onwards, the rest of the code will go inside the rendering HashingForm() function.
Let’s begin by setting up our initial state:
const [algorithms] = useState(['sha1','sha256','sha384','sha512']);
let [text_input, setTextInput] = useState('');
let [file_input, setFileInput] = useState('');
let [algorithm, setAlgorithm] = useState('sha1');
let [output,setOutput] = useState('');
A state can be an array of values, Booleans, strings, objects, or any other data that a component uses. Here we have created some variables with useState. This will let us interact with values stored by these variables while generating different hash algorithms.
Next, set up the various onChange handlers:
// For handling text input
const handleTextInput = async (e) => {

}

// For handling file input
const handleFileInput = (e) => {

}

// For handling algorithm change
const handleAlgorithmChange = async (e) => {

}
The initial states we defined hold data that will change based on user interaction and the hash algorithm they want to generate. Thus, we have to set up the above handlers to track user reactions to events such as clicking a button.
Now we will render the input fields like so:
return (
    <div className='hashing-container'>
        <div className='hashing-content'>

        // Start: Hashing form
            <div className="hashing-form">
                <h4 className="hashing-form-heading">Input</h4>
                <form>
                    <div className="form-group">
                        <label htmlFor="text-input">Text</label>
                        <input type="text" className="form-control" id="text-input" placeholder='Write some text' value={text_input} onChange={handleTextInput} />
                    </div>
                    <div className="form-group">
                        <label htmlFor="file-input">File Input</label>
                        <input type="file" className="form-control" id="file-input" onChange={handleFileInput} />
                    </div>
                </form>
            </div>
        // End: Hashing form

        </div>
    </div>
);
This template will set up a basic user input that allows users to enter different data they want to hash.
Next, render the hashing algorithms inside the hashing-content div, below the hashing-form div:
// Start: Hashing algorithms
<div className="hashing-algorithms">
    <h4 className="hashing-algorithms-heading">Algorithms</h4>
    <div className="hashing-algorithms-list">
        {
            algorithms.map(algo => {
                return (
                    <div className="form-check" key={algo}>
                        <input className="form-check-input" type="radio" name="algorithm" id={algo} value={algo} checked={algorithm === algo} onChange={handleAlgorithmChange} />
                        <label className="form-check-label" htmlFor={algo}>
                            {algo}
                        </label>
                    </div>
                )
            }
            )}
    </div>
</div>
// End: Hashing algorithms
This template allows the user to select the hash algorithm they want to use.
Next, we will render the hashed output inside the hashing-container div, below the hashing-algorithms div:
// Start: Hashed output
<div className="hashed-output">
    <h4 className="hashed-algorithm-heading">Output</h4>
    <div className="hashed-algorithm-container">
        <p className="hashed-algorithm-text">
            {output}
        </p>
    </div>
</div>
// End: Hashed output
While copying and pasting the above code templates, remember to remove the
Start:andEnd:comments to ensure they are not rendered inside your component.
Once a user inputs the data to hash and selects the hash algorithm to use, we want to capture the hashed algorithm output and display it using the above template.
Next up is to style the component we have created. Add the following styles to the hashing.css file:
.hashing-container {
    width: 100%;
    height: 100vh;
    display: flex;
    justify-content: center;
    align-items: center;
}

.hashing-content {
    width: 40%;
    margin: 0px auto;
    padding: 10px;
    box-shadow: 0 1px 3px #d4d4d5, 0 0 0 1px #d4d4d5;
}

.form-group label {
    width: 100%;
    display: block;
    margin-bottom: 5px;
    font-weight: bold;
}

.form-group input[type="text"] {
    width: 94%;
    padding: 10px;
    border: 1px solid #d4d4d5;
    border-radius: 3px;
    margin-bottom: 5px;
}

.hashing-algorithms .hashing-algorithms-list {
    display: flex;
    justify-content: space-between;
}

.hashed-output .hashed-algorithm-container {
    width: 100%;
    border: 1px solid #d4d4d5;
}

.hashed-output .hashed-algorithm-text {
    padding: 10px;
    word-wrap: break-word;
    width: 90%;
}
Head over to the src directory and edit App.js main component as follows:
import Hashing from './components/hashing'; // hashing component

function App() {
    return (
        <div className="App">
            <Hashing />
        </div>
    );
}

export default App;
From above, we are importing and rendering the Hashing component as the main component of the page.
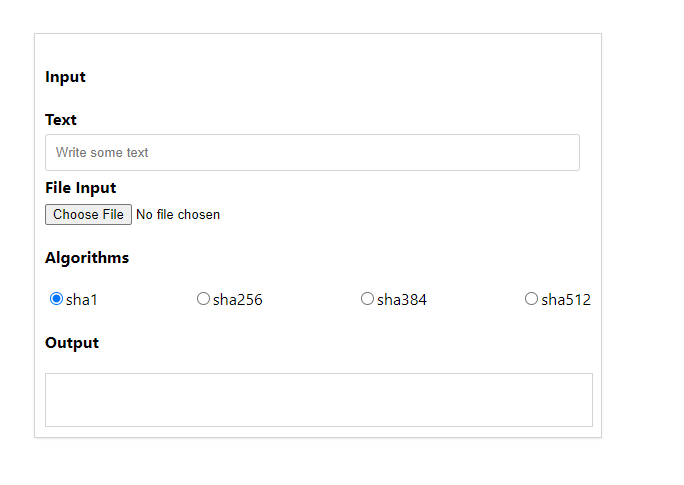
Let’s now test out if the created components work as expected. Ensure your development server is up and running and open http://localhost:3000 on your browser. If your server is not running, run npm run start before heading to http://localhost:3000.
Your landing page should now show the hashing component as below:
In this article, we will be using crypto-hash, a hashing package that uses the native crypto API.
To install it in your project, open a new terminal that points to your project folder and run the following command:
npm install crypto-hash
In src/components/hashing.js, add it to the list of imports:
import {sha1,sha256,sha384,sha512} from 'crypto-hash';
To hash a text, we will work on the handleTextInput onChange handler as follows:
const handleTextInput = async (e) => {
    // Get the value
    let value = e.target.value;

    let result = '';

    // Get the current active algorithm and hash the value using it.
    if (algorithm == 'sha1') {
        result = await sha1(value);
    } else if (algorithm == 'sha256') {
        result = await sha256(value);
    } else if (algorithm == 'sha384') {
        result = await sha384(value);
    } else if (algorithm == 'sha512') {
        result = await sha512(value);
    }

    // Set the hashed text as output
    setOutput(result);

    // Set the value of the text input
    setTextInput(value);
}
This will take in a text as the data value and hash it based on the user preference. A user can choose to use the SHA-1, SHA-256, SHA-384, or SHA-512 hashing algorithms. Once the text has been hashed, we will store the new value and update the setTextInput state. This new value will be displayed in the output section.
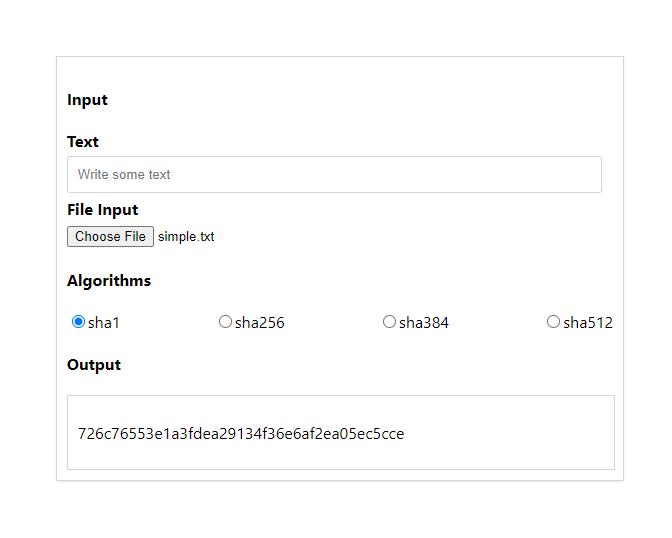
To test this out, head over to your React hashing page, input any text, and you should see the output section is rendered with the hashed text as follows:

Similarly, to hash file content, we will work on the handleFileInput onChange handler as follows:
const handleFileInput = (e) => {

    // Initializing the file reader
    const fr = new FileReader();

    // Listening to when the file has been read.
    fr.onload = async () => {

        let result = '';

        // Hashing the content based on the active algorithm
        if (algorithm == 'sha1') {
            result = await sha1(fr.result);
        } else if (algorithm == 'sha256') {
            result = await sha256(fr.result);
        } else if (algorithm == 'sha384') {
            result = await sha384(fr.result);
        } else if (algorithm == 'sha512') {
            result = await sha512(fr.result);
        }

        // Setting the hashed text as the output
        setOutput(result);

        // Setting the content of the file as file input
        setFileInput(fr.result);
    }

    // Reading the file.
    fr.readAsText(e.target.files[0]);
}
Choose any txt file from your computer, and you should be able to see the hashed content as follows:
Because we are working with different algorithms, we need to work on the handleAlgorithmChange onChange handler to visualize the hashed output from the various algorithms.
Edit the handler as follows:
const handleAlgorithmChange = async (e) => {

    // Get the selected algorithm
    let value = e.target.value;

    let result = '';

    // Check if we have a text input
    if (text_input) {

        // Hash the text based on the selected algorithm
        if (value == 'sha1') {
            result = await sha1(text_input);
        } else if (value == 'sha256') {
            result = await sha256(text_input);
        }
        else if (value == 'sha384') {
            result = await sha384(text_input);
        }
        else if (value == 'sha512') {
            result = await sha512(text_input);
        }

    }

    // Check if we have a file input
    if (file_input) {

        // Hash the file content based on the selected algorithm
        if (value == 'sha1') {
            result = await sha1(file_input);
        } else if (value == 'sha256') {
            result = await sha256(file_input);
        } else if (value == 'sha384') {
            result = await sha384(file_input);
        } else if (value == 'sha512') {
            result = await sha512(file_input);
        }

    }

    // Set the selected algorithm
    setAlgorithm(value);

    // Set the hashed text
    setOutput(result);
}
Now enter some text or choose a .txt file and switch between the algorithms, and you should see the hashed output change respectively.
Go ahead and try selecting different hashes and learn how different hashing algorithms convert your string of text and files to different values.
This article is a step-by-step guide to creating and implementing hash algorithms in a React application.
Hashes can be used in authentication apps such as logging systems, because a hash is always non-reversible. Once generated, the values can’t be changed. Each hash algorithm has a specific length of the hash output, and in this case, the length of the input text of the file doesn’t matter. The goal of the hash algorithm is to generate random and unique strings of hashes, thus, a slight change to the input value will always result in a completely different hashed value.
Check the code used in this article on this GitHub repository.
I hope you found this article helpful!
Install LogRocket via npm or script tag. LogRocket.init() must be called client-side, not
server-side
$ npm i --save logrocket

// Code:

import LogRocket from 'logrocket';
LogRocket.init('app/id');
// Add to your HTML:

<script src="https://cdn.lr-ingest.com/LogRocket.min.js"></script>
<script>window.LogRocket && window.LogRocket.init('app/id');</script>

Learn how contrast-color() automatically picks accessible text colors using native CSS, without JavaScript.

Learn how to build a harness-style AI workflow using Claude Code with specialized Dev, QE, and Ops subagents, gated handoffs, MCP telemetry, and LEARNING.md.

Learn how to build smooth staggered animations in CSS using modern features like sibling-index(), complete with practical examples, fallbacks, and accessibility tips.

Compare the top AI development tools and models of July 2026. View updated rankings, feature breakdowns, and find the best fit for you.
Would you be interested in joining LogRocket's developer community?
Join LogRocket’s Content Advisory Board. You’ll help inform the type of content we create and get access to exclusive meetups, social accreditation, and swag.
Sign up now

