
Editor’s Note: This post was reviewed on 8 March 2023. Vercel released Next.js v13 in October 2022, which includes the new app directory (beta), the addition of Turbopack, and more. Read our in-depth article on the app directory to learn more.

Over the past several years, Next.js has further established its position as the most popular backend framework built on React. Several recent updates have either enhanced or added to this framework’s existing features. One example is its ability to render pages both on the server side and client side along with its integrated routing system, which makes navigation between these renderers seamless.
However, transitioning between these renderers isn’t as buttery smooth as you might expect. Next.js takes a little bit of time to route between pages, especially to server-side rendered pages as these are rendered on request. A site may appear temporarily frozen each time a user tries to route to another page, and this can translate to a poor user experience.
This tutorial will address this issue by demonstrating how to build and display a progress bar indicator when changing routes in a Next.js application. We’ll create one version of the loader component with custom CSS and we’ll also show how to use third-party libraries to add animation.
The Replay is a weekly newsletter for dev and engineering leaders.
Delivered once a week, it's your curated guide to the most important conversations around frontend dev, emerging AI tools, and the state of modern software.
To follow along with this tutorial, you‘ll need the following:
Router events are event listeners that allow us to track route changes in Next.js via the Router object. The object provides properties that we can use to listen to different events happening in the Next.js Router and perform certain actions based on the events.
For example, if we want to log "route is changing" to the console every time a user clicks on a link and navigates to another page, we can use the "routeChangeStart" Router event, like so:
  Router.events.on("routeChangeStart", (url)=>{
    console.log(“route is changing”)
    })
The routeChangeStart event fires when a route starts to change. It returns a callback function that we can use to run codes and actions. As you can see in the above code, the event fires a callback function that logs the "route is changing" string to the console.
Here is a list of some supported Next.js Router events:
routeChangeStart: fires when a route starts to changerouteChangeComplete: fires when a route change is completedrouteChangeError: fires when an error occurs while changing routes, or when a route load is canceledbeforeHistoryChange: fires before changing the Router’s route historyVisit the Next.js documentation to learn more about these Router events.
I’ll assume you already have a Next.js project set up. If not, you can fork the sample project’s CodeSandbox to follow along.
The sample project used in this tutorial is a simple Next.js app based on the Rick and Morty sitcom. The sample app has three pages: Home, About, and Characters. The first two pages are client-side rendered, while the Characters page is server-side rendered.
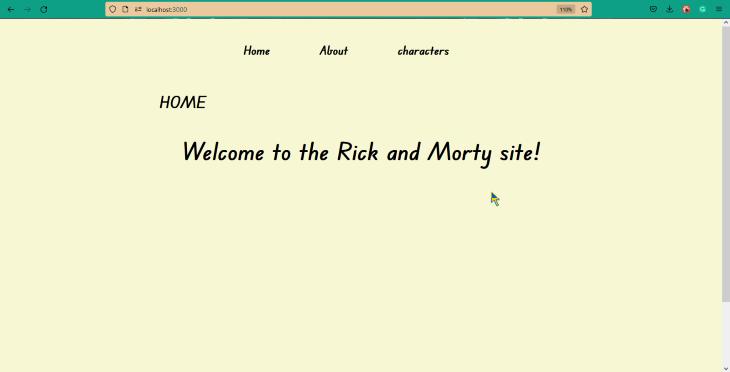
Inside the Characters page, we’re using the getServerSideProps function to fetch and display data from the Rick and Morty API:
const Characters = ({ data }) => {
    return (
        <div className={styles.container}>
        ...
        </div>
    );
}

export default Characters;

export async function getServerSideProps() {
    const delay = (s) => new Promise(resolve => setTimeout(resolve, s))
    const res = await fetch("https://rickandmortyapi.com/api/character")
    await delay(2000)
    const data = await res.json();

    return {
        props: {data}
    }
}
The Characters page is pre-generated on initial load, but the fetching request is only completed when a user clicks on the route. This way, the page’s content will only be displayed to the user when the request is finished, which may take some time.
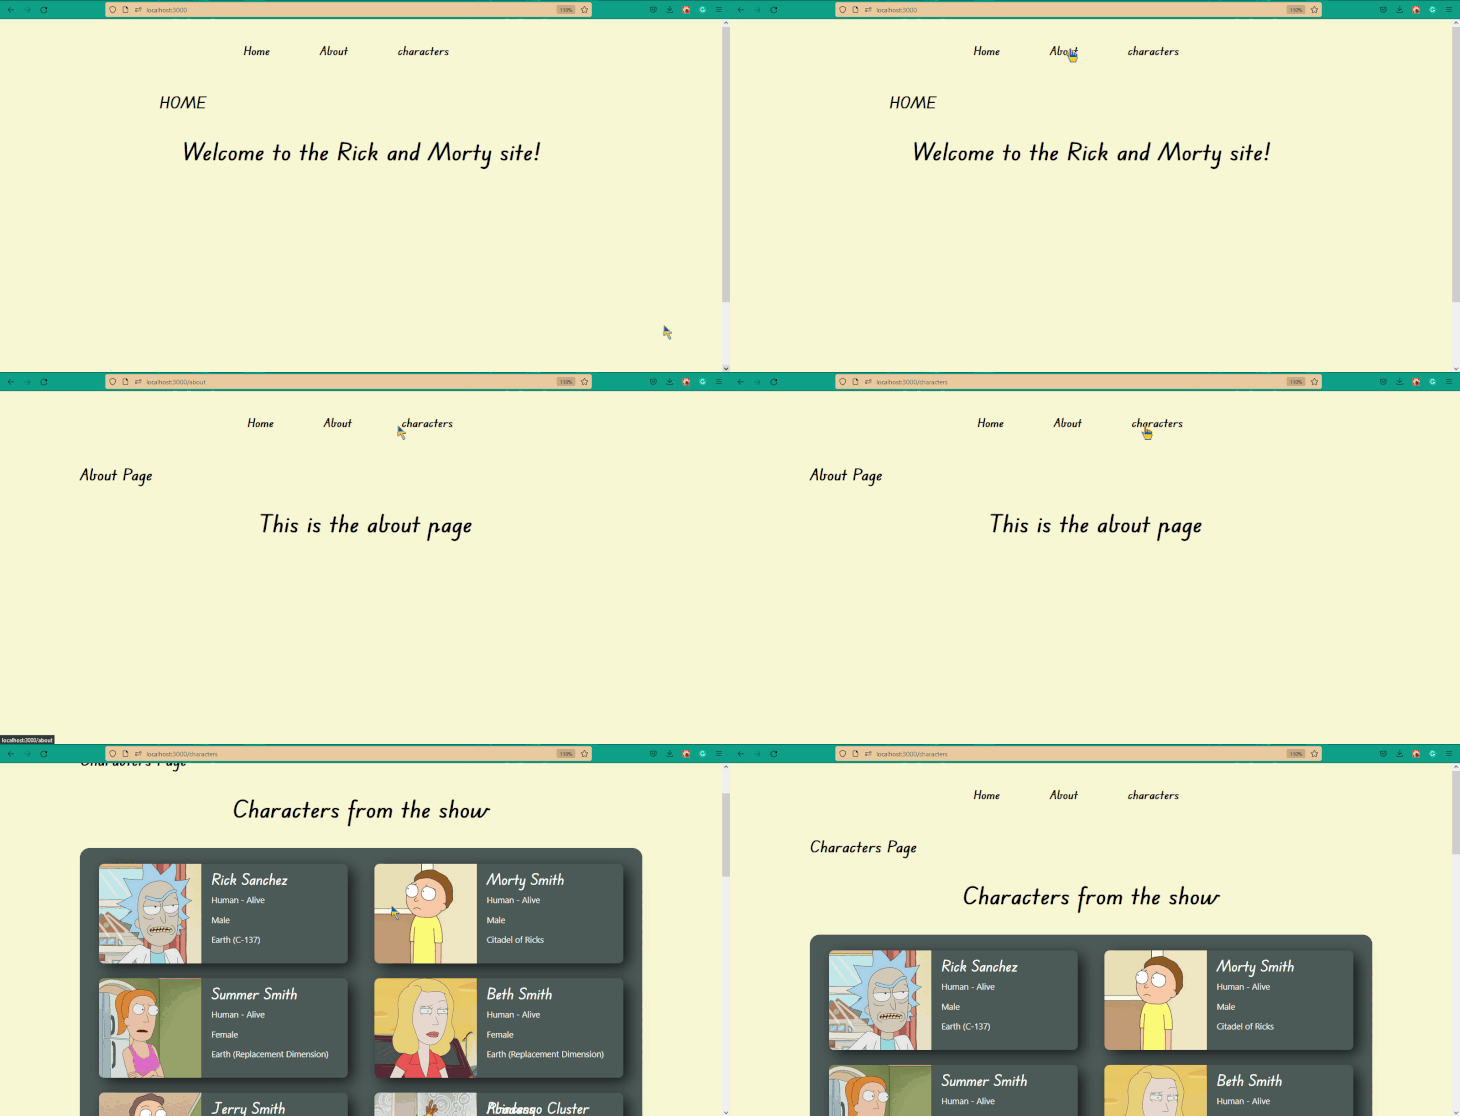
Instead of leaving the user clueless as to what’s going on during those few seconds, we’ll display a progress bar indicator using the Next.js Router events.
For this reason, we’ve added a 2s delay to the fetching process using the delay promise, as shown in the below code:
const delay = (s) => new Promise(resolve => setTimeout(resolve, s))
 ...
await delay(2000)
 ...
This delay will give us time to showcase the progress indicator when we route to the Characters page.
To finish setting up, run the following command in your terminal to install two third-party libraries, NProgress and React Spinners, that we’ll be using later in this tutorial.
npm i --save nprogress react-spinners
These libraries are animated progress bar providers; we’ll talk more about them later in this article.
Next, we need to create a component that will wrap the progress indicator element.
Start by creating a component folder and add a Loader.js file inside.
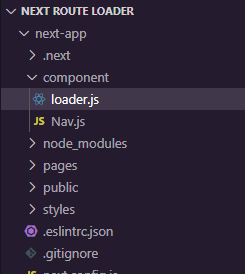
Now, open the loader.js file and add the following code:
const Loader = () => {
    return (
        <div className={styles.wrapper}>
            <div className={styles.loader}>

      </div>
        </div>
     );
}

export default Loader;
The code contains two div tags, a wrapper div, and a nested loader div. If you plan on creating a custom progress bar indicator with CSS, these elements will come in handy.
Next, navigate to the styles folder inside your project root folder, and create a new CSS module for the loader component.
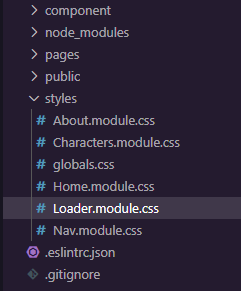
Inside the module, add the following code:
.wrapper{
    width: 100%;
    height: 100vh;
    position: absolute;
    top: 0;
    left: 0;
    background-color: rgb(0, 0, 0, 0.3);
    backdrop-filter: blur(10px);
    display: flex;
    justify-content: center;
    align-items: center;
    z-index: 99;
}

/*code for custom loading icon*/

.loader{
    border: 10px solid #f3f3f3;
    border-radius: 50%;
    border-top: 10px solid #505050;
    width: 60px;
    height: 60px;
    animation: spin 2s linear infinite;
}

@keyframes spin {
    0% { transform: rotate(0deg); }
    100% { transform: rotate(360deg); }
}
The above code will make the wrapper div take up the entire viewport with a backdrop filter and will center every child element (in this case, the loader div) within the wrapper.
N.B., the CSS properties within the loader selector are for a custom CSS progress bar indicator; ignore this if you’d prefer to use NProgress or React Spinners library instead
Now, go back to the loader.js component and import the CSS module at the top of the code block, like so:
import styles from '../styles/Loader.module.css'
Next, we’ll move on to creating the Router events.
routeChangeStart, routeChangeComplete, and routeChangeError)Since we’ll be displaying the progress bar indicator on every page route, rather than on a particular route, we’re going to call the Router event listeners directly inside the _app.js component.
If your project doesn’t have an _app.js component, go to the pages folder, create a new _app.js file, and add the following code:
import '../styles/globals.css'

function MyApp({ Component, pageProps }) {
  return ( <Component {...pageProps} /> )
}

export default MyApp
Next.js will use the _app.js component to initialize the pages in our project. We can override it and control the initialization.
Next, import the Router object, useState, and useEffect Hooks inside the _app.js component, like so:
import Router from 'next/router'
import { useState, useEffect } from 'react';
With the Router object imported, we can start declaring the events.
We want to be able to track when a route starts to change, has changed, and when an error occurs either while changing routes or when a route load is canceled. Therefore, we’ll subscribe to the routeChangeStart, routeChangeComplete, and routeChangeError events, respectively.
First, create an isLoading state variable using the useState Hook we imported earlier and pass it a default Boolean value of false.
const [isLoading, setIsLoading] = useState(false);
Then, call the useEffect Hook and add the routeChangeStart event listener inside its callback function.
useEffect(() => {
    Router.events.on("routeChangeStart", (url)=>{

    });

}, [Router])
Next, set the value of the isLoading state variable to true inside the event’s callback function, like so:
Router.events.on("routeChangeStart", (url)=>{
    setIsLoading(true)
  });
Now, create two more Router event listeners below the first, one for routeChangeComplete and one for routeChangeError:
  Router.events.on("routeChangeComplete", (url)=>{
    setIsLoading(false)
  });

  Router.events.on("routeChangeError", (url) =>{
    setIsLoading(false)
  });
The routeChangeComplete and routeChangeError events will be responsible for ending the loading session, which was initiated by the routeChangeStart event, when the route has completely changed or when an error occurs.
After completing the above steps, your useEffect function should look like this:
useEffect(() => {
    Router.events.on("routeChangeStart", (url)=>{
      setIsLoading(true)
    });

    Router.events.on("routeChangeComplete", (url)=>{
      setIsLoading(false)
    });

    Router.events.on("routeChangeError", (url) =>{
      setIsLoading(false)
    });

  }, [Router])
Now we have a state that reacts to the different events happening inside the Next.js Router.
Next, we’ll import the loader component we created earlier and render it based on the state of the isLoading variable.
import Router from 'next/router'
import { useState, useEffect } from 'react';
import Loader from '../component/loader';

function MyApp({ Component, pageProps }) {

  const [isLoading, setIsLoading] = useState(false);

  useEffect(() => {

    ...

  }, [Router])


  return (
    <>
      {isLoading && <Loader/>}
      <Component {...pageProps} />
    </>
  )
}

export default MyApp
What we’re doing here is pretty self-explanatory. We import the loader component and conditionally render it to the view.
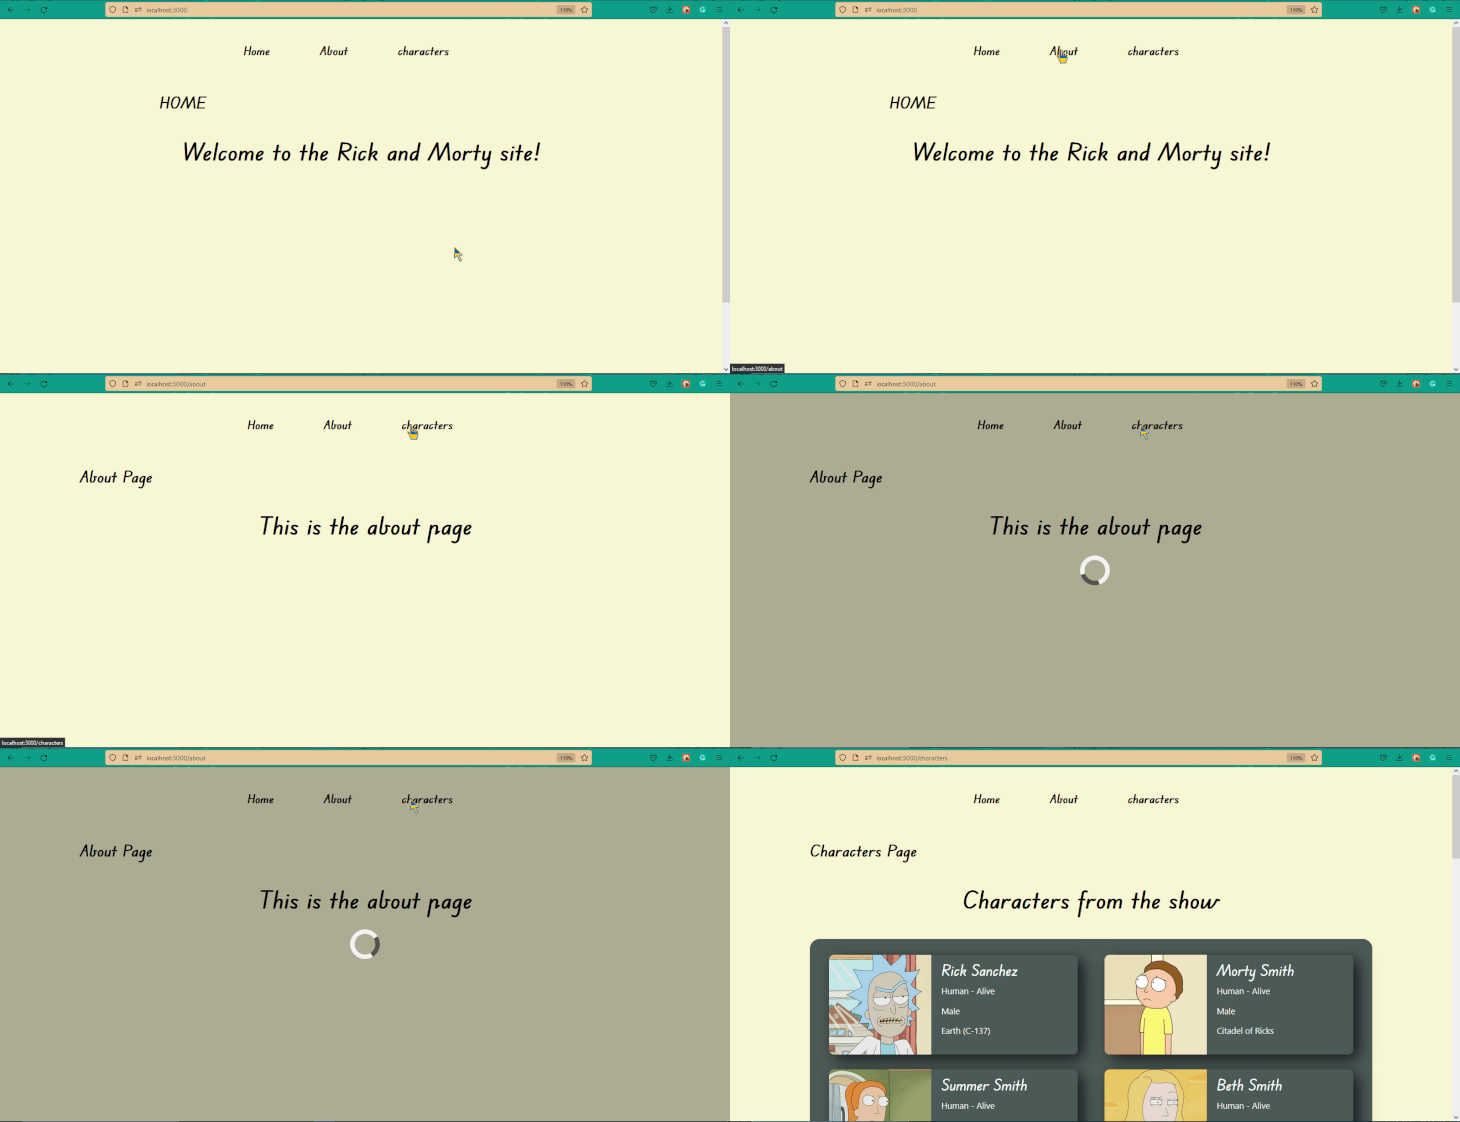
If you use the custom CSS loader we created earlier, you should see a similar loading screen to that shown below when you try routing within the application.
The progress indicator shown in the above section was built using custom CSS. Now, let’s experiment with adding animation using two libraries: NProgress and React Spinners.
NProgress is a lightweight library that lets us display realistic trickle animations at the top of the viewport to indicate loading progress, instead of using an animated loading icon.
To use NProgress, import the NProgress function inside the _app.js component, like so:
import NProgress from 'nprogress'
The function has a set of methods we can use to display and configure the progress bar animation. Here are some of the available methods:
start: shows the progress barset: sets a percentageinc: increments by a littledone: completes the progressconfigure: configures preferenceSee the NProgress official documentation to learn more about these methods.
Next, call the function’s start() and done() methods inside the routeChangeStart and routeChangeComplete event callbacks, respectively:
Router.events.on("routeChangeStart", (url)=>{
    Nprogress.start()
  })

Router.events.on("routeChangeComplete", (url)=>{
      Nprogress.done(false)
    });
Finally, we’ll add the NProgress-associated CSS to our project via the below CDN link:
<link rel="stylesheet" href="https://cdnjs.cloudflare.com/ajax/libs/nprogress/0.2.0/nprogress.min.css" integrity="sha512-42kB9yDlYiCEfx2xVwq0q7hT4uf26FUgSIZBK8uiaEnTdShXjwr8Ip1V4xGJMg3mHkUt9nNuTDxunHF0/EgxLQ==" crossorigin="anonymous" referrerpolicy="no-referrer" />
To go about this, import the Head component from Next.js and nest the CDN link within the declaration, like so:
  ...
import Head from "next/head"

function MyApp({ Component, pageProps }) {

  ...

  return (
    <>
      <Head>
        <link rel="stylesheet" ... />
      </Head>
      <Component {...pageProps} />
    </>
  )
}
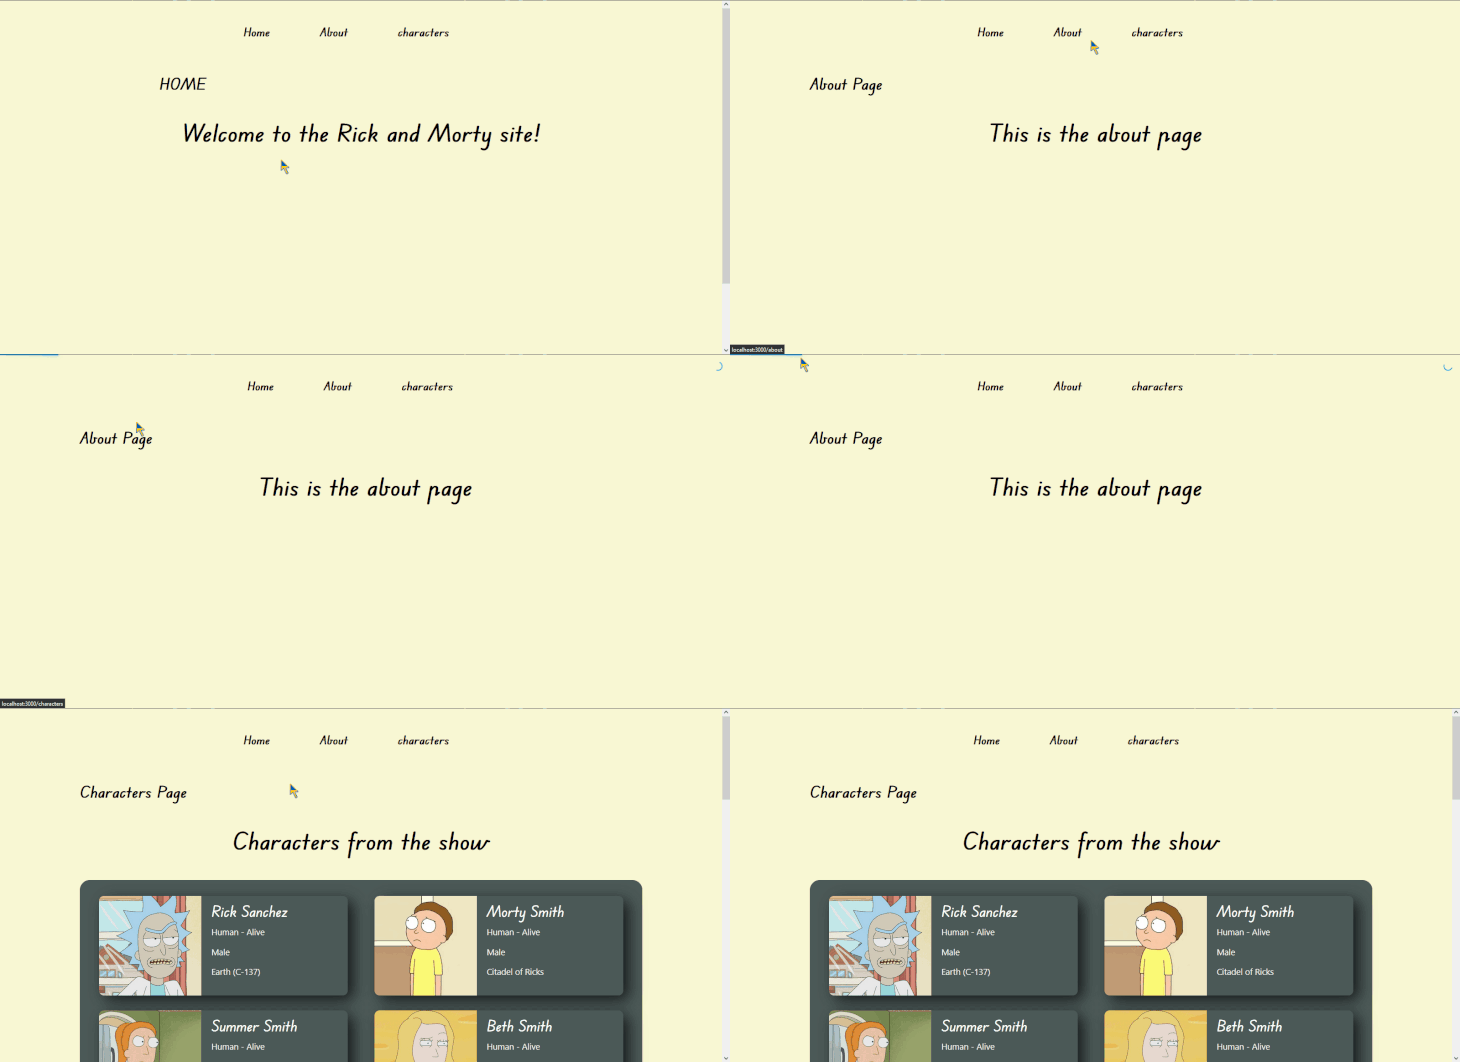
If you save your progress and click on a route in the browser, you should see a progress bar and a spinning icon at the top of the viewport similar to that shown below.
To disable the spinning icon at the top-right corner of the viewport, call the configure method and pass it an object with a showSpinner property and the value set to false.
Nprogress.configure({showSpinner: false});
Now if you save the code and go back to the browser, the spinning icon should be gone.
![]()
React Spinners is a lightweight library comprised of a collection of React-based progress indicators. The library provides varieties of animated loading icons that can be used to indicate loading progress.
![]()
The progress indicators are exposed from the library as components. These components take in props that we can use to customize their speed, size, loading state, and color.
To use React Spinners, go back to the loader.js component and import a spinner component, like so:
import {HashLoader} from 'react-spinners'
You can choose and configure your preferred spinner from the product page.
Next, nest the spinner component inside the wrapper div and save your progress.
<div className={styles.wrapper}>
      <HashLoader
       color="#eeeeee"
       size={80}
       />
</div>
Now, if you go back to the browser, you should see a nicely animated loading icon when you route between pages.
![]()
In this article, we introduced Next.js Router events and demonstrated how to use them to track routing activities and display a progress bar indicator.
We demonstrated how to create a loader component that renders a progress bar indicator based on the events emitted by the Router and also added customized loaders using the NProgress and React Spinners libraries.
Debugging Next applications can be difficult, especially when users experience issues that are difficult to reproduce. If you’re interested in monitoring and tracking state, automatically surfacing JavaScript errors, and tracking slow network requests and component load time, try LogRocket.
LogRocket captures console logs, errors, network requests, and pixel-perfect DOM recordings from user sessions and lets you replay them as users saw it, eliminating guesswork around why bugs happen — compatible with all frameworks.
LogRocket's Galileo AI watches sessions for you, instantly identifying and explaining user struggles with automated monitoring of your entire product experience.
The LogRocket Redux middleware package adds an extra layer of visibility into your user sessions. LogRocket logs all actions and state from your Redux stores.


Modernize how you debug your Next.js apps — start monitoring for free.

Claude Code is deceptively capable. Point it at a codebase, describe what you need, and it’ll autonomously navigate files, write […]

Compare the top AI development tools and models of February 2026. View updated rankings, feature breakdowns, and find the best fit for you.

Broken npm packages often fail due to small packaging mistakes. This guide shows how to use Publint to validate exports, entry points, and module formats before publishing.

Discover what’s new in The Replay, LogRocket’s newsletter for dev and engineering leaders, in the February 11th issue.
Would you be interested in joining LogRocket's developer community?
Join LogRocket’s Content Advisory Board. You’ll help inform the type of content we create and get access to exclusive meetups, social accreditation, and swag.
Sign up now