
The Replay is a weekly newsletter for dev and engineering leaders.
Delivered once a week, it's your curated guide to the most important conversations around frontend dev, emerging AI tools, and the state of modern software.
Sometimes while working on applications that require the use of images, a simple process like uploading images to a server can become difficult. With Cloudinary, we can upload and manage our images directly from the frontend. In this blog post, we will be taking a look at how to handle images in our React applications with the use of Cloudinary.

Cloudinary is a cloud-based image and video management platform used by engineering teams and developers alike to manage media assets(images, videos) in their applications. Before we proceed, take a minute to create your Cloudinary account here if you do not already have one. We will be using Cloudinary to store and retrieve our uploaded images.
In this project, we will set up a small React application to demonstrate how to handle images in React with Cloudinary.
Run this command below to create your React app in seconds using the terminal of your choice:
npx create-react-app react-image-app
When this is done you should get a similar result like the one below in your terminal: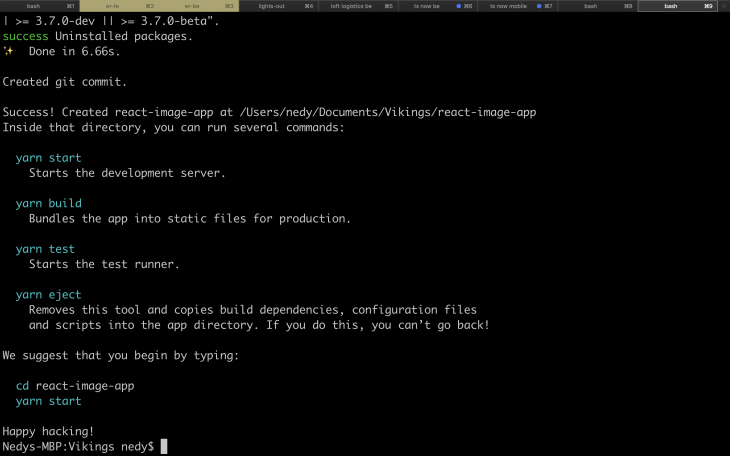 Run this command to change the current directory to your newly created React app and start it up:
cd react-image-app && npm start
And you should be greeted with this screen on your default browser:

Now that we have our React app up and running, let us edit it to contain an input field and a place to display images.
Open up your preferred editor and replace the content of /src/App.js with this:
import React from 'react';
import './App.css';

class App extends React.Component{
  state = {
    imageUrl: null,
    imageAlt: null,
  }

  render() {
    const { imageUrl, imageAlt } = this.state;

    return (
      <main className="App">
        <section className="left-side">
          <form>
            <div className="form-group">
              <input type="file"/>
            </div>

            <button type="button" className="btn" onClick={this.handleImageUpload}>Submit</button>
            <button type="button" className="btn widget-btn">Upload Via Widget</button>
          </form>
        </section>
        <section className="right-side">
          <p>The resulting image will be displayed here</p>
          {imageUrl && (
            <img src={imageUrl} alt={imageAlt} className="displayed-image"/>
          )}
        </section>
      </main>
    );
  }
}

export default App;
This block of code above returns a class component in React. This component renders an interface where we can upload images from.
On line 5 we set the URL and the alternate message for the image to be null because we do not have any default values for those image properties. On line 26 we write a conditional rendering using the && operator. This is similar to an inline if else statement, except here if the expression resolved to false, nothing is being rendered to the interface. In this case, if there is no URL for the image, the image tag will not be rendered.
From lines 15-24 we have the left-hand side of the interface with an input field with the file type, this is used for uploading file types from your device such as Pdf’s, images, audio, video, etc. We also defined an onClick function for the button called handleImageUpload which currently does not do anything.
The result currently looks like this:

This doesn’t currently look aesthetically appealing, so let’s add some styling with CSS. Go ahead and replace the content of /src/App.css with this:
.App {
  text-align: center;
  max-width: 100vw;
  min-height: 100vh;
  max-height: 100vh;
  display: flex;
  justify-content: center;
  align-items: center;
}

.App .left-side {
  display: flex;
  justify-content: center;
  align-items: center;
  border-right: .5px solid grey;
}

.App .right-side {
  border-left: .5px solid grey;
}

.App .left-side,
.App .right-side {
  height: 300px;
  width: 100%;
}

.App .left-side form {
  height: fit-content;
  background: white;
  border: 1px solid grey;
  border-radius: 4px;
  width: 300px;
  padding: 40px 10px;
}

.App .left-side form input {
  margin: 0 0 30px;
  width: 200px;
}

.App .left-side form .btn {
  height: 40px;
  width: 200px;
  background: white;
  border: 1px solid grey;
  cursor: pointer;
  border-radius: 4px;
}

.App .left-side form .btn:hover {
  color: white;
  background: grey;
}

.App .left-side form .btn:focus {
  box-shadow: none;
  outline: none;
}

.App .left-side form .btn.widget-btn {
  margin-top: 15px;
  background: #800080;
  border: 1px solid #800080;
  color: #FFFFFF;
}

.App .left-side form .btn.widget-btn:hover {
  margin-top: 15px;
  background: #4B0082;
  border: 1px solid #4B0082;
  color: #FFFFFF;
}

.App .right-side .displayed-image {
  height: 300px;
  width: 300px;
}
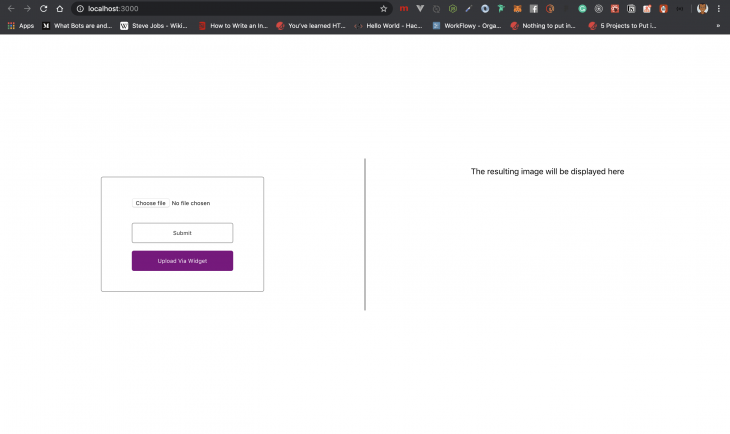
Here we use CSS Flexbox, to align out elements on the screen properly. We also add background colors and hover effects to our button. Now your application on http://localhost:3000/ should look like this:
Now that we have our interface setup, let us talk about how we would handle images via Cloudinary.
In this method, we will upload images to Cloudinary by sending a POST request to a Cloudinary endpoint. This will upload the image and return a response object to us. Let’s take a look.
First, we will write some JavaScript code to get the selected image from our device. If you take a look at your /src/App.js on line 17 you will notice that we called a function named handleImageUpload(). This is the function that will handle the image upload to Cloudinary via an endpoint.
STEP 1: Add this block of code just before the return statement in the App function:
handleImageUpload = () => {
  const { files } = document.querySelector('input[type="file"]')
  console.log('Image file', files[0])
}
This function queries the document to get the first input element with the type of file, then it de-structures the files array from the resulting object, then finally logs the first element of the array in the result to the console. This code could be expanded to look more like this:
handleImageUpload = () => {
  // get the first input element with the type of file,
  const imageFile = document.querySelector('input[type="file"]')
  // destructure the files array from the resulting object
  const files = imageFile.files
  // log the result to the console
  console.log('Image file', files[0])
}
Destructuring is a convenient way of extracting multiple values from data stored in (possibly nested) objects and arrays.
If we head over to our browser and choose and image file then click on the upload button we should have something similar to this:
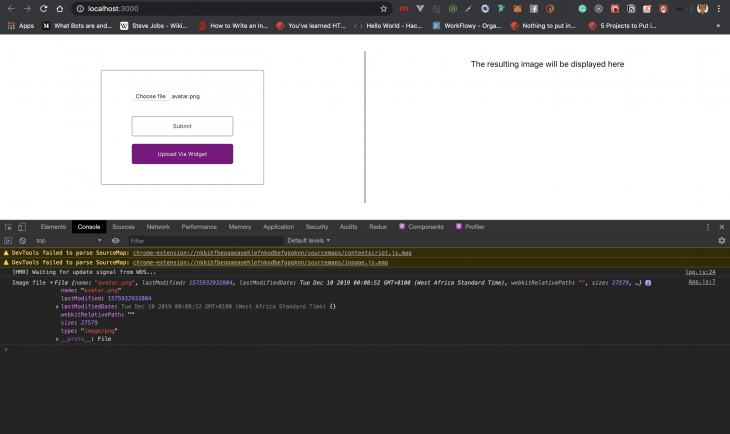
We can see the file object logged to our console. This object contains various data such as name of the file, size of the file, type of file, etc.
STEP 2: We are going to send a post request to a Cloudinary endpoint with the file object we got from the function above.
The base Cloudinary API endpoint looks like this:
https://api.Cloudinary.com/v1_1/:cloud_name/:action
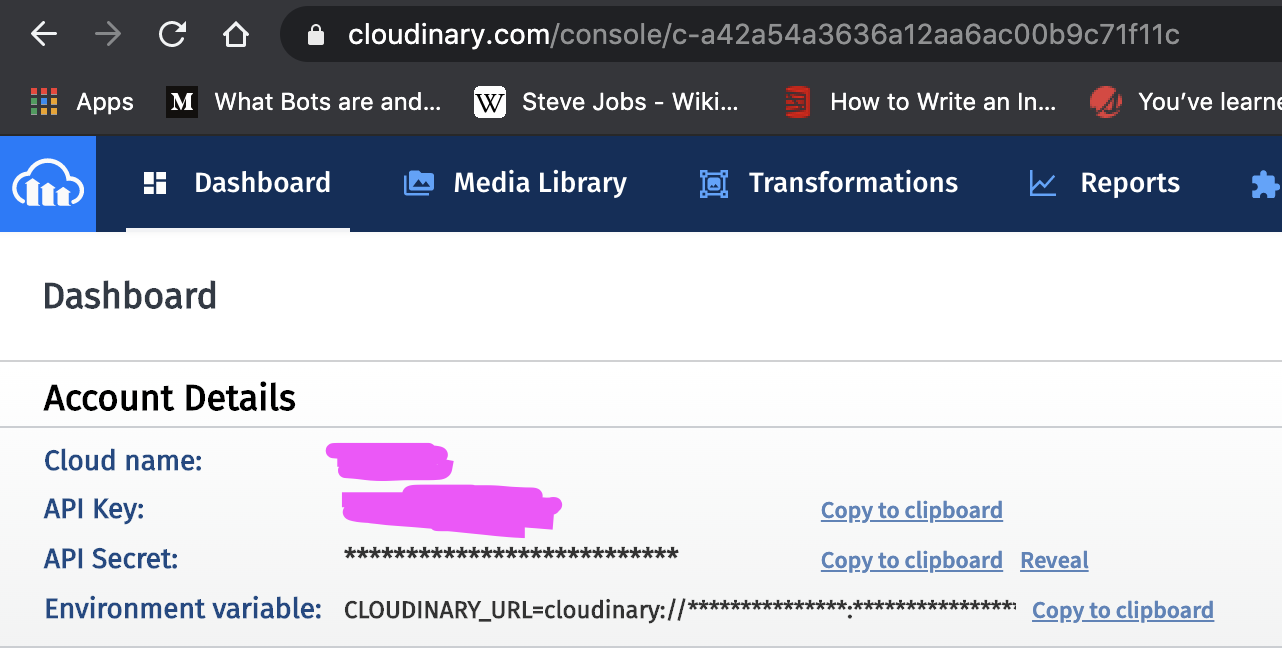
:cloud_name can be gotten from your Cloudinary dashboard:
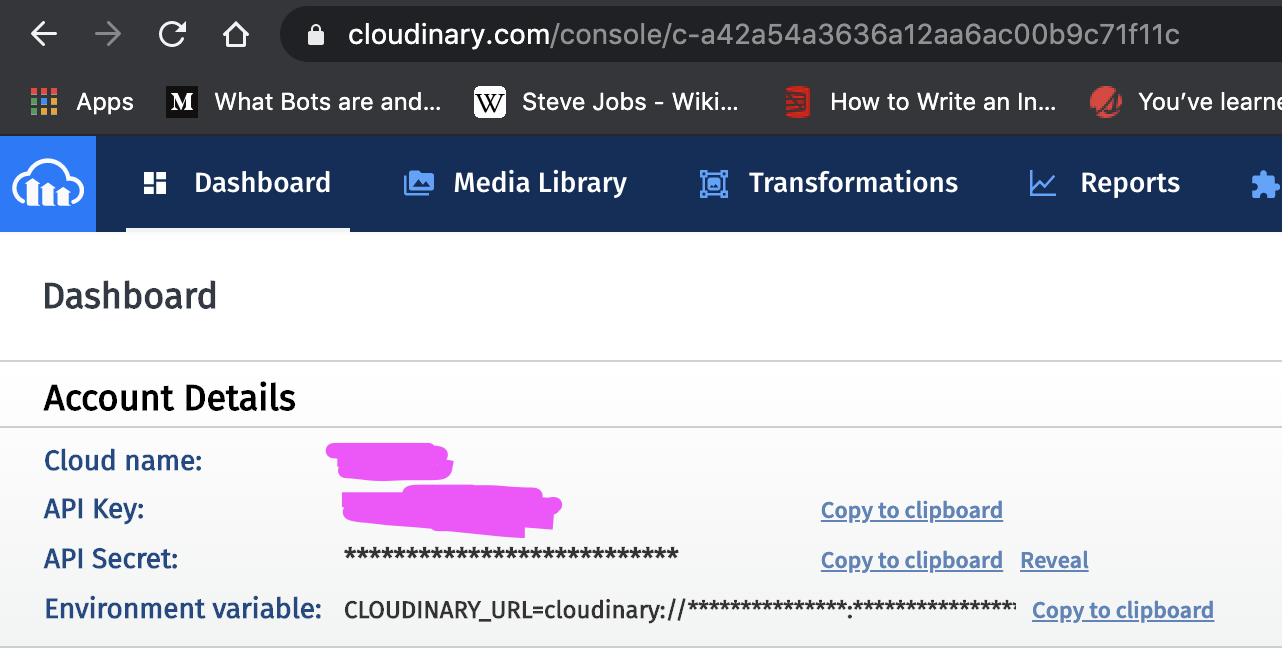
While the :action parameter in the URL represents whatever action you want to perform example /image/upload for uploading an image. A sample API URL would look like this:
https://api.Cloudinary.com/v1_1/john1234/image/upload
Where :cloud_name is john1234 and :action is /image/upload.
The last thing we need to set for now is an upload preset. An upload presets allow you to define the default behavior for your uploads. You can add an upload preset by navigating to settings then uploads in your Cloudinary dashboard. When you are done you should have something like this:
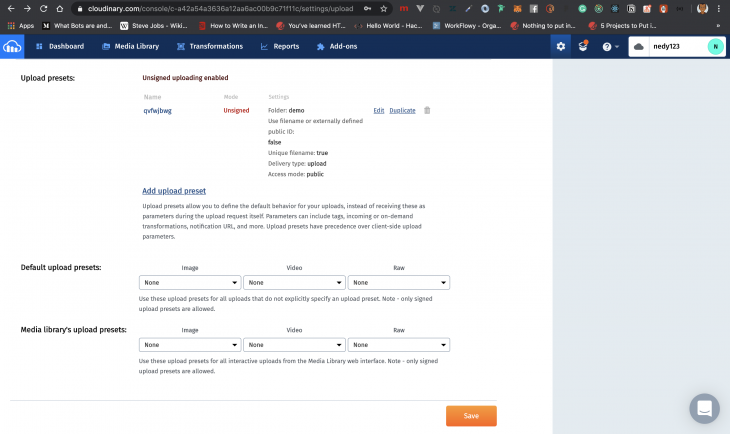
Now it is time to write the code that sends the POST request to our endpoint with all the necessary data.
Replace the code in your handleImageUpload() function with this:
const { files } = document.querySelector('input[type="file"]')
const formData = new FormData();
formData.append('file', files[0]);
// replace this with your upload preset name
formData.append('upload_preset', 'qv5rfbwg');
const options = {
  method: 'POST',
  body: formData,
};

// replace cloudname with your Cloudinary cloud_name
return fetch('https://api.Cloudinary.com/v1_1/:cloud_name/image/upload', options)
  .then(res => res.json())
  .then(res => console.log(res))
  .catch(err => console.log(err));
Replace the cloud_name on line 12 with your own Cloudinary cloud_name. This can be gotten from your Cloudinary dashboard:
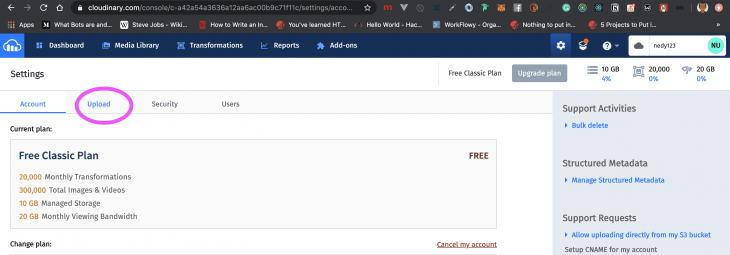
Replace the upload preset you had set at the end of step 2. Replace the dummy preset on line 4 above with your upload preset name. This can be found in the uploads section of the settings in your Cloudinary dashboard, to get there click on the gear icon on the top right section of your Cloudinary dashboard:

Then click on the Upload tab on the settings page:
Scroll down to the bottom of the page to where you have upload presets and you should see your upload preset or an option to add a new one if you do not have any.
We can head over to our React app in the browser and upload an image, we should see something like this:
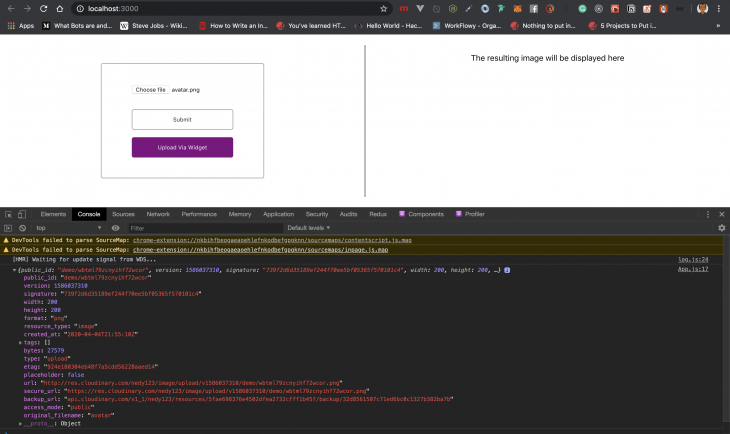
Here we can see that our image has successfully uploaded and a response has been returned to us. To confirm that the image has been uploaded you can go ahead and copy the value of secure_url and paste it in the address box of a new tab and you will see your uploaded image.
STEP 3: Here we will display the result of our upload on the right-hand side of our React app. We will do this by replacing the code that logs the result of the uploaded image to the console with this code block:
// Replace
.then(res => console.log(res))

// with this
.then(res => {
    this.setState({
      imageUrl: res.secure_url,
      imageAlt: `An image of ${res.original_filename}`
    })
  })
Upload another image and your result should be something similar to this:
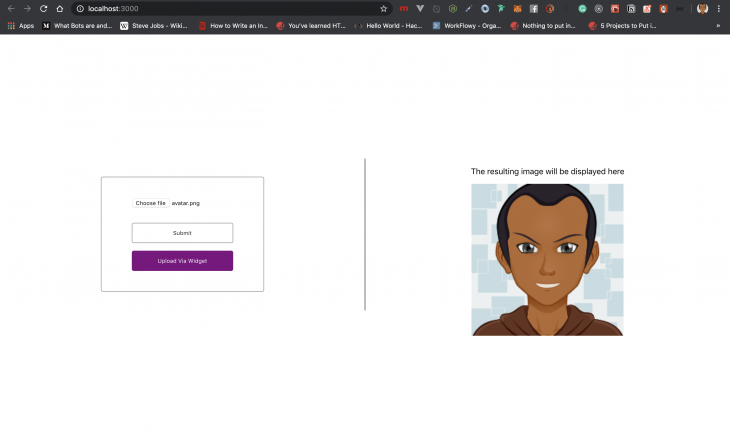 To confirm this you can go to your Cloudinary media library from your Cloudinary dashboard and see all your uploads.
In this method, we will invoke a Cloudinary widget called Upload Widget and let it handle the image for us. With this Cloudinary widget we can pretty much upload images from various places, such as Dropbox, Facebook, Instagram, we can even take pictures with it. Sounds Interesting? Let’s get into it.
STEP 1: Here we will include the widget’s remote JavaScript file in our in index HTML file located in public/index.html. We will include this file using the script tag just above the closing body tag:
<script
  src="https://widget.Cloudinary.com/v2.0/global/all.js"
  type="text/javascript"
></script>
STEP 2: We will create the widget and open it up when clicked. These two actions will be wrapped in a function.
// ...
openWidget = () => {
  // create the widget
  window.Cloudinary.createUploadWidget(
    {
      cloudName: 'john',
      uploadPreset: 'qv5rfbwg',
    },
    (error, result) => {
      this.setState({
        imageUrl: result.info.secure_url,
        imageAlt: `An image of ${result.info.original_filename}`
      })
    },
  ).open(); // open up the widget after creation
};

//...
This block of code should be placed above the render function. We are also using the same information from the previous method such as cloud_name and uploadPreset. The function that opens up the widget is appended to the createUploadWidget(). Alternatively, you could write this function like this:
// ...
openWidget = () => {
  // create the widget
  const widget = window.Cloudinary.createUploadWidget(
    {
      cloudName: 'john',
      uploadPreset: 'qv5rfbwg',
    },
    (error, result) => {
      if (result.event === 'success') {
        this.setState({
          imageUrl: result.info.secure_url,
          imageAlt: `An image of ${result.info.original_filename}`
        })
      }
    },
  );
  widget.open(); // open up the widget after creation
};

//...
Either way, the widget will be created and opened up at once after creation.
We will just call this function when the purple button is clicked. Update your button with the class of widget-btn code to look like this:
<button type="button" className="btn widget-btn" onClick={this.openWidget}>Upload Via Widget</button>
Now when you click the widget button on your React app in the browser, you should see something similar to this:
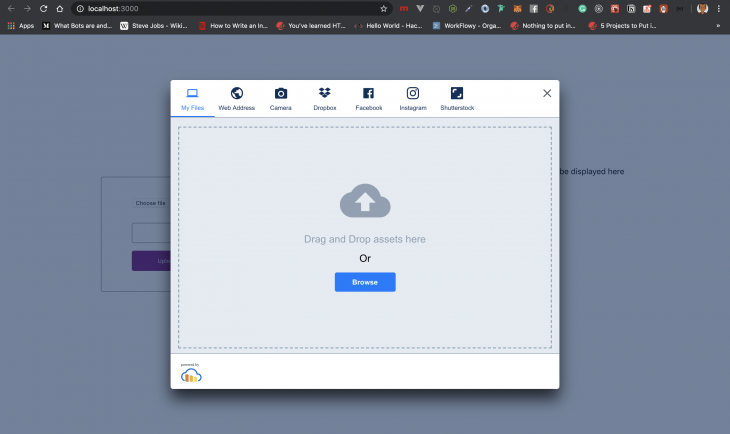
The beauty of this is that you can customize your widget to suit your needs. To do that go ahead and visit this page for more details on the widget customization.
You can go ahead and upload your image and watch it display on the right-hand side of your React application:
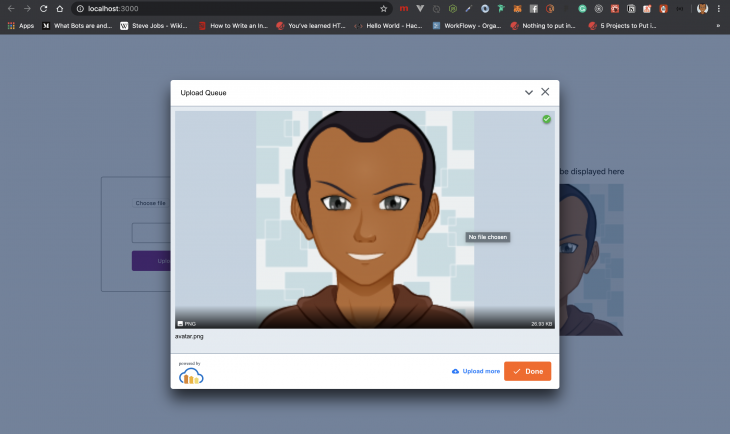
Cloudinary makes it very easy for us to handle our images, especially with the Cloudinary widget. The code for this project can also be found in this repository for your reference.
Install LogRocket via npm or script tag. LogRocket.init() must be called client-side, not
server-side
$ npm i --save logrocket

// Code:

import LogRocket from 'logrocket';
LogRocket.init('app/id');
// Add to your HTML:

<script src="https://cdn.lr-ingest.com/LogRocket.min.js"></script>
<script>window.LogRocket && window.LogRocket.init('app/id');</script>

@container scroll-state: Replace JS scroll listeners nowCSS @container scroll-state lets you build sticky headers, snapping carousels, and scroll indicators without JavaScript. Here’s how to replace scroll listeners with clean, declarative state queries.

Explore 10 Web APIs that replace common JavaScript libraries and reduce npm dependencies, bundle size, and performance overhead.

Russ Miles, a software development expert and educator, joins the show to unpack why “developer productivity” platforms so often disappoint.

Discover what’s new in The Replay, LogRocket’s newsletter for dev and engineering leaders, in the February 18th issue.
Would you be interested in joining LogRocket's developer community?
Join LogRocket’s Content Advisory Board. You’ll help inform the type of content we create and get access to exclusive meetups, social accreditation, and swag.
Sign up now
3 Replies to "Handling images with Cloudinary in React"
Hi. There is some error at line
window.Cloudinary.createUploadWidget(
Actually, Cloudinary MUST BE lowercase, so it should be
window.cloudinary.createUploadWidget(
Hope it help
hey can you please tell, how to send a file from reactjs frontend to backend?, (backend is flask) and in backend, I am going to upload the image to url.
Thank you very much! This helped me.