Page transitions are pivotal in shaping user experience in modern web design and applications. Tools like CSS transitions and the Web Animations API help create visual cues for navigation and indicate navigation flow.
Effective page transitions also help reduce cognitive load by helping users maintain context and perceive faster loading times. However, implementing these from scratch can be quite complex due to the CSS and JavaScript boilerplate code required, managing the state of elements, and ensuring accessibility when both states are present in the DOM.
The CSS View Transitions API tackles most of these challenges, but can be difficult to work with for its own reasons — for example, the fact that it’s a novel API with diverse usage. This is where tools like Velvette come into play.
Velvette is a library that simplifies view transition implementations and helps mitigate these challenges. In this article, we’ll introduce Velvette, explore its features, and explain how to integrate it into existing projects.
The CSS View Transitions API introduces a way to smoothly change the DOM while simultaneously animating the interpolation between two unrelated states without any overlap between them.
The underlying logic that makes this work is that the browser captures an element and takes two snapshots: one of the old state before the change and another of the new state after. To make this work, you need two parts.
First, you need the view-transition-name property assigned to the element’s selector in your stylesheet:
.element{
  view-timeline-name: transition-name;
}
Second, you need the method that updates the DOM wrapped in the document.startViewTransition() function:
document.startViewTransition(() =>
  updateTheDOMSomehow();
);
This declaration instructs the browser to capture the snapshots, stack them unto each other, and create a transition using a fade animation.
Developers who have worked with the View Transitions API since its release have likely encountered one or more of the following challenges:
Now, let’s see how Velvette can mitigate these challenges.
Velvette is a utility library developed to make working with view transitions easier. It tackles issues like redundant boilerplates and monotonous generation of unique names, allowing developers to focus on crafting smooth animations.
The library offers a declarative way to manage transition behavior in your application. You can define transitions for isolated elements — elements that operate independently — or in response to navigation events. These declarations are then seamlessly integrated with the View Transitions API.
Velvette’s key features include:
morph during the transitionview-transition-name properties: The view-transition-name property is crucial for specifying which elements participate in the transition. Velvette generates and sets these properties based on predefined rules. This ensures that the correct elements are animated during the transitionIn the upcoming sections, we’ll see more about how Velvette works and how to get started with it in your next project.
Velvette provides two key functions: a Velvette constructor and a startViewTransition method. These functions offer simplified methods for extending view transitions in response to a DOM update, catering to specific requirements.
startViewTransition methodThe startViewTransition method is ideally used for integrating straightforward transition animations, like sorting animations, to one or multiple elements on a page. It eliminates the need to manually declare transition names and avoids unnecessary captures.
The method accepts an object containing configuration options as its arguments:
startViewTransition({
  update: () => {...},
  captures: {...},
  classes: ...,
});
Here is a breakdown of the argument object:
update: This is a callback function that defines how the DOM will be updated during the transition. For example, if you have a separate function named updateTheDOM that handles DOM manipulation, you would pass that function as the update argumentcaptures: This object allows you to define elements to be captured for the transition. It uses a key-value structure. Keys are selectors for the elements you want to capture (e.g., class names, IDs), and the values define how to generate unique view-transition-name properties (often using element IDs or other unique identifiers)classes: This is an optional array of CSS class names that will be temporarily added to the document element during the transition. Adding these classes can be useful for applying specific styles during the animationVelvette constructorThe Velvette constructor is designed for creating complex view transition animations across page navigation. A typical example is a smooth image transition — like expanding or shrinking — when a user navigates between a list and a detail page.
Similar to startViewTransition, the constructor accepts a config object with various options as its argument:
const velvette = new Velvette({
  routes: {
      details: ""..."
      list: "..."
  },
  rules: [{
      with: ["list", "details"], class: ...
  }, ],
  captures: {
    ...
  }
});
Here is a breakdown of the config options:
routes: This object defines named routes for different views in your application. It uses key-value pairs, where the keys are route names and the values can be URLs that uniquely identify the viewrules: This is an array of rules that match specific navigation patterns. Each rule defines which navigations trigger a view transition and specifies the class and parameter to associate with the transitioncaptures: Similar to the startViewTransition method, this option allows you to define elements to capture during navigation transitions. This provides more granular control over the elements involved in the animationVelvette is built as an add-on, which means we can add it to existing projects by simply including the following script tag into the index.html file:
><script src="https://www.unpkg.com/[email protected]/dist/browser/velvette.js"></script>
We can also add it with npm using the following command:
>npm install velvette
Once Velvette is integrated into your project, you can start using the library by importing the startViewTransition or Velvette constructor in the needed components or pages:
import {Velvette, startViewTransition} from "velvette";
Alternatively, if you’ve included Velvette using a CDN link, you can simply call the Velvette constructor like so:
const velvette = new Velvette({...});
This is possible because the CDN link automatically injects a global Velvette class directly onto your window object, which can be accessible across the document.
Now that you’ve successfully added Velvette to your project, you can replace every vanilla View Transitions implementation in your project with Velvette’s.
For example, let’s say you have a to-do application with a base View Transitions implementation like in the following example:
document.addEventListener("DOMContentLoaded", () => {
const items = document.querySelectorAll(".item");
  items.forEach((item, index) => {
    item.id = `item-${index}`;
    item.addEventListener("click", (e) => {
     document.startViewTransition(() => moveItem(e));
    });
  });
});

const moveItem = (e) => {
  const item = e.target;
  var targetBoxId = item.closest(".box").id === "box1" ? "box2" : "box1";
  var targetList = document.getElementById(targetBoxId).querySelector("ul");

  item.parentNode.removeChild(item);
  targetList.appendChild(item);
};
This base implementation would look like so:
See the Pen
Todo list transition by david omotayo (@david4473)
on CodePen.
In such a case, we can replace the document.startViewTransition() declaration:
document.startViewTransition(() => moveItem(e));
With a Velvette declaration as follows:
>Velvette.startViewTransition({
    update: () => moveItem(e)
});
This will invoke Velvette, call the moveItem() function on every item click, and apply the default fade animation to each item on the list when they are removed or appended to either the Tasks or Completed Tasks parent elements.
However, for each item to animate smoothly, it needs a unique view-transition-name
value.
Let’s suppose we assign a transition name only to the first item on the list :
#item-0{
  view-transition-name: item;
}
As expected, only the first item animates:
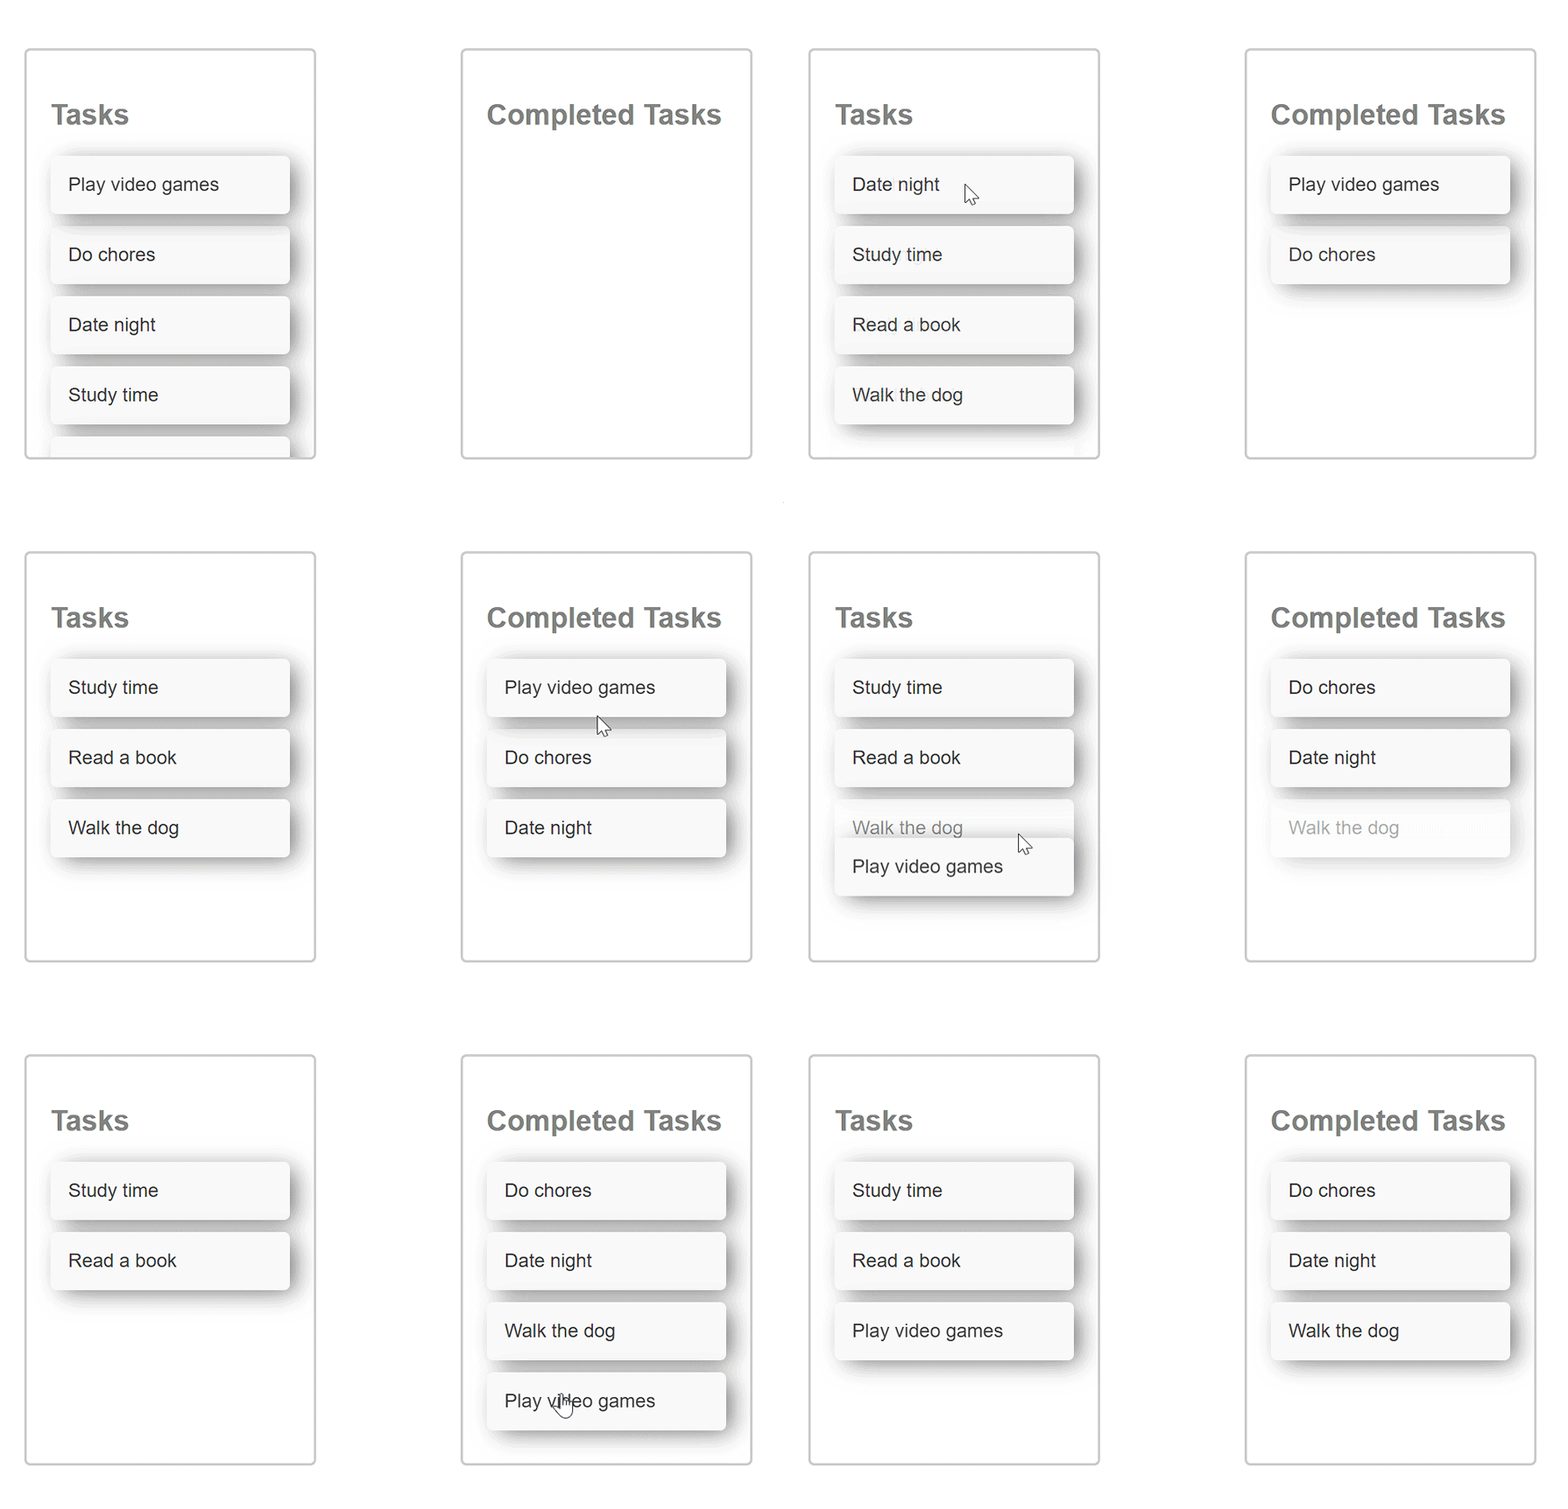
To achieve the same effect for all the items, we’d traditionally need to assign a unique view-transition-name value to each one, which can be quite tedious.
This is where Velvette’s captures object comes in. Instead of manual assignment, you can leverage captures to dynamically map between item selectors and assign temporary view-transition-name values during the transition:
Velvette.startViewTransition({
        update: () => moveItem(e),
        captures: {
          "ul#list li[:id]": "$(id)",
        },
      });
Here, we capture every child li element within the #list selector and use the element’s id to generate a view-transition-name property.
This may seem a bit overwhelming, so let’s break it down. Remember, an id is assigned to each item on the list:
const items = document.querySelectorAll(".item");
  items.forEach((item, index) => {
    item.id = `item-${index}`;
        ...
  });
And their parent elements are assigned a list ID selector:
<div>
        <h2>Tasks</h2>
        <ul id="list">
                ...
        </ul>
      </div>
        <div>
        <h2>Completed Tasks</h2>
        <ul id="list">
                ...
        </ul>
      </div>
The captures object looks for the ul element with the list class selectors in the code above, maps through its li child elements, grabs the ID we assigned in the previous code, and assigns it to their view-transition-name declarations:
captures: {
  "ul#list li[:id]": "$(id)",
},
The view-transition-name declaration for each item on the list will look something like this:
>#item-0{
  view-transition-name: item-0;
}
#item-1{
  view-transition-name: item-1;
}
#item-2{
  view-transition-name: item-2;
}
...
And the result:
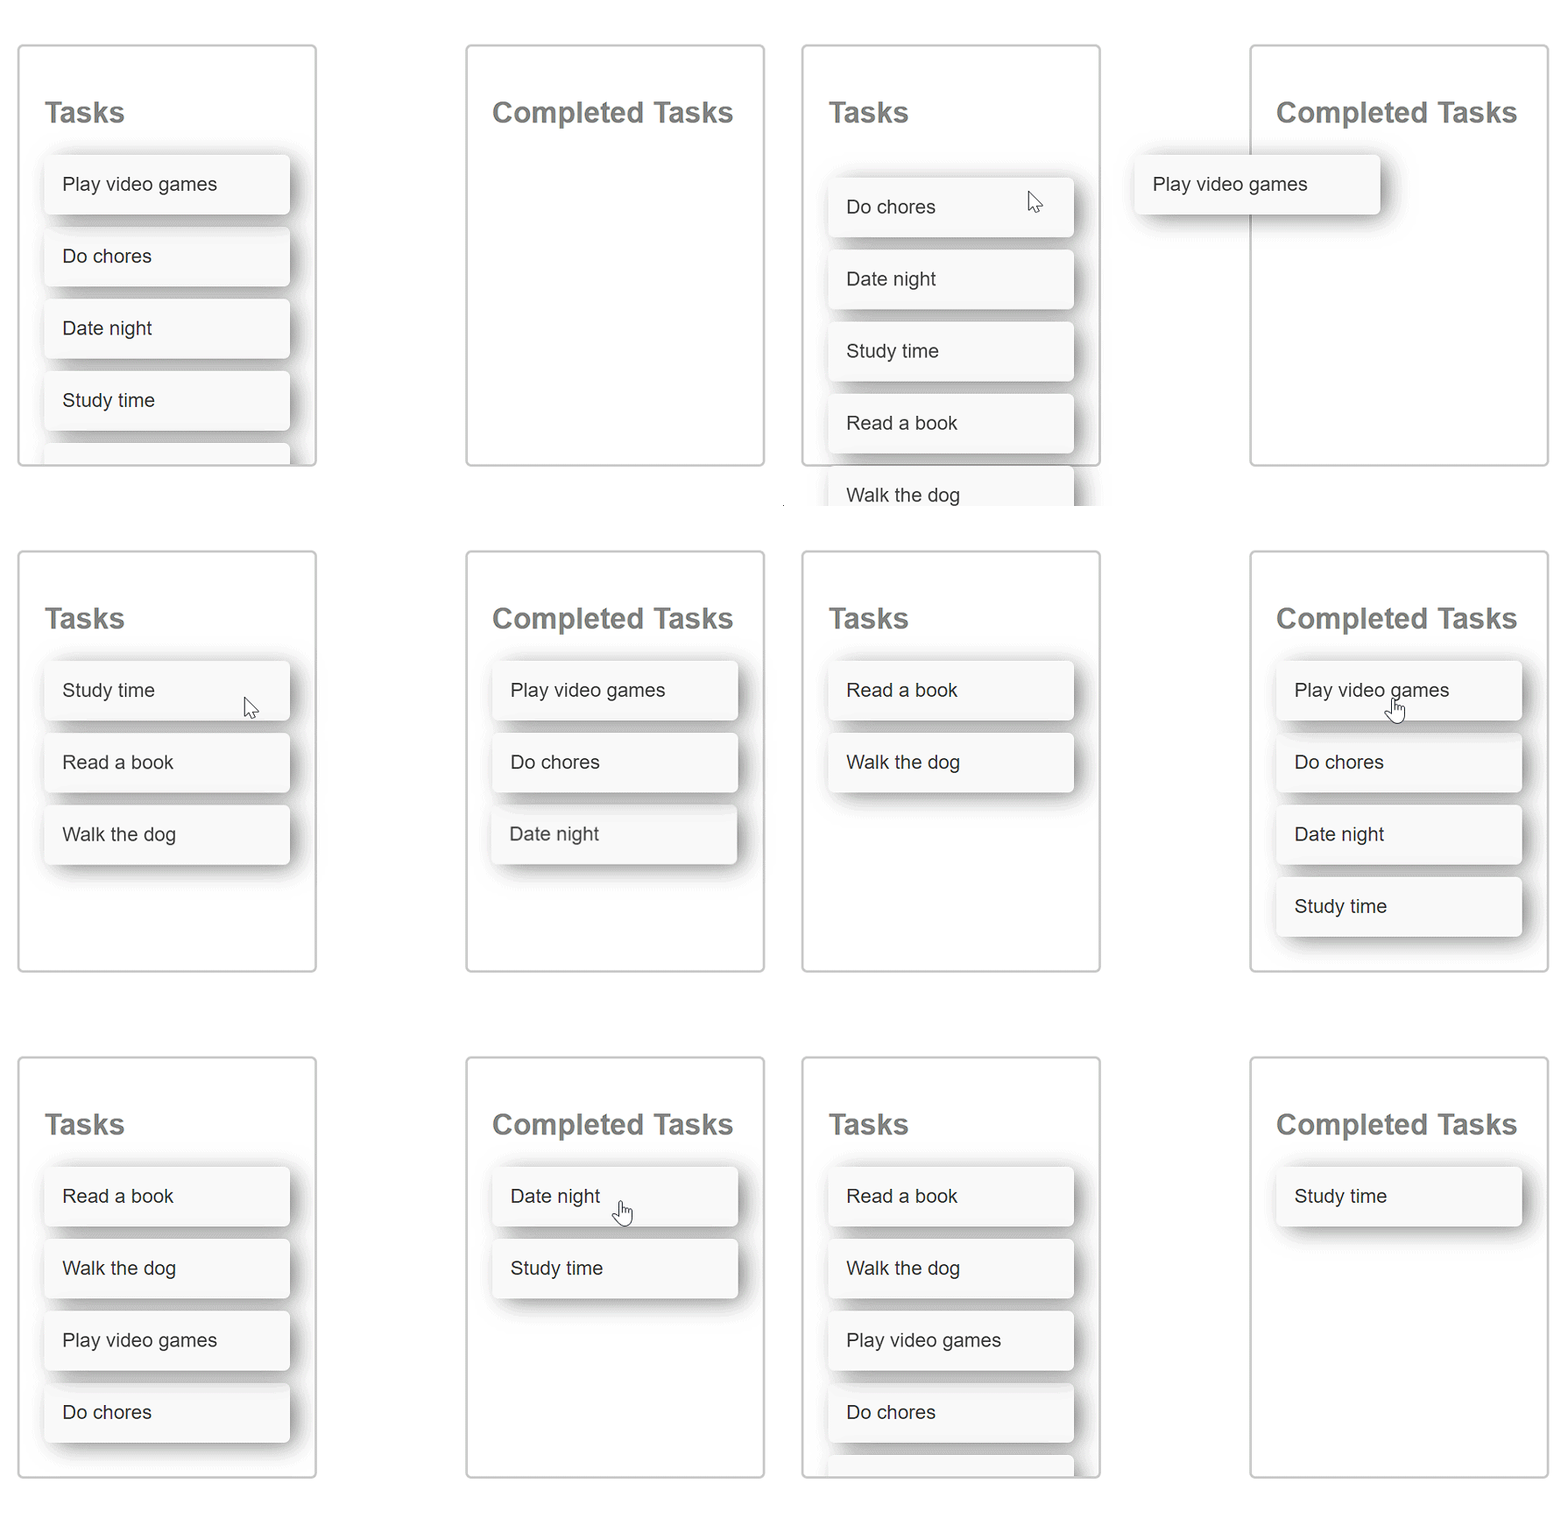
As you can see, the animation now works correctly for every list item.
A common use case for the View Transitions API is handling animations during page navigation, essentially transitioning between the outgoing and incoming pages. As mentioned before, a popular example involves animating the navigation between a list view and a details page:

Implementing this transition effect from scratch can be challenging. It typically involves triggering a view transition when navigating between the list and details pages.
One way to achieve this is by intercepting the navigation event and encapsulating the DOM update function — the function that modifies the page content — within the View Transitions API’s startViewTransition method.
Here’s an example:
async function init() {
  const data = await fetch("products.json");
  const results = await data.json();

  function render() {
    const title = document.getElementById("title");
    const product_list = document.querySelector("#product-list ul");
    product_list.innerHTML = "";

    for (const product of results) {
      const li = document.createElement("li");
      li.id = `product-${product.id}`;
      li.innerHTML = `
      <a href="?product=${product.id}">
      <img class="product-img" src="${product.image}" />
      <span class="title">${product.title}</span>
    </a>
      `;
      product_list.append(li);
    }

    const searchParams = new URL(location.href).searchParams;
    if (searchParams.has("product")) {
      const productId = +searchParams.get("product");
      const product = results.find((product) => product.id === productId);
      if (product) {
        const details = document.querySelector("#product-details");
        details.querySelector(".title").innerText = product.title;
        details.querySelector("img").src = `${product.image}`;
      }
    }

    if (searchParams.has("product")) {
      title.innerText = "Product Details";
    } else {
      title.innerText = "Product List";
    }

    document.documentElement.classList.toggle(
      "details",
      searchParams.has("product")
    );
  }

  render();

 navigation.addEventListener("navigate", (e) => {
    e.intercept({
      handler() {
        document.startViewTransition(() => {
          render();
        });
      },
    });
  });
}

init();
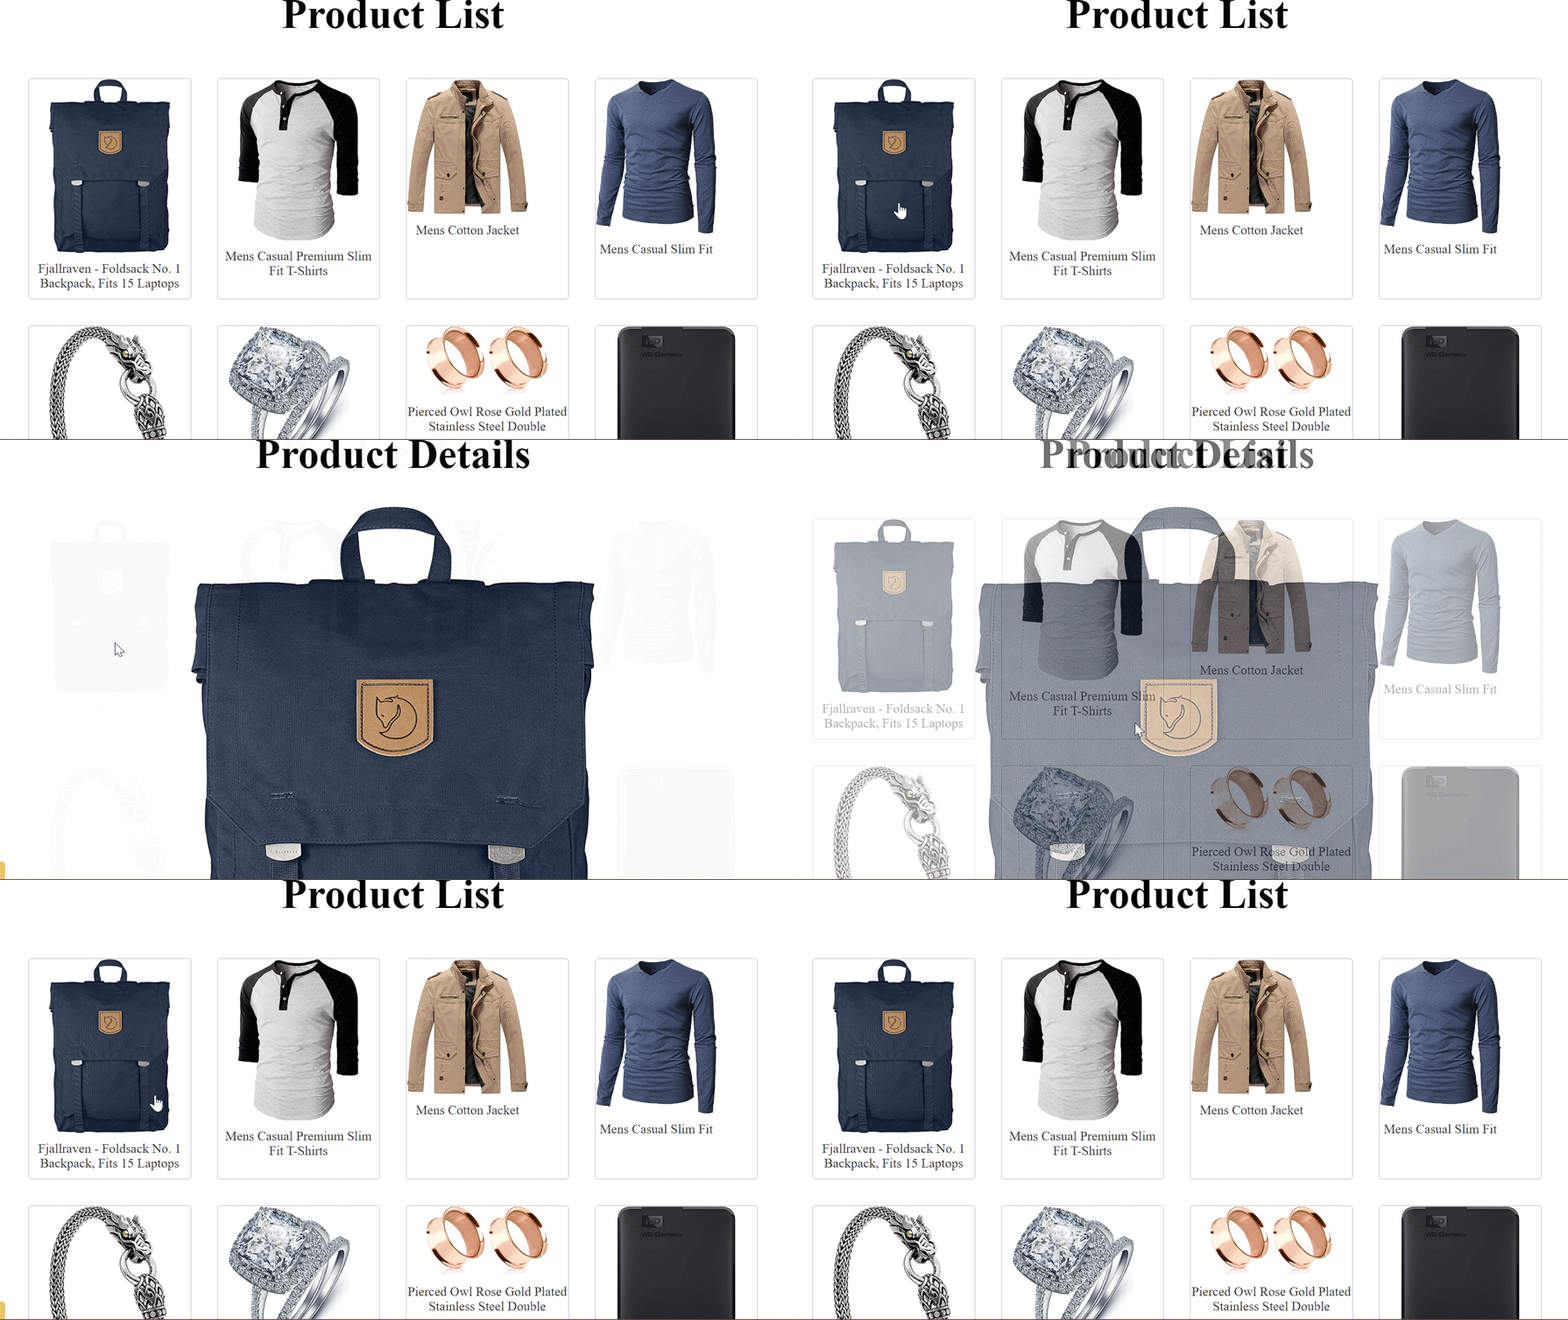
In this code example, we used the Navigation API to intercept navigation between a list and details page and trigger a view transition that is applied to render() function:
You can find the complete code for this example in this GitHub repository.
Note that the Navigation API currently has limited browser support — it’s only available on Chromium-based browsers. To ensure good UX for a wider range of users, consider implementing fallback mechanisms for unsupported browsers.
This basic implementation provides a starting point, but achieving a more complex effect requires additional steps.
For example, to morph thumbnails between the list and details pages, we would have to assign identical view-transition-name values to the corresponding thumbnails on both the details and list pages. However, this assignment needs to be done strategically:
While the following code snippet might require some adjustments, it demonstrates the core concept:
.details-thumbnail {
  view-transition-name: morph;
}

 //Javascript

list-thumbnail.addEventListener(“click”, async () => {
  list-thumbnail.style.viewTransitionName = "morph";

  document.startViewTransition(() => {
    thumbnail.style.viewTransitionName = "";
    updateTheDOMSomehow();
  });
};
The biggest drawbacks of depending on this method are the unnecessary complexity it introduces and the boilerplate code it adds to your project.
Velvette simplifies this process by offering a centralized configuration system. This configuration handles the heavy lifting behind the scenes, eliminating the need for manual implementation and saving you time and effort:
const velvette = new Velvette({
    routes: {
      details: "?product=:product_id",
      list: "?products",
    },
    rules: [
      {
        with: ["list", "details"],
        class: "morph",
      },
    ],
    captures: {
      ":root.vt-morph.vt-route-details #details-img": "morph-img",
      ":root.vt-morph.vt-route-list #product-$(product_id) img": "morph-img",
    },
  });
This Velvette configuration is a replica of the navigation transition we tried to implement manually earlier using view transition.
In this configuration, we use the routes and rules properties to define which navigation triggers a view transition. In this case, any navigation between the list and details routes will initiate a view transition and add a morph class to the transition:
routes: {
      details: "?product=:product_id",
      list: "?products",
    },
    rules: [
      {
        with: ["list", "details"],
        class: "morph",
      },
    ],
        ...
The captures property tackles the previously mentioned challenge of assigning unique view-transition-name properties during transitions:
captures: {
      ":root.vt-morph.vt-route-details #details-img": "morph-img",
      ":root.vt-morph.vt-route-list #product-$(product_id) img": "morph-img",
    },
Here, we use a key-value pair of selectors and values to assign identical transition names, morph-img, to generate a view-transition-name for both the details page thumbnail and the clicked product item image.
The ":root.vt-morph.vt-route-details #details-img" selector is a combination of:
vt-morph from the rules objectmorph transition — vt-route-details#details-imgNote that the vt prefix is required for Velvette to recognize the selectors.
The second selector, ":root.vt-morph.vt-route-list #product-$(product_id) img", uses the same method to add the morph-img transition name to the selected product item during the morph transition. The only difference is that it applies only when in the list route and the ${product_id} expression will be replaced by the product item’s ID, like so:
:root.vt-morph.vt-route-list #product-1 img: ...,
Finally, we can leverage Velvette to intercept navigation and apply the configurations defined above. To achieve this, we’ll update the previous navigation declaration as follows:
navigation.addEventListener("navigate", (e) => {
    velvette.intercept(e, {
      handler() {
        render();
      },
    });
  });
Here’s the result:
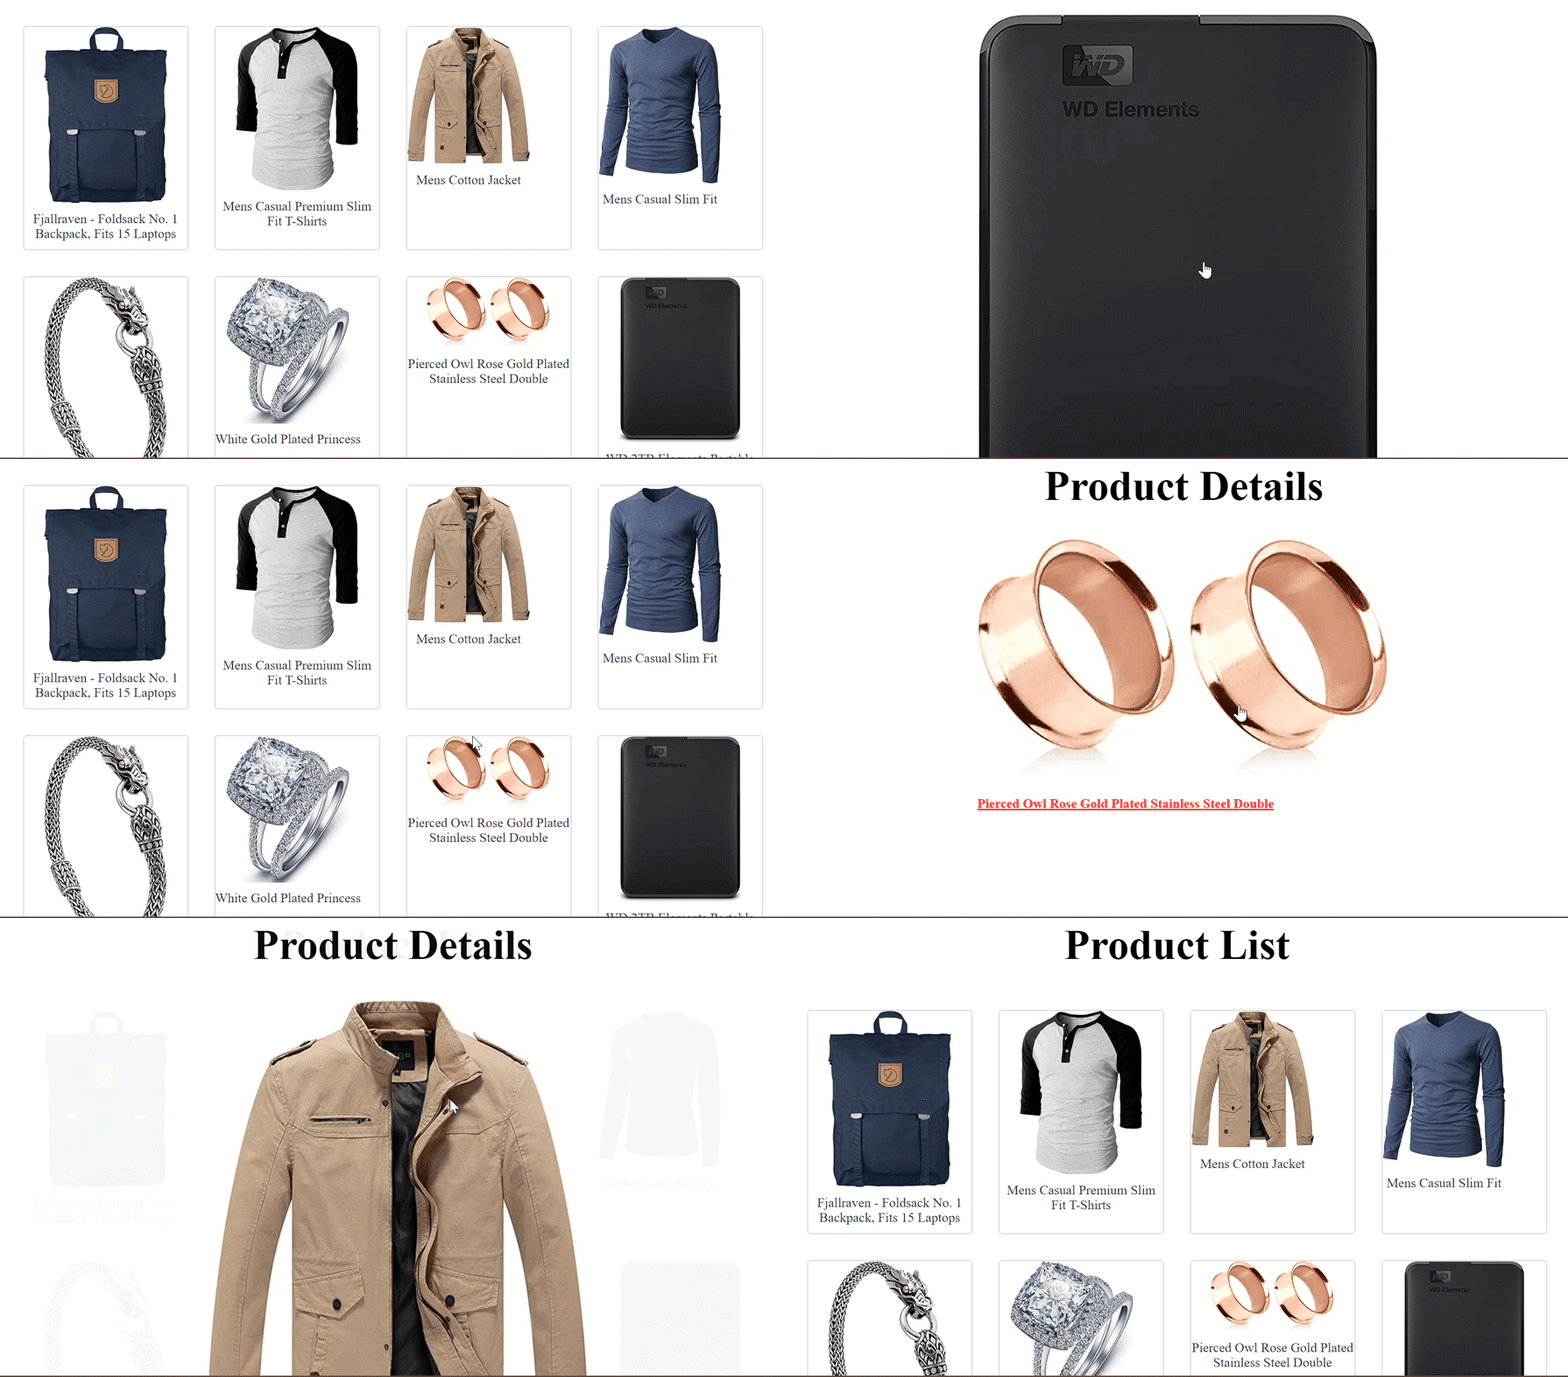
In this article, we introduced Velvette and explored its building blocks and how they work to achieve smoother and more engaging transitions between views. We also explored how to integrate Velvette into existing projects without a total overhaul of your existing code.
While Velvette offers powerful transition capabilities, it’s built on the View Transitions API, which currently has limited browser support, so consider implementing fallback mechanisms for browsers that don’t support the API.
We’ve only scratched the surface of what you can achieve with Velvette in this article. If you’re eager to learn more about the library, the Velvette documentation offers comprehensive examples that will assist you in getting started.
As web frontends get increasingly complex, resource-greedy features demand more and more from the browser. If you’re interested in monitoring and tracking client-side CPU usage, memory usage, and more for all of your users in production, try LogRocket.

LogRocket lets you replay user sessions, eliminating guesswork around why bugs happen by showing exactly what users experienced. It captures console logs, errors, network requests, and pixel-perfect DOM recordings — compatible with all frameworks.
LogRocket's Galileo AI watches sessions for you, instantly identifying and explaining user struggles with automated monitoring of your entire product experience.
Modernize how you debug web and mobile apps — start monitoring for free.
Hey there, want to help make our blog better?
Join LogRocket’s Content Advisory Board. You’ll help inform the type of content we create and get access to exclusive meetups, social accreditation, and swag.
Sign up now
Discover how to use Gemini CLI, Google’s new open-source AI agent that brings Gemini directly to your terminal.

This article explores several proven patterns for writing safer, cleaner, and more readable code in React and TypeScript.

A breakdown of the wrapper and container CSS classes, how they’re used in real-world code, and when it makes sense to use one over the other.

This guide walks you through creating a web UI for an AI agent that browses, clicks, and extracts info from websites powered by Stagehand and Gemini.