As a mobile developer, you may find yourself working on an app that demands highly customized user interactions. Your design team may come up with some wacky, never-before-seen UI/UX, and it’s your job to figure out how to execute it. Or let’s say you’re working on a pet project and you want to produce eye-catching visuals to engage your users. Imagine how frustrating it would be if you couldn’t access the assets required to do this, perhaps because the files are not in the proper format, they’re too expensive to add to your project, etc.
Don’t panic! Flutter has you covered.
Flutter’s CustomPaint widget enables you to pour your imagination onto the digital canvas. You can draw almost anything on the screen with this low-level painting API. It’s similar to drawing something on paper, but instead of a pencil and paper, you have an API and a canvas on which to draw.
In this tutorial, we’ll introduce you to CustomPaint, how to use it, what problems you may face while using it, and eventually the need of using the Flutter Shape Maker tool.
Here’s what we’ll cover:
CustomPaint is a widget in Flutter that generates a canvas on which to draw during the paint phase. The canvas has a coordinate system that matches the coordinate system of the CustomPaint object.
First, CustomPaint asks its painter to paint on the canvas. After it paints its child, the widget asks the foregroundPainter property to paint. The painters are restricted to a rectangular area that starts at the origin and encompasses a region of a specified size. If they venture outside this allotted space, there may not be enough memory to rasterize the painting commands.
The following video does a great job of breaking down how Flutter’s CustomPaint widget works:
CustomPaint (Flutter Widget of the Week)
Want a very custom user interface? Flutter provides access to many low-level paint calls that are fast and efficient. Learn more about CustomPaint() in this episode. Get more tips! → https://bit.ly/2B8M3vG Subscribe! → https://bit.ly/googledevs
To see Flutter CustomPaint in action, let’s try to draw a simple line:
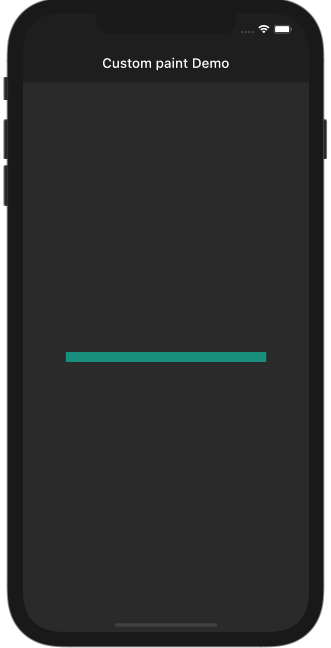
First, introduce the CustomPaint widget in your code. The basic code to draw a simple line looks like this:
// Step 1
class MyBookings extends StatelessWidget {
  @override
  Widget build(BuildContext context) {
    return Scaffold(
      appBar: AppBar(
        title: Text('Custom paint Demo'),
      ),
      body: Container(
        child: Center(
          child: CustomPaint(
            size: Size(300, 200),
            painter: LinePainter(),
          ),
        ),
      ),
    );
  }
}
CustomPaint needs at least two properties:
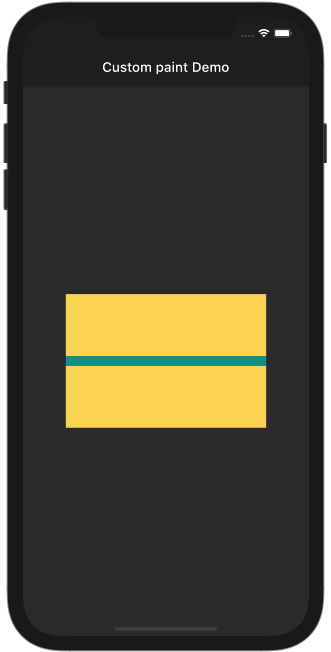
painter, which paints before the childrensize, which specifies the canvas over which to draw the lineIf you want the line to be drawn over any widget, such as container, stack, row, column, etc., replace size with child and painter with foregroundPainter:
CustomPaint(
  child: Container(
    width: 300,
    height: 200,
    color: Colors.amberAccent,
  ),
  foregroundPainter: LinePainter(),
)
Whatever child is given, the line will be drawn over it. foregroundPainter draws a line above the child.
The result looks like this:
Now let’s create a class that extends CustomPainter. This class is responsible for drawing actual paintings. It has a paint and canvas class, which allows you to draw different shapes, such as a line, circle, rectangle, custom path, etc.
class LinePainter extends CustomPainter {
  @override
  void paint(Canvas canvas, Size size) {
    var paint = Paint()
      ..color = Colors.teal
      ..strokeWidth = 15;

    Offset start = Offset(0, size.height / 2);
    Offset end = Offset(size.width, size.height / 2);

    canvas.drawLine(start, end, paint);
  }

  @override
  bool shouldRepaint(CustomPainter oldDelegate) {
    return false;
  }
}
The Paint class is used to configure the painting properties, such the color and size of the pen. Apart from this, it offers a lot of other fun stuff you can play around with. The paint class is usually configured before painting, just like you would decide which color pen to draw on paper with.
The canvas class offers a wide variety of methods to actually start painting.
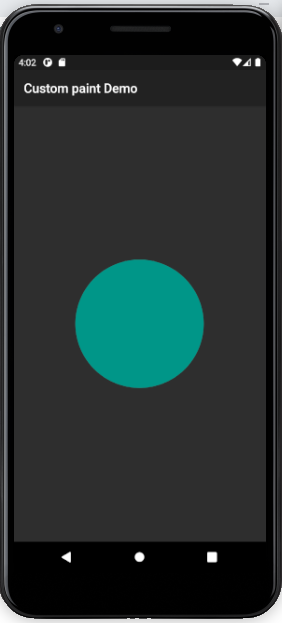
Drawing a circle in Flutter is also easy with CustomPaint. Canvas offers a drawCircle method, which, as the name suggests, draws a circle. The circle is centered at the point given by the first argument; the radius is given in the second argument.
Replace the LinePainter class in the above example with the below code to see a circle on the screen:
class CirclePainter extends CustomPainter {
  @override
  void paint(Canvas canvas, Size size) {
    var paint = Paint()
      ..color = Colors.teal
      ..strokeWidth = 15;

    Offset center = Offset(size.width / 2, size.height / 2);

    canvas.drawCircle(center, 100, paint);
  }

  @override
  bool shouldRepaint(CustomPainter oldDelegate) {
    return false;
  }
}
Drawing simples shapes, such as lines and circles, is easy. But let’s say you want to draw a curved shape, like this:
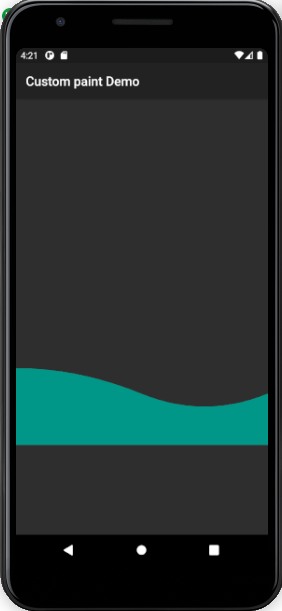
Canvas provides a way to draw a path using the drawPath method. Here, the Path class is very useful in moving the pointer. The curve is drawn using the path.quadraticBezierTo(x1,y1,x2,y2) method, which draws a curve to x2,y2 using x1,y2 as control points:
class MyBookings extends StatelessWidget {
  @override
  Widget build(BuildContext context) {
    return Scaffold(
      appBar: AppBar(
        title: Text('Custom paint Demo'),
      ),
      body: Container(
        child: Center(
          child: CustomPaint(
            size: Size(400,400),
            painter: CurvedPainter(),
          ),
        ),
      ),
    );
  }
}
class CurvedPainter extends CustomPainter {
  @override
  void paint(Canvas canvas, Size size) {
    var paint = Paint()
      ..color = Colors.teal
      ..strokeWidth = 15;

    var path = Path();

    path.moveTo(0, size.height * 0.7);
    path.quadraticBezierTo(size.width * 0.25, size.height * 0.7,
        size.width * 0.5, size.height * 0.8);
    path.quadraticBezierTo(size.width * 0.75, size.height * 0.9,
        size.width * 1.0, size.height * 0.8);
    path.lineTo(size.width, size.height);
    path.lineTo(0, size.height);

    canvas.drawPath(path, paint);
  }

  @override
  bool shouldRepaint(CustomPainter oldDelegate) {
    return true;
  }
}
The real challenge here is identifying the control points while developing. If you’re developing a UI that has a lot of curves, determining the best place for a control point can be tricky and time-consuming.
Although Flutter provides a hot reload feature that allows you to iterate fast on design while developing, sometimes you need more to put the control points in the best place. Put simply, you need something that allows you to manage the curves with UI controls instead of code.
Flutter Shape Maker by Paras Jain is the only toolset available today that enables you to manage curves with UI controls.
To configure Flutter Shape Maker to draw shapes, as in the real world, first select your canvas and then start drawing on it.
Here we have an option to select our canvas size. Make sure you configure the size that best matches the aspect ratio of the final shape. For example, if your desired shape is a rectangle, then you must set the size as something like 800(W) * 400(H).
The responsive code option will be on by default. It’s always good practice to have responsive code to make your shape ratio consistent across all the devices.
The pen tool allows you to plot points and create the desired shape on the canvas. Snap points to the grid help you create accurate drawings.
A layer is simply a stack of various shapes. This is super helpful for creating complex scenes composed of multiple shapes. You can add, delete, hide, and show any layer to manage one shape at a time:

This enables you to freely move the whole shape and do some final adjustment in the position of the shape.

Get code is the unique selling point of Flutter Shape Maker. The custom paint code is now just one click away. Click on it and you’ll get the responsive version of the code that is ready to be included directly in your code:
With Flutter Shape Maker, creating a curve is a piece of cake. Just select any point and click H to enable control handles to create the curve:
As you can see, the ease of creating and modifying a curve makes all the difference here.
To see Flutter Shape Maker in action, let’s quickly whip up a fairly complex ticket UI. The finished result will look like this:
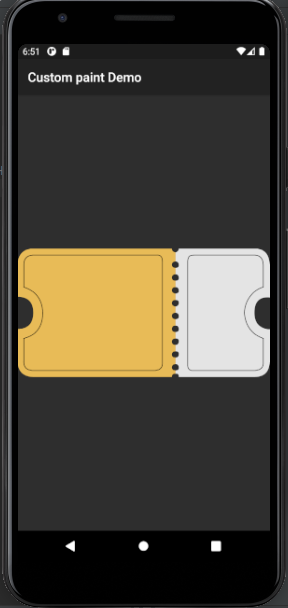
First, creating a bottom layer:
Then, create an upper layer:
By repeating the same process for the right-hand side using layers and carefully managing the curves with control handles, you can achieve a complicated-looking UI in a very short amount of time.
You can view the complete source code for this ticket UI.
In this tutorial, we introduced you to Flutter’s CustomPaint widget and demonstrated how to create and manage complex shapes using Flutter Shape Maker. We then walked you through how to create a relatively complex UI using these tools in an example Flutter app.
With these skills in your toolbox, the shapes you can create with Flutter are limited only by your imagination.
Install LogRocket via npm or script tag. LogRocket.init() must be called client-side, not
server-side
$ npm i --save logrocket

// Code:

import LogRocket from 'logrocket';
LogRocket.init('app/id');
// Add to your HTML:

<script src="https://cdn.lr-ingest.com/LogRocket.min.js"></script>
<script>window.LogRocket && window.LogRocket.init('app/id');</script>
Would you be interested in joining LogRocket's developer community?
Join LogRocket’s Content Advisory Board. You’ll help inform the type of content we create and get access to exclusive meetups, social accreditation, and swag.
Sign up now
Not sure if low-code is right for your next project? This guide breaks down when to use it, when to avoid it, and how to make the right call.

Compare Firebase Studio, Lovable, and Replit for AI-powered app building. Find the best tool for your project needs.

Discover how to use Gemini CLI, Google’s new open-source AI agent that brings Gemini directly to your terminal.

This article explores several proven patterns for writing safer, cleaner, and more readable code in React and TypeScript.


