As organizations grow, so does the quantity and complexity of the software required to sustain the trajectory of the business. Microservices are a common pattern that developers use to split software services into smaller pieces, making them easier to maintain and improving sustainability.

When multiple web applications need to be built for an organization, they can be separated into individual pieces and loosely coupled. Teams that adopt this pattern become autonomous and enjoy independent deployments, domain logic, and a host of other benefits.
In this article, we’ll discuss some considerations and tradeoffs associated with using Nx to develop microservices. Nx is a development framework for building applications inside of monorepos. Monorepos contain multiple apps inside of a single Git repository. Nx handles many monorepo use cases like build systems, inbuilt tools, and smart caching. We’ll demonstrate how to use Nx to create multiple Next.js apps within a monorepo.
The Replay is a weekly newsletter for dev and engineering leaders.
Delivered once a week, it's your curated guide to the most important conversations around frontend dev, emerging AI tools, and the state of modern software.
Monorepos enable organizations to share code, such as components and utility libraries, across apps and teams. This structure can be particularly helpful for companies that have reached a critical growth stage where there are many web applications to maintain and build features for and multiple API servers across the organization that must be cared for.
At this inflection point, the number of Git repositories increases, processes start to differ, and it becomes increasingly difficult to keep track of all the code being used across the organization. With a monorepo, one Git repository holds all the code you need, split up the way your organization wants. For example, if there is a common React authentication component, you could store this in a library package that’s used by multiple Next.js apps.
Another benefit of monorepo structures is that changes between layers of the stack can be propagated in a single pull request. For example, a developer could create a single pull request that updates an API server route, changes the shared TypeScript type package, and integrates it with a connected frontend component.
As with anything, there are some tradeoffs associated with monorepos, such as longer build times and the challenge of keeping code consistent across the repository. That’s where solutions like Nx, Yarn and npm workspaces, and Bazel come into play. These tools are designed to make monorepos easy to use by providing a variety of solutions like task orchestration, caching, generators, and dependency graph analysis.
Nx is a robust monorepo solution that offers a first-class experience for creating Next.js microservices. It offers templates and commands, allowing developers to quickly start using monorepos.
The Nx CLI enables consistent generation of new apps and packages and offers first-class support for JavaScript and TypeScript. But, the advanced features make Nx really shine. For example, Nx lets developers declare task dependencies, such as having an API run a build task before a frontend build task.
Nx also supports running tasks only on “affected” code, which helps shorten build task times when a change spans multiple apps or packages. Nx supports many common monorepo functionalities and is feature-rich compared to other competing tools (check out the breakdown here). For additional information about Nx, refer to the official docs.
Nx is available in a few versions. Integrated Repos is an opinionated fully-fledged version that hooks into existing build tools. It offers a single package.json file for the entire monorepo for ease of package management. It is more difficult to add to an existing project as it hooks into code bundling, tools like Jest and webpack need to be wrapped in special Nx packages to make them work.
Package-Based Nx is similar to how workspaces work in Yarn and npm. Each package has its own set of dependencies.
For this tutorial, we’ll stick with the Integrated Repos version of Nx.
Many growing companies use Next.js to build their web apps because it provides important inbuilt features such as data fetching, image optimizations, and dynamic HTML streaming. Nx provides excellent support for Next.js, enabling developers to easily generate Next.js apps in a consistent manner.
The @nx/next npm package offers specific tools and integrations, including Nx-specific code generators and build tools. For example, there’s a Next.js plugin called withNx that helps Next.js understand the monorepo libs structure and other Nx-specific features.
Nx tools provide developers with a documented approach to creating multiple Next.js apps within a monorepo. This enables the sharing of component libraries and utility libraries, while also supporting the latest Next.js features.
For our tutorial, let’s consider a hypothetical example. Organization Y is growing and now has two web applications it needs to develop: a list and a forum. Both apps will need authentication.
The frontend team decides to build two Next.js applications. They’ve been told that authentication should have a consistent look and feel across both websites. A separate backend development team creates one authentication API for the entire organization to use.
The developers agree that it feels wasteful to create everything twice for two websites that are meant to have identical content and behavior. So, they opt to build the two Next.js apps inside one Nx monorepo.
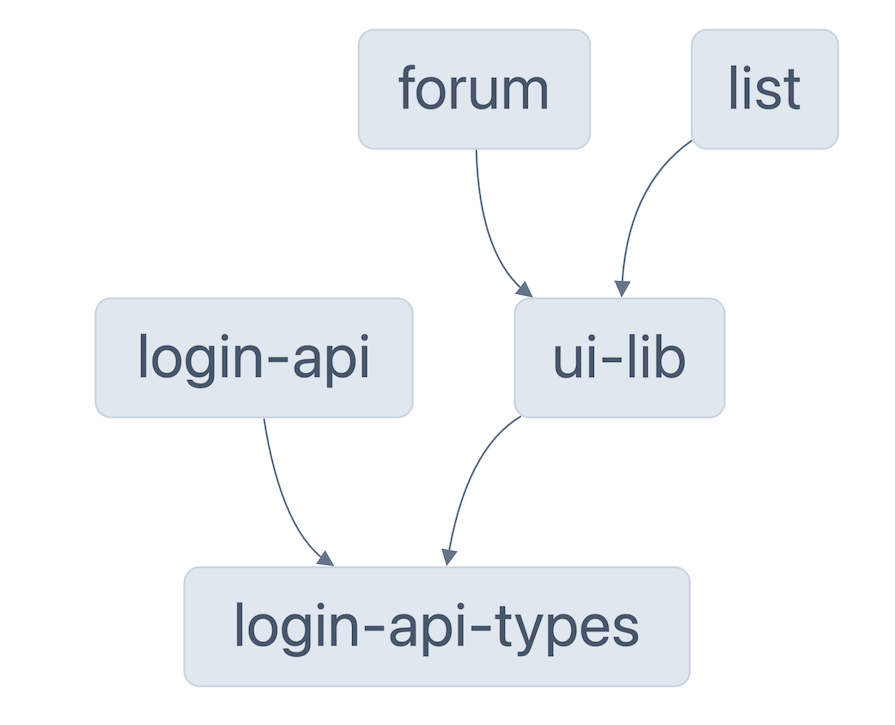
The project they create has an Authentication React component inside a ui-lib package and a login-api service serving the API. To make the frontend truly type safe, the team creates a login-api-types package that holds the API types.
Here’s the project’s dependency graph:

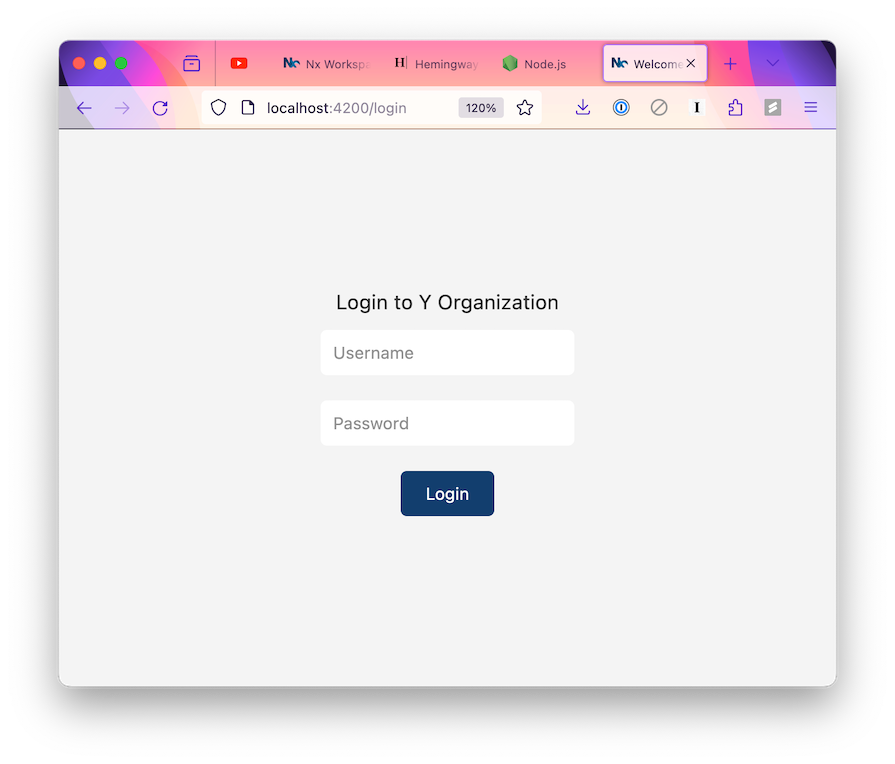
Here’s how the final project looks:

Let’s walk through building this sample Nx monorepo project.
For this project, we’ll create two Next.js applications: list and forum. Then we’ll use Node.js and Express to create the login-api. If an user enters admin for the username and password for the password, they will be redirected to the homepage.
N.B., to keep things simple, choose the derived option for file naming and use CSS for styling whenever possible
To start, ensure you have Node.js installed:
node --version
// This should output >= 18.x.x
Now, go to your home directory where you store GitHub repositories; mine is ~/Github:
cd ~/Github
Create a monorepo for the yorg using npx and the create-nx-workspace npm script, like so:
npx create-nx-workspace@latest yorg --preset=ts
The above command creates a folder with all necessary boilerplate for an integrated workspace using TypeScript. Next, cd into the directory:
cd yorg
Install the Next.js Nx plugin; this will enable you to generate Next.js apps within the monorepo in a consistent fashion and also includes Next.js plugins that we’ll use later in this tutorial:
npm i -D @nx/[email protected]
Now it’s time to create the list and forum Next.js applications. To start, install the Nx CLI globally:
npm i -g [email protected]
Use the Nx CLI to create two Next.js apps:
mkdir apps
nx generate @nx/next:application --name=list --directory=apps
nx generate @nx/next:application --name=forum --directory=apps
Next, run a command to generate the login page in both the list and the forum. This is a React component that renders when a user navigates to <rootURL>/login:
nx g @nx/next:page --name=login --project=list
nx g @nx/next:page --name=login --project=forum
Before moving on, serve them with the below commands and visit http://localhost:4300 to see if the apps work:
nx serve list
nx serve forum --port 4300
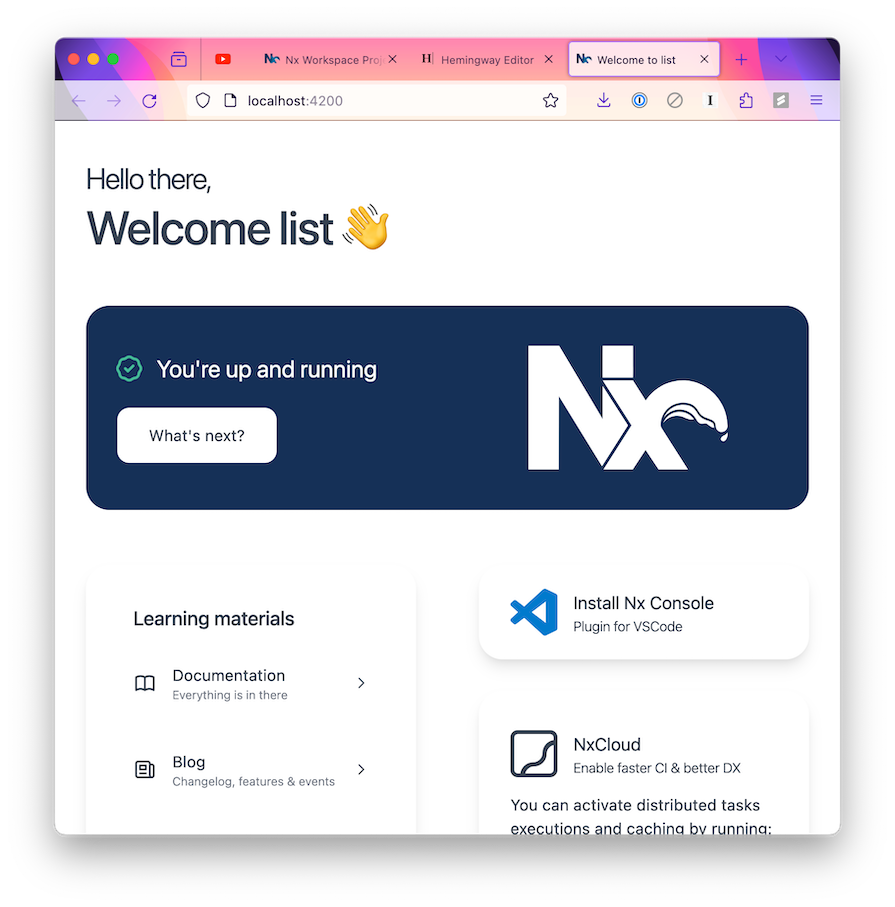
Here’s the list application; the forum app should look the same:

Next, we’ll create the shared authentication component. To start, create a Nx library, named ui:
mkdir lib
nx g @nx/next:library ui --directory=lib
Then, create a Next.js React component, named auth-component:
nx g @nx/next:component auth-component --project=lib-ui
Now, add basic input HTML elements and a login button inside the lib/ui/src/lib/auth-component/auth-component.tsx file:
import styles from './auth-component.module.css';
import { useState } from 'react';

export function AuthComponent(props: AuthComponentProps) {
  const [username, setUsername] = useState('');
  const [password, setPassword] = useState('');

  const handleLogin = () => {
    // Handle login logic here
  };

  return (
    <div className={styles['container']}>
      <h1>Login to Y Organization</h1>
      <input
        type="text"
        value={username}
        onChange={(e) => setUsername(e.target.value)}
        placeholder="Username"
        id="username"
        className={styles['input']}
      />
      <input
        type="password"
        value={password}
        onChange={(e) => setPassword(e.target.value)}
        placeholder="Password"
        id="password"
        className={styles['input']}
      />
      <button onClick={handleLogin} id="login-button" className={styles['button']}>Login</button>
    </div>
  );
}
export default AuthComponent;
Next, add some basic CSS inside the lib/ui/src/lib/auth-component/auth-component.module.css file:
.container {
  display: flex;
  flex-direction: column;
  justify-content: center;
  align-items: center;
  height: 100vh;
  background-color: #f4f4f4;
  color: #333;
}

.input {
  margin: 10px 0;
  padding: 10px;
  border: none;
  border-radius: 5px;
  background-color: #fff;
  color: #333;
}

.button {
  margin: 10px 0;
  padding: 10px 20px;
  border: none;
  border-radius: 5px;
  background-color: #123f6e;
  color: #fff;
  cursor: pointer;
}

.button:hover {
  background-color: #0056b3;
}
To use the auth-component inside your list and forum apps, open the lib/ui/src/index.ts file and a command to export from ./lib/auth-component/auth-component, like so:
'use client';

export * from './lib/lib-ui';
export * from './lib/auth-component/auth-component';
Now, add the auth-component to the login pages in the apps/list/app/login/page.tsx and apps/forum/app/login/page.tsx files:
import { AuthComponent } from '@yorg/lib/ui';
import styles from './page.module.css';

/* eslint-disable-next-line */
export interface LoginProps {}

export function Login(props: LoginProps) {
  return (
    <div className={styles['container']}>
      <h1>Welcome to Login!</h1>
      <AuthComponent />
    </div>
  );
}

export default Login;
Serve up the apps to make sure they render properly:
nx serve list
nx serve forum
The next step is to set up the Node.js API server. Start by installing the Nx Express plugin:
npm i --save-dev @nx/express
Now, create a new Express app:
nx g @nx/express:app login-api --directory=apps/login-api
Next, create a basic login route that returns a 200 response when a user enters admin and password as credentials:
/ LoginRequestBody doesn't exist yet!
app.post(
  '/api/login',
  (req: Request<unknown, unknown, LoginRequestBody>, res) => {
    // if the username is 'admin' and the password is 'password' return a 200 status code
    if (req.body.username === 'admin' && req.body.password === 'password') {
      res.status(200).send();
    }
    // otherwise return a 401 status code
    res.status(401).send();
  }
);
Create a TypeScript library package to house the types for the request body input:
nx g @nx/js:lib login-api-types --directory=lib/login-api-types
Now, insert the types into the libs/login-api-types/src/lib/login-api-types.ts file:
export interface LoginRequestBody {
  username: string;
  password: string;
}
Use the types inside the /login API route inside the apps/login-api/src/main.ts file:
import { LoginRequestBody } from '@yorg/login-api-types';

app.post(
  '/api/login',
  (req: Request<unknown, unknown, LoginRequestBody>, res) => {
    ...
  }
);
To call the login API route, write a login handler function inside the auth-component in the lib/ui/src/lib/auth-component/auth-component.tsx file:
import { LoginRequestBody } from '@yorg/login-api-types';

export function AuthComponent(props: AuthComponentProps) {
  const [username, setUsername] = useState('');
  const [password, setPassword] = useState('');

  const handleLogin = async () => {
    const requestBody: LoginRequestBody = {
      username,
      password,
    };
    // call the login api using the inbuilt browser fetch library at http://localhost:3333/api/login with the username and password as the body
    // if the response is 200, then redirect to the home page
    // if the response is 401, then show an error message
    const response = await fetch('http://localhost:3333/api/login', {
      method: 'POST',
      body: JSON.stringify(requestBody),
      headers: {
        'Content-Type': 'application/json',
      },
    })
    if (response.status === 200) {
      window.location.href = '/';
    } else {
      alert('Invalid username or password');
    }
  };
  ...
};
To verify that everything works, serve up the list and forum apps, visit the login pages and provide admin and password as the login credentials. If everything is working properly, you’ll be redirected to the homepage.
As an organization grows so does the complexity of managing its increasingly diverse codebases. Monorepos, coupled with tools like Nx, offer an effective solution to centralizing code while preserving team autonomy.
Nx integrates with Next.js to provide a streamlined approach for building scalable and consistent applications within a monorepo. Despite tradeoffs, such as longer build times, Nx is invaluable for managing complexity in modern software development.
In this article, we looked at a practical example that demonstrates the benefits of using Nx for creating shared components and APIs, showcasing its potential for organizations seeking efficient and maintainable development practices. Embracing Nx in the evolving landscape of software development can pave the way for sustainable and scalable solutions.
Debugging Next applications can be difficult, especially when users experience issues that are difficult to reproduce. If you’re interested in monitoring and tracking state, automatically surfacing JavaScript errors, and tracking slow network requests and component load time, try LogRocket.
LogRocket captures console logs, errors, network requests, and pixel-perfect DOM recordings from user sessions and lets you replay them as users saw it, eliminating guesswork around why bugs happen — compatible with all frameworks.
LogRocket's Galileo AI watches sessions for you, instantly identifying and explaining user struggles with automated monitoring of your entire product experience.
The LogRocket Redux middleware package adds an extra layer of visibility into your user sessions. LogRocket logs all actions and state from your Redux stores.


Modernize how you debug your Next.js apps — start monitoring for free.

@container scroll-state: Replace JS scroll listeners nowCSS @container scroll-state lets you build sticky headers, snapping carousels, and scroll indicators without JavaScript. Here’s how to replace scroll listeners with clean, declarative state queries.

Explore 10 Web APIs that replace common JavaScript libraries and reduce npm dependencies, bundle size, and performance overhead.

Russ Miles, a software development expert and educator, joins the show to unpack why “developer productivity” platforms so often disappoint.

Discover what’s new in The Replay, LogRocket’s newsletter for dev and engineering leaders, in the February 18th issue.
Hey there, want to help make our blog better?
Join LogRocket’s Content Advisory Board. You’ll help inform the type of content we create and get access to exclusive meetups, social accreditation, and swag.
Sign up now
One Reply to "Developing Next.js microservices with Nx"
I am failing to see the microservices point here