Firebase is an application development platform. It provides services like hosting, databases, file storage, analytics, and authentication. Firebase Hosting, one of the platform’s main products, hosts users ’ web assets on a content delivery network. With Firebase Hosting, you can deploy all sorts of projects from mobile app pages, single-page applications, static sites, progressive web apps to microservices, and APIs.
Once an Angular app is compiled, it takes a few steps to deploy it on Firebase. A site needs a Google Cloud Platform project to be deployed. These projects use Firebase services and are called Firebase projects. The projects are created on the Firebase Console but are accessible on the GCP and Google API consoles. On deployment, a site is automatically assigned two free subdomains on the firebaseapp.com and the web.app domains. However, you can customize a unique domain for the deployed site if you choose. Additionally, free SSL certificates are provisioned for each site.
With Firebase Hosting you can deploy multiple sites on a single project. This is especially useful when you’d like sites to share Firebase resources and services such as authentication, storage, APIs, databases, etc. For example, a customer-facing site can share the same database with an administration site under one project. With this approach, sites can share resources while running different applications with different deployment configurations on different domains. However, this setup is not recommended for different workflow environments like production, staging, development, etc. as it may tamper with production resources, like a database.
Firebase Cloud Functions allow users to deploy Angular Universal apps on Firebase. Cloud Functions is a serverless framework that runs backend code. They are triggered by events like HTTP requests and other Firebase features. You do not have to set up servers, manage, and scale them. When deploying Angular Universal apps to Firebase, a Cloud Function will perform server-side rendering without requiring additional development or configuration.
In this article, we will cover how to deploy Angular applications to Firebase using a single project. Next, we will go through how to deploy multiple Angular apps to one project. Additionally, we will look at how to deploy Angular Universal apps using Cloud Functions. Lastly, we’ll outline how to roll them back.
You need a Firebase account to deploy any app on it. Firebase requires that you use a Google account when signing in. If you don’t already have an account, you can create one here. Firebase offers a free Spark plan that you can take advantage of for app deployments. Under this plan, you can host up to 10GB in files and make 125K cloud function invocations a month for free.
You will also need to install Angular CLI. The deployment approach we shall be exploring relies on the @angular/fire library. We will use it for builds, local previews, and deployments in conjunction with the Angular CLI. If you do not have Angular CLI, you can install it by running:
npm install -g @angular/cli
Finally, you will need to install the Firebase CLI tool. We shall use this to authenticate and access your Firebase account and create projects and deployment targets. To install it run:
npm install -g firebase-tools
To make a deployment, you first need to log the CLI tool into your Firebase account. Run:
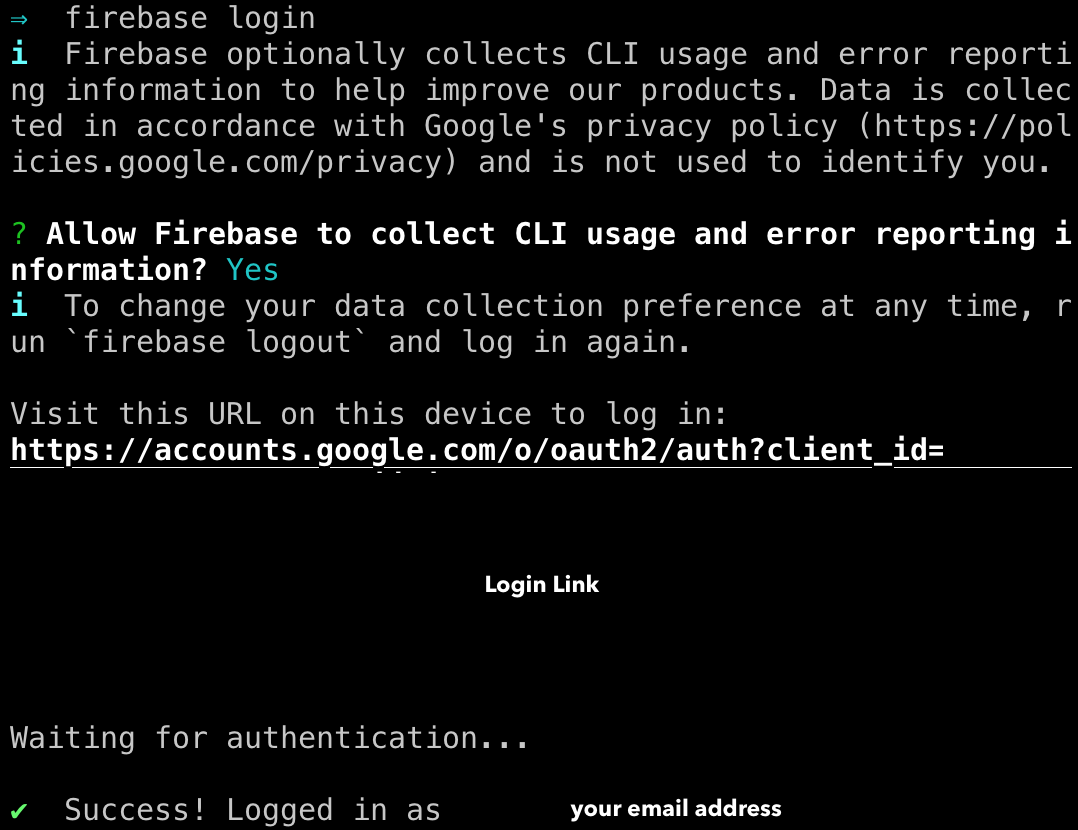
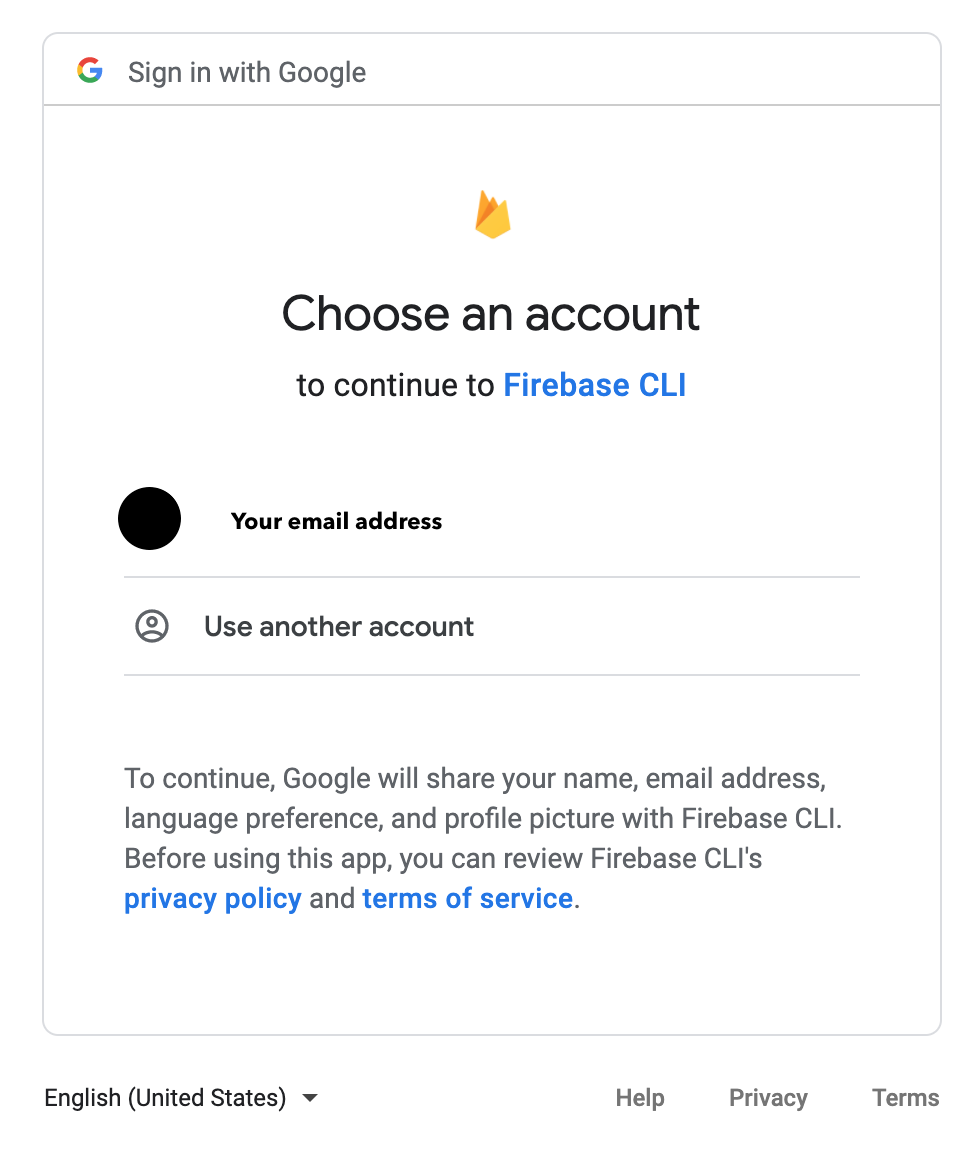
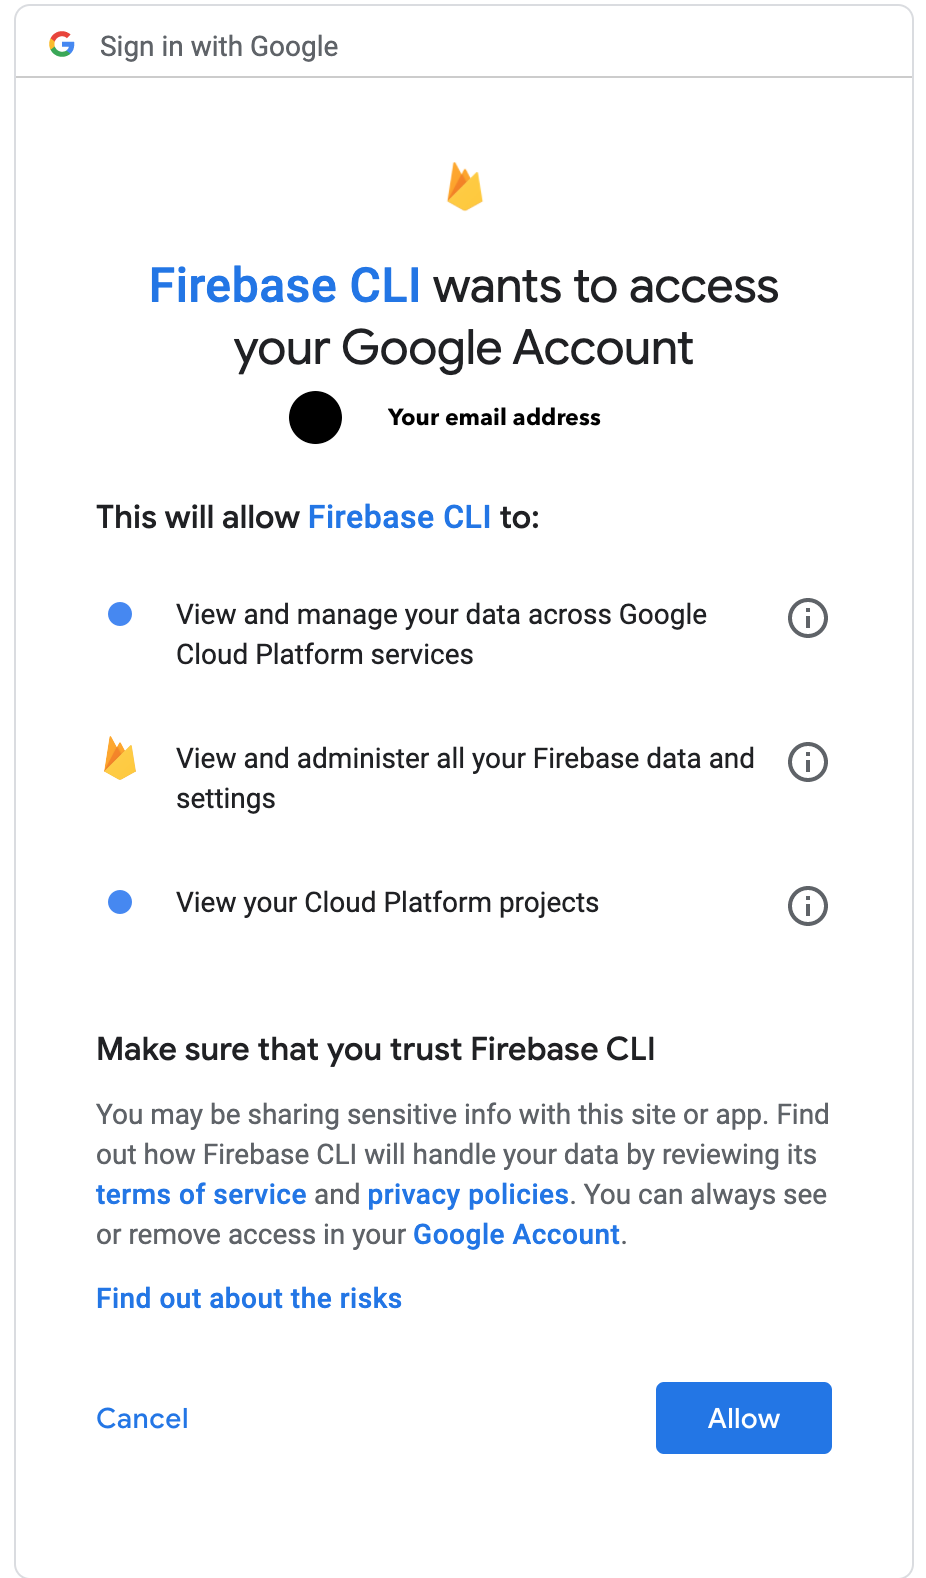
firebase login
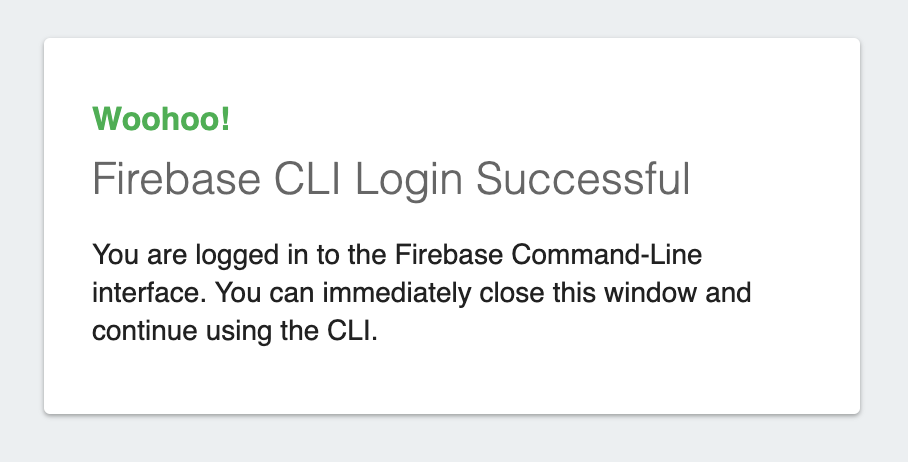
The firebase login command may ask to collect CLI usage and error reporting information. Answer as you please. The command will redirect you to a browser where you will be asked to pick a Google account to log in with. Next, you will be prompted to authorize Firebase CLI to access your Google account and to perform some tasks related to your Firebase account. If you allow it, you should see the “Firebase CLI Login Successful” dialog as shown in the screenshots below.
Next, you’ll need to create a Firebase project from which to deploy your Angular app from. You do this by running:
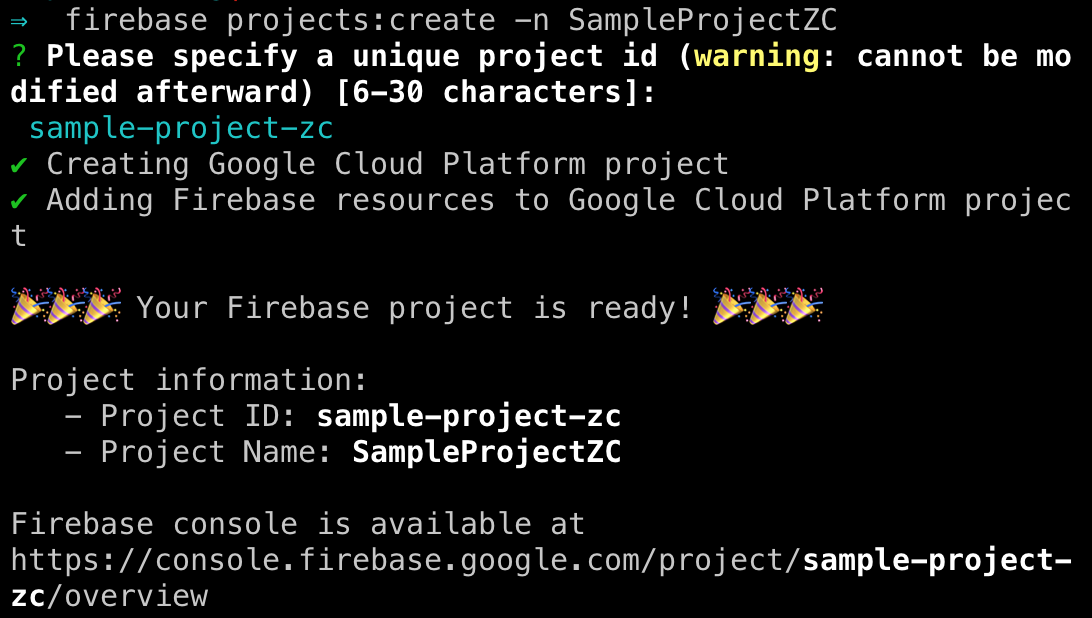
firebase projects:create -n <YOUR_PROJECT_DISPLAY_NAME>
Pass the -n flag with a display name for your project. You shall be prompted to enter a unique project ID. This ID should be unique across all created projects on Firebase. If it is not unique, the project creation will fail. If successful, you will get a “Your project is ready!” like this:
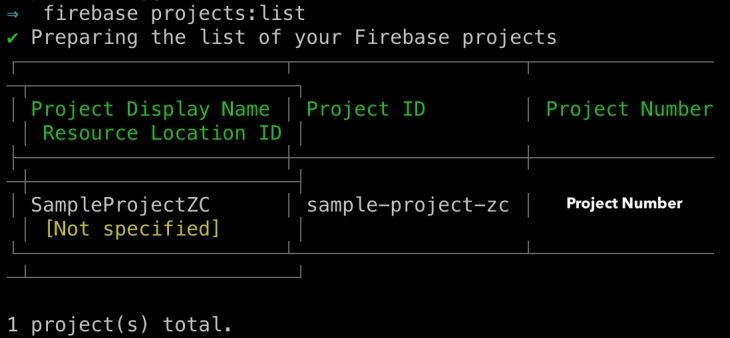
You can check that your project has been successfully created by running this command. It will list all the Firebase projects you have access to:
firebase projects:list
Projects created using the firebase projects:create command do not have Cloud Logging linked to it by default. You can link this kind of project to Cloud Logging on the Firebase Console under Project Settings > Integration.
First, begin by adding the Angular Firebase library to your application if you do not have it installed already. In the application’s root directory, run:
ng add @angular/fire
Once the necessary dependencies are installed, you will be prompted to pick a Firebase project that will be associated with the Angular app. Pick the project that was created above.
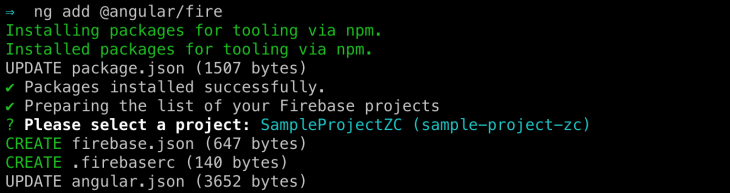
Completing this step creates two files, a .firebaserc and a firebase.json. All the hosting and project configuration is stored in the firebase.json file. The .firebaserc file specifies the default project. This file is used by the firebase use command to quickly switch between projects. What’s more, the architect tool configuration section of the angular.json file is updated. It will include a deploy target that specifies @angular/fire:deploy as a builder. Lastly, the package.json and package-lock.json are updated to reflect the latest dependencies added.
To preview what the compiled app will look like once deployed, build it with the --prod and --watch flags. The --prod flag specifies that build configuration should be for a production target. The --watch flag indicates that the app needs rebuilding when you make changes to its files:
ng build --prod --watch
To serve the app, run the command below and head on over to http://localhost:5000 to view it:
firebase serve
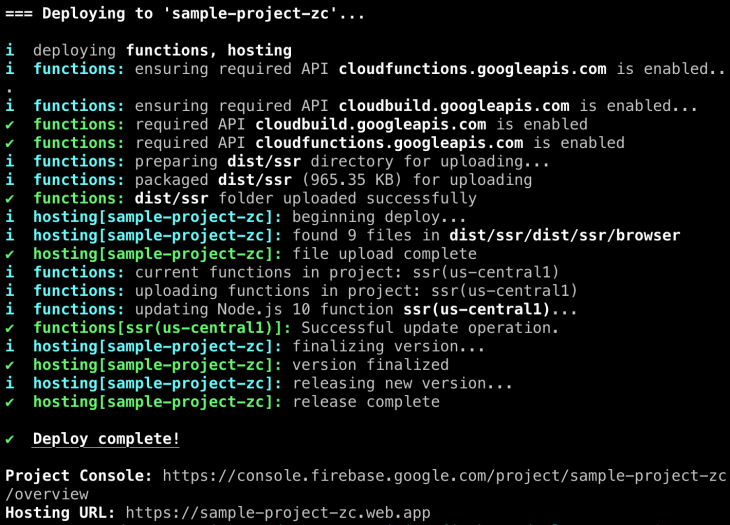
To deploy the app, run:
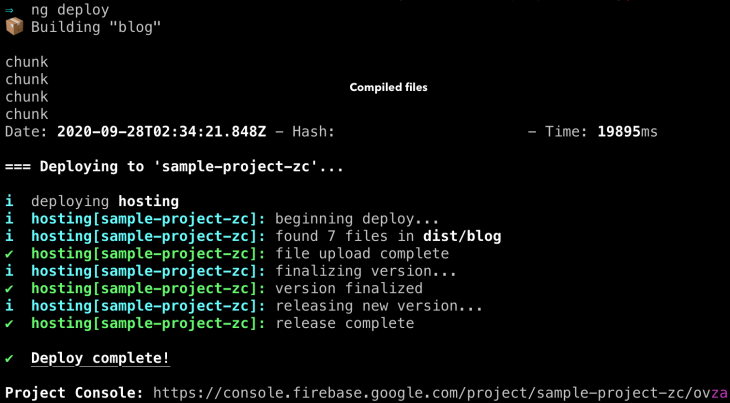
ng deploy
This command builds the application to dist/ then deploys the resultant output files. The app is deployed to the .web.app and .firebaseapp.com subdomains.
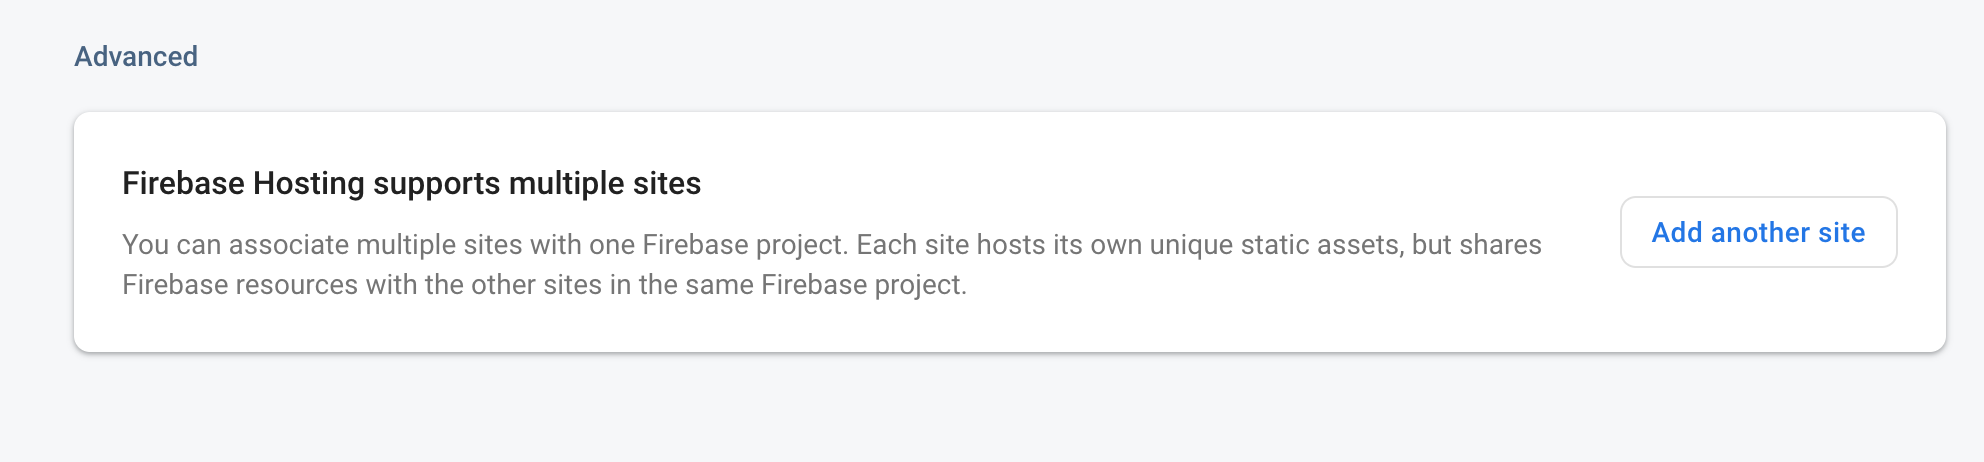
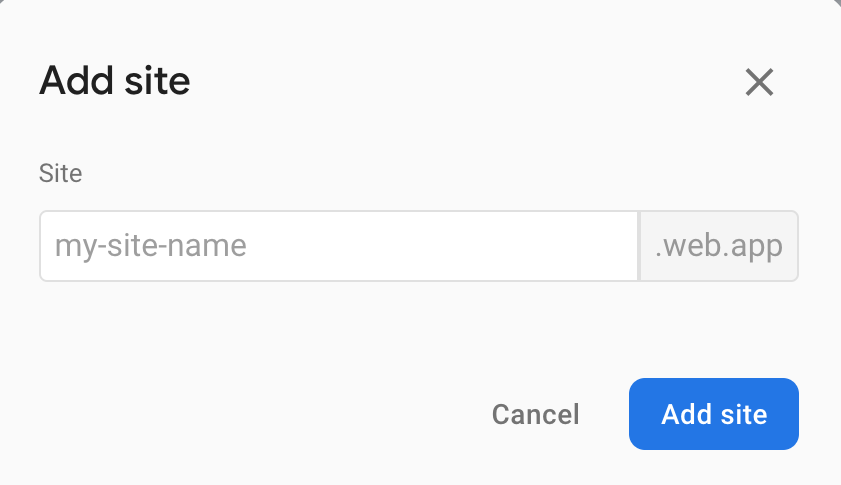
To deploy multiple apps to a single project, you need to create a Firebase site corresponding to each app. Head over to the Hosting Settings of the Project Overview on the Firebase Console. Let’s say, for example, we are trying to deploy a portfolio and a blog on one project. We’ll create two sites. One with the subdomain blog-zc.web.app and another with portfolio-zc.web.app.
@angular/fire library as described above to each of your projects, if they do not already use itIn this case, we’ll set deploy targets for the two different Firebase Hosting sites that we created above. We’ll run firebase target:apply <resource_type> <target_name> <resource_name> where:
resource_type can be hosting, storage buckets, databases,target_name is the name you assign to the deploy target, andresource_name is the name assigned to the resource on the Firebase Console (in this case, the hosting site subdomain)In the respective app root directories, run:
# Run this in the portfolio app root directory
firebase target:apply hosting portfolio portfolio-zc
# Run this in the blog app root directory
firebase target:apply hosting blog blog-zc
Running this will modify the hosting entry in the .firebaserc to include the new hosting site:

All that’s left to do is deploy each of the apps. Within the app root directories, run:
ng deploy
Angular Universal renders Angular apps on the server. It generates static pages from the app that are bootstrapped on the client when requested. To render an Angular app this way, we’ll use Firebase Cloud Functions and the Angular Express Engine module of Angular Universal.
First, we’ll begin by installing Angular Express Engine, if you do not have it already installed:
ng add @nguniversal/express-engine
Running the above command will install necessary dependencies, create an express web server that will run on a cloud function, a server-side app module, and a bootstrapper for the server app, as well as modify additional app configuration. For an in-depth explanation of what will be modified in your app when you add this schematic, visit this link.
Next, if not already part of your app dependencies, add the Angular Firebase library:
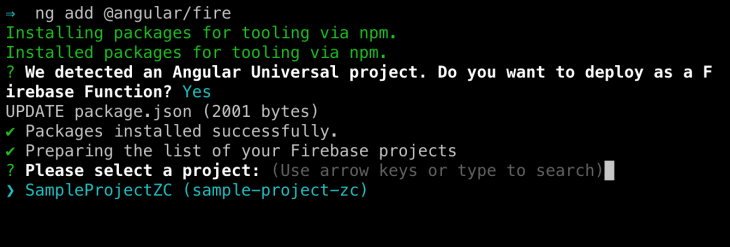
ng add @angular/fire
During installation, it will check whether your app is using Angular Universal as part of its setup. If it detects that your app does use it, it will ask whether it should deploy it as a Firebase Function. Enter yes for this prompt:

Next, you’ll be prompted to pick a Firebase project to associate with your app. Proceed to pick one from the list of projects accessible to your account:
This command will create the firebase.json and .firebaserc files based on the configuration you’ve specified. It will also update the angular.json file with the Firebase deployment builder and will set the ssr deployment option to true.
There are a couple of ways you could preview your app before deploying it. You could use:
npm run dev:ssr
This method uses the ssr-dev-server builder. You can access the app at http://localhost:4200 on a browser when previewing with this method.
You could also choose to preview it before deployment. This second method uses a Firebase functions emulator to run your express server that will then render your app. However, you have to cancel the deployment when done previewing your app. The command will ask you whether you’d like to complete the deployment. Answer No to this prompt until you are ready to deploy your app to production. You can view this preview of your app at http://localhost:5000.
ng deploy --preview

Once you’re sure your app works as expected, deploy it:
ng deploy
It’s important that if you’re running Node.js greater than version 8, you will have to switch billing plans from the free Spark plan to the pay-as-you-go Blaze plan. This is because the free Spark plan is limited to the Node.js 8 runtime for Cloud Functions but the Blaze plan supports Node.js 10 or later runtimes. However, the Blaze plan has a free tier for Cloud Functions up to a certain limit. You can find out more about what each pricing plan provides at this link.
If the current release of your hosted site has a problem, you could roll back your app to a previous working version on the Firebase Console. It’s not possible to rollback to a previous version using the Firebase CLI tools. To rollback to a past version, head on over to the hosting page of your project on the Firebase Console. Select the site you’d like to modify and in its Release History table, pick the version you’d like to roll back to it, open its dropdown menu, and select Rollback.
Firebase Hosting supports the deployment of compiled Angular apps. With the Angular Fire library, a lot of what goes into project setup and site deployment on Firebase has been automated. Using both the Angular CLI and the Angular Fire library, you can simplify intricate project deployments like multiple sites on a single project and server-side rendered apps. To learn more about hosting on Firebase, visit this link.
Debugging Angular applications can be difficult, especially when users experience issues that are difficult to reproduce. If you’re interested in monitoring and tracking Angular state and actions for all of your users in production, try LogRocket.
LogRocket lets you replay user sessions, eliminating guesswork by showing exactly what users experienced. It captures console logs, errors, network requests, and pixel-perfect DOM recordings—compatible with all frameworks.
With Galileo AI, you can instantly identify and explain user struggles with automated monitoring of your entire product experience.
The LogRocket NgRx plugin logs Angular state and actions to the LogRocket console, giving you context around what led to an error, and what state the application was in when an issue occurred.
Modernize how you debug your Angular apps — start monitoring for free.

Discover how React Fiber works under the hood. Learn how React builds the DOM, handles concurrent rendering, and works alongside React 19 features and the new React Compiler.

Learn how to use Skybridge, an open-source React framework, to build and deploy cross-platform AI apps and interactive UI widgets for ChatGPT, Claude, and MCP clients from a single codebase.

Learn how to set up Meilisearch, index documents, and build keyword, semantic, and hybrid search with AI-powered retrieval.

Compare pnpm and npm across security defaults, disk usage, dependency strictness, and workspace policy to decide which package manager fits your project.
Hey there, want to help make our blog better?
Join LogRocket’s Content Advisory Board. You’ll help inform the type of content we create and get access to exclusive meetups, social accreditation, and swag.
Sign up now

