An input mask is used to constrain the data format that the user can provide or enter into an input field. Input masks help make data more readable and inform users of what type of data is requested, helping reduce the chance of input errors. It’s an essential concept that is aimed at keeping user-provided data uniform, keeping the UI consistent, and reducing the chances of accepting wrong or incorrect data from users.

This is best illustrated in a phone number input field, which formats the raw value of 3453454634that the user enters into the input field to +1 (345) 345-4634.
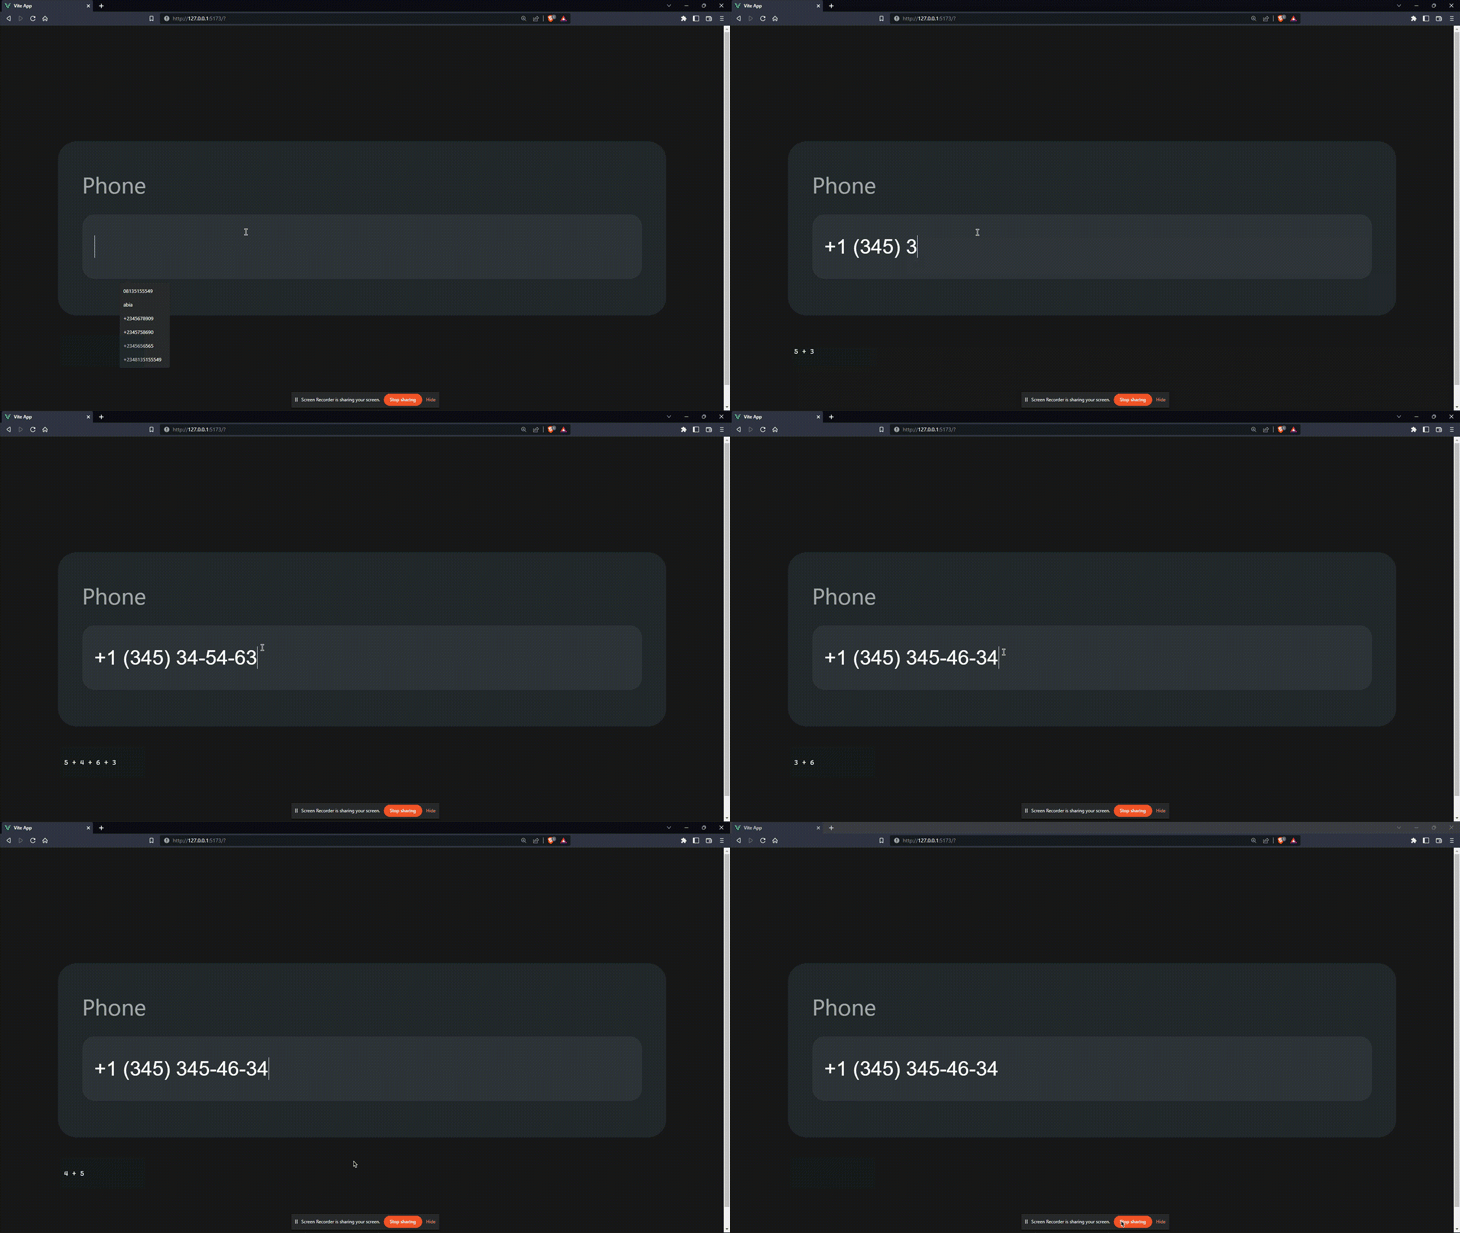
The phone number input field applies a few constraints, which include that only numbers and a maximum of 10 characters can be entered.
Another thing that happens is that the input is also automatically formatted while the values are being entered. When the user enters some value to the input, the following happens:
+1 in this case, is added to the front of the valueIn this post, we’ll cover how to use input masks in Vue.js apps using the Maska library.
Jump ahead:
Now that we’ve seen what input masks can do, let’s add them to a Vue application. In this article, we’ll be using the Maska package for Vue.js.
Maska is one of many packages out there that we can use to add input masks to our apps without having to write out the code ourselves. A few of Maska’s features include:
To follow along in this article, you should have a basic understanding of JavaScript and Vue.js, as well as an up-to-date version of Node.js installed on your machine.
Navigate to your directory of choice and run the command:
npm init vue@latest
This command will install and execute create-vue, the official Vue project scaffolding tool. We’ll be presented with prompts for several optional features, such as TypeScript and testing support:
√ Project name: ... vue-mask
√ Add TypeScript? ... No / Yes
√ Add JSX Support? ... No / Yes
√ Add Vue Router for Single Page Application development? ... No / Yes
√ Add Pinia for state management? ... No / Yes
√ Add Vitest for Unit Testing? ... No / Yes
√ Add an End-to-End Testing Solution? » No
√ Add ESLint for code quality? ... No / Yes

Scaffolding project in C:\Users\Mirac\Documents\writing\Using-input-masks-with-Vue\vue-mask...

Done.
Now run:
cd vue-mask
npm install
Once the application has been created, we install the Maska package:
npm install maska
Next, we need to explicitly add the Maska plugin to our app:
// ./src/main.js
import { createApp } from 'vue'
import App from './App.vue'
import Maska from 'maska'
import './assets/main.css'

createApp(App).use(Maska).mount('#app')
Maska has been set up globally! Let’s proceed.
Before we build out masked input fields, let’s take a look at the common syntax used with input masks. With Maska, we have a few default tokens that represent certain characters or character combinations defined by a regex pattern and a few other options, including uppercase, lowercase, etc.
With these tokens, we can specify the characters the user is allowed to enter into the input field. You can see the default tokens and what they do below:
{
    // # represents numbers 0 - 9
    '#': { pattern: /[0-9]/ },

    // X represents alphanumeric characters 0 - 9, a - z and A - Z
    'X': { pattern: /[0-9a-zA-Z]/ },

    // S represents alphabets a - z and A - Z
    'S': { pattern: /[a-zA-Z]/ },

    // A represents alphabets a - z and A - Z transformed to uppercase
    'A': { pattern: /[a-zA-Z]/, uppercase: true },

    // a represents alphabets a - z and A - Z transformed to lowercase
    'a': { pattern: /[a-zA-Z]/, lowercase: true },

    // ! escapes next token (mask !# will render #)
    '!': { escape: true },

    // * is a repeat symbol that allows repeating current token until it’s valid (e.g. mask #* for all digits or A* A* A* A* for ALLOW FOUR WORDS ONLY)
    '*': { repeat: true }
}
To best demonstrate how we can use input masks in our application, let’s create a form with inputs that use input masks.
Replace the template code in ./src/App.vue with:
<!-- ./src/App.vue -->
<template>
  <section>
    <form class="form">
      <header>
        <h1>Input masks for Vue 3</h1>
      </header>
      <div class="wrapper">
        <div class="form-control">
          <label for="phone">Phone</label>
          <input v-maska="'###'" id="phone" type="text" />
        </div>
      </div>
    </form>
  </section>
</template>
<style>
section {
  width: 100%;
}
.form {
  background: rgb(36, 39, 44);
  padding: 1rem;
  border-radius: 0.75rem;
  width: 400px;
  margin: 0 auto;
}
.form > header {
  padding: 0 0 1rem 0;
}
.form > .wrapper {
}
.form-control {
  display: flex;
  flex-direction: column;
  gap: 0.5rem;
}
.form-control > input {
  padding: 0.85rem 0.5rem;
  border-radius: 0.5rem;
  border: none;
  outline: none;
  background: rgb(48, 52, 59);
  color: rgb(255, 255, 255);
}
</style>
Here, we have a form with an input field and some simple styling. Notice that in the input field, we have a directive v-mask with the value of '``###``':
<input v-maska="'###'" id="phone" type="text" />
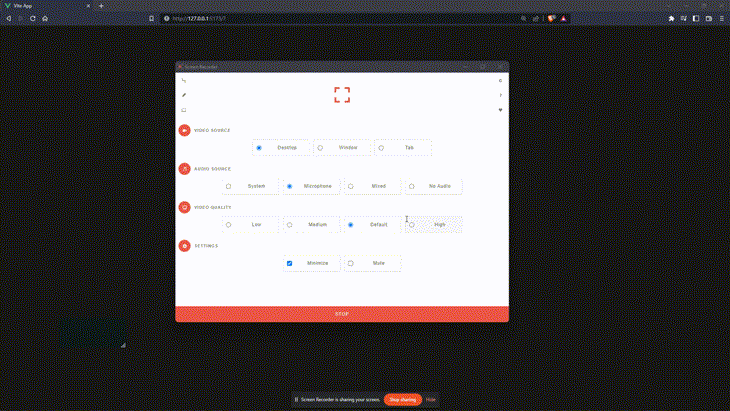
The # represents a numerical token; ### represents three numerical tokens. This means that only three digits can be entered into the input field.
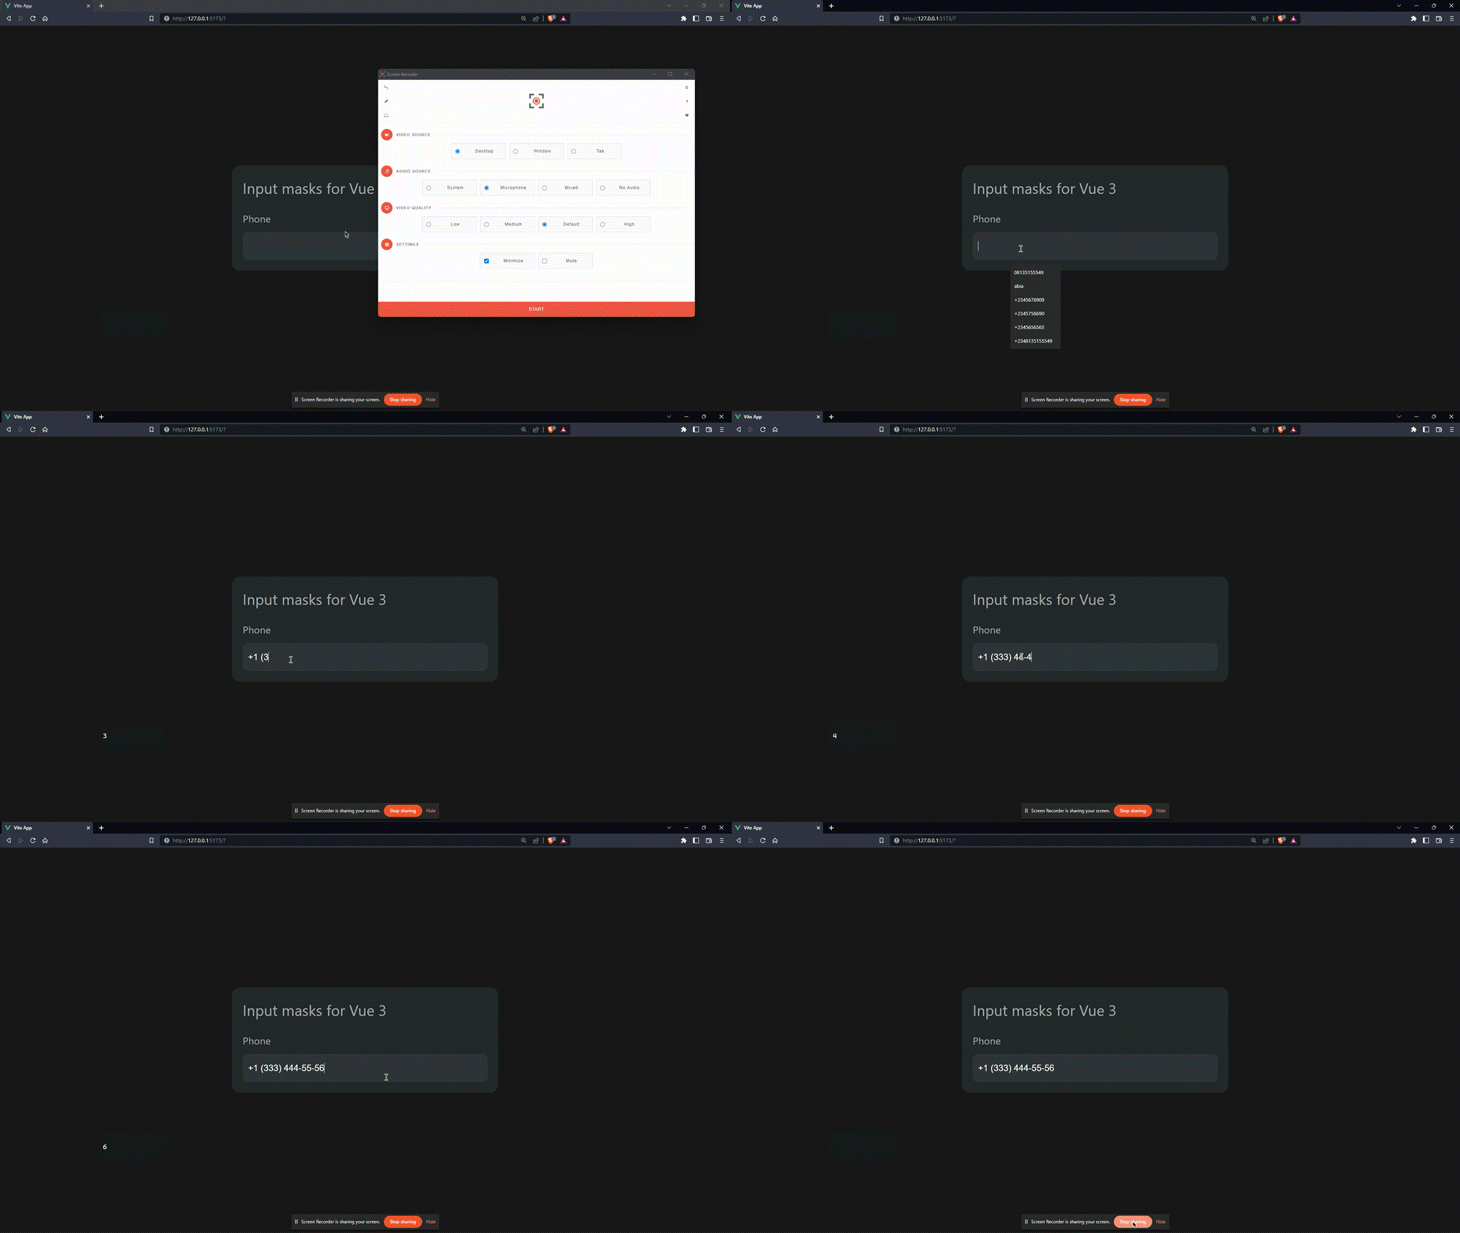
It’s easy to add a phone number input mask. We just need to update the v-maska directive to ['+1 (###) ##-##-##', '+1 (###) ###-##-##'], which is a dynamic mask that allows us to use several masks on a single input, by passing an array instead of a string as mask value.
<input
  v-maska="['+1 (###) ##-##-##', '+1 (###) ###-##-##']"
  id="phone"
  type="text"
/>
We should have something like this:
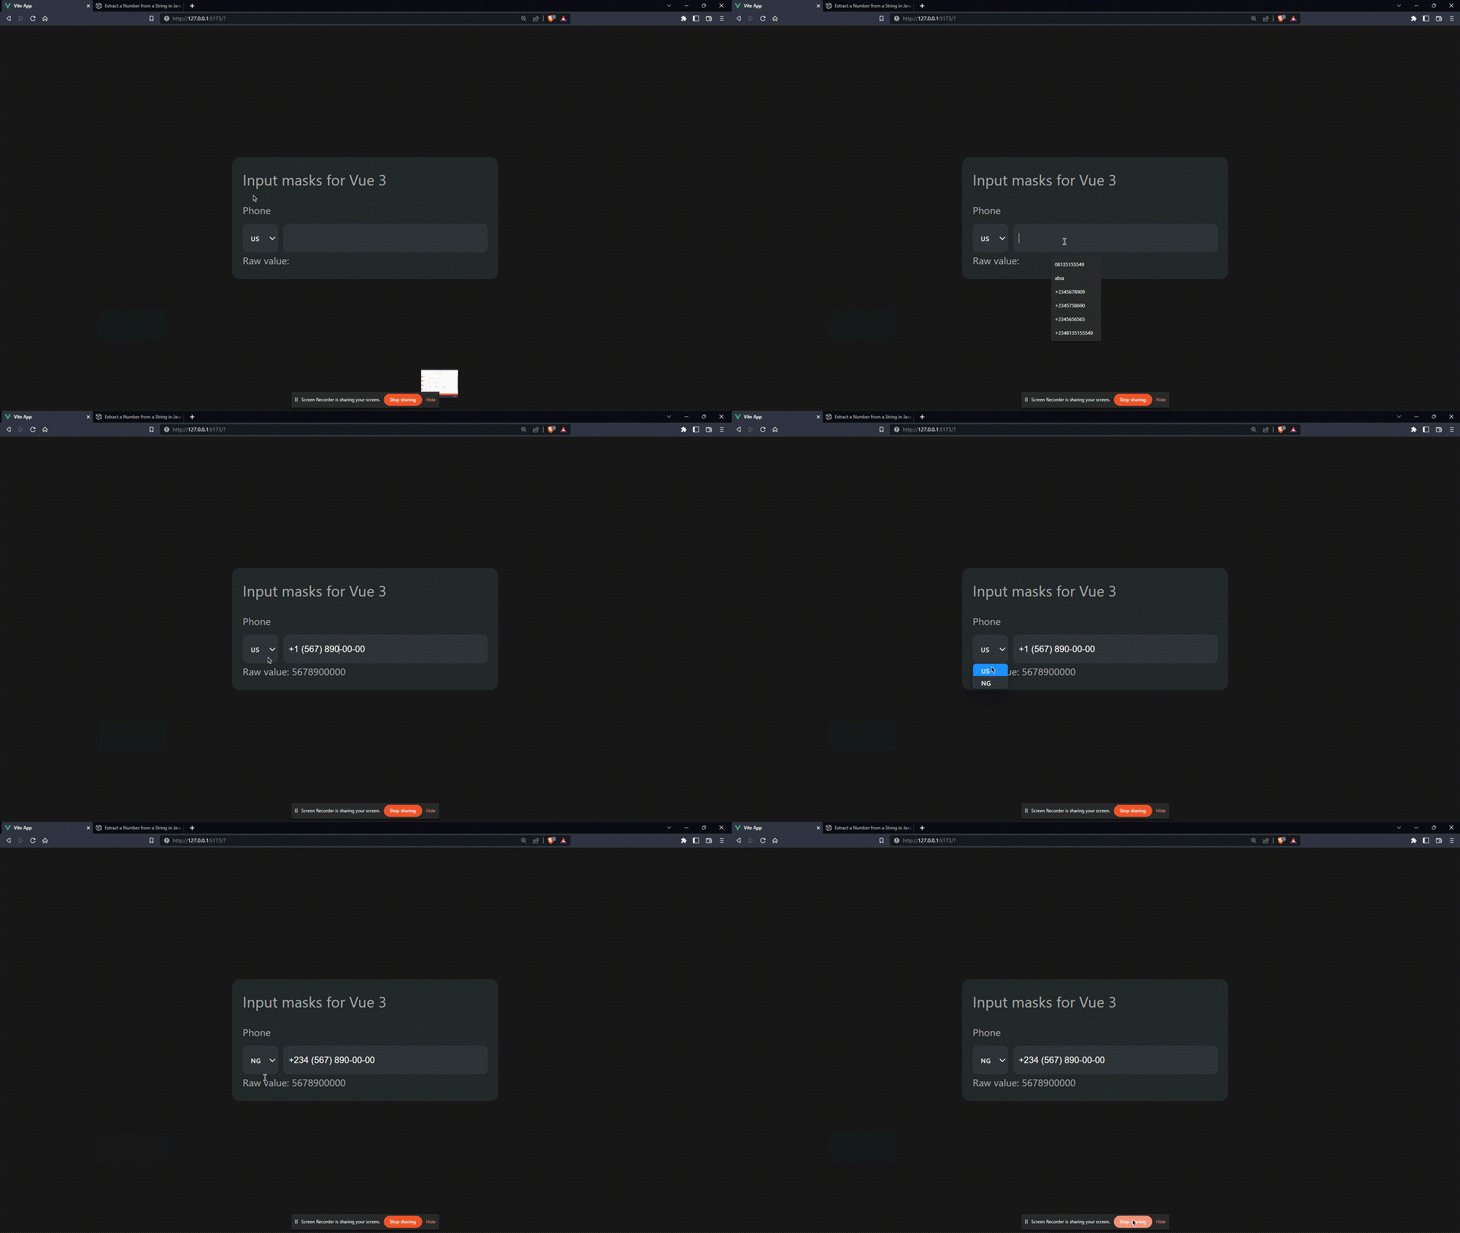
Maska allows us to get the raw value of the input using the @maska event. This is useful for knowing and tracking when this value updates:
@maska="rawValue = $event.target.dataset.maskRawValue"
To see this in action, let’s add a <s``elec``t> tag that allows us to pick a country code for our phone number.
<!-- ./src/App.vue -->
<script setup>
import { ref, watch } from "vue";

const selected = ref("+1");
const phoneValue = ref("");
const rawValue = ref("");
const options = ref([
  { text: "🇺🇸", value: "+1" },
  { text: "🇳🇬", value: "+234" },
]);

watch(selected, (value) => {
  phoneValue.value = rawValue.value;
});
</script>
<template>
  <section>
    <form class="form">
      <header>
        <h1>Input masks for Vue 3</h1>
      </header>
      <div class="wrapper">
        <div class="form-control">
          <label for="phone">Phone</label>
          <div class="input-group">
            <select v-model="selected">
              <option v-for="option in options" :value="option.value">
                {{ option.text }}
              </option>
            </select>
            <input
              v-maska="['+1 (###) ##-##-##', '+1 (###) ###-##-##']"
              v-model="phoneValue"
              id="phone"
              type="text"
              @maska="rawValue = $event.target.dataset.maskRawValue"
            />
          </div>
        </div>
        <p>Raw value: {{ rawValue }}</p>
      </div>
    </form>
  </section>
</template>
Here, we set up a few reactive variables:
selectedphoneValuerawValueoptionsWe bind selected value to our <select> tag using v-model, which allows the <options> tag to update the selected value.
We also bind to our phoneValue, which will contain the masked value. Using @maska, we assign the raw value of the input to rawValue as the user enters the number. Then, we set up a watch that watches selected in order to replace the input’s masked value to the raw one in order to prevent it from repeating the country code in the phone number.
<h3=”creating-name-input-field”>Creating a name input field
In a typical name field, we would require just the first and last name. With input masks, we want to:
S tokenS token until valid in two places, S* S*With that, our input field will look like this:
<div class="form-control">
  <label for="full-name">Full name</label>
  <input
    type="text"
    name="full name"
    id="full-name"
    v-maska="'S* S*'"
  />
</div>
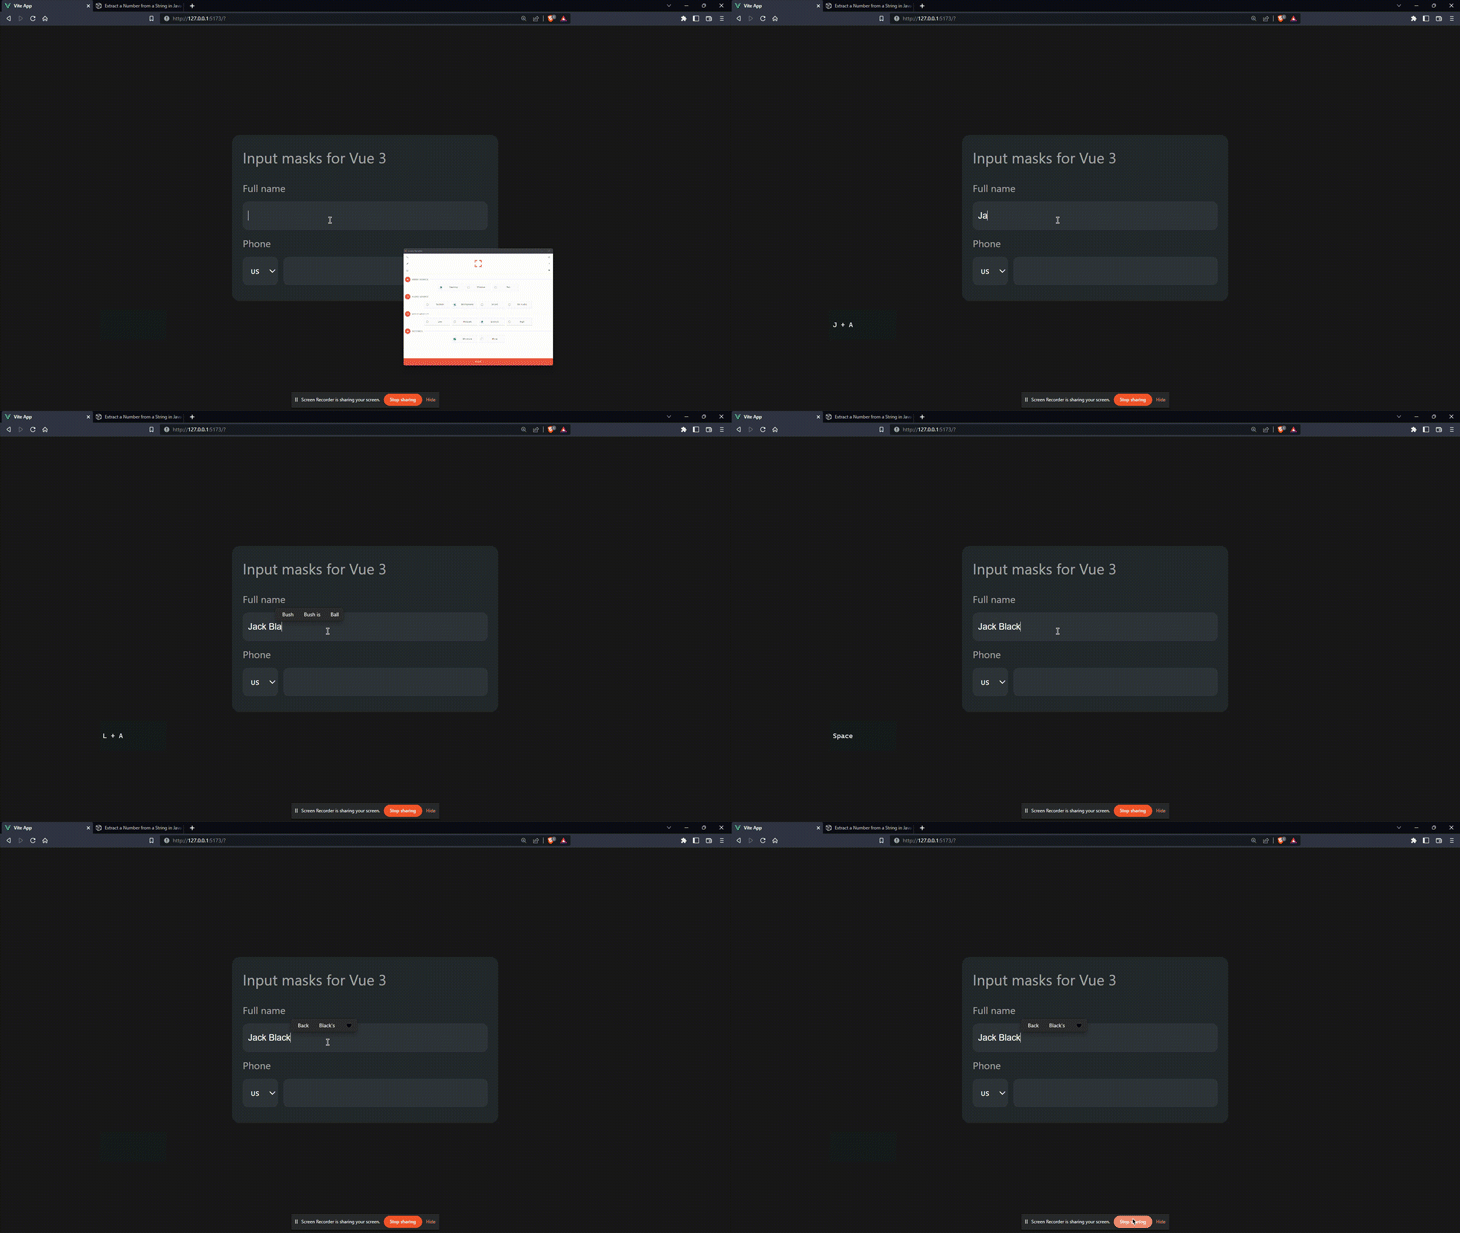
We can only enter up to two words:
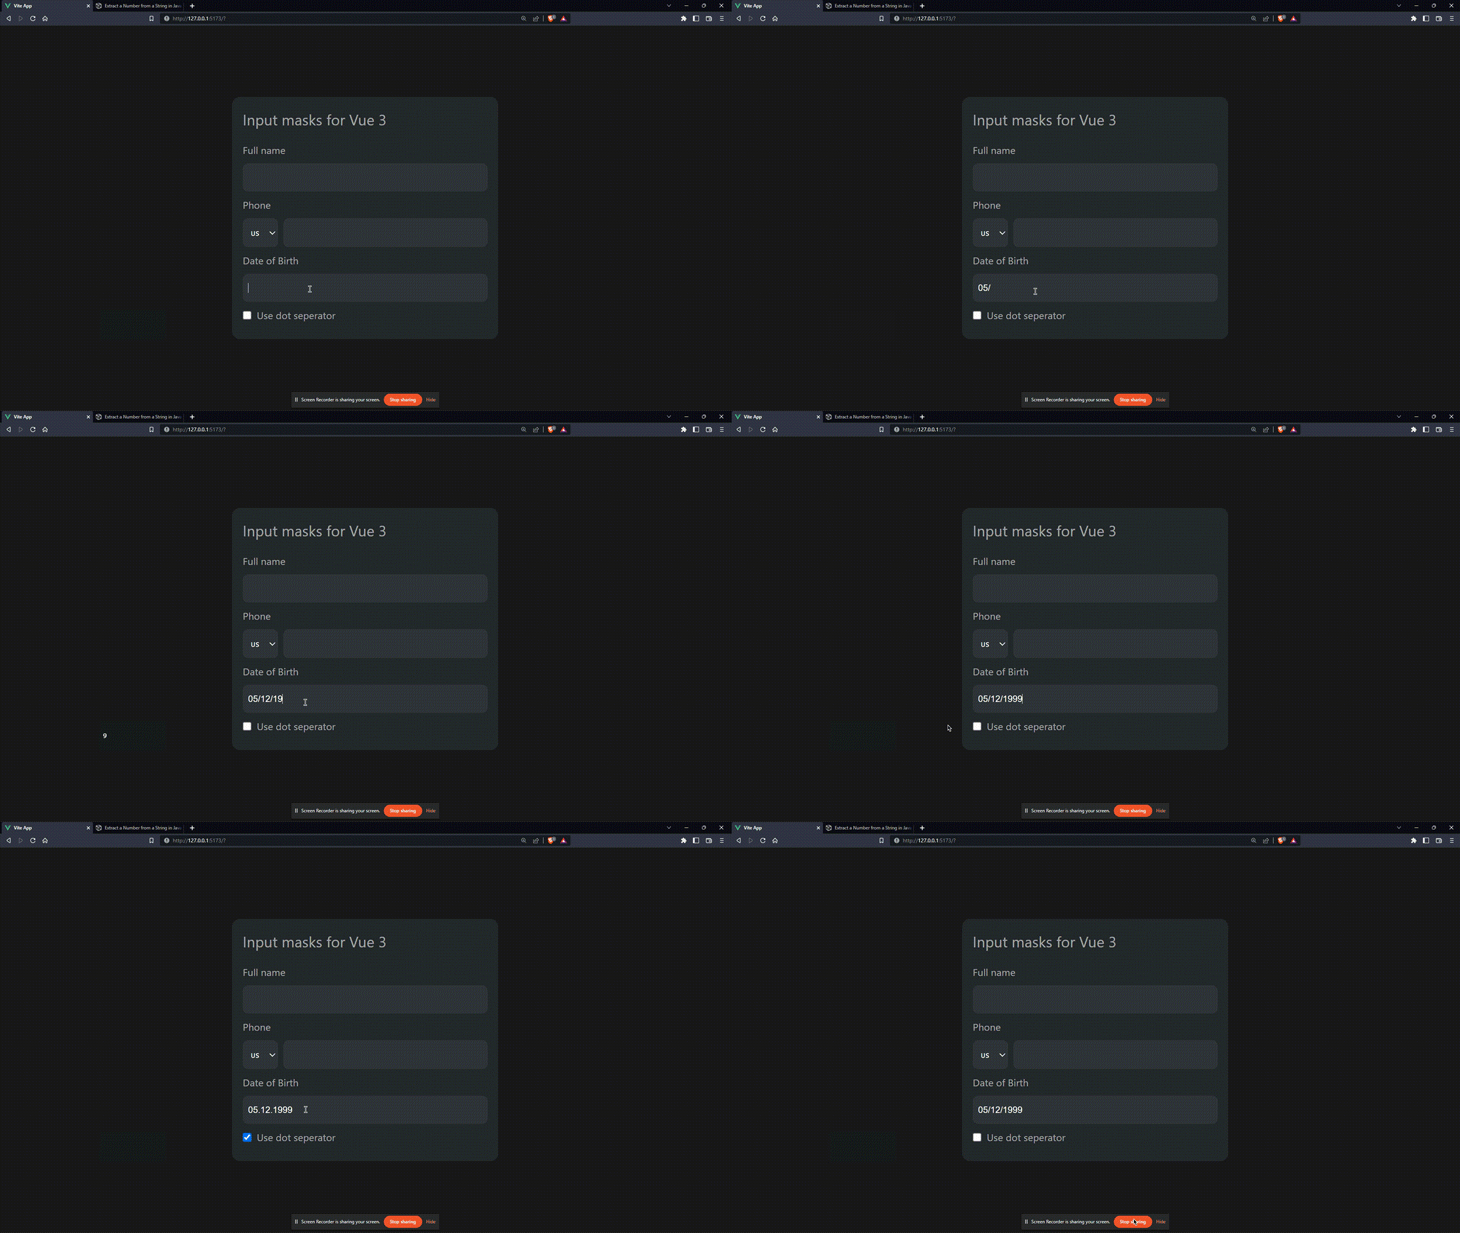
For our date input, we’ll add the ability to customize the date separator (either . or /) using a computed property.
In the script section, create a new reactive property useDot and assign it to false. Then, create a computed property that returns ##.##.### or ##/##/####, depending on useDot:
<!-- ./src/App.vue -->
<script setup>
// ...

const useDot = ref(true);
const dateMask = computed(() => (useDot.value ? "##.##.####" : "##/##/####"));
</script>
Then in the template, create your new inputs and assign the computed property dateMask to v-maska:
<template>
  <section>
    <form class="form">
      <!-- ... -->
      <div class="wrapper">
      <!-- ... -->
        <div class="form-control">
          <label for="dob">Date of Birth</label>
          <input type="text" name="dob" id="dob" v-maska="dateMask" />
        </div>
        <div class="form-control checkbox">
          <input v-model="useDot" type="checkbox" name="use-dot" id="use-dot"  />
          <label for="use-dot">Use dot seperator</label>
        </div>
      </div>
    </form>
  </section>
</template>
Check it out:
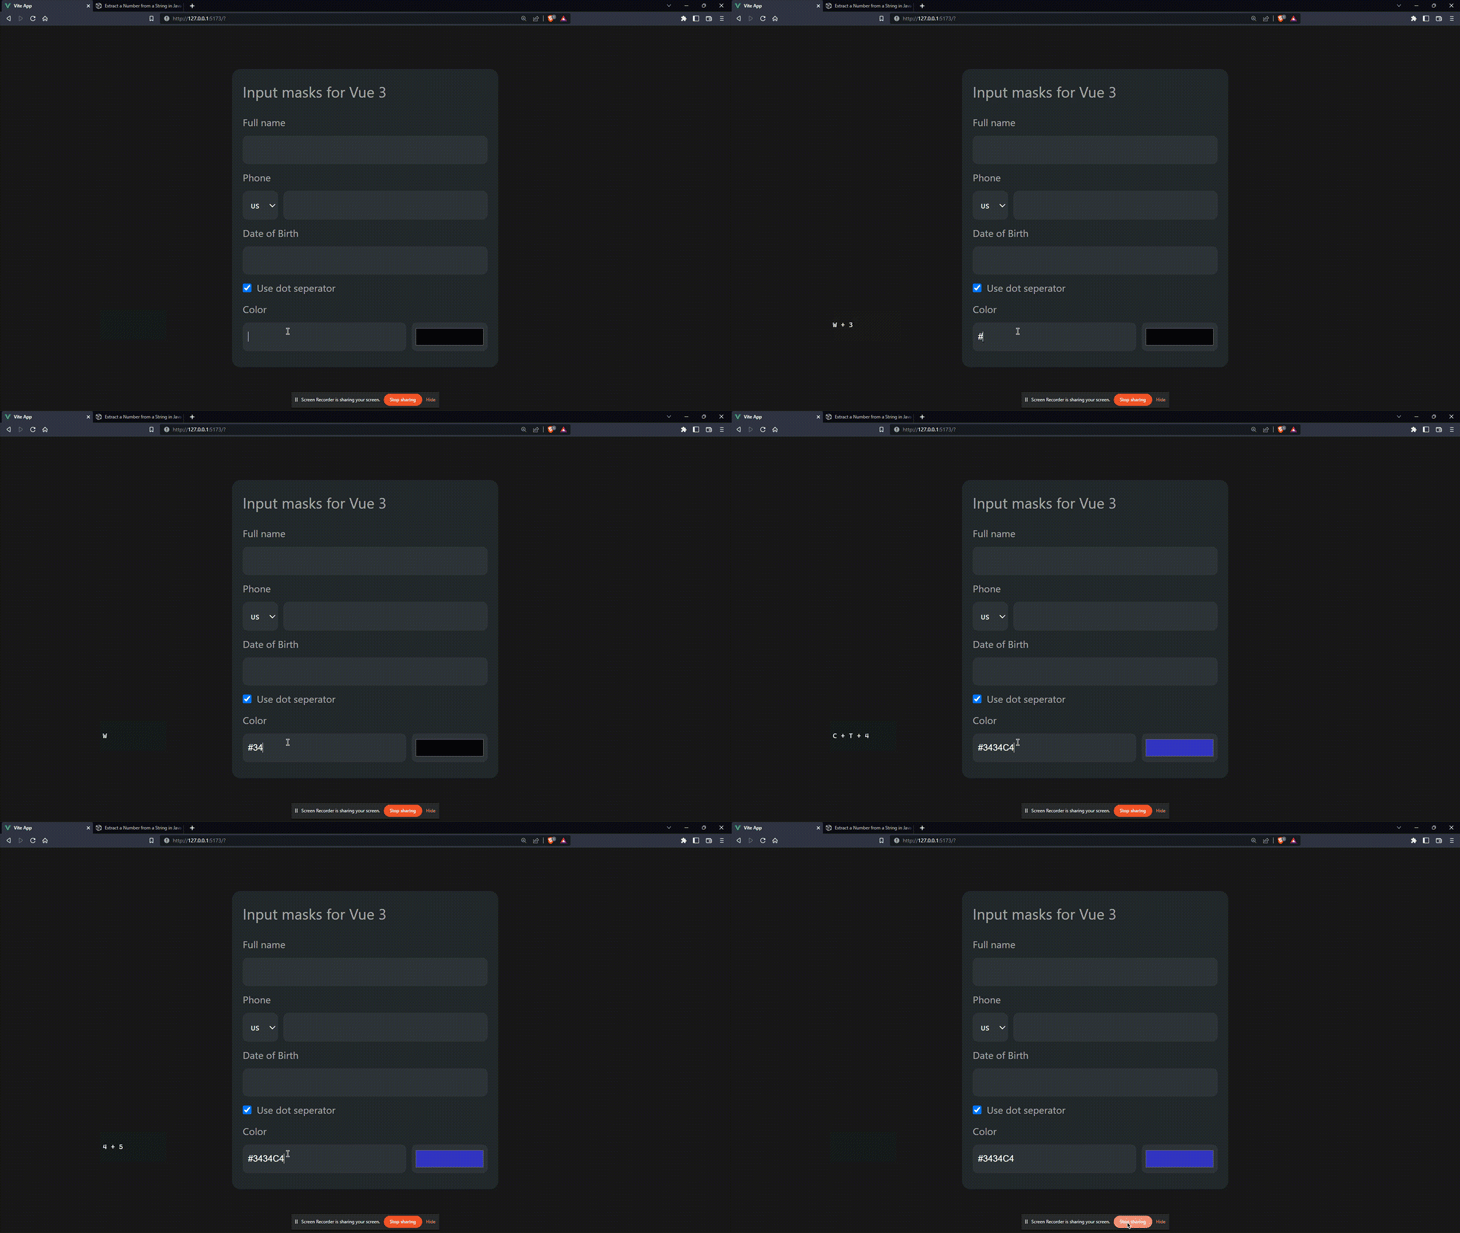
For this input, we’ll create our custom pattern. This works because hex colors have a range of values from 0–9 and A–F, as well as a #.
Let’s take a look at how we can fulfill all these conditions with a custom transform function for tokens. Back in ./src/app.vue, create a reactive value color and bind it to both a text input and color input. We’ll also create a colorMask computed property, where we’ll define a HEX pattern and assign it to the custom token "``````H``````":
<!-- ./src/App.vue -->
<script setup>
import { computed, ref, watch } from "vue";
// ...

const color = ref("#000000");
const colorMask = computed(() => {
  const HEXPattern = { pattern: /[0-9a-fA-F]/, uppercase: true };
  return {
    mask: "!#HHHHHH",
    tokens: { H: HEXPattern },
  };
});
</script>
<template>
  <section>
    <form class="form">
      <!-- ... -->
      <div class="wrapper">
        <!-- ... -->
        <div class="form-control">
          <label for="color">Color</label>
          <div class="input-group">
            <input v-model="color" v-maska="colorMask" type="text" />
            <input v-model="color" type="color" name="color" id="color" />
          </div>
        </div>
      </div>
    </form>
  </section>
</template>
And here’s our color input in action:
So far, we’ve seen what input masks are, what they do and the benefits they provide, and how we can add them to our Vue application using maska, an input mask library for Vue.js.
To learn more about input masks in Vue, visit the Maska documentation. You can also find the live example of our app hosted on Netlify.
Debugging Vue.js applications can be difficult, especially when users experience issues that are difficult to reproduce. If you’re interested in monitoring and tracking Vue mutations and actions for all of your users in production, try LogRocket.

LogRocket lets you replay user sessions, eliminating guesswork by showing exactly what users experienced. It captures console logs, errors, network requests, and pixel-perfect DOM recordings — compatible with all frameworks.
With Galileo AI, you can instantly identify and explain user struggles with automated monitoring of your entire product experience.
Modernize how you debug your Vue apps — start monitoring for free.
Would you be interested in joining LogRocket's developer community?
Join LogRocket’s Content Advisory Board. You’ll help inform the type of content we create and get access to exclusive meetups, social accreditation, and swag.
Sign up now
Learn how to integrate MediaPipe’s Tasks API into a React app for fast, in-browser object detection using your webcam.

Integrating AI into modern frontend apps can be messy. This tutorial shows how the Vercel AI SDK simplifies it all, with streaming, multimodal input, and generative UI.

Interviewing for a software engineering role? Hear from a senior dev leader on what he looks for in candidates, and how to prepare yourself.

Set up real-time video streaming in Next.js using HLS.js and alternatives, exploring integration, adaptive streaming, and token-based authentication.
3 Replies to "Creating Vue.js masked input fields"
I don’t think installing for a little task like this is an optimal option. There can only 3 to 4 such input fields at max. Don’t worth the KBs it would add in the js bundle of project
lol ~2.5 Kb gziped
the time spent on self-implementation is definitely not worth these kb
Really? What year is this? 2.5kb is almost nothing.