If you want people to use your app to quickly visually recognize data, you can’t get past using barcodes and QR codes. They’ve been around for a long time to optically recognize pieces of data with no chance of error or misinterpretation.
These days, there are still many uses for barcodes. One of the more common uses we’ve seen recently is at restaurants, where customers can scan QR codes to order particular items off a menu.
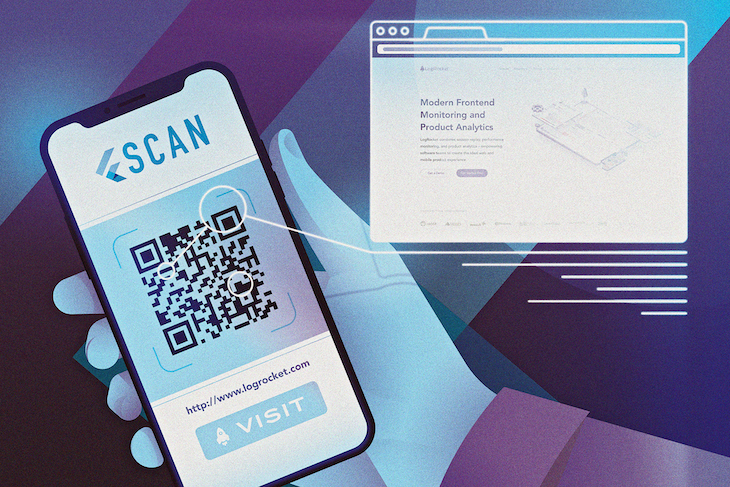
In this article, that’s exactly what we’ll do to show how barcodes and QR codes can work in mobile apps: we’ll create a simple app called Scantastic, which will look like this:
This app will let users scan QR codes that are then recognized as food items. To create this, we must complete the following steps:
qr_code_scanner that lets us scan QR codes and barcodes from our appReady? Let’s get started.
The first thing we need to do is create our Flutter project, which we can accomplish by typing flutter create scantastic at the command line.
Once the command completes, we can add qr_code_scanner to our project, which we can accomplish by writing the following code into the command line:
flutter pub add qr_code_scanner
This adds a dependency on the QR code scanning package. Because we’ll use the camera on a users’ phone to execute our task, we must do a bit of setup to make this work.
Normally, Flutter is broadly compatible with any version of Android, even versions that are very old. However, because the qr_code_scanner package uses functionalities that are only available from Android KitKat, we must adjust some of our configuration settings to affect this change.
To use this plugin, ensure that you have Gradle, Kotlin, and the Kotlin Gradle Plugin up to date. To do this, follow the integration process outlined in the qr_code_scanner repository.
Here we must simply adjust the version of Kotlin and Gradle that our app uses, and set a minimum SDK version of our app to 20. This just means the app will only work on Android KitKat and up.
Because we’re accessing a phone’s camera, the Apple App Store will see that we are making this request to access the camera and will want to know why we are making that request.
We can configure iOS for the plugin by adding the following into the Info.plist file:
<key>io.flutter.embedded_views_preview</key>
<true/>
<key>NSCameraUsageDescription</key>
<string>This app needs camera access to scan QR codes</string>
Now, when the user attempts to scan a QR code in the app with their camera, they will see a warning that lets them accept or reject the app from using their camera.
With our platforms configured, we can now create our QR code Flutter app. For ease of use, I’ve split the project out into a few different files so it’s not confusing to understand. The layout of the project looks like the following:
>- lib\main.dart (Contains the opening screen for our app)
- lib\home\home.dart (Contains the QR Code Scanner screen)
- lib\home\order.dart (The screen that loads when a code is recognized)
- qrcodes\ (A directory with sample QR codes to use)
Because the focus of this article is the process of scanning a QR code, we’ll spend the majority of our time looking at the home.dart file.
The first thing we’ll do is create a List of items that our scanner should recognize. We must do this because it’s possible that our barcode scanner could recognize any barcodes, and we want to limit it to only react to a predefined list of items.
We also want to associate a particular icon to each item, so we can show the user a visual representation of the item they’re about to order.
Our class for an ExpectedScanResult looks like the following:
class ExpectedScanResult {
  final String type;
  final IconData icon;

  ExpectedScanResult(this.type, this.icon);
}
Then, we can initialize the following code on line 15 of our home.dart:
final recognisedCodes = <ExpectedScanResult>[
  ExpectedScanResult('cake', Icons.cake),
  ExpectedScanResult('cocktail', Icons.local_drink_outlined),
  ExpectedScanResult('coffee', Icons.coffee),
  ExpectedScanResult('burger', Icons.fastfood_rounded),
];
This adds our list of accepted items when scanning, including the associated icons.
Barcode resultThe next thing we must do is set up our Barcode result and our QRViewController.
To do this, we’ll add these variables in, but make them nullable by suffixing them with a ?. We do this because we won’t know what our barcode result will be until after the user scans a barcode, and we can only access our QRViewController after the QR code scanner initializes:
Barcode? result;
QRViewController? controller;
QRView widgetNow, we can configure our QRView widget within our widget tree. In the sample app, we place the QR scanner within a Stack widget, so we can tell the user what to scan while the QR code scanner is up.
Let’s configure our QRView like so:
QRView(
  cameraFacing: CameraFacing.back, // Use the rear camera
  key: qrKey, // The global key for the scanner
  onQRViewCreated: _onQRViewCreated, // Function to call after the QR View is created
  overlay: QrScannerOverlayShape( // Configure the overlay to look nice
    borderRadius: 10,
    borderWidth: 5,
    borderColor: Colors.white,
  ),
),
Within the _onQRViewCreated function, we pull in our list of food items that we expect to see. Then, we can subscribe to the events that we receive from the QR code scanner.
If what we’re scanning has a value that is in our accepted list, we take the user to another page where they can confirm their order like so:
void _onQRViewCreated(QRViewController controller) {
  this.controller = controller;
  // Retrieve the list of expected values
  final expectedCodes = recognisedCodes.map((e) => e.type);
  // Subscribe to the incoming events from our QR Code Scanner
  controller.scannedDataStream.listen((scanData) {
    // If the scanned code matches any of the items in our list...
    if (expectedCodes.any((element) => scanData.code == element)) {
      // ... then we open the page confirming the order with our user
      Navigator.of(context).push(
        MaterialPageRoute(
          builder: (context) => OrderPage(
            // Pass in the recognised item to the Order Page
            item: recognisedCodes.firstWhere((element) => element.type == scanData.code),
          ),
        ),
      );
    }
  });
}
And with that, we’ve laid the groundwork for a QR code scanner within our app. But, we have a small problem now: it would be a pain to deploy this app to a physical device for debugging if we wanted to scan a physical piece of paper with QR codes on it.
Fortunately, the Android Emulator comes with a virtual environment that we can take photos in. It also lets us set an image within the environment, which we can use to test our QR code scanning. Let’s see how to do this.
Once we have our code good to go or we’ve cloned the sample app, we can start the Android Emulator. Depending on whether you use Visual Studio Code or Android Studio, how you do this will change.
Once you started your Android Emulator, open the camera settings to set an image. First, click on the three dots at the bottom of the menu, then click Camera then Add Image, like the below screenshot:
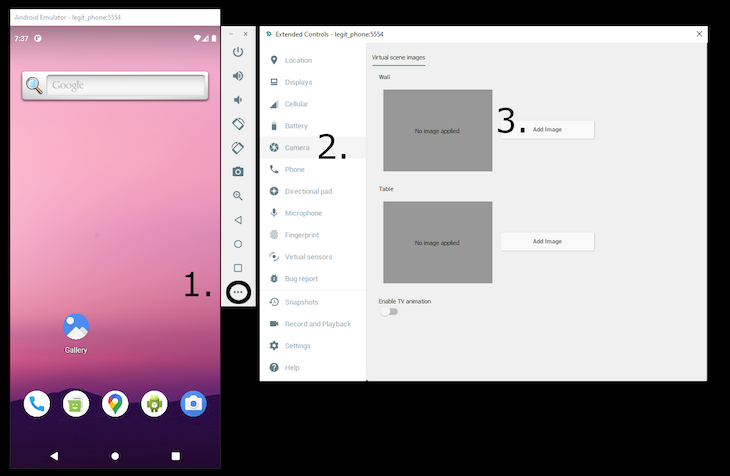
Next, select one of the images in the qrcodes directory. This makes the code appear within the virtual camera environment.
If you open the camera in the Emulator now and hold down the left ALT key, use W to walk forward and the mouse to look around to “walk over” to where the QR code is displayed, like this:
I will admit that this is convoluted, placing a QR code on a wall within a virtual environment; but it’s still better than printing out a physical piece of paper with QR codes on it and scanning it.
And, if you do the same in our sample app, the QR code will be recognized and the user will be presented with the option to order that item (as shown in the opening video).
QR codes and barcodes are powerful tools that can be used for quick optical recognition of data. In this article, we learned how to use a Flutter package to recognize these codes and do something with them.
We also configured an emulator to show one of these codes so we can use a physical piece of paper with codes on it, which speeds up our workflow.
The full code of the sample app can be seen here. Happy scanning! 📷
Install LogRocket via npm or script tag. LogRocket.init() must be called client-side, not
server-side
$ npm i --save logrocket

// Code:

import LogRocket from 'logrocket';
LogRocket.init('app/id');
// Add to your HTML:

<script src="https://cdn.lr-ingest.com/LogRocket.min.js"></script>
<script>window.LogRocket && window.LogRocket.init('app/id');</script>
Hey there, want to help make our blog better?
Join LogRocket’s Content Advisory Board. You’ll help inform the type of content we create and get access to exclusive meetups, social accreditation, and swag.
Sign up now
A breakdown of the wrapper and container CSS classes, how they’re used in real-world code, and when it makes sense to use one over the other.

This guide walks you through creating a web UI for an AI agent that browses, clicks, and extracts info from websites powered by Stagehand and Gemini.

This guide explores how to use Anthropic’s Claude 4 models, including Opus 4 and Sonnet 4, to build AI-powered applications.

Which AI frontend dev tool reigns supreme in July 2025? Check out our power rankings and use our interactive comparison tool to find out.


