Read–eval–print loop (REPL) is a term that refers to an interactive computer environment that takes the user input, executes it, and returns an output. I.e., the user enters one or more expressions, these expressions are evaluated, and a result is displayed.

Fact is, as a developer, you’ve probably used a REPL environment before now without knowing what it’s called. Common examples of REPL include:
In this article, we will be learning how a REPL works internally, how to use the Node.js inbuilt REPL, and finally how to set up a customized REPL environment in Node.js.
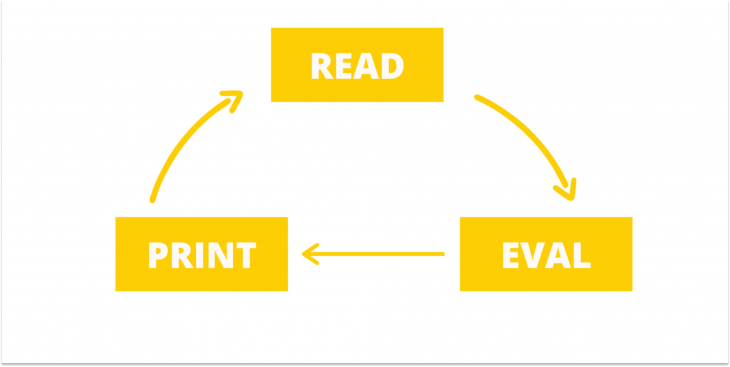
The idea behind how a REPL works is quite straightforward. First, it reads a piece or block of code entered by the user, then it evaluates this code. After the evaluation process is completed, the resulting output is printed to the user, and this process is repeated (looped) until the user signals to quit.
Node.js is bundled with a REPL environment that allows you to quickly test and explore JavaScript code without having to store it in a file.
Before you can run this, you’ll need to have Node.js installed on your development machine; you can install Node.js by following the instructions here.
If you already have Node.js installed, you do not need to install any additional software, and you can start the REPL environment by entering the command below in your terminal:
node
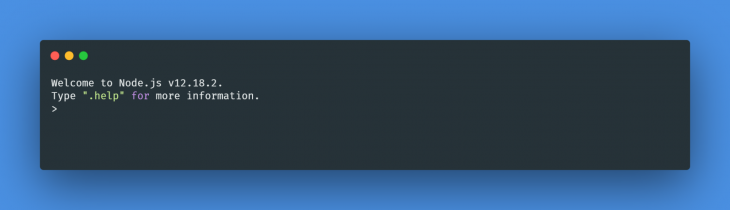
Depending on the version of Node you have installed, you should see an output that is similar to the one below:
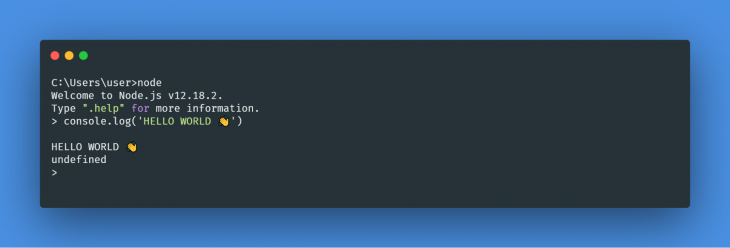
The > sign displayed in the console signifies that the REPL is now active, and you can enter any JavaScript code to be immediately evaluated.
Let us try this out by using the global console.log method to print “Hello world.” Enter the code below in your Node REPL:
console.log("Hello World 👋");
You should see the following output displayed:
Node.js also allows developers to create and use custom REPL with the repl module. This is the same package that was used to create the default REPL shipped with Node.js, so it does provide all the customizability options that we might need.
Also, this is an inbuilt module. I.e., we can use it without any further installation.
To import the module in our program:
const repl = require('repl');
We can create a new repl instance with the repl.start() method. This method accepts two parameters — the first is the string that is used for the prompt of your REPL (and this defaults to >), while the second is the stream (user input) that the REPL listens to.
To try this out, create a new file (app.js), and paste the following code:
const repl = require("repl");
repl.start("custom-repl => ");
Save the file, and from your CLI, run the code:
node app.js
You should see the following output:

And, yes, this works the same way as the default Node REPL. You can try entering basic JavaScript code — like console.log("Hello world") — in your REPL, and you should see the output displayed.
By default, the new REPL instance has access to all variables declared in Node.js global scope, and it is also possible to expose a local variable to REPL by explicitly assigning it to the context object:
const repl = require("repl");

/* this can be accessed directly from repl without exposing it to repl context */
global.globalVariable = "This can be accessed anywhere!";

const name = "John Doe";

// exposing local variable to repl context
repl.start("custom-repl => ").context.name = name;
Also, variables exposed to repl context are not read-only by default, and they can be modified directly from the REPL environment. We can change this by defining the context properties like below:
const repl = require("repl");
const name = "John Doe";

const r = repl.start("custom-repl => ");

Object.defineProperty(r.context, "name", {
  configurable: false,
  enumerable: true,
  value: name,
});
The REPL module also lets you create a custom evaluation function; i.e., the function to be used when evaluating each given line of input. This can be handy when you are trying to build fully customized REPL applications.
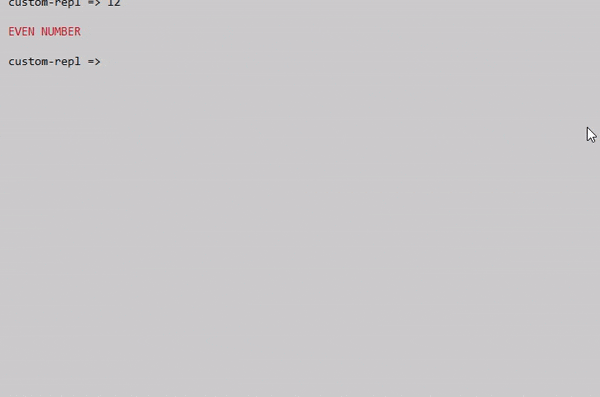
Below is an example that checks if the user input is an even or odd number and prints the respective output based on the input:
const repl = require("repl");

function isEven(uInput, context, filename, callback) {
  callback(null, uInput % 2 == 0 ? "Even number" : "odd number");
}

repl.start({ prompt: "custom-repl => ", eval: isEven });
We can also customize the outputs returned from our REPL by passing in a new function for the writer option while creating a new repl instance.
The code below capitalizes the output returned from our previous example, and using npm colors.js module, it also changes the text color to red:
const repl = require("repl");
const colors = require("colors");

const r = repl.start({ prompt: "custom-repl =>  ", eval: isEven, writer: modifyOutput });

function isEven(uInput, context, filename, callback) {
  callback(null, uInput % 2 == 0 ? "Even number" : "odd number");
}

function modifyOutput(output) {
  return output.toUpperCase().red;
}
And here’s what the output looks like:
While you can stop the REPL environment from running by pressing the Ctrl+C key or entering the .exit command directly, you can also do this programmatically with the repl.close() method:
Below is an example that closes the REPL automatically after five seconds:
const repl = require("repl");

const r = repl.start("custom-repl => ");

setTimeout(() => {
  r.close();
}, 5000);
REPL is an interactive computer environment that takes the user input, executes it, and returns an output. REPL is also a great alternative to text editors if you’re looking toward exploring code samples without having to store them in a file.
And in this article, we learned how a REPL works internally, how to use the Node inbuilt REPL environment, and finally how to create a custom REPL in Node.js.
 Monitor failed and slow network requests in production
Deploying a Node-based web app or website is the easy part. Making sure your Node instance continues to serve resources to your app is where things get tougher. If you’re interested in ensuring requests to the backend or third-party services are successful, try LogRocket.

LogRocket lets you replay user sessions, eliminating guesswork around why bugs happen by showing exactly what users experienced. It captures console logs, errors, network requests, and pixel-perfect DOM recordings — compatible with all frameworks.
LogRocket's Galileo AI watches sessions for you, instantly identifying and explaining user struggles with automated monitoring of your entire product experience.
LogRocket instruments your app to record baseline performance timings such as page load time, time to first byte, slow network requests, and also logs Redux, NgRx, and Vuex actions/state. Start monitoring for free.
Hey there, want to help make our blog better?
Join LogRocket’s Content Advisory Board. You’ll help inform the type of content we create and get access to exclusive meetups, social accreditation, and swag.
Sign up now
This guide explores how to use Anthropic’s Claude 4 models, including Opus 4 and Sonnet 4, to build AI-powered applications.

Which AI frontend dev tool reigns supreme in July 2025? Check out our power rankings and use our interactive comparison tool to find out.

Learn how OpenAPI can automate API client generation to save time, reduce bugs, and streamline how your frontend app talks to backend APIs.

Discover how the Interface Segregation Principle (ISP) keeps your code lean, modular, and maintainable using real-world analogies and practical examples.


