Whether it’s your portfolio website or a SaaS product website, you need a dedicated contact page for visitors and potential customers so they can reach out to you. Usually, this page includes a form that visitors can fill out to send a message or ask a question. But where and how do you store these responses?

Setting up a database for the sole purpose of storing form submissions isn’t the most convenient option. With Next.js and the Notion API, you can use the database feature to save all submissions directly to your Notion workspace. This is especially useful if you already use Notion as a project management tool and can bring everything together in one place.
You’ll need a basic understanding of Next.js (or React) for this tutorial. All code that we’ll be writing in the Next.js API routes can also be used in your Node.js server in case you’re not using Next.js.
In this tutorial, we’ll cover:
First, let’s set up our Notion database and create a new integration to access it via Notion API. Visit the Notion website and start by creating a new page for the database. You might be prompted to log in if you’ve never used Notion before.
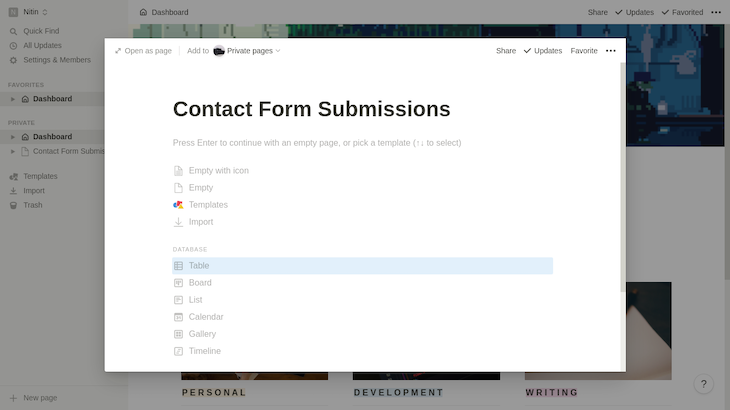
On the bottom left corner of your screen, click + New Page and name it whatever you prefer. I’ll name it “Contact Form Submissions” for now. Now, click on Table in the database section to create a tabular database for storing form responses.

You can modify the database for your requirements by adding new properties and/or editing existing ones to the table. Here are the properties and their types we’ll be storing in our Notion database:
Now that our Notion database is ready, let’s create a new integration to connect the database to our Next.js application.
To create a new integration, go to Notion’s My Integrations page and click +New Integration. You’ll need to fill out basic information and select the workspace in which you created the contact page. Once you’re finished, you’ll be redirected to a screen like this:
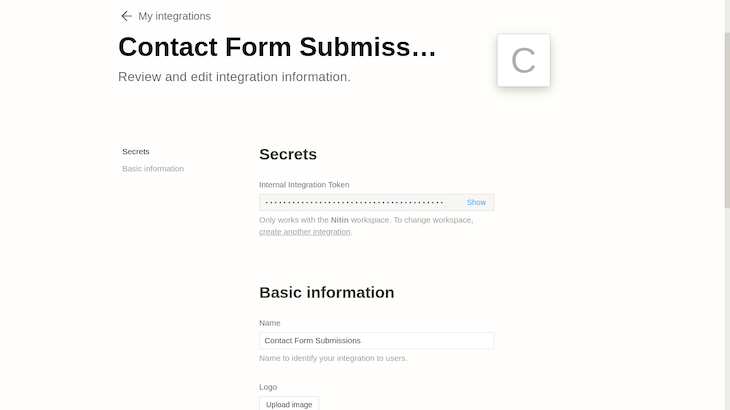
Copy and store the internal integration token somewhere safe, as we’ll need it later when we interact with the Notion API. Do not share this token with anyone else.

Finally, to connect the Notion database to our newly created integration, return to the Contact Form Submissions page and click on Share, located on the top-right corner of your screen. Select your integration and click Invite to allow it edit access.
That’s it for the configuration part. Time to move on to the code.
You can use the create-next-app tool to quickly bootstrap a new Next.js application by running this command on your terminal:
npx create-next-app
# or
yarn create next-app
Next, open the project folder on your favorite text editor or IDE. Let’s install a couple of npm packages before running the Next.js development server.
We’ll use two packages: react-toastify to display toast notifications on form submissions and @notionhq/client for using the Notion JavaScript SDK to interact with the Notion API.
npm install react-toastify @notionhq/client
# or
yarn add react-toastify @notionhq/client
Start the development server by running npm run dev on your terminal. On visiting http://localhost:3000, you will see a screen like this:
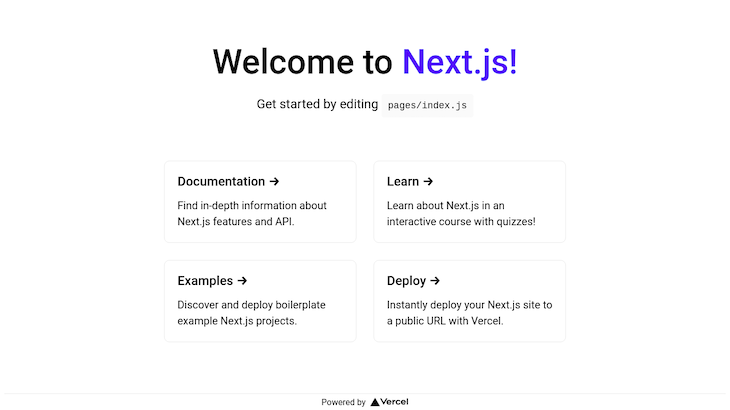
Let’s replace the boilerplate code generated by the create-next-app tool with our custom contact page with a form. Open the pages/index.js file and paste the given below:
import styles from '../styles/Home.module.css';

export default function Home() {
  return (
    <div className={styles.container}>
      <form className={styles.form}>
        <h1 className={styles.title}>React Out To Us</h1>
        <div>
          <label htmlFor="name">Full Name</label>
          <input
            type="text"
            id="name"
            name="name"
            placeholder="John Doe"
            required
          />
        </div>
        <div className={styles.inputs}>
          <div>
            <label htmlFor="email">E-Mail Address</label>
            <input
              type="email"
              name="email"
              placeholder="[email protected]"
              required
            />
          </div>
          <div>
            <label htmlFor="purpose">Purpose</label>
            <select name="purpose" id="purpose">
              <option value="" selected disabled required>
                Select one
              </option>
              <option value="Web Development">Web Development</option>
              <option value="App Development">App Development</option>
              <option value="Query / Question">Query / Question</option>
              <option value="Feedback / Message">Feedback / Message</option>
            </select>
          </div>
        </div>
        <div>
          <label htmlFor="message">Message</label>
          <textarea
            name="message"
            id="message"
            rows="5"
            placeholder="Hi there!"
            required
          ></textarea>
        </div>
        <button className={styles.btn} type="submit">
          Submit
        </button>
      </form>
    </div>
  );
}
Feel free to modify the inputs, and make sure your Notion database also has the same inputs. Now let’s dress up the form with some CSS.
Go to styles/Home.module.css and replace the styles in that file with the styles given below:
.container {
  height: 100vh;
  display: flex;
  justify-content: center;
  align-items: center;
  background-color: #0093e9;
  background-image: linear-gradient(160deg, #0093e9 0%, #80d0c7 100%);
}
.form {
  background: white;
  padding: 2rem 1.5rem;
  border-radius: 6px;
  box-shadow: 2px 4px 8px rgba(0, 0, 0, 0.1);
  max-width: 600px;
}
.title {
  margin: 0 0 1.5rem;
}
.form label {
  display: block;
  text-transform: uppercase;
  font-size: 0.9rem;
  margin-bottom: 0.5rem;
  color: #334155;
}
.form input,
.form select,
.form textarea {
  width: 100%;
  border: none;
  background: #f4f4f5;
  padding: 0.75rem 0.5rem;
  font-size: 1rem;
  margin-bottom: 1.25rem;
  border-radius: 4px;
}
.form input:focus,
.form select:focus,
.form textarea:focus {
  outline: 2px solid #0093e9;
}
.inputs {
  display: flex;
  justify-content: space-between;
}
.inputs div {
  flex: 1;
}
.inputs div:first-child {
  margin-right: 1rem;
}
.btn {
  background-color: #0093e9;
  background-image: linear-gradient(160deg, #0093e9 0%, #80d0c7 100%);
  padding: 0.5rem 1rem;
  border: none;
  color: white;
  font-size: 1rem;
  font-weight: bold;
  border-radius: 4px;
  box-shadow: 2px 2px 5px rgba(0, 0, 0, 0.1);
  cursor: pointer;
}
Just like the inputs, you can play around with the styles to customize them to your liking. Visit http://localhost:3000, and you’ll see a page similar to this:
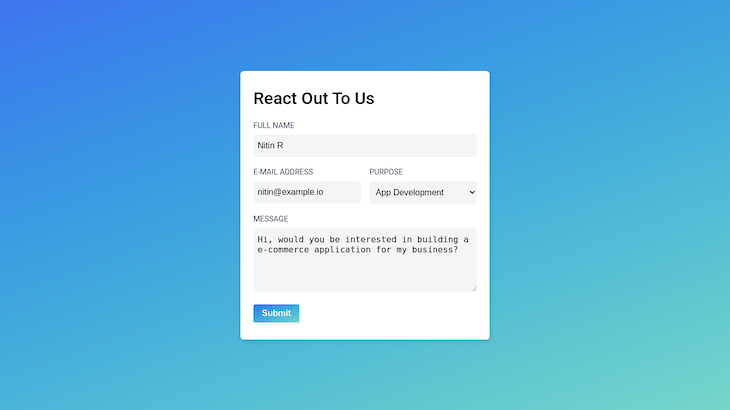
Not bad! We’ve yet to set up the input states and the form submission handler, but we’ll come back to it later after setting up our API routes.
It’s good practice to store all sensitive information — such as your Notion internal integration token and Notion database ID — as environment variables so you can easily change them later when required and to prevent exposing them to the browser.
So, create a new file named .env.local inside the root directory of the project. Inside this file, we’ll be storing the NOTION_API_KEY variable, which is the internal integration token, and NOTION_DATABASE_ID, which we can get from the URL of the Notion database.
The URL to your Notion database might look something like this.

The database ID is the alphanumeric before ?v=, which is 491b722c931a42208cfff667dcb58a12.
Make sure to use your own integration token and database ID. Here’s how your .env.local file should look:
NOTION_API_KEY = secret_qidbxxxxxxxxxxxxxxxxxxxxMYitF6IM
NOTION_DATABASE_ID = 491b722c931a42208cfff667dcb58a12
Go to the pages/API folder and rename the hello.js file to submit-form.js. The API route for this file will be available at http://localhost:3000/api/submit-form. We’ll use Notion’s official JavaScript SDK to interact with our Notion database.
First, we need to import Client from the @notionhq/client SDK package and create a new instance of it. This instance takes an object with the auth key’s value set to the integration token, which can be accessed using process.env.NOTION_API_KEY.
In the handler function, the HTTP request method can be accessed using req.method. Because we’re only anticipating POST requests from our Next.js frontend, we can respond with 405 Method Not Allowed for other types of requests.
const { Client } = require('@notionhq/client');

const notion = new Client({
  auth: process.env.NOTION_API_KEY,
});

export default async function handler(req, res) {
  if (req.method !== 'POST') {
    return res
      .status(405)
      .json({ message: `${req.method} requests are not allowed` });
  }
  try {
    const { name, email, purpose, message } = JSON.parse(req.body);
    await notion.pages.create({
      parent: {
        database_id: process.env.NOTION_DATABASE_ID,
      },
      properties: {
        Name: {
          title: [
            {
              text: {
                content: name,
              },
            },
          ],
        },
        Email: {
          email: email,
        },
        Purpose: {
          select: {
            name: purpose,
          },
        },
        Message: {
          rich_text: [
            {
              text: {
                content: message,
              },
            },
          ],
        },
      },
    });
    res.status(201).json({ msg: 'Success' });
  } catch (error) {
    res.status(500).json({ msg: 'There was an error' });
  }
}
To add a new form response to our Notion database, use the notion.pages.create() method. If you haven’t used Notion before, it is worth noting that each database entry is a page in Notion. This method takes an object with the parent object and properties object as a parameter.
In the parent object, set the database_id to your Notion database’s ID, which can be accessed via process.env.NOTION_DATABASE_ID. The properties object may seem complicated at first glance, but the documentation for property value object has examples for various property types, such as rich_text, number, title, select, and more.
Finally, enclose the entire notion.pages.create() method inside a try…catch block to catch errors and respond accordingly. Your API route is now ready to interact with your Notion database.
Although the contact form is ready in terms of layout and design, we’ve yet to add functionality to it. Let’s do that now by:
useState() hookLet’s code these functionalities in pages/index.js.
// For handling input states
import { useState } from 'react';

// For display toasts
import { ToastContainer, toast } from 'react-toastify';
import 'react-toastify/dist/ReactToastify.min.css';

import styles from '../styles/Home.module.css';

export default function Home() {

  // Input states
  const [name, setName] = useState('');
  const [email, setEmail] = useState('');
  const [purpose, setPurpose] = useState('');
  const [message, setMessage] = useState('');

  // Form submit handler
  const submitForm = async (e) => {
    e.preventDefault();
    const res = await fetch('http://localhost:3000/api/submit-form', {
      method: 'POST',
      body: JSON.stringify({ name, email, purpose, message }),
    });
    // Success if status code is 201
    if (res.status === 201) {
      toast('Thank you for contacting us!', { type: 'success' });
    } else {
      toast('Please re-check your inputs.', { type: 'error' });
    }
  };

  return (
    <div className={styles.container}>
      <ToastContainer />
      <form className={styles.form} onSubmit={submitForm}>
        <h1 className={styles.title}>React Out To Us</h1>
        <div>
          <label htmlFor="name">Full Name</label>
          <input
            type="text"
            id="name"
            name="name"
            placeholder="John Doe"
            value={name}
            onChange={(e) => setName(e.target.value)}
            required
          />
        </div>
        <div className={styles.inputs}>
          <div>
            <label htmlFor="email">E-Mail Address</label>
            <input
              type="email"
              name="email"
              placeholder="[email protected]"
              value={email}
              onChange={(e) => setEmail(e.target.value)}
              required
            />
          </div>
          <div>
            <label htmlFor="purpose">Purpose</label>
            <select
              name="purpose"
              id="purpose"
              value={purpose}
              onChange={(e) => setPurpose(e.target.value)}
            >
              <option value="" disabled required>
                Select one
              </option>
              <option value="Web Development">Web Development</option>
              <option value="App Development">App Development</option>
              <option value="Query / Question">Query / Question</option>
              <option value="Feedback / Message">Feedback / Message</option>
            </select>
          </div>
        </div>
        <div>
          <label htmlFor="message">Message</label>
          <textarea
            name="message"
            id="message"
            rows="5"
            placeholder="Hi there!"
            value={message}
            onChange={(e) => setMessage(e.target.value)}
            required
          ></textarea>
        </div>
        <button className={styles.btn} type="submit">
          Submit
        </button>
      </form>
    </div>
  );
}
For handling input states, we can use the useState() hook and assign each input a value and an onChange handler accordingly to make it a controlled input.
Now create an asynchronous function named submitForm that makes a POST request to our API route at http://localhost:3000/api/submit-form using fetch(). The input states can be sent in the body.
Once the request has been made, we can check the status code of the request. Status code 201 denotes that the response has been successfully added to the Notion database. Otherwise, it will produce status code 500, which denotes an error.
For adding toasts, import the toast() function and the ToastContainer component from react-toastify. Additionally, import the CSS file from react-toastify/dist/ReactToastify.min.css to style them.
Add the <ToastContainer /> component to the JSX and use the toast() function to dispatch toasts based on the response received from the API inside the submitForm function.
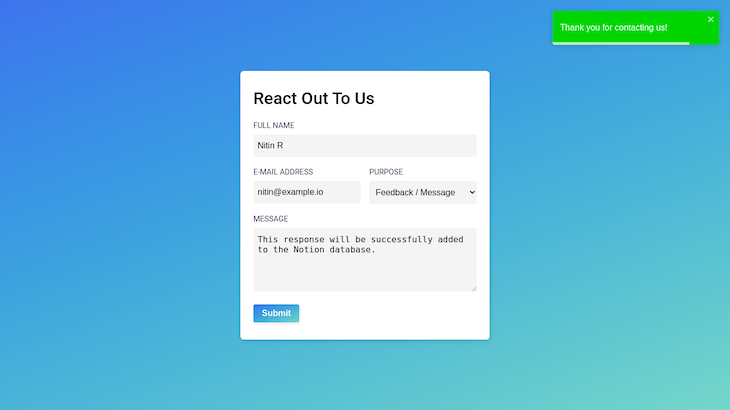
Let’s test our contact form to see if it’s working. Fill out the form with proper inputs. You’ll notice a successful toast on submitting the form.
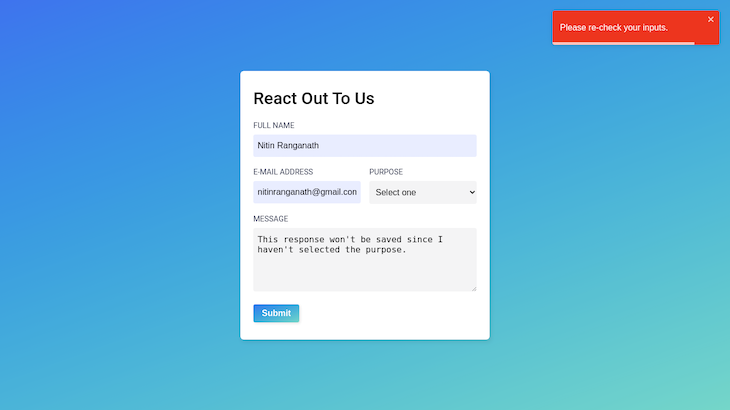
On submitting an incorrect response, such as an invalid purpose, the error toast will pop up.
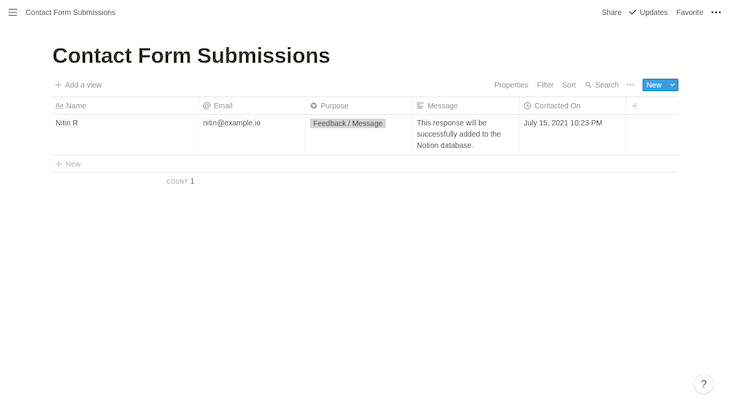
You can verify this with your Notion database to confirm that the responses are stored as intended.
Notion is a powerful tool for teams and individuals alike. With the Notion API, you won’t ever need to set up a database or use a third-party service to manage your contact form responses. You can even share it with your team and visualize the responses in multiple ways — for free! I hope you enjoyed this tutorial.
Debugging Next applications can be difficult, especially when users experience issues that are difficult to reproduce. If you’re interested in monitoring and tracking state, automatically surfacing JavaScript errors, and tracking slow network requests and component load time, try LogRocket.
LogRocket captures console logs, errors, network requests, and pixel-perfect DOM recordings from user sessions and lets you replay them as users saw it, eliminating guesswork around why bugs happen — compatible with all frameworks.
LogRocket's Galileo AI watches sessions for you, instantly identifying and explaining user struggles with automated monitoring of your entire product experience.
The LogRocket Redux middleware package adds an extra layer of visibility into your user sessions. LogRocket logs all actions and state from your Redux stores.


Modernize how you debug your Next.js apps — start monitoring for free.

Debug RSC hydration mismatches in production with Next.js instrumentation, Suspense isolation, HTML diffing, and CI smoke tests.

Explore why npm dependencies are a major supply chain security risk and how to protect JavaScript apps from compromised packages and transitive threats.

Enabled React Compiler v1.0 on a production Next.js app. Here’s every warning, breakage, and silent opt-out I documented — and what actually worked.

We built the same app in TanStack Start RSC and Next.js RSC. TanStack shipped 40% less JS and built 4x faster — but Next.js is still the safer production bet.
Hey there, want to help make our blog better?
Join LogRocket’s Content Advisory Board. You’ll help inform the type of content we create and get access to exclusive meetups, social accreditation, and swag.
Sign up now

