Editor’s note: This article was last updated and verified for accuracy on 16 September 2022.

React Hooks unlock a whole new way of writing functional components, allowing us to add features available for class components, like stateful logic.
To do so, React primarily uses the useState and useEffect Hooks, which, respectively, allow you to define a state object and a function that updates it and perform side effects in a functional component. You can think of it like lifecycle events in class components.
In this tutorial, we’ll explore getting started with custom Hooks in React.
The Replay is a weekly newsletter for dev and engineering leaders.
Delivered once a week, it's your curated guide to the most important conversations around frontend dev, emerging AI tools, and the state of modern software.
In React, a custom Hook is a function that starts with the word “use” and may call other Hooks. The “useWhatever” naming convention mainly allows the linter to find bugs in how these hooks are used, for example, scenarios where their usage goes against the rules of Hooks.
The general rules of React Hooks also apply to custom Hooks; these include:
There is only one other valid place to call Hooks, your own custom Hooks. These rules are in place because React relies on the order in which Hooks are called to associate the Hooks with a certain local state. Placing a Hook inside conditions may change this order, resulting in the subsequent Hooks failing to be called, and more likely than not, resulting in bugs.
This is illustrated in the React docs using a form with several Hooks, as shown below:
function Form() {
// 1. Use the name state variable
const [name, setName] = useState('Mary');

// 2. Use an effect for persisting the form
useEffect(function persistForm() {
localStorage.setItem('formData', name);
});

// 3. Use the surname state variable
const [surname, setSurname] = useState('Poppins');

// 4. Use an effect for updating the title
useEffect(function updateTitle() {
document.title = name + ' ' + surname;
});

// ...
}

These hooks are called in the following order on two renders:
// ------------
// First render
// ------------
useState('Mary') // 1. Initialize the name state variable with 'Mary'
useEffect(persistForm) // 2. Add an effect for persisting the form
useState('Poppins') // 3. Initialize the surname state variable with 'Poppins'
useEffect(updateTitle) // 4. Add an effect for updating the title
// -------------
// Second render
// -------------
useState('Mary') // 1. Read the name state variable (argument is ignored)
useEffect(persistForm) // 2. Replace the effect for persisting the form
useState('Poppins') // 3. Read the surname state variable (argument is ignored)
useEffect(updateTitle) // 4. Replace the effect for updating the title
// ...
Calling the second Hook inside a condition so that it only saves when data is entered, as shown below, would go against the rules of Hooks:
if (name !== '') {
useEffect(function persistForm() {
   localStorage.setItem('formData', name);
});
}
The result is that the third and fourth Hooks fail to read the state and apply the respective desired effects. Fortunately, we can fix this by moving the condition inside of the Hook:
useEffect(function persistForm() {
//
 We're not breaking the first rule anymore
if (name !== '') {
  localStorage.setItem('formData', name);
 }
});
You can find more on this in the rules of Hooks section in the React docs.
In a scenario where we would want to implement the logic for both the useState and useEffect Hooks across different components, using custom Hooks is an efficient solution.
With custom React Hooks, we can reuse stateful logic easily across different components in an optimized and scalable format. Custom Hooks also produce a clean and structured codebase that reduces complexity and redundancy in your React project.
There is no limit to the types of custom Hooks that you can create for handling different use cases, as long as they follow the rules of React Hooks.
Let’s learn how we can create our own custom React Hooks. To do so, we’ll build a small application that uses a custom React Hook.
Our app will be a basic cryptocurrency checker that allows us to check the value in U.S. dollars of some popular cryptocurrencies. For this demo, we’ll only check Ethereum and Bitcoin, but you can follow the same steps to add other coins.
To get our app up and running, we’ll use Create React App to generate the boilerplate code for our application, and we’ll use the dropdown component from Semantic UI React.
To bootstrap your app, run the following code in your console:
npx create-react-app hooked-cryptochecker
Next, we’ll install our two dependencies, semantic-ui-react and dotenv. In your terminal, run the following command:
yarn add semantic-ui-react semantic-ui css dotenv
You’ll need to add .env to your .gitigignore file because the default gitignore generated by CRA does not include it. Here, we’ll place our environment variables.
To get the current values of Ethereum and Bitcoin, we’ll use the API from CoinAPI.io. To do so, we’ll need to get an API key. Fortunately, these are free, so head over to CoinAPI to get yours.
Once you have your API key, create a .env file in the root directory of your project and paste your API key there. Inside either App.js or Index.js, paste the following code to load the environment variables:
require('dotenv').config()

Import semantic-ui’s stylesheet into the index.js file:

import 'semantic-ui-css/semantic.min.css'
Now that we’re set up, let’s get to the meat of the application. Create a components directory under the src directory by running the code below:
mkdir src/components
Create a file called CryptoChecker.jsx in the components directory and place the following code in it:
import React, { useState, useEffect } from "react";
import { Dropdown } from "semantic-ui-react";

const coinAPIKey = process.env.REACT_APP_COIN_API_KEY;

const CryptoChecker = () => {
 const [coinName, setCoinName] = useState(null);

 const useCryptoFetcher = () => {
   const [coinData, setCoinData] = useState(null);
   const [fetched, setFetched] = useState(false);
   const [loading, setLoading] = useState(false);

   useEffect(() => {
     const coinUrl = `https://rest.coinapi.io/v1/exchangerate/${coinName}/USD`;
     setLoading(true);
     if (coinName) {
       fetch(coinUrl, {
         headers: {
           "X-CoinAPI-Key": coinAPIKey,
         },
       })
         .then((res) => {
           if (!coinUrl) {
             setFetched(false);
             return null;
           }
           if (!res.ok) {
             setFetched(false);
             return null;
           } else {
             return res.json();
           }
         })
         .then((data) => {
           setLoading(false);
           setFetched(true);
           setCoinData(data);
         });
     }
   }, [coinName]);
   return [coinData, loading, fetched];
 };

 const mapCoinData = () => {
   if (!fetched) return <div>No data fetched</div>;
   if (loading) return <div>Loading...</div>;
   if (!coinData) {
     return <div>No Coin Data</div>;
   } else {
     return (
       <div>
         <h1>{coinName}</h1>
         <div>{coinData.rate} USD</div>
       </div>
     );
   }
 };

 const [coinData, loading, fetched] = useCryptoFetcher();
 const coinOptions = [
   {
     key: "BTC",
     value: "BTC",
     text: "Bitcoin",
   },
   {
     key: "ETH",
     value: "ETH",
     text: "Ethereum",
   },
 ];

 return (
   <div>
     <Dropdown
       placeholder="Select Coin"
       clearable
       selection
       options={coinOptions}
       onChange={(e, { value }) => setCoinName(value)}
     />
     <br />
     {mapCoinData()}
   </div>
 );
};

export default CryptoChecker;
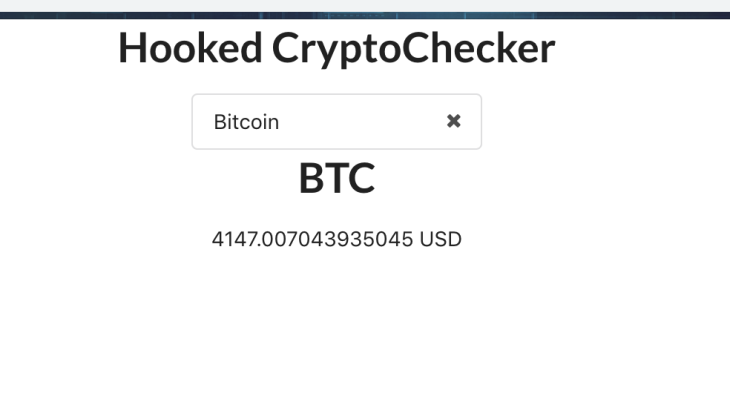
Let’s go through our component to see how it works. CryptoChecker is our functional component that returns a dropdown that allows us to choose which coin we wish to check. Underneath it, we’ll display the name of the coin accompanied by its value in U.S. dollars.
We used the useState Hook to initiate the name of the coin we’ll search and place it in state. We then use it to set the URL that we’ll hit to get our coin data.
Next, you’ll notice a function called useCryptoFetcher, which is our custom Hook. It returns the coin data as well as our API call state, either loading or completed, as well as a boolean called fetched that tells us when we have fetched any data.
Our custom Hook uses both the useEffect and useState Hooks. We use the useState Hook to place our coin data in state as well as update the state of our API call to know when data is being loaded and when calls are complete. We use the useEffect Hook to trigger a call to CoinAPI.io to fetch the exchange rate value of our coin.
We optimize the useEffect Hook by passing it a second argument, an array containing the URL, which ensures that side effects are only applied when the URL changes. This avoids unnecessary re-renders as well as repeated API calls.
We also check the coinName variable to ensure that we only make the API call when it is not null. This optimizes the component by preventing an API call when the page loads for the first time.
The function called mapCoinData uses the data returned by our custom Hook, changing what is displayed in the DOM depending on what values are returned. To make these values available to mapCoinData, we’ll destructure it from useCryptoFetcher, placing it in the general scope of our component.
The array called coinOptions contains the names of the coins we’ll have in our dropdown. Here, you can provide more options if you wish to fetch the values of other coins.
Our component is ready to use, complete with a personalized Hook to add some functionality to it. Let’s go ahead and edit App.js to add it to our app. It should look something like the code below:
import React, { Component } from 'react';
import './App.css';
import CryptoChecker from './components/CryptoChecker';
require('dotenv').config()

class App extends Component {
 render() {
   return (
     <div className="App">
       <h1>Hooked CryptoChecker</h1>
       <CryptoChecker />
     </div>
   );
 }
}

export default App;
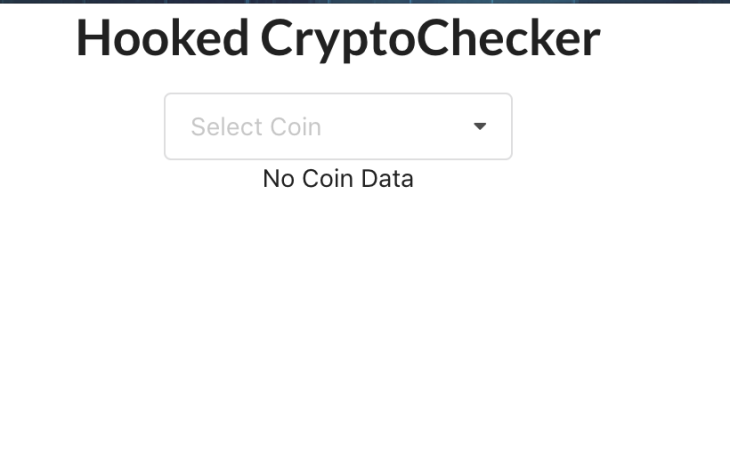
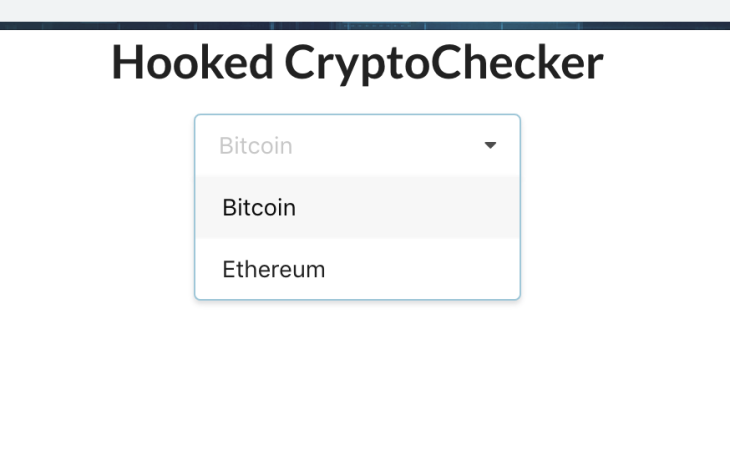
Now, let’s fire up our application and see the magic. In your terminal, run the yarn start command and try out the application:


At its core, fetching data with Hooks boils down to the same things as most other data fetching methods used in React:
Custom Hooks really opens up new ways to write components, allowing you to tailor the functionality to your liking. useHooks is a nice resource to check out for some examples of custom Hooks that already exist for different use cases.
Overall, Hooks have added a lot of flexibility to how we can write React apps, minimizing the need for class-based components. You can expand on the functionality of these Hooks using some additional Hooks that come built-in with React to create even more amazing Hooks of your own.
Install LogRocket via npm or script tag. LogRocket.init() must be called client-side, not
server-side
$ npm i --save logrocket

// Code:

import LogRocket from 'logrocket';
LogRocket.init('app/id');
// Add to your HTML:

<script src="https://cdn.lr-ingest.com/LogRocket.min.js"></script>
<script>window.LogRocket && window.LogRocket.init('app/id');</script>

React Server Components and the Next.js App Router enable streaming and smaller client bundles, but only when used correctly. This article explores six common mistakes that block streaming, bloat hydration, and create stale UI in production.

Gil Fink (SparXis CEO) joins PodRocket to break down today’s most common web rendering patterns: SSR, CSR, static rednering, and islands/resumability.

@container scroll-state: Replace JS scroll listeners nowCSS @container scroll-state lets you build sticky headers, snapping carousels, and scroll indicators without JavaScript. Here’s how to replace scroll listeners with clean, declarative state queries.

Explore 10 Web APIs that replace common JavaScript libraries and reduce npm dependencies, bundle size, and performance overhead.
Hey there, want to help make our blog better?
Join LogRocket’s Content Advisory Board. You’ll help inform the type of content we create and get access to exclusive meetups, social accreditation, and swag.
Sign up now