A search bar helps to filter out what is necessary and find the user their desired result.

You might be thinking, there are several React libraries that can help you set up a search component in seconds — why waste your time writing a bunch of lines to create something that already exists?
Or, maybe you’re wondering why it isn’t always the best idea to use a library to implement a search bar in your project. Here are some thoughts on it.
Below is a detailed report of a popular package on npm.
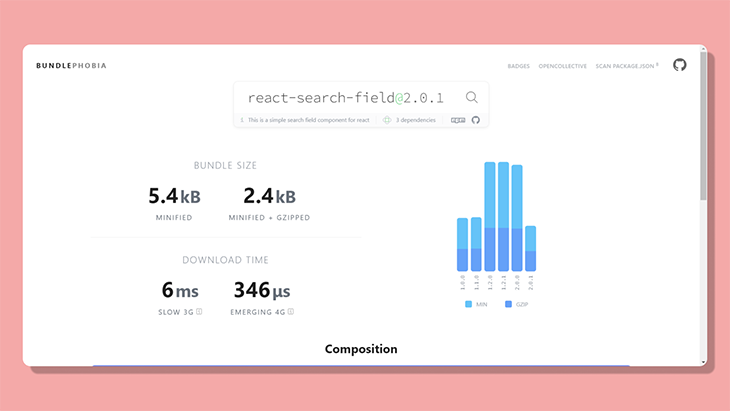
Even if we consider the minified version of the library, it’s quite large to include in a project. Our code below is around 746 bytes, which is quite a lot less than any library out there!
Another advantage of creating a search bar from scratch is that it’s much more customizable than the libraries are. No matter how many libraries you use in a project, from state management to components, the basics are still quite important for a developer to know.
In this tutorial, we’ll try to replicate a search bar that tracks any changes in the input field and filters out the data present on the site. More specifically, we’ll build a search bar that filters the blog posts by their title.
Here’s what we’ll cover in this article:
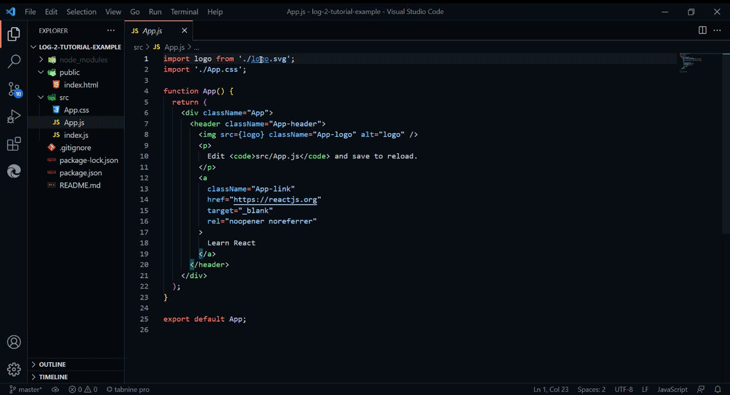
Go ahead and initialize a new React project using Create React App.
npx create-react-app search-bar-tutorial
Head over to the root file and remove all the unnecessary files.
Open the App.js file and clear out the raw JSX elements.
Now, create an input field for the user to enter the query.
export default function App (){
  return {
    <div>
      <input placeholder="Enter Post Title"/>
    </div>
 }
}
Next up, let’s create some mock data for the search bar to filter through. You can either create your own mock data or simply head over to Mockaroo and generate some mock data easily.
Go ahead and enter the fields you need in the mock data.
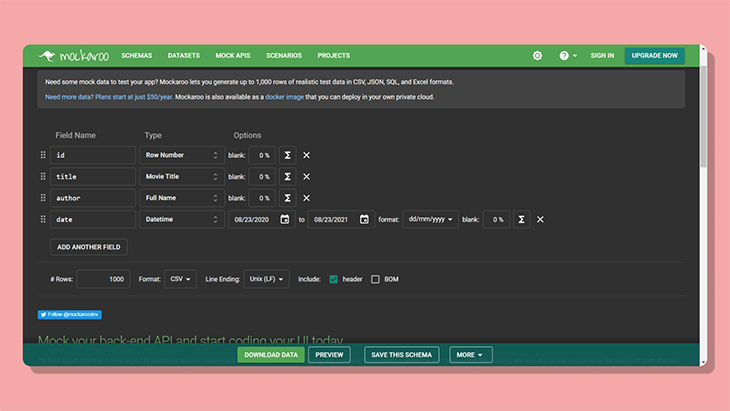
The number of rows you create should basically be the same number of objects you receive in the mock data, so it’ll be better if you reduce the number from the default of 1000. Make sure you set the file type to JSON.
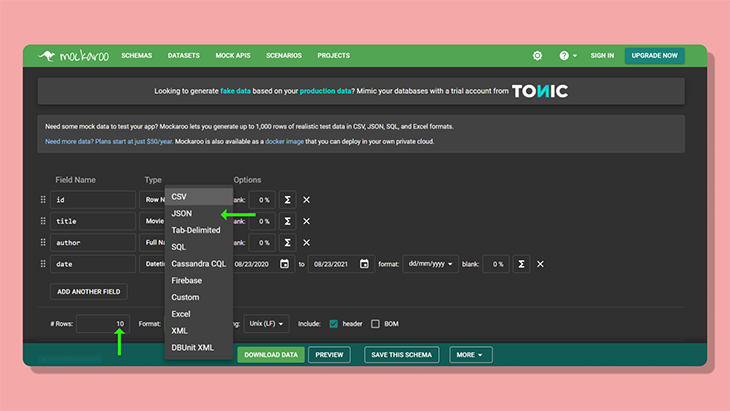
Click Preview and copy all of your mock data into your code editor.
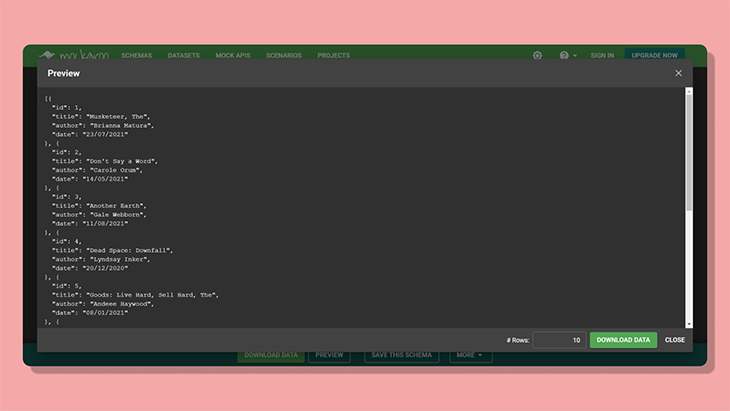
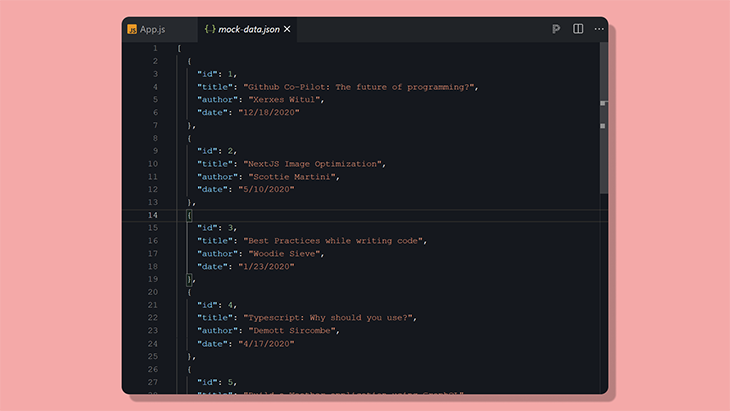
Make a separate file — let’s call it mock-data.json — and paste the generated data. The JSON file will look something like this:
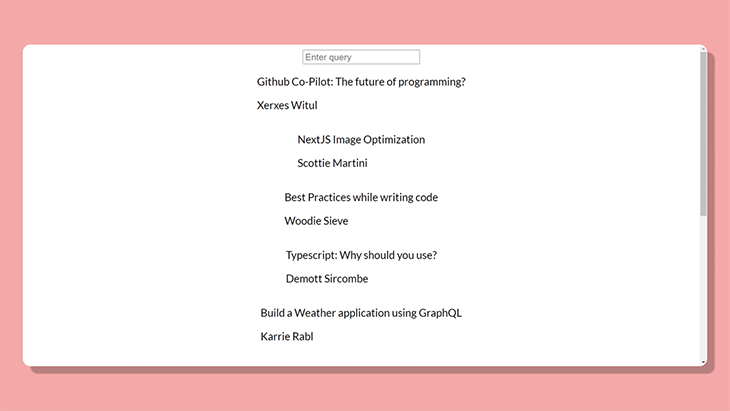
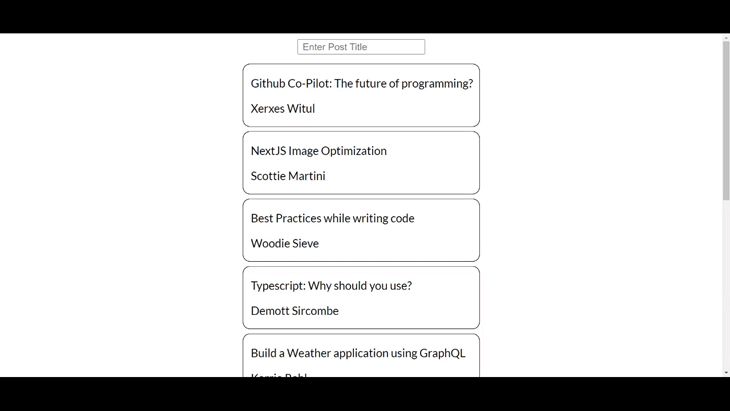
Now, before we actually make the search bar functional, let’s map through all the data and display it on the app.
Import the JSON data, like so:
import Data from "../mock-data.json"
Since the mock data is an array, we’ll use the JavaScript ES6 Map function to loop through each object in the array and display it using JSX.
{
  Data.map((post) => (
    <div key={post.id}>
      <p>{post.title}</p>
      <p>{post.author}</p>
    </div>
  ));
}
This is how it’ll turn out:

Styling is not necessary, but what’s the fun without any CSS? Feel free to skip to the next section if you’re good on styling demos.
Let’s try to center each element, including the search bar. The parent element has a class name of app, and so we’ll target that to center everything.
In the styles.css file, target the .app class name and apply the flex property.
.app {
  display: flex;
  flex-direction: column;
  justify-content: center;
  align-items: center;
}
The posts still look boring. Let’s make a card for each post. Assign a class name to the JSX element in the Map function.
//App.js
{
  Data.map((post) => (
    <div className="box" key={post.id}>
      <p>{post.title}</p>
      <p>{post.author}</p>
    </div>
  ));
}
To make each card distinguishable, we’ll use the border property and make the corners rounded.
/* App.css */
.box {
  text-align: left;
  border: black ridge 1px;
  border-radius: 10px;
  margin: 3px;
  width: 20rem;
  padding-left: 10px;
}
With the styling done, let’s now get back to the main focus of the tutorial — making the search bar functional!
Now for the interesting part! We want to track each change whenever the user types into the input field. For this, we use the useState Hook and set the state whenever there is a change in the input field.
import Data from "../mock-data.json";
import {useState} from "react";

export default function App (){
  const [query, setQuery] = useState("")
  return {
    <div>
      <input placeholder="Enter Post Title" onChange={event => setQuery(event.target.value)} />
    {
      Data.map((post, index) => {
        <div key={index}>
          <p>{post.title}</p>
          <p>{post.author}</p>
        </div>
      })
    }
    </div>
 }
}
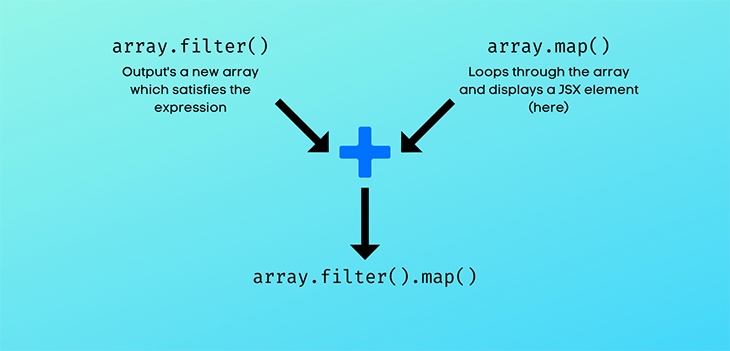
With that done, the next thing we want to do is see if the entered query matches any of the mock data. In our example, we’ll see if the post title matches the entered query. This approach will support both partial and identical matching.
In more basic terms, if the user enters a single letter, the function would return all post titles that will include that letter. Similarly, if the user enters a valid word, the search function will return an array containing post titles that have that word in it.
The Filter method is perfect in this scenario. It returns an array that satisfies the condition specified — the condition here would be to return a new array that matches what the user entered.
Data.filter(post => {
  if (query === "") {
    //if query is empty
    return post;
  } else if (post.title.toLowerCase().includes(query.toLowerCase())) {
    //returns filtered array
    return post;
  }
});
Let’s get this straight. If the user hasn’t entered anything, we can say the input field is not in use and the filter function will return the original array.
If the entered query matches any of the data (in our case, a post title from our example blog), then it will return a new array with the objects that match the user-entered query. To avoid any errors caused by the capitalization of letters, it’s best to convert both the user-entered query and the post.title from the mock data to lowercase. This way, no matter what the user enters, even if it is all lowercase letters, our filter will still be able to output a matching result, if one is found.
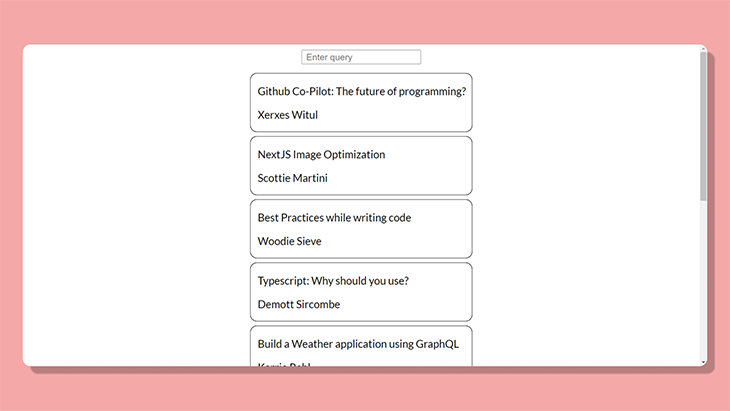
To display the filtered data, we’ll just combine it with our previous Map function.
Your final code should look something like this:
{
  Data.filter(post => {
    if (query === '') {
      return post;
    } else if (post.title.toLowerCase().includes(query.toLowerCase())) {
      return post;
    }
  }).map((post, index) => (
    <div className="box" key={index}>
      <p>{post.title}</p>
      <p>{post.author}</p>
    </div>
  ))
}
And that’s it! Good job on that hustle. The search bar should be up and ready. 🚀
Now that you know how to create a search bar in React from scratch, you can further customize it as per the project requirements. You can make it call a certain API, as well as display the data similarly.
Furthermore, we came across some JavaScript ES6 functions, which are super handy and can be used for other applications, such as sorting the filtered data to display the data per your desired order (date, alphabetical, time, etc.) using the sort() function.
Ultimately, the biggest advantage with creating from scratch is definitely how flexible the component is compared to other third-party packages out there. What are you going to make your search bar do?
Install LogRocket via npm or script tag. LogRocket.init() must be called client-side, not
server-side
$ npm i --save logrocket

// Code:

import LogRocket from 'logrocket';
LogRocket.init('app/id');
// Add to your HTML:

<script src="https://cdn.lr-ingest.com/LogRocket.min.js"></script>
<script>window.LogRocket && window.LogRocket.init('app/id');</script>

Learn how to set up Meilisearch, index documents, and build keyword, semantic, and hybrid search with AI-powered retrieval.

Compare pnpm and npm across security defaults, disk usage, dependency strictness, and workspace policy to decide which package manager fits your project.

I migrated 20 production-style components from Tailwind to StyleX. Here’s what the data showed about LOC, CSS bundle size, build time, and type safety.

A guide for using JWT authentication to prevent basic security issues while understanding the shortcomings of JWTs.
Would you be interested in joining LogRocket's developer community?
Join LogRocket’s Content Advisory Board. You’ll help inform the type of content we create and get access to exclusive meetups, social accreditation, and swag.
Sign up now

