Judging by the latest issue of the annual “State of JavaScript” survey, Svelte is the frontend library to watch in 2020 thanks to its modern style and simplicity.

Svelte is a modern reactive component framework that runs at build time, converting components into highly efficient imperative code that surgically updates the DOM.
The Replay is a weekly newsletter for dev and engineering leaders.
Delivered once a week, it's your curated guide to the most important conversations around frontend dev, emerging AI tools, and the state of modern software.
In this article, we’ll explore how Svelte consumes and renders data from an API by building a simple app. We’ll first write a simple backend to store our data and then write our Svelte components.
I assume you have an understanding of JavaScript, CSS, Node.js, and how Svelte works itself. If you’re brand new to Svelte, you should take a look at this tutorial before proceeding. You can also find the code used in this article in this GitHub repo.
The first thing we’ll do is set up a working directory where we’ll store the code for our application. There are a number of ways to get a Svelte project up and running, and since this isn’t an introductory tutorial on Svelte, we’ll be using degit, a scaffolding tool to clone a Svelte template.
To scaffold our app, which we’ll call continent-app, run the following command in your terminal from your preferred working directory:
npx degit sveltejs/template continent-app
Next is to navigate into the newly created directory and install the dependencies:
cd continent-app && npm install
Once the dependencies installation is complete, we create two component files, Continents and Continent, and then start the app:
touch src/{Continent,Continents}.svelte
npm run dev
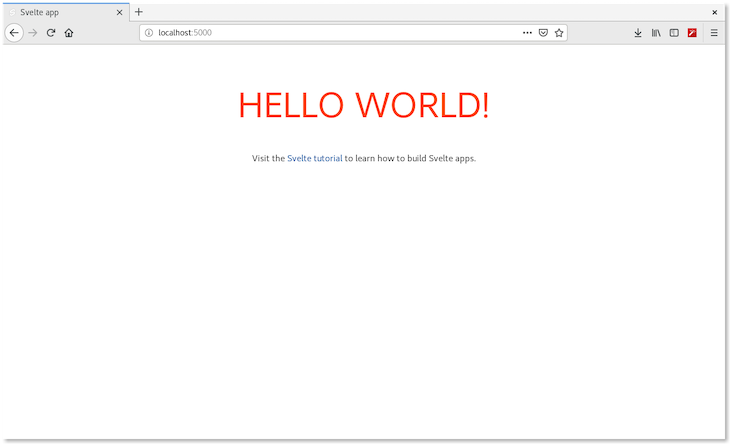
You should get the screen below:

Now that we have our Svelte app up and running, we are set to build the API before writing the components for the Svelte app. Our API is a simple one that holds hard coded informations about the seven continents that can be retrieved once a call is made to it.
Next, create a new folder api, in the app’s directory and install the following dependencies:
mkdir api && cd api
npm init -y // Quick initialisation of directory
npm install express cors body-parser
After the installation, create a new file, app.js, that will hold the simple backend, and then copy the accompanying code below into it:
touch app.js
app.jsWe start off by importing the dependencies and initializing them:
const express = require("express");
const bodyParser = require("body-parser");
const cors = require('cors')

const app = express();
app.use(bodyParser.json());
app.use(cors())
Next, we create an array of data in JSON format holding the names, population, number of countries in the continent, and the area in kilometers
const continents = [
  {
    id: 1,
    name: "Asia",
    population: "4,624,520,000",
    no_of_countries: 50,
    area: "44,579,000"
  },
  {
    id: 2,
    name: "Africa",
    population: "1,327,042,300",
    no_of_countries: 54,
    area: "30,370,000"
  },
  {
    id: 3,
    name: "North America",
    population: "590,176,500",
    no_of_countries: 23,
    area: "24,709,000"
  },
  {
    id: 4,
    name: "South America",
    population: "429,276,300",
    no_of_countries: 12,
    area: "17,840,000"
  },
  {
    id: 5,
    name: "Antartica",
    population: "No real data on populants",
    no_of_countries: 0,
    area: "14,000,000"
  },
  {
    id: 6,
    name: "Europe",
    population: "747,447,200",
    no_of_countries: 51,
    area: "10,180,000"
  },
  {
    id: 7,
    name: "Australia",
    population: "42,448,700",
    no_of_countries: 14,
    area: "8,600,000"
  }
]
Now that we have our continents’ data stored in the continents variable, we will write the handler for the API that allows us retrieve the data as well as start the backend:
app.get("/", (req, res) => {
  res.send(continents);
});

app.listen(8081, () => {
  console.log("App's running on port 8081");
});
We have successfully completed the backend app! We can start it with the command:
node app.js
We get a running message, and navigating to the url localhost:8081 returns a list of the continent and its data.
Next we’ll write the Svelte app’s component to retrieve and render data.
As we have seen above, the Svelte app displays its default landing page, and we have completed the backend. The next step is to write our Svelte components and redesign the app to render our continents data. We’ll be writing two components:
Continent: This component renders the data of the continents passed as a prop to it from the Continents componentContinents: This component retrieves the list of continents from the backend and renders them through the Continent componentWe’ll begin by writing the Continent component that renders the data of continents passed to it from the Continents component.
Continents.svelteWe’ll begin by creating a prop, continent, in the <script> section of the component.
<script>
  // create a prop
  export let continent;
</script>
The continent prop will be used to render data, just as in other libraries like React and Vue.
Next, we render the data from the prop. Remember that from our API, we have the following data: name, population, number of countries, and area. We’ll render this just below the script tags:
<article>
    <h1>{continent.name}</h1>
    <small>
      Population: <b>{continent.population}</b>
    </small><br/>
    <small>
      Number of countries: <b>{continent.no_of_countries}</b>
    </small><br/>
    <small>
      Continent's size: <b>{continent.area}</b>
    </small>
</article>
Great! Next, we’ll add a little styling :
<style>
  article {
    margin: 0 0 1em 0;
  }
  h1 {
    font-size: 1.4em;
    margin: 0;
    display: block;
  }
</style>
We have successfully completed our Continent component, this is quite straightforward than in other libraries where you have to write plenty code for a component. Next, we write the Continents component.
Continents.svelteIn this component, we retrieve the list of continents from the backend, iterate over it, and pass each continent as a prop to the Continent component to render it. We’ll begin by importing the onMount() method and the Continent component.
<script>
  import { onMount } from "svelte";
  import Continent from "./Continent.svelte";
  // define the data holding variable
  let continents;
Next, we define the onMount method that executes as soon as the Continents component is rendered.
onMount(async () => {
    await fetch(`http://localhost:8081/`)
      .then(r => r.json())
      .then(data => {
        continents = data;
      });
  })

</script>
Next thing is to iterate over the continents data retrieved and pass each one as a prop to the Continent. This is done through Svelte’s built-in conditional support.
{#if continents}
  {#each continents as continent }
    <ul>
      <li>
        <Continent {continent} />
      </li>
    </ul>
  {/each}
{:else}
  <p class="loading">loading...</p>
{/if}
In the code above, we first check if the data has been retrieved. If yes, the data is iterated and rendered through the Continent component, as can be seen in lines 2–8. Otherwise, it displays a loading message.
onMount() component methodJust as we have componentDidMount() in React, we also have the onMount() method in Svelte.
This method is a function that is executed when the component is rendered. It can take a predefined function as an argument, or a function can be defined in it, as seen above.
Next, we add a little styling:
<style>
  .loading {
    opacity: 0;
    animation: 0.4s 0.8s forwards fade-in;
  }
  @keyframes fade-in {
    from { opacity: 0; }
    to { opacity: 1; }
  }
  li {
    list-style-type: georgian;
  }
</style>
We’ve successfully written the components, and the next step is to render the data via the app’s main component. We’ll be rewriting the App component:
<script>
  import { onMount } from "svelte";
  import Continent from "./Continent.svelte";
  import Continents from "./Continents.svelte";
  let continents;
  let continent;
</script>

<h1>The Seven Continents Svelte App</h1>
<main>
    <Continents {continents} />
</main>
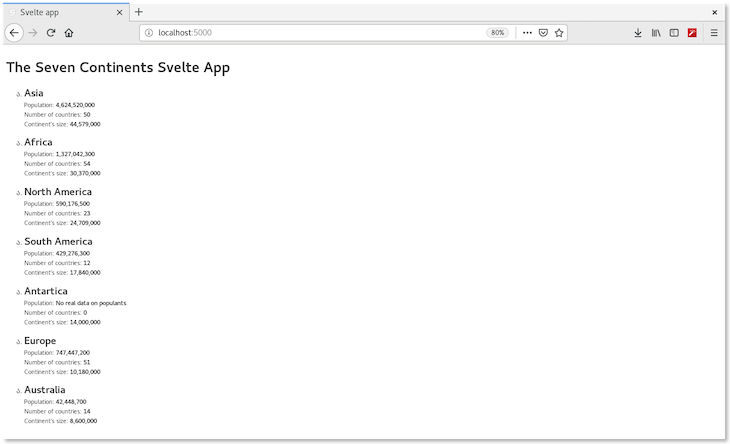
Svelte has a hot-reloading function pre-built, and so if we navigate to our application via http://localhost:5000, we get a screen as this:

Next we’ll change our app title and style our app a bit (if you’d like to keep it black-and-white, it’s OK to skip this 😊).
<svelte:head>
  <title>Svelte Continent App</title>
</svelte:head>


<style>
  main {
    background-color: lavenderblush;
    font-size: 15px;
  }
  h1 {
    font-size: 25px;
  }
</style>
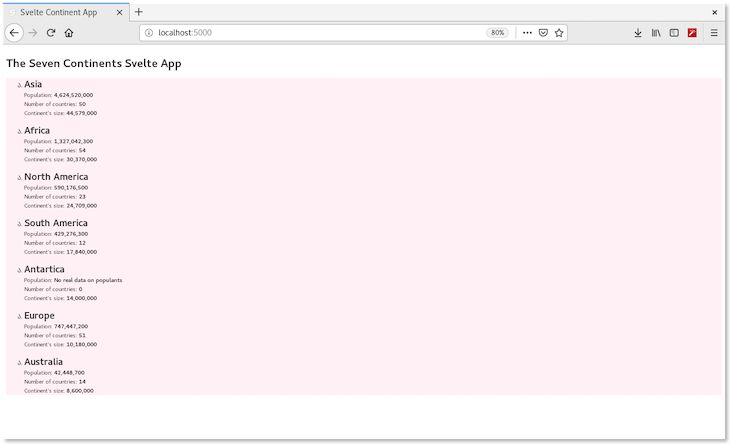
Once saved, the app reloads and we have this screen:

In this article, we looked at how to consume and render data from a backend in Svelte, define and export props, and pass props to components. We also briefly looked at what the onMount() method is.
The inbuilt template system is also a great advantage to building simple apps since this function removes the need for excessive JavaScript conditionals we’d normally need in, say, React. After reading this tutorial, I believe you should now be able to write components and consume and render consumed data from an API — keep coding, and again, you can find the code used in this article here.
Install LogRocket via npm or script tag. LogRocket.init() must be called client-side, not
server-side
$ npm i --save logrocket

// Code:

import LogRocket from 'logrocket';
LogRocket.init('app/id');
// Add to your HTML:

<script src="https://cdn.lr-ingest.com/LogRocket.min.js"></script>
<script>window.LogRocket && window.LogRocket.init('app/id');</script>

Learn how LLM routing works in production, when it’s worth the complexity, and how teams choose the right model for each request.

Compare key features of popular meta-frameworks Remix, Next.js, and SvelteKit, from project setup to styling.

Discover what’s new in The Replay, LogRocket’s newsletter for dev and engineering leaders, in the February 4th issue.

AI-first isn’t about tools; it’s about how teams think, build, and decide. Ken Pickering, CTO at Scripta Insights, shares how engineering leaders can adapt.
Would you be interested in joining LogRocket's developer community?
Join LogRocket’s Content Advisory Board. You’ll help inform the type of content we create and get access to exclusive meetups, social accreditation, and swag.
Sign up now
3 Replies to "Consuming REST APIs in Svelte"
Hi, you have Continents.svelte listed as the heading for both file sections (first one should probably be Continent.svelte). A bit confusing.
Will you be updating the log rocket bindings for use in Svelte??
Hey Anthoni, if you have specific questions about LogRocket’s capabilities, get in touch with us via the chat widget at https://logrocket.com/