React is an ultra-popular frontend library for building user interfaces. As the output is HTML, CSS, and JavaScript, it can be hosted on multiple services like Github pages or Netlify, to name a few.

Recently, Cloudflare Pages has become generally available, which makes it another great service on which to host your React app. Cloudflare Pages is secure, fast, and highly scalable.
In this step-by-step tutorial, we will host a demo React app setup on Cloudflare Pages. Let’s get going.
Of course, React (or any other static output) can be hosted on at least half a dozen services for free. Why should we go for Cloudflare Pages?
In addition to the regular features like preview deployments and Github integration, Cloudflare Pages has custom domains, redirects, and unlimited bandwidth, all for free. All of these features at zero dollars a month, and we get a fast network, security with free SSL, and amazing scalability.
Before we jump into the code below, here are some prerequisites:
Time to get cracking.
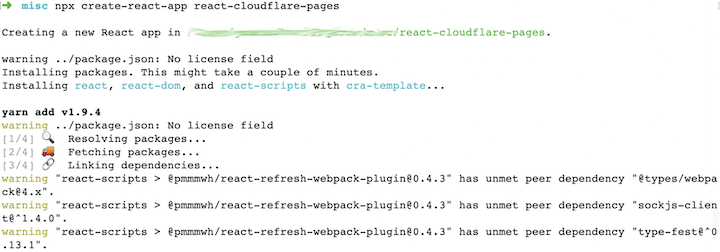
As the first step of this guide, we will set up React with Create React App (CRA). If you don’t have CRA installed you can do so with npm install -g create-react-app. To initiate a React app boilerplate with CRA we will execute the following command:
bash
npx create-react-app react-cloudflare-pages
This will set up the whole React boilerplate for us. As soon as it runs, we will see an output like the one below:
It will take a couple of minutes to download and set up the React boilerplate and finish up with the output as follows:
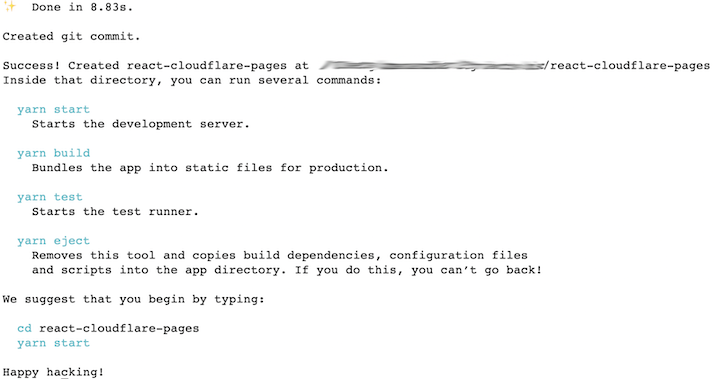
As instructed in the image above, to check if our React app is working we can run:
bash
cd react-cloudflare-pages
yarn start
It will run the development server, and you can runhttps://localhost:3000 in your default browser to show an output like so:

Congrats! Our React boilerplate with CRA is working.
Next up, we will push this basic code to Github and later change it to get a list of users from a mock API, and show some of its fields.
To push our basic React boilerplate, we will create a new Github repository as follows:

It is ok to keep it public and empty. Scroll to the bottom of the page and click the Create Repository button. We will see a page similar to the below:

Next, copy the SSH URL to the Github repository, which in my case was [email protected]:geshan/react-cloudflare-pages.git, and add it as a remote running the following command in our project root to push the code:
bash
git remote add origin [email protected]:geshan/react-cloudflare-pages.git
git push origin master
It will look something like the following:

Consequently, we will update the code to call the mock API and list some of the user details. If you want, you can create a new Git branch to do the following changes, but I will leave that up to you.
Our React boilerplate is up and running, and it has been pushed to GitHub too. Now, we will change the code to call a mock list of 10 users and show some fields in our React app.
To do this we will change the src/App.js to look like this below:
js
import {Component} from 'react';
import Users from './components/users';

class App extends Component {
  state = {
    users: []
  };

  componentDidMount() {
    fetch('https://jsonplaceholder.typicode.com/users')
      .then(res => res.json())
      .then((data) => {
        this.setState({ users: data })
      })
      .catch(console.log)
  }

  render() {
    return (
      <Users users={this.state.users} />
    )
  }
}

export default App;
Note that we have removed the unnecessary CSS file and logo.
Time to dive a bit deeper into what the code is doing. First, we are importing Component from React, then importing another component called users, which we will write next.
Then in the App class that extends the React component, we are introducing a state with the users array. When the component mounts, we fetch a list of 10 users from our mock API – http://jsonplaceholder.typicode.com/users – and set it in the users of the state. In case of an error, we log it.
For the final step in the main App component, we render the Users component which we will write up next.
As we use the users component above, we will create a new file src/components/users.js that will contain the following:
js
const Users = ({ users }) => {
  return (
    <div className="users">
      <center><h1>Application Users</h1></center>
      {Array.isArray(users) && users.map((user) => (
        <div className="user" key={user.id}>
          <div className="user-details">
            <h2 className="user-name">{user.name}</h2>
            <h3 className="user-email">{user.email}</h3>
            <h4 className="user-company">Company: {user.company.name}</h4>
            <hr/>
          </div>
        </div>
      ))}
    </div>
  )
};

export default Users
Let’s look at how this file works. It is a very simple component that relies on the users being passed in as an array. We check if it is an array and loop through the users. Then we print out the user’s name, email, and user’s company name.
If we want, we can delete the unnecessary files after this change with the following command:
bash
rm -rf src/App.css src/logo.svg src/App.test.js
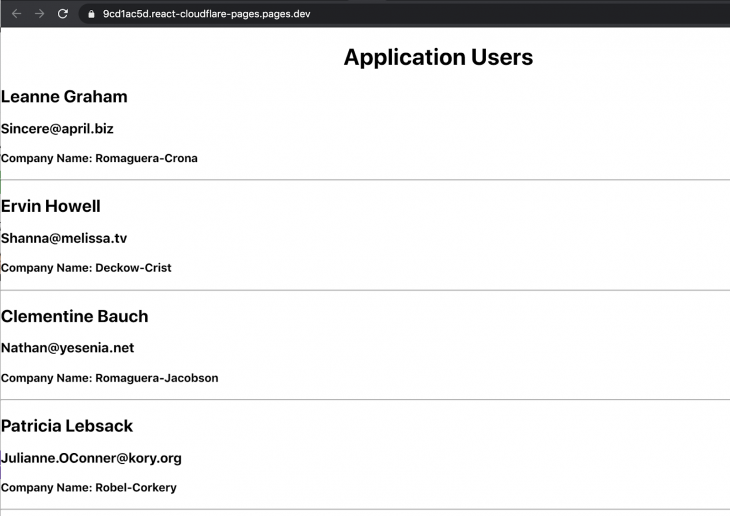
After that we can run yarn start and see the following output:
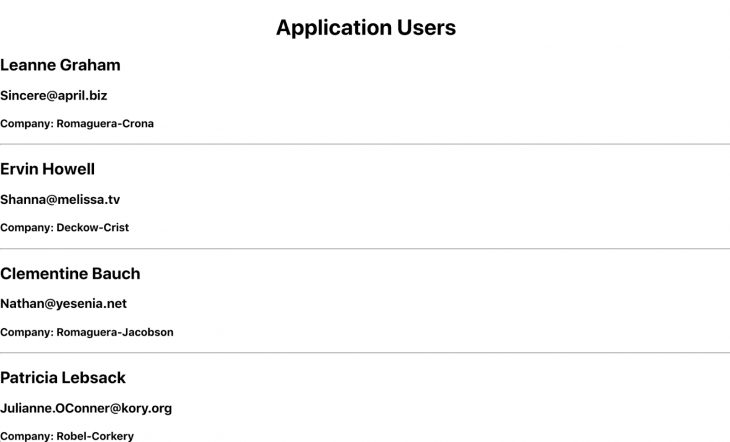
Hurray! The mock API is being called properly and we see the user’s name, email, and company name rendering correctly. After this, we will push our code change to GitHub and wire it up with Cloudflare Pages. If you want to look at what files have changed you can have a look at this pull request.
To push our changes to the master branch we will run the following commands on the project root:
bash
git add .
git add -u #because we have deleted files
git commit -m "Call the mock users API"
git push origin master # if you are in a different branch push that and open a PR
After the push, you should see the changes reflected in your Github repository as well. Now it’s time to get a Cloudflare Pages URL for our React app.
To connect your React app with Cloudflare pages, create a Cloudflare account if you haven’t done so already. Then, log in to Cloudflare and click Pages on the right:
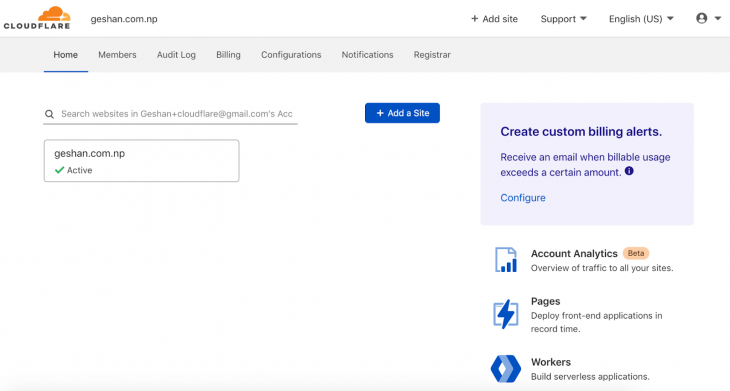
We will see a page similar to below:
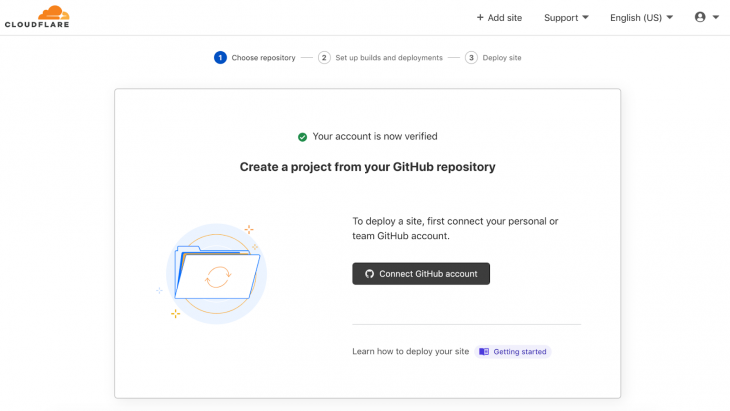
Click on Connect Github account. We will be redirected to Github where we can configure the accounts and repositories we want CloudFlare to access:
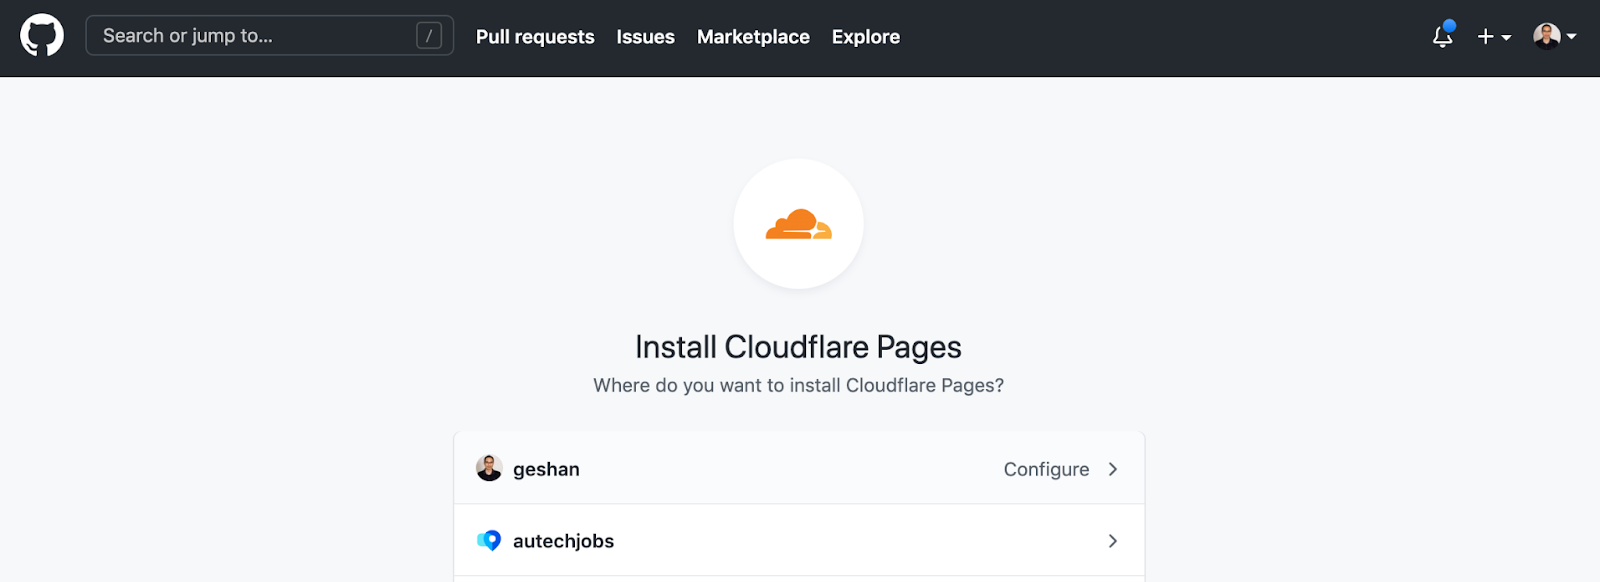
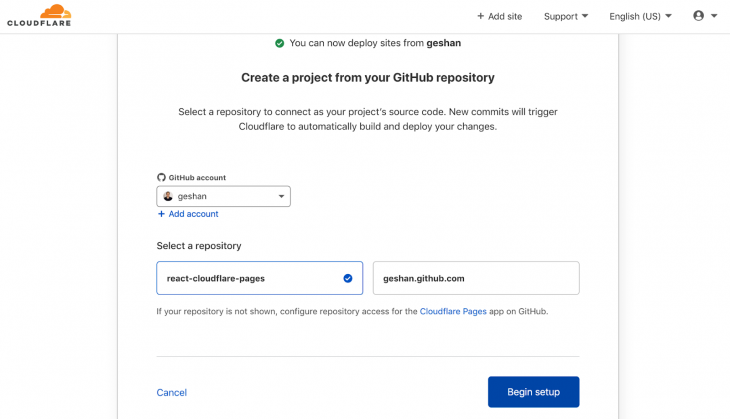
Click on the account into which you pushed the above React app (it will probably be your personal account) and choose the right repository to connect to:
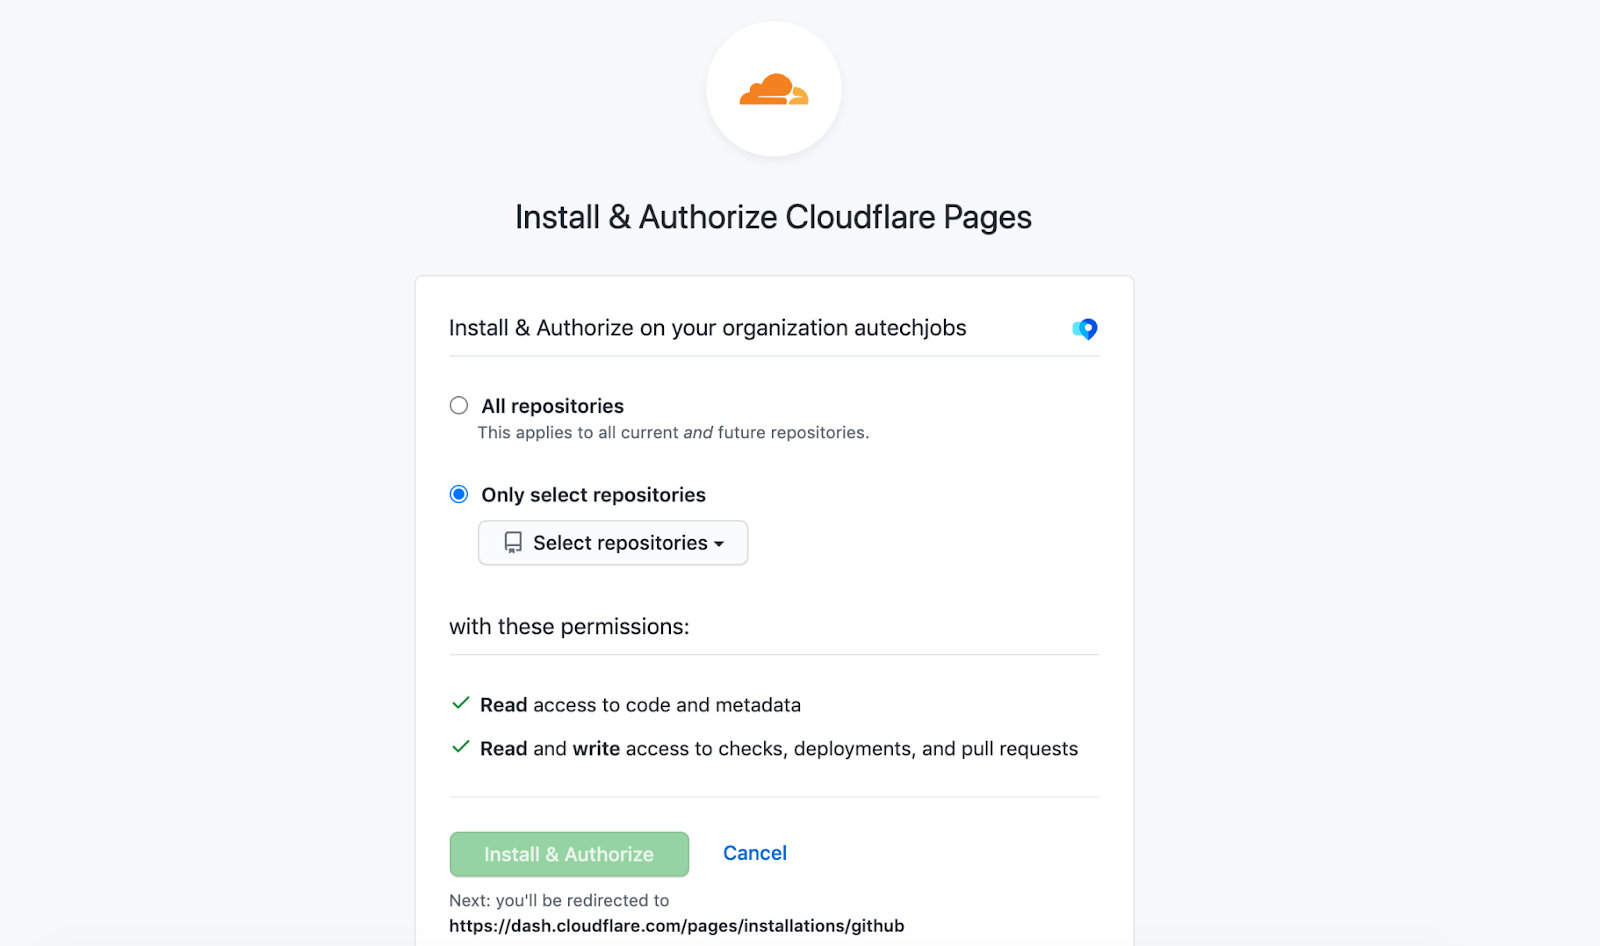
It is better to give access to the required repository only. After giving access we will be redirected to Cloudflare Pages where were can deploy the React app, select the repository, and click Begin Setup as below:
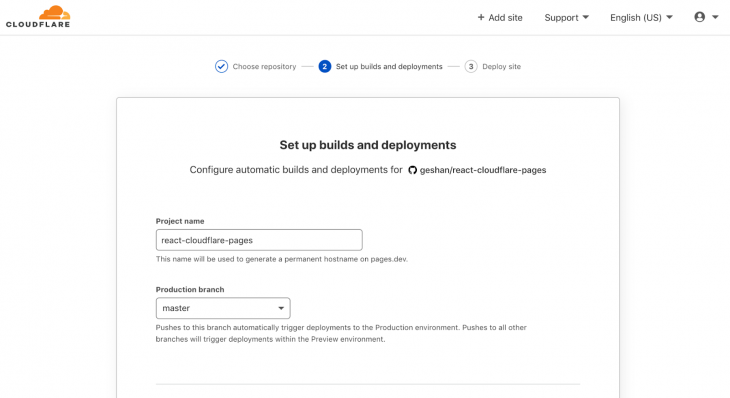
Next, we will configure the main branch as master:
Scroll below on that page to configure the build settings as follows:
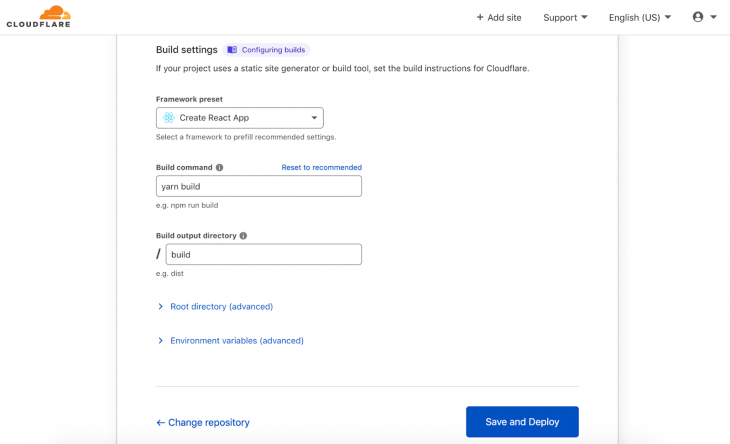
I had to update npm build with yarn build in the build command field because CRA uses yarn in place of npm.
Then click Save and Deploy. If all goes well, the project will be created and start to deploy as seen below:
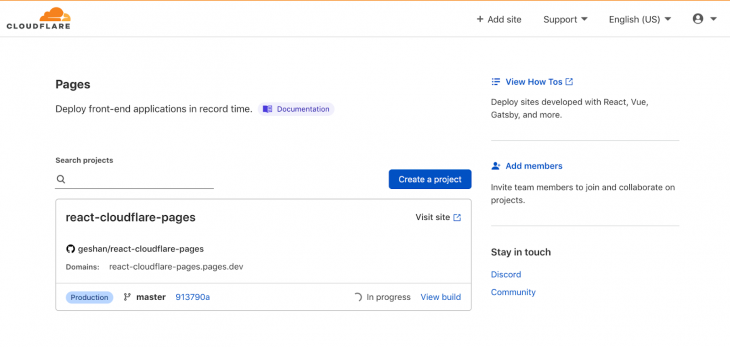
After a couple of minutes, the build should be done, and if we click the title of the project react-cloudflare-pages we will see a page like below:
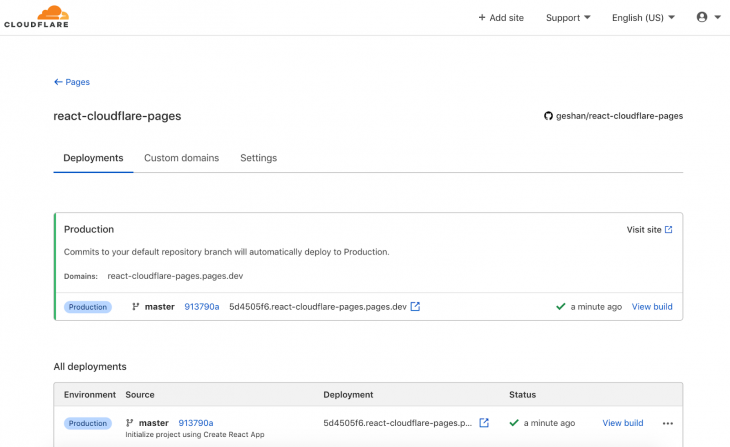
If we click the link below Deployment, which is a pages.dev URL, we should be able to see our React app deployed on Cloudflare Pages as follows:
As seen above, it is an HTTPS Cloudflare Pages URL on pages.dev.
For us to see how previewing deployment works, I am going to change the Company label to Company Name on line 10 of src/components/users.js.
We will push it in a branch called preview-deployment, which will give us a preview on Github when we open a pull request. After it is built successfully on Cloudflare Pages, it will give us a unique link to the changes as a comment, which can be seen here:
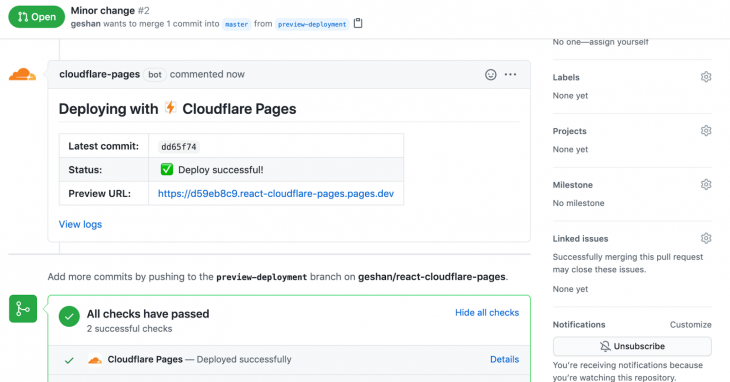
This is a very neat feature to see the changes on a fully functioning URL.
We can easily configure a custom domain for our React app on Cloudflare Pages, which is free as well. In addition, redirects and access control for the preview deployments can also be configured. I will leave it up to you to explore them.
As we have seen in this step-by-step tutorial, Cloudflare Pages is easy to set up for your React app or any other frontend framework. There is no need to configure a build process on something like Github actions or another CI system.
Connect your Github repo with Cloudflare Pages, and use the build command once as each pull request automatically gets a preview deployment URL. Exploit the power of Cloudflare Pages for free and make your websites fly.
Install LogRocket via npm or script tag. LogRocket.init() must be called client-side, not
server-side
$ npm i --save logrocket

// Code:

import LogRocket from 'logrocket';
LogRocket.init('app/id');
// Add to your HTML:

<script src="https://cdn.lr-ingest.com/LogRocket.min.js"></script>
<script>window.LogRocket && window.LogRocket.init('app/id');</script>
Hey there, want to help make our blog better?
Join LogRocket’s Content Advisory Board. You’ll help inform the type of content we create and get access to exclusive meetups, social accreditation, and swag.
Sign up now
Get to know RxJS features, benefits, and more to help you understand what it is, how it works, and why you should use it.

Explore how to effectively break down a monolithic application into microservices using feature flags and Flagsmith.

Native dialog and popover elements have their own well-defined roles in modern-day frontend web development. Dialog elements are known to […]

LlamaIndex provides tools for ingesting, processing, and implementing complex query workflows that combine data access with LLM prompting.


