Access control is crucial for securing web applications and ensuring a smooth user experience. It answers the question: What are you, as the user, allowed to do?

On the frontend, access control isn’t about security. In fact, instead of enforcing security or permission checks, which don’t scale well, they are used for a different purpose: improving user experience. They help guide users by only displaying UI elements they can actually interact with.
This raises an important question: Which access control model is best for frontend applications? For most web applications, RBAC is the go-to. It integrates well with frameworks like React and Next.js, allowing you to have a smooth performance while scaling easily with growing teams. But what about other models like ABAC, ACL, or PBAC? Can they also work for frontend applications?
This article explores how each model works, their suitability for frontend access control, and why RBAC might be the best choice for most cases.
RBAC, or role-based access control, is a model that restricts access to resources and data based on a user’s role. On the frontend, RBAC can be used to control what parts of the UI a user can view or interact with. Instead of assigning permissions to users, permissions are put into roles so that access management becomes easier as the application scales:
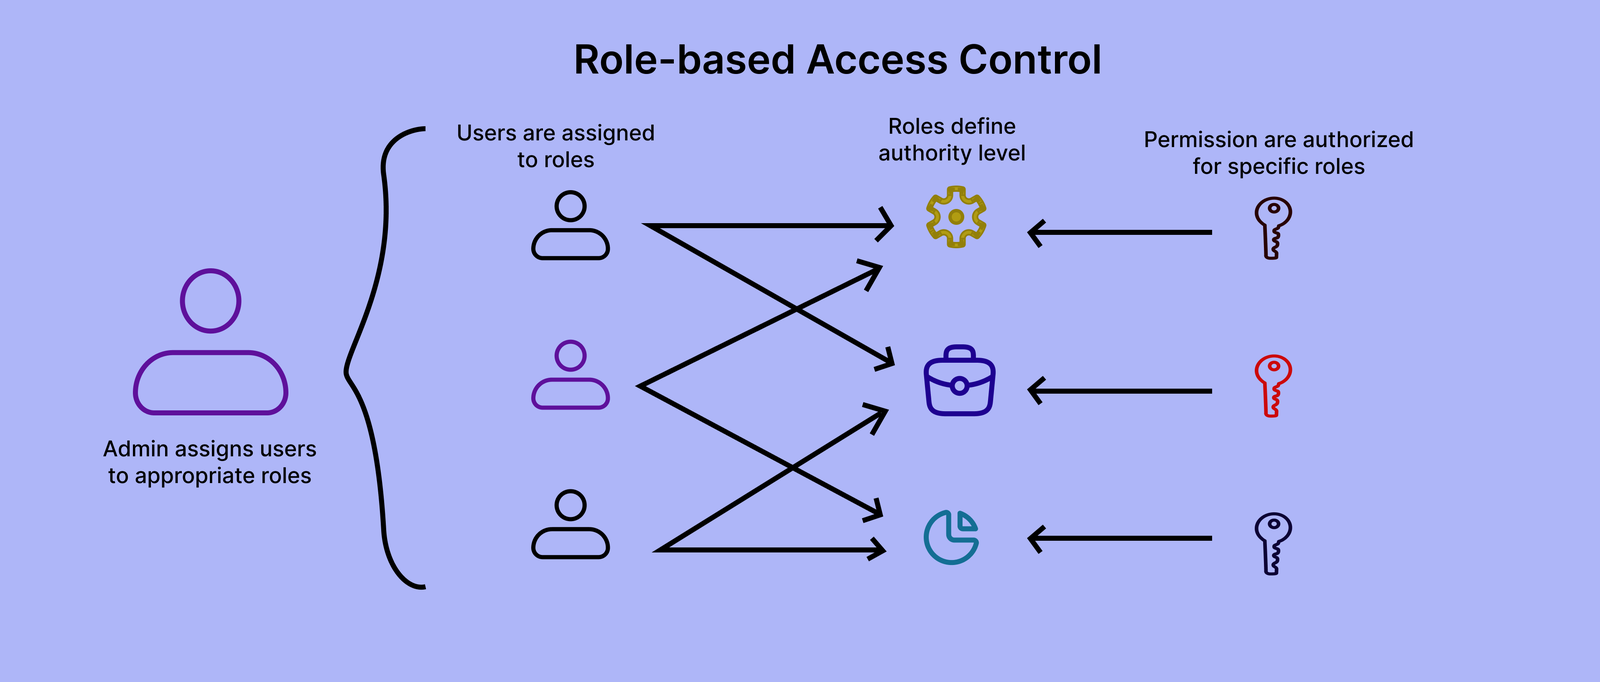
RBAC operates based on three principles:
RBAC lets your UI adapt dynamically based on the user’s role, and it does this by hiding or disabling elements that users don’t have access to. For example:
You can also represent this logic in a code setting like so:
import React, { useState } from "react";

const roles = {
  user: ["viewProfile"],
  manager: ["viewProfile", "viewReports", "approveRequests"],
  admin: ["viewProfile", "viewReports", "approveRequests", "manageSystem"],
};

const hasPermission = (role, permission) => roles[role]?.includes(permission);

const Dashboard = ({ role }) => (
  <div>
    <h1>Dashboard</h1>
    {hasPermission(role, "viewProfile") && <p> Profile Section</p>}
    {hasPermission(role, "viewReports") && <p> Team Reports</p>}
    {hasPermission(role, "approveRequests") && <p>Approval Requests</p>}
    {hasPermission(role, "manageSystem") && <p>System Management</p>}
  </div>
);

const App = () => {
  const [role, setRole] = useState("user");

  return (
    <div>
      <label>Select Role:</label>
      <select value={role} onChange={(e) => setRole(e.target.value)}>
        <option value="user">User</option>
        <option value="manager">Manager</option>
        <option value="admin">Admin</option>
      </select>
      <Dashboard role={role} />
    </div>
  );
};

export default App;
Each role dictates what content appears in the UI so you get a more customized experience.
RBAC is a popular choice for frontend applications due to some of the following reasons:
Despite all its pros, RBAC has some limitations, especially when applications require more granular control:
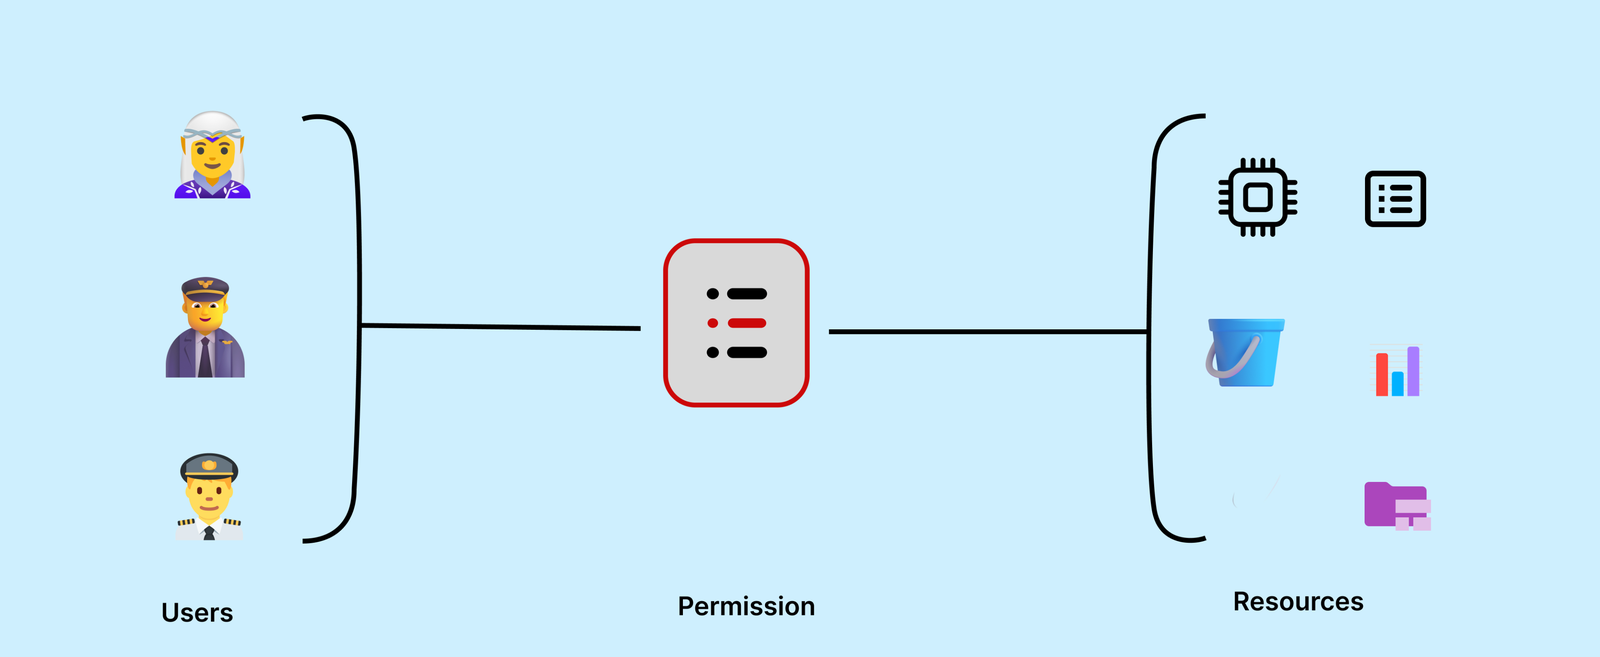
Attributes-based access control, or ABAC, is an access model that makes decisions based on several attributes, including:
For a simple explanation, it’s like saying, “If the user’s department is X, the document is Y-classified, and it’s during business hours, then allow access.”
So, because ABAC permissions are dynamic, can they be used on the frontend?
The short answer is yes. You can show or hide components based on evaluated attributes in order to shape the experience to fit what a user should see or interact with. However, ABAC decisions are dynamic, so UI elements can’t be cached easily, unlike RBAC. For ABAC, every interaction may require recalculating access rules, making the UI less performant, especially in large-scale applications. It can also lead to increased state management complexities.
ABAC is best used when roles aren’t expressive enough and you need more granular, real-time control over what the user sees or does.
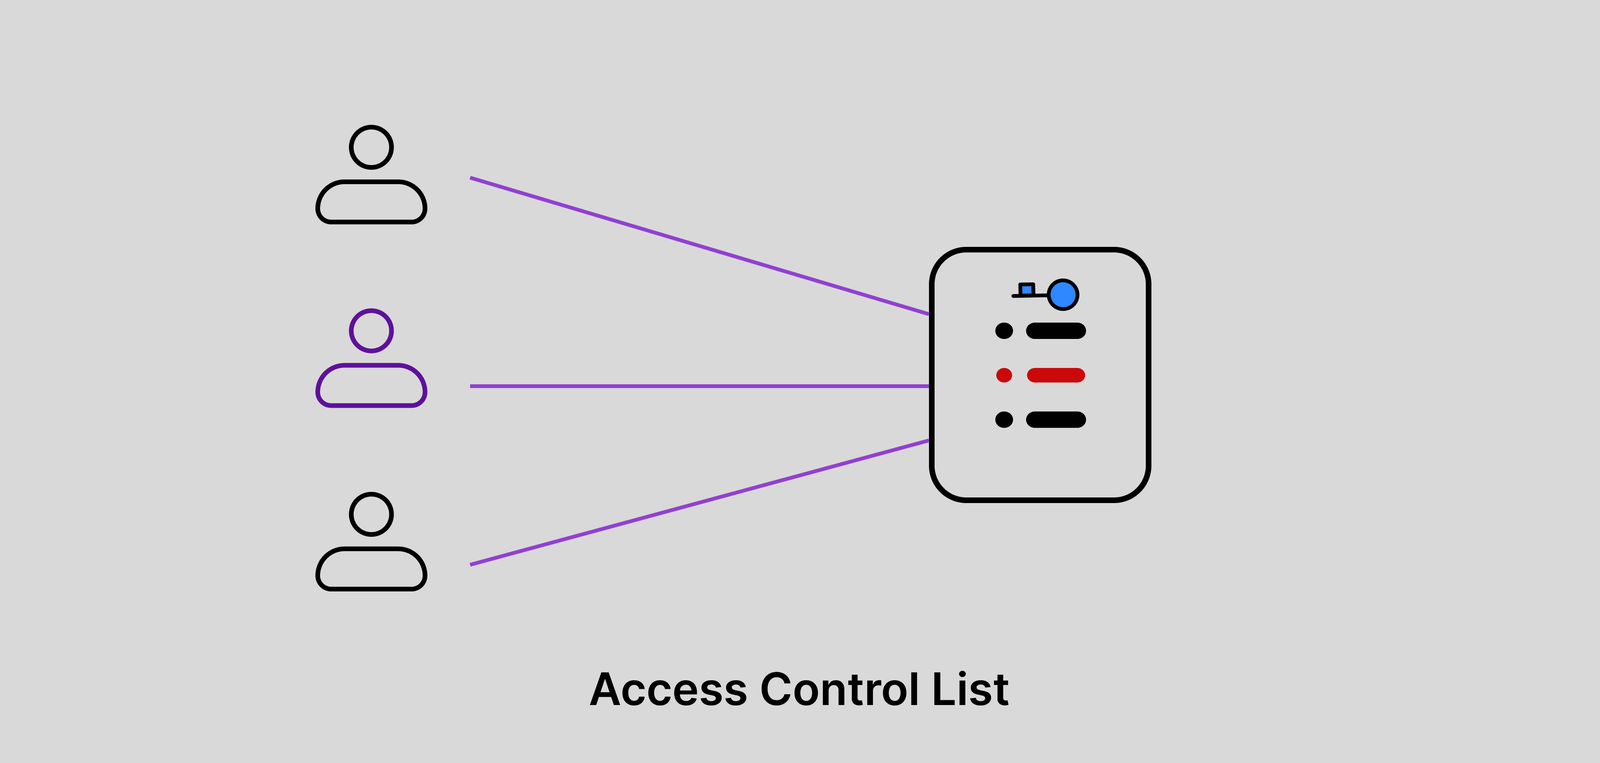
Access control list, or ACL, is an access control model that defines permissions at an individual resource level. This means that access is assigned directly to specific users or groups rather than assigning permissions based on roles (RBAC) or attributes (ABAC).
Each resource, such as a file, database record, or API endpoint, has a list of explicit allow or deny rules that determine:
ACLs work well in backends, where fine-grained control is needed. But in frontend applications, they’re often a poor fit. The main issue is complexity; the UI has to scan large permission lists in order to decide whether to show or hide elements like buttons or menu items. This doesn’t scale well and quickly becomes hard to manage.
Some teams make it work by loading ACL data after login, storing it in memory (like Redux), and using helper functions or hooks to check permissions. This approach is fine for smaller projects or when you already rely on ACLs on the backend. But it’s more of a workaround than a clean solution; you’ll spend more time wrestling with ACL than actually building product.
RBAC or ABAC is usually better for frontend-level access control because they’re simpler, easier to maintain, and scale more gracefully.
Often regarded as the superior access control approach, Policy-Based Access Control (PBAC) is a model that grants or denies access based on pre-defined policies rather than roles (RBAC), attributes (ABAC), or individual permissions (ACL).
PBAC uses a set of rules and conditions to enforce access decisions dynamically. PBAC is commonly implemented using policy engines such as OPAs (Open Policy Agents), which evaluate logical conditions to determine access control.
In PBAC, policies are centrally defined and enforced based on a combination of:
Now, can PBAC be used on the frontend? Technically, yes, but that doesn’t mean it’s a good idea.
PBAC is built for real-time security checks, so it should be considered for use only in the backend. When you try to do verifications on the frontend, you’ll run into issues like having to verify live conditions before you can render pages or buttons. This will not only take time, but it can also cause your UI to flicker and make it unresponsive.
So, while PBAC is powerful, it’s a bit too heavy for frontend use. It shines in backend services, especially in microservice architectures where you want centralized, consistent policy enforcement across APIs.
While all four models have their uses, RBAC is still the most practical choice for frontend apps. Here’s how it compares to the others:
| Model | Strengths | Weaknesses | Best for |
|---|---|---|---|
| RBAC (Role-Based) |
|
|
SPAs, dashboards, tiered SaaS apps, ecommerce |
| ABAC (Attribute-Based) |
|
|
Apps where roles aren’t enough, e.g., department-based restrictions |
| ACL (Access Control List) |
|
|
Rare edge cases where you need manual overrides |
| PBAC (Policy-Based) |
|
|
Backend APIs, microservices, enterprise policy enforcement |
RBAC might not be the flashiest model, but for frontend applications, it hits the right balance between simplicity, performance, and control. If your app doesn’t need highly dynamic, context-aware permissions, there’s usually no reason to reach for ABAC or ACL.
Having covered why RBAC is an ideal choice for frontend applications, let’s demonstrate a simple implementation with Next.js. In this example, we’ll create:
Open your terminal and navigate to the folder where you want to build this project.
Then, run the following commands:
npx create-next-app@latest rbac-demo
cd rbac-demo
npm install
On installation, you’ll see the following prompts:
✔ Would you like to use TypeScript? … No / Yes
✔ Would you like to use ESLint? … No / Yes
✔ Would you like to use Tailwind CSS? … No / Yes
✔ Would you like your code inside a `src/` directory? … No / Yes
✔ Would you like to use App Router? (recommended) … No / Yes
✔ Would you like to use Turbopack for `next dev`? … No / Yes
✔ Would you like to customize the import alias (`@/*` by default)? … No / Yes
Afterward, Next.js and its required dependencies will be installed.
In the src folder, create a config folder. Inside it, add a file called roles.js:
export const roles = {
  user: ["viewProfile"],
  manager: ["viewProfile", "viewReports", "approveRequests"],
  admin: ["viewProfile", "viewReports", "approveRequests", "manageSystem"],
};
export const hasPermission = (role, permission) => {
  return roles[role]?.includes(permission);
};
This maps each role to its allowed permissions and includes a helper function to check if a role has a given permission.
Now, you need a custom hook to manage roles and permissions. Create a hooks folder in the src folder, and inside it, add useRBAC.js:
import { roles } from "../config/roles";
const useRBAC = (role = "user") => {
  const hasPermission = (permission) => {
    return roles[role]?.includes(permission);
  };
  return { hasPermission };
};
export default useRBAC;
This hook manages the current role and checks permissions based on it.
Create a components folder in the src folder. Inside it, create a file called Dashboard.js. Add the following code:
import useRBAC from "../hooks/useRBAC";
const Card = ({ title, emoji }) => (
  <div
    style={{
      border: "1px solid white",
      borderRadius: "8px",
      padding: "20px",
      marginBottom: "15px",
      backgroundColor: "#000",
      color: "white",
    }}
  >
    <h3>
      {emoji} {title}
    </h3>
    <p>This section is visible because your role has permission.</p>
  </div>
);
const Dashboard = ({ userRole }) => {
  const { hasPermission } = useRBAC(userRole);
  return (
    <div>
      <h2 style={{ color: "white" }}>Dashboard</h2>
      {hasPermission("viewProfile") && <Card title="Profile Section" />}
      {hasPermission("viewReports") && <Card title="Team Reports" />}
      {hasPermission("approveRequests") && <Card title="Approval Requests" />}
      {hasPermission("manageSystem") && <Card title="System Management" />}
    </div>
  );
};
export default Dashboard;
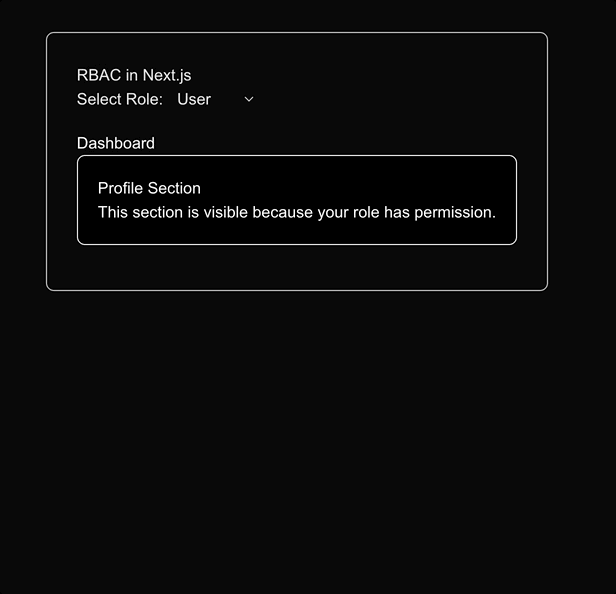
The dashboard shows different sections based on permissions for the current role.
Edit src/app/page.js like this:
"use client";
import { useState } from "react";
import Dashboard from "../components/Dashboard";
export default function Home() {
  const [role, setRole] = useState("user");
  return (
    <div style={{ textAlign: "center", marginTop: "50px" }}>
      <h1>RBAC in Next.js</h1>
      <label>Select Role:</label>
      <select value={role} onChange={(e) => setRole(e.target.value)}>
        <option value="user">User</option>
        <option value="manager">Manager</option>
        <option value="admin">Admin</option>
      </select>
      <Dashboard userRole={role} />
    </div>
  );
}
This lets you switch roles dynamically and updates the dashboard accordingly.
You need a protected admin-only page to ensure that only users with the right permissions can access a particular page. In the src/app folder, create a folder called admin with a page.js file inside it. Add the following code:
"use client";
import { useSearchParams, useRouter } from "next/navigation";
import { useEffect } from "react";
import useRBAC from "../../hooks/useRBAC";
const AdminPage = () => {
  const searchParams = useSearchParams();
  const role = searchParams.get("role") || "user";
  const { hasPermission } = useRBAC(role);
  const router = useRouter();
  useEffect(() => {
    if (!hasPermission("manageSystem")) {
      router.push("/forbidden");
    }
  }, [hasPermission, router]);
  return (
    <div
      style={{ display: "flex", justifyContent: "center", marginTop: "50px" }}
    >
      <div
        style={{
          padding: "30px",
          border: "1px solid #ccc",
          borderRadius: "8px",
          minWidth: "300px",
        }}
      >
        <h1>Admin Panel</h1>
        <p>Welcome to the admin panel. Only admins can see this.</p>
      </div>
    </div>
  );
};
export default AdminPage;
If the current role lacks the "manageSystem" permission, the user is redirected to a 403 page.
In the src/app folder, create a folder called forbidden with a page.js file inside it. Add the following code:
export default function ForbiddenPage() {
  return (
    <div style={{ textAlign: "center", marginTop: "50px" }}>
      <h1>Access Denied</h1>
      <p>You do not have permission to access this page.</p>
    </div>
  );
}
Then, run and test the changes with the following command:
npm run dev
Now, visit http://localhost:3000 and try switching between roles. Navigate to /admin and test the access control:
This example demonstrates how RBAC works on the frontend. You’ll notice different sections of the dashboard become visible based on the selected role, each one representing a permission.
You can also test access to a protected route, which in this case is the /admin, by appending a role to the URL, for example, the URL /admin?role=admin. If the role lacks permission, you’ll be redirected to a 403 forbidden page.
N.B., this is for demonstration purposes only. Real access control should be enforced on the backend.
In more complex apps, using a single access control model like RBAC isn’t always enough. Sometimes, mixing models gives you more flexibility, especially when handling edge cases or dynamic UI behavior.
One common combination is RBAC and ABAC. RBAC handles broad role-based rules, while ABAC fills in the gaps with context-based decisions. For example, you might give all admins access to reports but only let them view reports from their own department. That department check is a dynamic attribute, something RBAC can’t do alone but ABAC can easily handle.
In rare cases, you might mix RBAC with ACLs. This usually happens when specific users need custom permissions that don’t cleanly fit into any existing role. It’s not ideal, but for manual overrides or one-off exceptions, ACL-style rules can help, but you have to be disciplined and try not to use them too much so that things don’t get out of hand.
As for PBAC, let the backend sort that out, as it’s too heavy for the browser to deal with. Also, its policy engines are suited for APIs and services but not for displaying menus and buttons.
Access control on the frontend is about shaping the user experience. It helps you keep the UI clean, reduce confusion, and make sure users only see what they can actually interact with. While several access control models exist, such as ABAC, ACL, and PBAC, not all of them are built with the frontend in mind.
For most web applications, including SPAs, dashboards, and SaaS applications, RBAC is the most scalable and practical choice. It’s simple to implement, simple to reason about, and gets along well with frameworks like Next.js.
Of course, no model is perfect. In more complex scenarios, blending RBAC with ABAC can help when roles are not sufficiently expressive. Occasionally, ACLs might be convenient for overrides manually, although they require management overhead. And PBAC, while strong, should stay on the backend where performance, security, and centralized policy management are better suited.
The frontend isn’t your fortress, it’s your storefront. Use access control to guide users, not guard the gates.
Header image source: IconScout

Learn how to set up Meilisearch, index documents, and build keyword, semantic, and hybrid search with AI-powered retrieval.

I migrated 20 production-style components from Tailwind to StyleX. Here’s what the data showed about LOC, CSS bundle size, build time, and type safety.

A guide for using JWT authentication to prevent basic security issues while understanding the shortcomings of JWTs.

Discover how to build, render, and automate product demo videos with Remotion, replacing traditional screen recordings with reusable React code.
Would you be interested in joining LogRocket's developer community?
Join LogRocket’s Content Advisory Board. You’ll help inform the type of content we create and get access to exclusive meetups, social accreditation, and swag.
Sign up now

