In programming, caching is when you store the results of an expensive operation so that you can reuse them later. This can be useful when a function takes a long time to run or when a function is called multiple times with the same input.

The same concept can be extended to web development. Caching can be applied to the response of an API call or even a whole page being returned from the server. In this article, we will learn how to cache data in Next.js using the unstable_cache method introduced in Next.js v14. We will also compare the Next.js cache method with the React cache method to understand the use cases in which you would use one over the other.
The Replay is a weekly newsletter for dev and engineering leaders.
Delivered once a week, it's your curated guide to the most important conversations around frontend dev, emerging AI tools, and the state of modern software.
unstable_cacheThe unstable_cache function is a new addition to the Next.js cache API. Next.js already had several high-level APIs that we will discuss later in this article. But unstable_cache is a low-level cache API that allows you more granular control over the caching.
It is important to note that this API is still unstable and its contract might change in the future. Nonetheless, it is a powerful tool that can be used to cache the results of database queries or API calls.
Here’s an example of how the unstable_cache API can be used:
const data = unstable_cache(func, keys, options)()
func is the function that we want to cache. It must always return a promisekeys is an array of globally unique values that together identify the key of the data being cachedoptions is an object that lets us control some more granular aspects of the caching, like adding tags that can be used to later invalidate the cache. Or passing a revalidate parameter, which is the number of seconds after which the cache should be revalidatedNotice the () at the end of the function call. This is because unstable_cache returns a function that we need to call to get the cached data.
unstable_cache APIYou might be wondering why we need a low-level cache API when Next.js already provides high-level caching mechanisms mentioned in the documentation. Let us first understand those mechanisms so that we can appreciate what unstable_cache brings to the table.
With request memoization, the fetch API automatically memoizes requests that have the same URL and options during a render cycle of the React component tree.
Let’s say we have a server-rendered React component called Parent that looks something like this:
export default function Parent() {
  return (
    <div>
      <Child/>
      <Child/>
      <Child/>
    </div>
  )
}
Say that the child component has some code to make an API call like this:
async function getData() {
  const res = await fetch('https://.../data')
  return res.json()
}
const item = await getData()
Notice that there are three Child components inside the Parent component. This means that the function getData will be called three times. But, because of request memoization, the fetch API will only make the API call once and return the same result for all the calls without the need for any explicit configuration. That is because the rendering of these three child components is happening in the same render cycle of the React component tree.
Then, there is the Data Cache that persists API results across server requests. Caching is enabled by default, and we can configure it in a more granular manner using the cache option in the fetch request. This is different from request memoization because the Data Cache persists the results across server requests.
Continuing from our previous example, if we refresh the Parent component page after its initial render, the API call won’t reach out to the original data source ('https://.../data'). Instead, it returns the cached result from the Data Cache, which was filled during the previous request. To prevent this default behavior and fetch from the original data source, we can pass the option { cache: 'no-store' } to the fetch request.
The Full Route Cache is the type of caching wherein Next.js automatically renders and caches routes at build time. To understand this, we need to understand the steps that take place every time a component is rendered in Next.js:
Thus, a static route gets cached in the Data Cache at build time and a dynamic route gets cached the first time it is accessed.
The Router Cache is an in-memory version of the cache that is stored on the client (browser) as opposed to the Full Route Cache, which gets stored on the server. An interesting thing to note is that the Router Cache is split by route segments. This means that if we have a common layout for pages A and B, then the layout gets cached when either of these two components is rendered. The layout does not need to be rendered the second time because it has already been cached.
unstable_cache APIWith all of that understood, we can now learn where the unstable_cache API fits in. In our previous examples, the common underlying assumption was that all the data fetching would happen via the fetch API. As the fetch API is already modified by Next.js to support memoization, we did not have to do much apart from configuring a few options.
But, what about the cases where our external data comes from some DB clients or GraphQL clients? In those cases, we would not be able to use the fetch API and that is when a function like unstable_cache is necessary to wrap the database call function and explicitly memoize it.
Right now, the Next.js official documentation suggests using the React cache function for this purpose because the Next.js cache API is still unstable. In a later section, we will cover the differences between the Next.js cache API and the React cache API.
unstable_cache APIIn this section, we will follow a hands-on example to better understand how the unstable_cache API works. We’ll use the Next.js CLI to create a fresh project:
npx create-next-app@latest nextjs-cache-example
Answer the prompts and then navigate to the project directory to start the dev server:
npm run dev
This brings up the Next.js dev server on http://localhost:3000, which looks like this:

Create a new folder inside the app directory called tasks. This folder will hold the page.js that links to the /user route. This route will show information related to a user including their ID, name, and email.
To test the capabilities beyond the fetch API, we will be creating a key-value store using Vercel storage. You can follow this quickstart guide on the official Vercel documentation to create a KV store connected to your project.
After creating the store and connecting it with the project, we will use the CLI from the Storage menu of the project. We will run this command to create a hash key-value pair:
hset user:123 email [email protected] id 123 name "Test User"
We will now set up the /user route to fetch the data from the KV store. Once we have that JSON, we will map over the keys to show the key-value pairs on the page. This is what the component code inside the page.js file looks like:
import styles from "../page.module.css";
import { kv } from '@vercel/kv';

export function getUser() {
  return kv.hgetall('user:123');
}

export default async function User() {
  const user = await getUser();

  return (
    <main className={styles.main} >
      <div className={styles.description}>
        {Object.keys(user).map((key) => (
          <div key={key}>
            <code className={styles.code}>{key}:</code>
            {user[key]}
          </div>
        ))}
      </div>
    </main>
  )
}
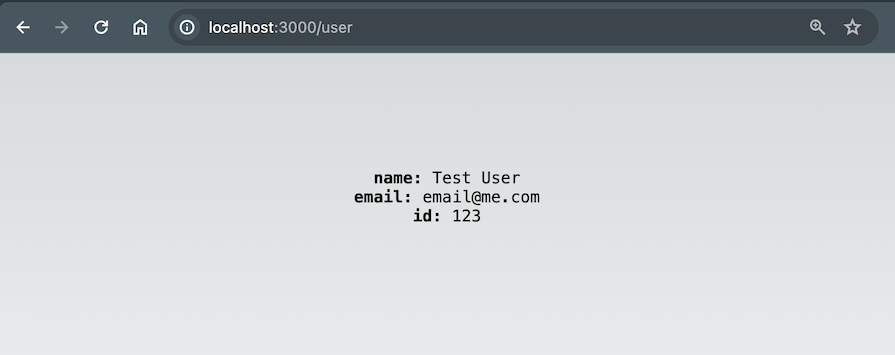
This is the information it displays based on the data that we added to the KV store:
We will now create an edit page, which will be a client-side route and will have a single button to allow us to edit user information.
First, create a page.js file inside the edit folder inside the app directory. This is what the component code looks like:
'use client'
import styles from "../page.module.css";
import { editUser } from '../actions.js';

export default function Tasks() {
  return (
    <main className={styles.main} >
      <div className={styles.description}>
        <button className={styles.button} onClick={async () => {
          await editUser()
        }}>Edit User</button>
      </div>
    </main>
  )
}
Notice the 'use client' at the top of the component that makes this a client-side route and allows us to configure action handlers like the onClick handler. This is how the page looks, with just a single button:

We can also see that we are triggering a server action called editUser when the button is clicked. This is what the actions.js file looks like:
'use server'
import { kv } from '@vercel/kv';

export async function editUser() {
  try {
    await kv.hset('user:123', { id: 123, email: '[email protected]', name: 'Test User' });
  } catch (error) {
    console.log('error while editing user')
  }
}
Notice the 'use server' at the top of the page. Also, notice how we can directly write code that talks to the KV store as we are sure this code will run on the server.
We have configured the code such that when we click the Edit User button, the email of the user will change to [email protected] and we are expecting it to reflect on the /user page.
But when we click the button and visit the /user page, we see that the email has not changed. This is because of the Full Route Cache that we mentioned earlier. Here’s a GIF that shows the edit action and the user page:

Next.js has a utility that allows us to fix this issue. The utility is called revalidatePath and it is exported from the next/cache module. We can use this utility to invalidate the cache of the /user route when the user information is edited. This is what the updated actions.js file looks like this:
try {
  await kv.hset('user:123', { id: 123, email: '[email protected]', name: 'Test User' });
  revalidatePath('/user')
} catch (error) {
  console.log('error while editing user')
}
By calling the revalidatePath function, we are telling Next.js that modifying the user information in the DB should invalidate the cache of the /user route and that Next.js should re-render the /user route with the updated information.
Now, when we click the Edit User button, the email of the user changes to [email protected] and it also gets updated on the /user page. Here’s a GIF that shows the edit action and the user page:

But there’s a small caveat with this approach. Because we modified a small detail for a user, we invalidated the cache for the whole /user route. In real-world applications, it might be the case that the route shows us lots of information and the user information might just be a small part of it. In such cases, we would prefer a more granular control over the cache invalidation.
unstable_cache for granular controlThis is where the unstable_cache API can be useful. We will first cache the result of our call to the DB inside our page.ts in the /user route. This is what the updated code looks like:
import { unstable_cache } from 'next/cache';

export function getUser() {
  return kv.hgetall('user:123');
}

const getCachedUser = unstable_cache(
  async () => getUser(),
  ['my-app-user'],
  { tags: ['user'] }
);

export default async function User() {
  const user = await getCachedUser();
  // rest of the component
}
Notice the unstable_cache function that takes our original getUser function as an argument. We have dual benefits from using this function:
tags option with the value ['user']. This is important because we can use the tags option to have granular control over the cache invalidationTo take advantage of this granular control, we just have to change the revalidatePath(/user) to revalidateTag('user') in the actions.js file. And that’s it!
To test out the code, let’s change the email to [email protected] this time:
await kv.hset('user:123', { id: 123, email: '[email protected]', name: 'Test User' });
Here’s what the updated behavior looks like:

It looks the same as the previous example but this time we have a more granular control over the cache invalidation. We can now invalidate the cache of only the API and not the entire /user route.
cache APIAt this point, we also need to talk about a React function that is similar to the unstable_cache function. This function is called the cache function and it is exported from the react module. This is what the code looks like:
import {cache} from 'react';
import calculateReport from 'lib/reports';

export const getReport = cache(calculateReport);

function Chart({data}) {
  const report = getReport(data);
  // ...
}
As we can see, this takes just one argument, which is the function we want to cache. When we want to cache an API call, that function will be an async function that wraps that API call. While calling the function, we need to pass the arguments that we would normally pass to the uncached function. If the cached function is called with the same argument again, the cached result will be returned.
While this can be useful, we would prefer to use the Next.js cache API because of how seamlessly it integrates with the invalidation strategies that Next.js provides.
For example, unlike before, there is no way to link the cached function with tags and then use it for invalidation.
The React cache function is best utilized for caching expensive calculations inside client components where invalidation is not a concern. Another good use case for the React cache function is when you want to “prefetch” some data.
Let’s say that we have a parent component similar to the Chart component that calls the cached getReport function but does not use its result. In that case, it might look like this:
function Chart({id}) {
  getReport(id);
  return (
   <>
     <MiniChart id={id} />
   </>
  );
}
Then, the MiniChart function is the one that actually uses the data returned by the getReport function:
import getReport from './Chart;

function MiniChart({id}) {
  const report = getReport(id);
  return (
   <>
     // use the report here
   </>
  );
}
In this way, the parent pre-fetches the data even though it does not use any of it. However, the data is more likely to be available by the time the child component gets to use it.
In this article, we learned about the different caching strategies in Next.js. We explored the unstable_cache function and learned how it can be used to cache the result of DB queries that do not involve the fetch API. The use of tags also offered granular control over cache invalidation, enhancing efficiency.
It is great to see that Next.js finally has a low-level cache API that can be used to cache the results of expensive operations. Developers now have a choice between this and higher-level caching methods, or integrating the React cache function, based on their specific needs.
Debugging Next applications can be difficult, especially when users experience issues that are difficult to reproduce. If you’re interested in monitoring and tracking state, automatically surfacing JavaScript errors, and tracking slow network requests and component load time, try LogRocket.
LogRocket captures console logs, errors, network requests, and pixel-perfect DOM recordings from user sessions and lets you replay them as users saw it, eliminating guesswork around why bugs happen — compatible with all frameworks.
LogRocket's Galileo AI watches sessions for you, instantly identifying and explaining user struggles with automated monitoring of your entire product experience.
The LogRocket Redux middleware package adds an extra layer of visibility into your user sessions. LogRocket logs all actions and state from your Redux stores.


Modernize how you debug your Next.js apps — start monitoring for free.

I tested the Speculation Rules API in a real project to see if it actually improves navigation speed. Here’s what worked, what didn’t, and where it’s worth using.

How AGENTS.md and agent skills improve coding agents, reduce mistakes, and make AI IDE workflows more reliable and project-aware.

Build a simple, framework-free Node.js app, and then deploy it to three different services that offer a free tier, Render, Railway, and Fly.io.

Understand best practices for structuring Node.js projects, such as separating roles using folder structures and practicing modular code.
Hey there, want to help make our blog better?
Join LogRocket’s Content Advisory Board. You’ll help inform the type of content we create and get access to exclusive meetups, social accreditation, and swag.
Sign up now


2 Replies to "Caching in Next.js with unstable_cache"
Is Full Route Cache the reason why the result did not change when moving to `/users` without `revalidatePath()`?
Thank you for cool post!
Thank you for this detailed explanation. It was fun seeing my data change in real time rather than reloading the entire page