Editor’s note: This article was last updated by Fimber Elemuwa on 8 March 2024 to include information about how to deploy a Nextron app to production as well as best practices for ensuring the security of your Electron and Next.js apps.
Since the introduction of Node.js, basic web technologies (HTML, CSS, and JavaScript) have grown so much that we can now build multi-device/multi-platform applications with them. This massive development also resulted in the introduction of frameworks and libraries, which further simplified our job. Next.js and Electron are significant examples on this list.
In this article, we’ll explore Nextron, a package that combines the powerful features of Next.js and Electron to enable us to create multi-platform desktop applications in a simple and enjoyable way.
The following prerequisites are required to follow along with this tutorial:
Electron is an open source JavaScript library that allows you to create cross-platform desktop applications using web technologies. Behind the scenes, Electron utilizes Node.js and the powerful Chromium engine to render applications created with basic web technologies as desktop applications. As a result, if you’re already familiar with the process of creating a website, you can also create a desktop application for different OS platforms with Electron.
Electron offers several advantages, such as:
Despite Electron’s many advantages, it also has some drawbacks:
Using two fantastic technologies, Nextron enables us to rapidly create desktop applications. And, as you’ll see in this tutorial, creating a desktop application with Nextron is both simple and enjoyable.
You can easily create a new Nextron application by running:
npx create-nextron-app my-app
Nextron also provides various example templates that support TypeScript as well as popular CSS frameworks, such as Tailwind CSS, Ant Design, Material UI, and Emotion. All of the templates can be found here, and after deciding which to choose for your project, you can install them by prefixing the installation command with the preferred example template along with the --example flag.
So if you want to use the TypeScript and Tailwind templates, you’ll have to run:
npm init nextron-app my-app --example with-typescript-tailwindcss
Running the installation command will create all the necessary files and directories for our project. However, we’ll still need to install all the required dependencies with the command below:
npm install
# OR
yarn
Once this is completed, we can start our application with either of the following commands:
npm run dev
# OR
yarn dev
This will immediately open a new window for our application, as shown in the image below:
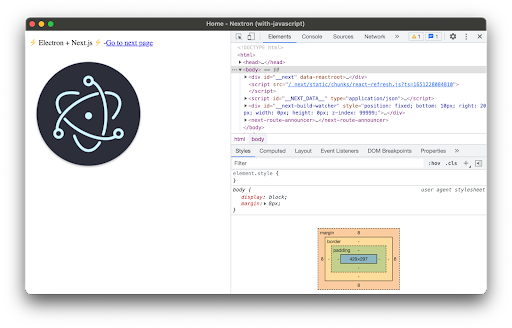
You can also close the dev tool so that you can access the application fullscreen.
While there may be minor changes, mostly depending on the example template you choose during installation, the file structure for a typical Nextron project is as follows:
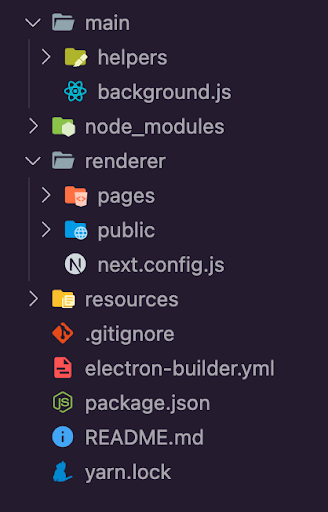
And as you might have noticed, all the Next.js-related code is located inside the /render folder. Some other files and directories that you might not be familiar with include:
main/helpers: This directory exports a module called createWindow, which uses Electron’s BrowserWindow function to create our desktop application window. We can configure the default app window options here, such as its initial size and positionmain/background.js: This file is where the createWindow function is initialized and is responsible for serving our Next.js application as an Electron applicationresources/: Here, we can put our desktop application resources, such as app iconsIt’s easy to grasp how Nextron works behind the scenes. It automatically checks if your application is running in development mode or production. If in development mode, Nextron takes the localhost URL generated by running a Next.js application and serves it as an Electron app. However, if in production, Nextron takes the static files generated from a Next.js build and renders them instead.
Pages function exactly the same way as they would in a standard Next.js application, with no exception. To try things out, let’s create a new sample.js file inside the renderer/pages directory with the following content:
import Link from "next/link";

const sample = () => {
  return (
    <>
      <div>
        <h1>Hello world</h1>
        <p>Welcome to sample page</p>
        <Link href="/home">
          <a>Go Home</a>
        </Link>
      </div>
    </>
  );
};

export default sample;
Also, update the default home.jsx file in this same directory with the content below, so that it links to our new page instead:
import Link from "next/link";

const Home = () => {
  return (
    <>
      <h1>Hello World</h1>
      <p>Welcome to my Nextron desktop app</p>
      <Link href="/sample">
        <a>Go to sample page</a>
      </Link>
    </>
  );
};

export default Home;
We have the following results:
Layouts operate just as they would in a regular Next.js application, with no exceptions. For example, suppose we have a navbar that we want to share across multiple pages in our desktop application. First, we’ll need to create our layout file; for example, a new layout.js file within the /renderer directory with the following content:
import React from "react";
import Navbar from "./components/navbar";

const Layout = ({ children }) => {
  return (
    <>
      <Navbar />
      <main>{children}</main>
    </>
  );
};

export default Layout;
And because Nextron doesn’t automatically include the _app.js file, which would normally come with an application created with the create-next-app package, we’ll have to create one manually as well and include our layout. Note that this should be done just outside the pages folder:
//_app.js
import Layout from "../layout";

export default function MyApp({ Component, pageProps }) {
  return (
    <Layout>
      <Component {...pageProps} />
    </Layout>
  );
}
With a little CSS applied to the navbar and the pages we’ve previously generated, we’ll get the following results:
Browser-based APIs and the Electron APIs work graciously too, and you can directly import them into any page. An example is the browser notification API, which we can utilize on a page like below:
const showNotification = () => {
    const notificationTitle = "My Notification 🔔";
    console.count("Start Notify");
    new Notification(notificationTitle, {
      body: "This is a sample notification.",
      renotify: true,
      tag: "test",
    }).onclick = () => console.log("Notification Clicked");
  };
And any time we perform an action that triggers the showNotification function, we’ll immediately get a notification on our desktop. Here’s an example of a macOS notification:
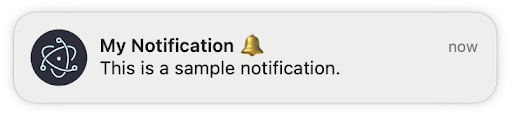
Note that the Notification API requires user permission to display notifications, which is typically requested when the page is first loaded or when the Notification constructor is called for the first time.
Nextron applications via Next.js run on two different webpack processes, namely the client process and server process. With this in mind, it’s critical to determine which process you’re in, especially if you intend to use libraries that don’t support server-side rendering.
You should check if the current process is server or client. According to the Nextron documentation, here’s the recommended syntax for checking this for an Electron module:
const Home = () => {
  if (typeof window !== "undefined") {
    // your client side code goes here --> eg: alert("YAY")
  };
export default Home;
Optionally, you can leverage React’s useEffect() Hook and the browser’s window to check if you’re currently on the client process, like so:
import { useEffect } from "react";

const Home = () => {
  useEffect(() => {
    // your client side code goes here --> eg: alert("YAY")
  }, []);
};
export default Home;
Once you’re done coding your application, you’ll want to generate an executable file to share the application with others. Nextron handles this with electron-builder. We can generate the executable for our Nextron project with the command below:
npm run build
# OR
yarn build
You can also update the script section in your package.json file to include other build options:
. . .
{
  "scripts": {
    "build": "nextron build",
    "build:all": "nextron build --all",
    "build:win32": "nextron build --win --ia32",
    "build:win64": "nextron build --win --x64",
    "build:mac": "nextron build --mac --x64",
    "build:linux": "nextron build --linux"
  }
}
So, if we want to generate an executable for Windows 64-bit, we’ll use the following command:
npm run build:win64
# OR
yarn build:64
To install and deploy your application locally, simply navigate to the “dist” directory and locate the setup or installer file. Clicking on the setup initiates the installation process, guiding users through the setup wizard:
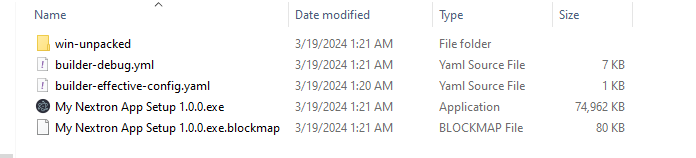
Once installed, users can launch your application and experience its functionalities seamlessly.
Nextron is ideal for building desktop applications that run across multiple operating systems, so you can deploy your Nextron app on:
.tar.gz) containing the necessary executables and resourcesWhen developing Electron and Next.js applications, you have to pay attention to the security needs of both frameworks to ensure the safety and integrity of your application. Here are some security best practices to consider:
In this article, we’ve looked at Nextron, a JavaScript package that allows us to effortlessly create desktop applications with Electron and Next.js. We looked at how to create new pages, application layout, and new windows, how to use Electron APIs, how to check which webpack process you’re in, and how to generate executable files for your application.
Debugging Next applications can be difficult, especially when users experience issues that are difficult to reproduce. If you’re interested in monitoring and tracking state, automatically surfacing JavaScript errors, and tracking slow network requests and component load time, try LogRocket.
LogRocket captures console logs, errors, network requests, and pixel-perfect DOM recordings from user sessions and lets you replay them as users saw it, eliminating guesswork around why bugs happen — compatible with all frameworks.
LogRocket's Galileo AI watches sessions for you, instantly identifying and explaining user struggles with automated monitoring of your entire product experience.
The LogRocket Redux middleware package adds an extra layer of visibility into your user sessions. LogRocket logs all actions and state from your Redux stores.


Modernize how you debug your Next.js apps — start monitoring for free.

Learn how to protect full-stack projects from NPM supply chain attacks with a practical security checklist.

Explore 15 essential MCP servers for web developers to enhance AI workflows with tools, data, and automation.

Learn how contrast-color() automatically picks accessible text colors using native CSS, without JavaScript.

Learn how to build a harness-style AI workflow using Claude Code with specialized Dev, QE, and Ops subagents, gated handoffs, MCP telemetry, and LEARNING.md.
Would you be interested in joining LogRocket's developer community?
Join LogRocket’s Content Advisory Board. You’ll help inform the type of content we create and get access to exclusive meetups, social accreditation, and swag.
Sign up now

