An on-site search feature allows users to quickly query data, providing relevant information as a result. If your search feature is ineffective, users may exit your application without satisfying their needs, creating a bad user experience leading to bad conversion rates.

In this tutorial, we’ll build a search feature using Lyra and TypeScript and learn how to push notifications from your application to different platforms.
POST request from a Next.js API routePOST requestTypeScript is a superset of JavaScript that you can use to build and manage small to large-scale JavaScript applications. Strongly typed and precise, TypeScript offers easy code management for team collaborations.
JavaScript is an interpreted programming language and therefore involves no code compilation. Errors are caught during the application’s run time. Since TypeScript compiles into JavaScript, errors are reported during the compile-time rather than the runtime. Errors are well detailed, making them easier to debug and fix.
TypeScript also includes optional static typing along with its type inference system. In the event that a user creates a variable with no specified type, TypeScript assigns it one based on its value.
In a web application, a site search feature allows the site’s visitors to filter what content they obtain based on a search term that they enter into a provided input field. As a result, site visitors can easily find relevant information fitting their needs, reducing a web application’s bounce rate.
Lyra is an easy-to-integrate, full-fledged search feature developed with TypeScript. Lyra helps developers perform lightning-fast data queries, and it can also provide suggestions, auto-completes, and error tolerance for user search queries.
Apprise is a lightweight notification service that allows developers to send notifications to different platforms simultaneously, including social media platforms, mail, and SMTP services.
To use TypeScript, we’ll need to install a TypeScript compiler. We can perform a global install for TypeScript with the following command:
npm install -g typescript
Once the installation is complete, in a working directory, run npm init--y to initialize npm with the default settings.
Next, we can create a TypeScript config file that lets us configure the behavior of our TypeScript file, including what version of JavaScript our TypeScript files will be converted to, the destination folder for converted files, an option to allow JavaScript files, and Jsx, the root directory where all of our TypeScript files will be stored. There are many available options that are commented out by default and can be enabled if needed.
To create a config file in the directory, type tsc--init in the CLI and hit the enter button. TypeScript allows the user to define what directories the TypeScript file and the converted JavaScript files will be stored in. These folders are conventionally called src and dist folders, respectively. To do so, modify the config file tsconfig.json as follows:
//...
    "rootDir": "./src",
/* Specify the root folder within your source files. */
//...
    "module": "ES6",                                /* Specify what module code is generated. */
//...
    "outDir": "./dist",
/* Specify an output folder for all emitted files. */
To compile TypeScript files into JavaScript, we can use the Tsc compiler and the name of the file to be compiled.
Alternately, to avoid having to manually compile our TypeScript files, we can set up our compiler to watch for changes in the file and recompile whenever it detects them. For this, we’ll modify the start script in our package.json file to run the watch command:
//...
 "scripts": {
    "start": "tsc --watch"
  },
With the src directory specified, TypeScript will automatically watch for changes in the TypeScript files in this folder and automatically convert them to JavaScript files in the dist directory.
For our site search feature, we‘ll use TypeScript and Lyra. To set up TypeScript, open up the directory of your choice on your local machine and start an instance of the command line interface. In the terminal environment, run the following command to install the TypeScript compiler:
npm insta f
You can check what version of the TypeScript compiler you have installed with the typescript -v command.
To easily use Node modules with TypeScript, we’ll require a bundler; for this, we’ll use Next.js. To set up Next.js with TypeScript on your local machine, run the following command in the directory of your choice:
npx create-next-app@latest --ts
To install the Lyra search dependency, run the following:
cd <name of your application created with the above command>
npm i @lyrasearch/lyra
The last dependency we’ll require in our application is Apprise, which we’ll use to send notifications on data queried by our Lyra search field. We’ll install Apprise later in this tutorial.
For our application, we’ll first create our input field that will use Lyra, after which we’ll add and query data using it. Modify the index.txs file in the pages directory as follows:
import type { NextPage } from 'next'
import Head from 'next/head'
import { useState } from 'react'

const Home: NextPage = () => {
  const [query, setQuery] = useState('')
  return (
    <div>
      <Head>
        <title>Create Next App</title>
        <meta name="description" content="Generated by create next app" />
        <link rel="icon" href="/favicon.ico" />
      </Head>
      <div className="maincontainer">
        <input type="text" id="input" placeholder="Enter your search term" value={query} onChange={(e)=>{setQuery(e.target.value)}} />
        <div id="results">{/* display search results  */}</div>
      </div>
    </div>
  )
}
export default Home
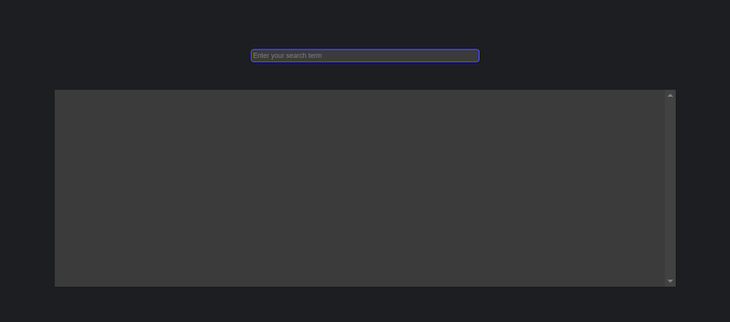
In the code above, we have created our basic input field and display area. To style our application, add the following code to global.css:
html,
body {
  padding: 0;
  margin: 0;
  font-family: -apple-system, BlinkMacSystemFont, Segoe UI, Roboto, Oxygen,
    Ubuntu, Cantarell, Fira Sans, Droid Sans, Helvetica Neue, sans-serif;
}
a {
  color: inherit;
  text-decoration: none;
}
* {
  box-sizing: border-box;
}
@media (prefers-color-scheme: dark) {
  html {
    color-scheme: dark;
  }
  body {
    color: white;
    background: black;
  }
}
.maincontainer{
  min-height: 100vh;
  background: #1c1e21;
  display: flex;
  justify-content: center;
  align-items: center;
  flex-direction: column;
}
#results{
  display: grid;
  margin-top: 55px;
  grid-template-columns: 1fr 2fr 1fr;
  gap: 20px;
  padding: 14px;
  width: 85%;
  height: 60vh;
  overflow-y: scroll;
  background: #3b3b3b;
}
#input{
  height: 25px;
  margin-top: 25px;
  width: 450px;
  outline: none;
  border: 2px solid rgb(72, 72, 255);
  padding-left: 2px;
  border-radius: 5px;
  background: #3b3b3b;
}
If we run our application with the npm run dev command, we’ll get a result similar to the image below:
Next, we’ll add the Lyra dependency to our input field using the index.tsx file in our pages directory:
import { create, search, insert } from "@lyrasearch/lyra";
In the code block above, we imported the create, search, and insert methods from Lyra. These three methods will carry out the following functionalities.
createWe’ll use the create method to define the schema of the data that we’ll store. We’ll also define the data type for each property. The code below illustrates an example of this:
const newMovies = create({
      schema: {
        name: "string",
        downloadURL: "string",
        rating: "number",
      },
    });
We create an instance of Lyra called newMovies. Its schema would contain three sets of values, name, downloadURL, and rating. Therefore, any data being added to the newMovies instance must contain these fields.
searchThe search method is used to query the data stored in the created instances, and we’ll use this to carry out our search functionality.
insertWe use the insert method to add new data to the created instances:
 insert(newMovies, {
      name: "The Shawshank Redemption",
      downloadURL: "https://www.imdb.com/title/tt0111161/",
      rating: 9.3,
    });
In the code above, we inserted new data into the newMovies instance. To create our Lyra instance, make the following additions to index.tsx:
import { useState, useEffect } from "react";
import {
  create,
  search,
  insert,
} from "@lyrasearch/lyra";
const Home: NextPage = () => {
  const [query, setQuery] = useState("");
  const [results, setResults] = useState([]);
  const newMovies = create({
    schema: {
      name: "string",
      downloadURL: "string",
      rating: "number",
    },
  });
  insert(newMovies, {
    name: "The Shawshank Redemption",
    downloadURL: "https://www.imdb.com/title/tt0111161/",
    rating: 9.3,
  });
  insert(newMovies, {
    name: "The Godfather",
    downloadURL: "https://www.imdb.com/title/tt0068646/",
    rating: 9.2,
  });
  insert(newMovies, {
    name: "The Godfather: Part II",
    downloadURL: "https://www.imdb.com/title/tt0071562/",
    rating: 9.0,
  });
  insert(newMovies, {
    name: "The Dark Knight",
    downloadURL: "https://www.imdb.com/title/tt0468569/",
    rating: 9.0,
  });
  insert(newMovies, {
    name: "Superman",
    downloadURL: "https://www.imdb.com/title/tt0078346/",
    rating: 7.3,
  });
  insert(newMovies, {
    name: "Batman Begins",
    downloadURL: "https://www.imdb.com/title/tt0372784/",
    rating: 8.3,
  });
  insert(newMovies, {
    name: "The Dark Knight Rises",
    downloadURL: "https://www.imdb.com/title/tt1345836/",
    rating: 8.5,
  });
  useEffect(() => {
    const searchresults = search(newMovies, {
    //search here
  }, [query]);
We created a Lyra instance called newMovies and used the insert method to add movies to it. We used the useEffect Hook and the search method to query the newMovies instance and return results that matched the input in our search field.
To return search results in our application, we’ll update the results state with the result from our search method. We’ll render this array in our application as follows:
//useEffect
 const searchresults = search(newMovies, {
      term: query,
      properties: '*',
    });
    setResults(searchresults.hits);
Then, in our return block, add the following code:
<div id="results">
{/* display search results */}
{/* {console.log(results)} */}
{results.length > 0 ? (
results && results.map((movie, index) =>
<div key={index} style={{background: "#1c1e21", height: '200px', paddingLeft: "13px"}}>
<h3>{movie.name}</h3>
<a href={movie.downloadURL} style={{color: "blueviolet"}} target="_blank" rel="noreferrer" >Download URL</a>
<p>Movie Rating: {movie.rating}</p>
</div>
)
) : (
<div style={{textAlign: "center", fontSize: "25px"}}>No results found</div>
)}
</div>
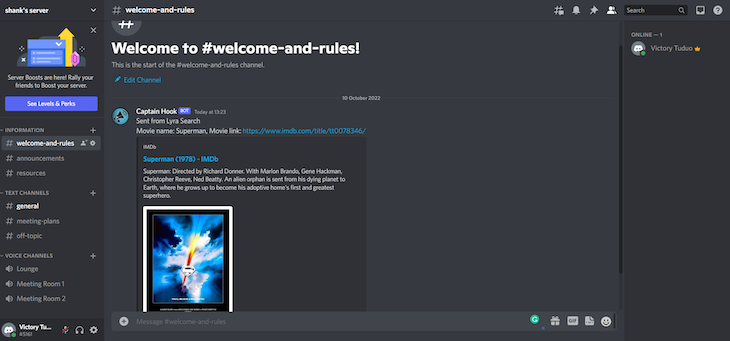
When our results state returns a value with an array length greater than zero, we render the content from our Lyra search result. Otherwise, we return a simple text reading No results found. Now, if we run our application with the npm run dev command, we’ll get the following result:
To install Apprise, you’ll require Docker on your local machine. If you don’t already have Docker set up, you can follow this guide to install it.
With Docker installed, we can install Apprise by running docker pull caronc/apprise in the terminal. Once the installation is complete, we can start Apprise by selecting the Images option on the left navigation bar and running Apprise on the new window that opens up:
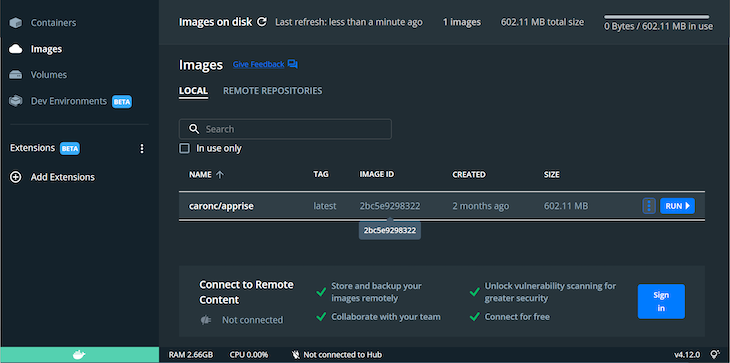
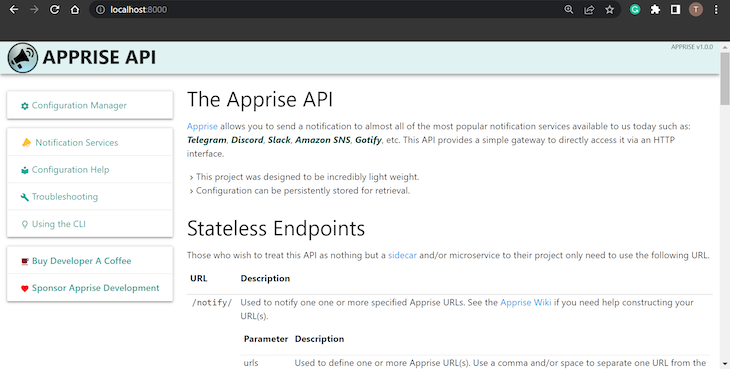
Under the additional settings, you can specify a name or port for Apprise and click run to start the server. With Apprise running, opening up the URL in your browser will produce the following result:
POST request from a Next.js API routeWe’ll send notifications to Discord and Telegram. We’ll need the following configurations:
For Discord, we’ll require the webhook id and webhook token for the channel we wish to send notifications to. You can obtain this from the Settings tab of the Discord channel under the Integrations pane:
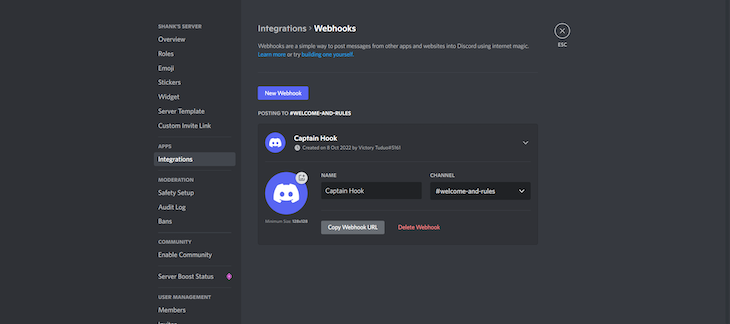
Click on Copy Webhook URL to obtain a URL containing your ID and Hook. Then, create a URL as follows:
discord://{your webhook id}/{your webhook token}
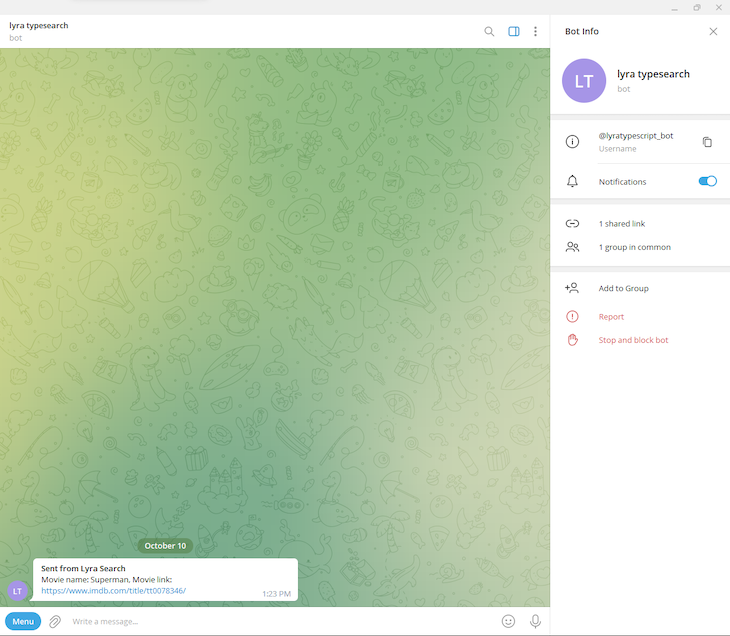
To send notifications to Telegram, we’ll first need to set up a Telegram bot, BotFather. To message the bot, reference the steps in the docs.
I’ve created a new bot called lyratypescript_bot, but you can name your bot whatever you wish. Create a Telegram URL using the format below:
tgram://<your telegram bot token>/
POST requestWith our Apprise server up and running, we’ll define a POST request in our api directory to post the details from our newMovies instance whenever a movie is clicked on. In the api folder, create a new file called sendnotifications.ts and add the following code to it:
// Next.js API route support: https://nextjs.org/docs/api-routes/introduction
import type { NextApiRequest, NextApiResponse } from "next";
import axios from "axios";
type Data = {
  name: string;
};
export default async function handler(
  req: NextApiRequest,
  res: NextApiResponse<Data>
) {
  let headersList = {
    Accept: "*/*",
    "Content-Type": "application/json",
  };
  let bodyContent = JSON.stringify({
    urls: "<discord URL>, <telegram URL>",
    title: "Sent from Lyra Search",
    body: `Movie name: ${JSON.parse(req.body).title}, Movie link: ${JSON.parse(req.body).Movielink}`,
    tag: "all",
  });
  let reqOptions = {
    url: "http://localhost:8000/notify/",
    method: "POST",
    headers: headersList,
    data: bodyContent,
  };
  let response: Data = await axios.request(reqOptions);
  console.log(response.data);
  res.status(200).json(response.data);
}
In our index.tsx file, we can create a POST request with our movie data to this api URL:
//function to send notifications
const sendnotifs = async (notification) => {
    const response = await fetch("/api/sendnotifications", {
      method: "POST",
      body: JSON.stringify({
        title: notification.name,
        Movielink: notification.downloadURL,
        rating: notification.rating,
      }),
    });
    const data = await response.json();
    console.log(data);
  };
Then, in our results display container, we’ll add an onClick handler to run this function, passing the movie as an argument:
//....
<div
  key={index}
  style={{
    background: "#1c1e21",
    height: "200px",
    paddingLeft: "13px",
  }}
  onClick={() => {
    sendnotifs(movie);
  }}
>
Now, when we click on any of the movies, we get a response sent to Discord and Telegram:
In this tutorial, we learned how to use Lyra to perform search functionality and how to handle push notifications with Apprise. We reviewed the benefits of adding search functionality to your web application, and we saw how easy it is to set up and get started with Lyra and TypeScript.
If you have any questions, feel free to leave a comment below. Happy coding!

LogRocket lets you replay user sessions, eliminating guesswork by showing exactly what users experienced. It captures console logs, errors, network requests, and pixel-perfect DOM recordings — compatible with all frameworks, and with plugins to log additional context from Redux, Vuex, and @ngrx/store.
With Galileo AI, you can instantly identify and explain user struggles with automated monitoring of your entire product experience.
Modernize how you understand your web and mobile apps — start monitoring for free.
Would you be interested in joining LogRocket's developer community?
Join LogRocket’s Content Advisory Board. You’ll help inform the type of content we create and get access to exclusive meetups, social accreditation, and swag.
Sign up now
This guide explores how to use Anthropic’s Claude 4 models, including Opus 4 and Sonnet 4, to build AI-powered applications.

Which AI frontend dev tool reigns supreme in July 2025? Check out our power rankings and use our interactive comparison tool to find out.

Learn how OpenAPI can automate API client generation to save time, reduce bugs, and streamline how your frontend app talks to backend APIs.

Discover how the Interface Segregation Principle (ISP) keeps your code lean, modular, and maintainable using real-world analogies and practical examples.


