Tesseract.js is an open source text recognization engine that allows us to extract text from an image. Another word for this technology is Optical Character Recognition, or OCR.

OCRs work by scanning images and extracting their text as a machine-readable file. For example, imagine you have an image of a letter that you’d like to copy. In this scenario, Tesseract can allow your computer to copy and paste the letter’s content by extracting text from your image.
A great benefit of Tesseract is that it supports more than 100 languages in case you need to extract text in a language other than English.
In this article, we’ll learn about Tesseract, what we can do with it, and demonstrate how it works by creating an example image-to-text conversion app with React.
The app we are going to make is very simple; we’ll have a “choose image” option, then after selecting the image we will do some processing, and finally show the scanned text. Simple, right?
Our finished app will look like this:
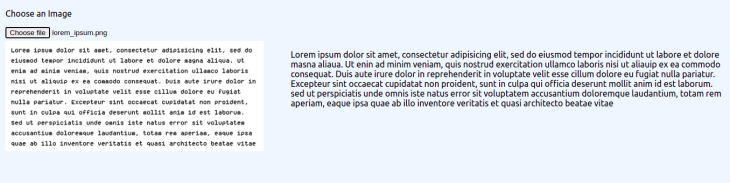
At the top, we have a “choose image” button. Below it will show the uploaded image, and to the right we have converted text.
To make this app, we have to first create a React app. To do so, we will use the Create React App command-line tool.
Open your terminal and write the following:
npx create-react-app <your_app_name>
After creating the app, we need to install Tesseract.
Open your terminal in your project’s directory and install with the following:
yarn add tesseract.js
or
npm install -S tesseract.js
Now we have installed the Tesseract dependency.
Open the App.js file and input the following to create the UI:
import { useEffect, useState } from "react";
import { createWorker } from "tesseract.js";
import "./App.css";
function App() {
  const [ocr, setOcr] = useState("");
  const [imageData, setImageData] = useState(null);
  const worker = createWorker({
    logger: (m) => {
      console.log(m);
    },
  });
  const convertImageToText = async () => {
    if (!imageData) return;
    await worker.load();
    await worker.loadLanguage("eng");
    await worker.initialize("eng");
    const {
      data: { text },
    } = await worker.recognize(imageData);
    setOcr(text);
  };

  useEffect(() => {
    convertImageToText();
  }, [imageData]);

  function handleImageChange(e) {
    const file = e.target.files[0];
    if(!file)return;
    const reader = new FileReader();
    reader.onloadend = () => {
      const imageDataUri = reader.result;
      console.log({ imageDataUri });
      setImageData(imageDataUri);
    };
    reader.readAsDataURL(file);
  }
  return (
    <div className="App">
      <div>
        <p>Choose an Image</p>
        <input
          type="file"
          name=""
          id=""
          onChange={handleImageChange}
          accept="image/*"
        />
      </div>
      <div className="display-flex">
        <img src={imageData} alt="" srcset="" />
        <p>{ocr}</p>
      </div>
    </div>
  );
}
export default App;
In the above code, we have two states; the first is for OCR text which we will extract, and the second is for the chosen image which will be shown in the UI.
After that we have the worker, which helps Tesseract run in the background; in the createWorker function, we have a logger option.
Next, we created convertImageToText function, which is our main function. It will do exactly what it says: convert our image to text.
First, we load the Tesseract core scripts using the worker.load() function. After that, we load the language trained model from the cache storage. Otherwise, it will download the trained modal from the Tesseract server, cache it, and use it.
After loading the language model, we initialize Tesseract using worker.initialize(), then pass in eng for English, which is our preferred language.
Next, we need to call the recognize function and pass in the image URL. It will return the text as data; after receiving the data, we set it to our ocr state using the setOcr function so that we can show it to the user.
We also have a handleImageChange function, which is triggered when we choose another image. In this function, we read the file and store its data in the imageData state.
Finally, let’s write some JSX for the UI.
In the UI, we have an input tag with type="file" and an onChange prop, which is handled by our handleImageChange function that we wrote previously.
At the the bottom, we are displaying the image using imageData, and showing text using the OCR state.
Now if you run your app, it will convert the text and show it on the UI. However, you will notice that it takes some time to show that text.
To make a better UX, we can add a progress bar while our users wait for the conversion to load:
function App() {
....
....
const [progress, setProgress] = useState(0);

  const worker = createWorker({
    logger: (m) => {
      console.log(m);
      setProgress(parseInt(m.progress * 100));
    },
  });

.....
.....

return (
    <div className="App">
      <div>
        <p>Choose an Image</p>
        <input
          type="file"
          name=""
          id=""
          onChange={handleImageChange}
          accept="image/*"
        />
      </div>
      {progress < 100 && progress > 0 && <div>
        <div className="progress-label">Progress ({progress}%)</div>
        <div className="progress-bar">
          <div className="progress" style={{width: `${progress}%`}} ></div>
        </div>
      </div>}
      <div className="display-flex">
        <img src={imageData} alt="" srcset="" />
        <p>{ocr}</p>
      </div>
    </div>
  );
This way, we can show a percentage progress bar so that user knows how long it will take to convert the image to text.
This will be our final CSS for the UI:
body {
    background-color: aliceblue;
}
.App {
    padding: 10px;
}
input {
    margin-bottom: 5px;
}
img {
    width: 30vw;
    height: auto;
    margin-right: 50px;
}
p {
    width: 50vw;
}
.display-flex {
    display: flex;
}
.progress-label {
    margin-bottom: 5px;
}
.progress-bar {
    background-color: rgb(232, 232, 232);
    border-radius: 10px;
    overflow: hidden;
    margin-bottom: 10px;
    max-width: 50vw;
}
.progress {
    background-color: rgb(0, 255, 170);
    width: 0%;
    height: 10px;
}
Nothing fancy here, just simple CSS rules to make a better UI. Here, we changed the page background color and made a progress bar to indicate progress while we converting image to text.
Congrats folks, now you know how you can utilize the power of Tesseract to make some awesome and mind blowing projects. I hope this article has taught you more about Tesseract and the many possibilities this tool has.
Some other fun things to build with this technology is a maths solving app, where users can upload an image of a math equation, which will be converted to text and solved. Or, you can make an app that detects links from an image and makes them clickable.
Thanks for reading and have a great day. 🙂
Install LogRocket via npm or script tag. LogRocket.init() must be called client-side, not
server-side
$ npm i --save logrocket

// Code:

import LogRocket from 'logrocket';
LogRocket.init('app/id');
// Add to your HTML:

<script src="https://cdn.lr-ingest.com/LogRocket.min.js"></script>
<script>window.LogRocket && window.LogRocket.init('app/id');</script>

I migrated 20 production-style components from Tailwind to StyleX. Here’s what the data showed about LOC, CSS bundle size, build time, and type safety.

A guide for using JWT authentication to prevent basic security issues while understanding the shortcomings of JWTs.

Discover how to build, render, and automate product demo videos with Remotion, replacing traditional screen recordings with reusable React code.

Chrome’s Modern Web Guidance embeds modern web platform skills into AI coding agents, helping them choose native HTML, CSS, and browser APIs over legacy patterns.
Hey there, want to help make our blog better?
Join LogRocket’s Content Advisory Board. You’ll help inform the type of content we create and get access to exclusive meetups, social accreditation, and swag.
Sign up now

