Most full-stack applications separate frontend and backend code into distinct files; most web frameworks are built based on this structure. As the number of files and lines of code increases, it may increase the complexity of your codebase, thereby making it even more difficult to debug. The complexity caused by these separate files was minimized through the introduction of a framework called Tetra.

This tutorial will introduce you to the Tetra framework and its components. You will also learn how to build a simple full-stack blog application that performs CRUD functionalities using Tetra.
We’ll cover the following:
AddPost componentPostItem componentViewPosts componentPostDetail componentUpdatePost componentThe Replay is a weekly newsletter for dev and engineering leaders.
Delivered once a week, it's your curated guide to the most important conversations around frontend dev, emerging AI tools, and the state of modern software.
Tetra is a full-stack framework built with Django on the server side and Alpine.js to perform frontend logic. Tetra allows you to have frontend and backend logic in a unified location and reduces code complexity in your application. It connects the backend implementation with the frontend using a class known as the Component class.
A tetra component is a unit of code that handles its Python, HTML, CSS, and JavaScript logic as an entity in a single Python file. If you’re familiar with the React framework, you can liken the behavior of its components to the Tetra components, except that React components perform only the frontend functionalities.
Components can be either dependent on or independent of one another. This implies that you can invoke one component from another or have it as a standalone component. You can read more information about the tetra component here.
The rest of this tutorial will guide you through how to install Tetra in your Django application and a step-by-step flow of how you’d build a blog app using Tetra. The blog app will be presented from an admin perspective, where you’ll be able to create a new post, update an existing post, delete a post, and view all blog posts.
The application will not include any authentication or authorization layer. The aim is to keep it as simple as possible while focusing on Tetra’s core functionalities.
The first step is to create a virtual environment for the application. Run the following command in your terminal to set up your project directory and virtual environment:
mkdir tetra
cd tetra
python -m venv tetra
cd tetra
Scripts/activate
The next step is to install Django. Since Tetra operates on the Django framework, it is required to integrate Django in your application.
pip install django
django-admin startproject tetra_blog
cd tetra_blog
Next, create the blog app:
python manage.py startapp blog
Add the blog app to the INSTALLED_APPS list in the settings.py file, as shown below:
INSTALLED_APPS = [
    'blog.apps.BlogConfig',
    ...
 ]
Within the app directory, create a components.py file that will contain all the components you’ll build in the project.
After successfully setting up the Django project, the next step is to install the Tetra framework in your application.
pip install tetraframework
In the settings.py file, add tetra to the INSTALLED_APPS list, as shown below:
INSTALLED_APPS = [
    ...
    'tetra',
    'django.contrib.staticfiles',
    ...
]
Ensure tetra is listed before the django.contrib.staticfiles element.
Next, you’ll want to include tetra.middleware.TetraMiddleware at the end of the MIDDLEWARE list. This adds the JavaScript and CSS from your component to the HTML template.
MIDDLEWARE = [
    ...
    'tetra.middleware.TetraMiddleware'
]
Apply the below modifications to the root urls.py file to expose Tetra’s endpoints through your public methods:
from django.urls import path, include
from django.conf import settings
from django.conf.urls.static import static

urlpatterns = [
    ...

    path('tetra/', include('tetra.urls')),
  ] + static(settings.STATIC_URL, document_root=settings.STATIC_ROOT)
Tetra builds your JS/CSS components and packages them using esbuild. This allows you to trace any errors that may occur on the frontend implementation to your source Python files.
npm init
npm install esbuild
If you’re using Windows OS, you’ll have to explicitly declare the build path for esbuild in your settings.py file:
TETRA_ESBUILD_PATH = '<absolute-path-to-project-root-directory>/node_modules/.bin/esbuild.cmd'
The application will perform CRUD functions on a blog post. The Post model will comprise three attributes: title, content, and date.
Add the following code to the models.py file to set up the Post model:
from django.db import models
from django.utils import timezone
from django.urls import reverse


class Post(models.Model):
    title = models.CharField(max_length=100)
    content = models.TextField()
    date_posted = models.DateTimeField(default=timezone.now)


    def __str__(self):
        return self.title
    // generate a reverse url for the model
    def get_absolute_url(self):
        return reverse('post-detail', kwargs={'pk': self.id})
Perform the migration commands to create a table for the model:
python manage.py makemigrations
python manage.py migrate
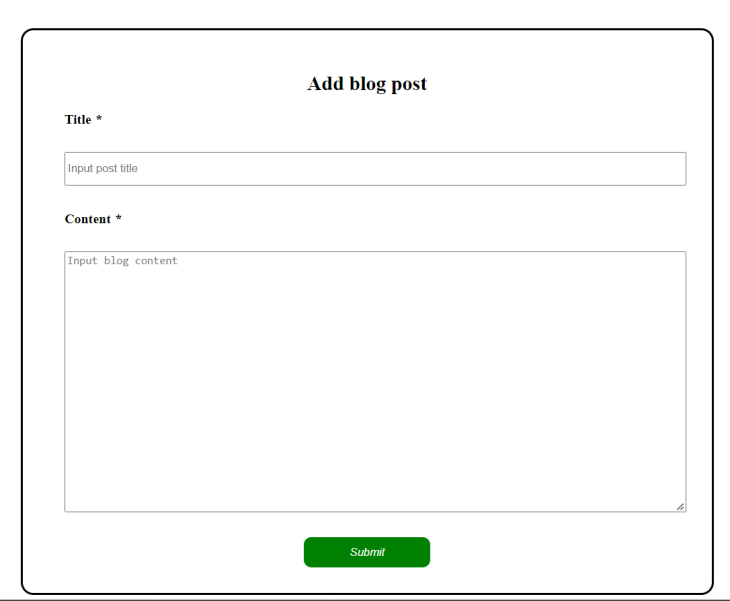
AddPost componentThis component is responsible for rendering the UI to create a new post. It will also contain the Python logic we need to create a Post model and persist the data in the database.
Create add_post.py file in the components folder and add the following code to the file:
from sourcetypes import javascript, css, django_html
from tetra import Component, public, Library
from ..models import Post

default = Library()

@default.register
class AddPost(Component):
    title=public("")
    content=public("")


    def load(self):
        self.post = Post.objects.filter(id=0)


    @public
    def add_post(self, title, content):
        post = Post(
            title = title,
            content = content
        )
        post.save()
In the code above, the AddPost class is a subclass of the Tetra component class, which is the base class upon which you build your custom components. Using the @default.register decorator, you register your AddPost component to the Tetra library.
The title and content variables are public attributes of the component, each with an initial value of an empty string. The values of public attributes are available to the templates, JavaScript, and server logic.
The load method runs when the component initiates, and when it resumes from a saved state. You can think of the load method as the constructor of the component; it runs when you invoke the component from a template.
The add_post method is a public method that receives the title and content as arguments to create a Post instance and then saves it to the database. Just like public attributes, public methods are exposed to the template, JavaScript, and Python. You declare a method as public by adding the @public decorator above the method signature.
Here is the HTML code you should include in the add_post.py file as part of the AddPost component:
template: django_html = """

    <div class="container">
        <h2>Add blog post</h2>
        <label> Title
        <em>*</em>
        </label>
        <input type="text" maxlength="255" x-model="title" name="title" placeholder="Input post title" required/>

        <label> Content
        <em>*</em>
        </label>
        <textarea rows="20" cols="80" x-model="content" name="content" placeholder="Input blog content" required /> </textarea>

        <button type="submit" @click="addPost(title, content)"><em>Submit</em></button>
    </div>

    """
The input field receives the post title and binds it to the title public attribute through the Alpine.js x-model property. Likewise, the textarea receives the content of the blog post and binds the value to the component’s content public attribute.
Using the Alpine.js @click directive within the button tag, the template invokes the JavaScript addPost method:
script: javascript = """
    export default {

        addPost(title, content){
            this.add_post(title, content)
        }

    }
    """
The JavaScript addPost method passes the values obtained from the title and content as arguments to the add_post public method of the component. You can also invoke the add_post public method directly from the HTML template above.
The aim of passing it through the JavaScript function here is to demonstrate how you’d perform a JavaScript operation within your Tetra component. This is helpful for situations in which you want to have more control over the user’s behavior, such as potentially disabling a button after a user has clicked it to prevent them from sending multiple requests while processing previous ones.
Here is the CSS code to style the template:
style: css = """
    .container {
        display: flex;
        flex-direction: column;
        align-items: left;
        justify-content: center;
        border-style: solid;
        width: fit-content;
        margin: auto;
        margin-top: 50px;
        width: 50%;
        border-radius: 15px;
        padding: 30px;
    }

    input, textarea, label{
        margin-bottom: 30px;
        margin-left: 20px;
        ;
    }

    label {
        font-weight: bold;
    }

    input{
        height: 40px;
    }

    h2 {
        text-align: center;
    }

    button {
        width: 150px;
        padding: 10px;
        border-radius: 9px;
        border-style: none;
        background: green;
        color: white;
        margin: auto;
    }

    """
The next step is to invoke the AddPost component from the Django view template. Create a add_post.html file in the blog app templates folder that you created in the previous section of this tutorial. Add the following snippet to the file:
{% load tetra %}
<!Doctype html>
<html lang="en">
  <head>
    <title> Add post </title>
    {% tetra_styles %}
    {% tetra_scripts include_alpine=True %}
  </head>
  <body>
     <form enctype="multipart/form-data" method="POST">
      {% csrf_token %}
      {% @ add_post / %}
    </form>
  </body>
  </html>
This template starts by loading the Tetra template tags into the template. It achieves this through the {% load tetra %} command depicted at the top of the code. You’ll also need to inject the CSS and JavaScript into the template through {% tetra_styles %} and {% tetra_scripts}, respectively.
By default, Tetra doesn’t include Alpine.js in your template. You have to explicitly declare it by adding include_alpine=True when injecting the component’s JavaScript.
The {% @ add_post / %} tag within the form tag invokes the load method of the AddPost component and renders the HTML content you declared above when creating the component.
Notice that the component name used to load the component is in snake case. This is the default configuration for invoking components from templates. You can also set a custom name when you create the component, as shown below:
...
@default.register(name="custom_component_name")
class AddPost(Component):
...
Then you can load the component using {% @ custom_component_name / %}.
Next, add the below snippet to the views.py file:
from django.shortcuts import render

def add_post(request):
    return render(request, 'add_post.html')
Create a urls.py file in the blog app directory and add the following snippet to the file:
from django.urls import path
from . import views


urlpatterns = [
     path("add", views.add_post, name='add-post'),

]
In the root urls.py file, add the below path:
urlpatterns = [
    ...
    path('tetra/', include('tetra.urls')),
    path('post/', include('blog.urls'))
]
Run the application with python manage.py runserver command. View the page on your browser through localhost:8000/post/add.
Here is the output of the page:
PostItem componentThe PostItem component contains the template for rendering a created post on the home screen.
@default.register
class PostItem(Component):

    def load(self, post):
        self.post = post
The load method receives the Post instance as its argument and exposes it to the HTML template that renders its title and content on the screen.
 template: django_html = """

    <article class="post-container" {% ... attrs %}>
            <small class="article-metadata">{{ post.date_posted.date}}</small>
            <p class="article-title"> {{ post.title }}</p>
            <p class="article-content">{{ post.content }}</p>

        </article>

    """
The {% ... attrs %} tag is a Tetra attribute tag that the template uses to receive the arguments passed down to it when invoking the component. When receiving arguments using the attributes tag, you should declare the tag in the root node of the HTML template, as done in the article tag in the snippet above.
Here is the CSS implementation of the template:
style: css = """

    .article-metadata {
        padding-bottom: 1px;
        margin-bottom: 4px;
        border-bottom: 1px solid #e3e3e3;

    }


    .article-title{
        font-size: x-large;
        font-weight: 700;
    }

    .article-content {
        white-space: pre-line;
    }

    .post-container{
        margin: 50px;
    }

    a.article-title:hover {
        color: #428bca;
        text-decoration: none;
    }

    .article-content {
        white-space: pre-line;
    }

    a.nav-item{
        text-align: right;
        margin-right: 100px;
    }

    h1 {
       text-align: center;
    }
    """
Here is what a post will look like through the PostItem component:

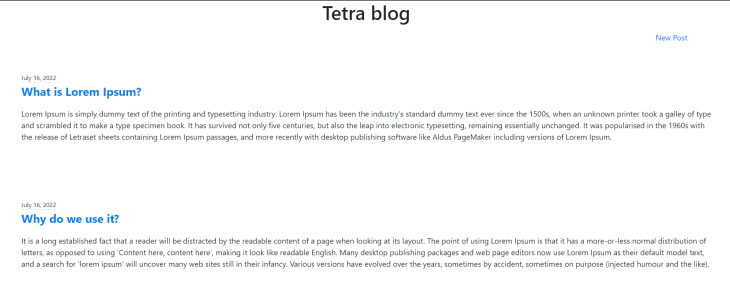
ViewPosts componentThis component is responsible for rendering all the created posts. Add the following snippet to the components.py file:
@default.register
class PostView(Component):

    def load(self):
        self.posts = Post.objects.all()

    template: django_html = """
        <div>
            <h1> Tetra blog </h1>
            <div class="navbar-nav">
                <a class="nav-item nav-link" href="{% url 'add-post' %}">New Post</a>
            <div>
            <div class="list-group">
                {% for post in posts %}
                    {% @ post_item post=post key=post.id / %}
                {% endfor %}
            </div>
         </div>
        """
The load method in the components retrieves all the created posts from the database. The HTML template contains an anchor tag that directs to the add-post URL to create a new post.
For each post fetched from the database, the HTML creates a PostItem component by passing the post object as its argument within the for-loop.
Next, invoke the ViewPost component from the Django view template. Create a home.html file in the blog app’s templates folder and add the following snippet to the file:
{% load tetra %}
<!Doctype html>
<html lang="en">
  <head>
    <title> Blog home </title>
    <link rel="stylesheet" href="https://maxcdn.bootstrapcdn.com/bootstrap/4.0.0/css/bootstrap.min.css" integrity="sha384-Gn5384xqQ1aoWXA+058RXPxPg6fy4IWvTNh0E263XmFcJlSAwiGgFAW/dAiS6JXm" crossorigin="anonymous">
    {% tetra_styles %}
    {% tetra_scripts include_alpine=True %}
  </head>
  <body>
      {% @ view_post / %}
  </body>
  </html>
Next, add the following to the views.py file:
def home(request):
    return render(request, 'home.html')
Lastly, update the urlpatterns list in the blog app urls.py file.
urlpatterns = [
     path("", views.home, name='home'),
    ...
]
You can view the page via localhost:8000/post.
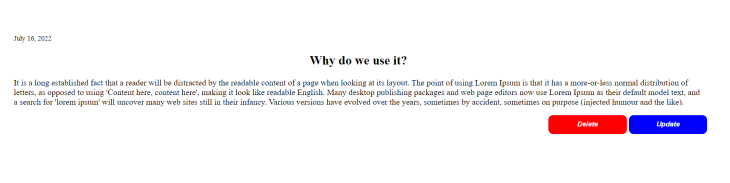
PostDetail componentThis component will render the full post on a single page. The page will also contain two buttons: one each for deleting and updating the post. Add the following code to the components.py file:
@default.register
class PostDetail(Component):

    def load(self, pk):
        self.post = Post.objects.filter(id=pk)[0]

    @public(update=False)
    def delete_item(self):
        Post.objects.filter(id=self.post.id).delete()
        self.client._removeComponent()
The load method receives the id of the post through the pk variable and fetches the Post instance, whose ID matches the pk value from the database.
The delete_item method deletes the Post instance from the database, automatically removing it from the home screen. By default, a public method will re-render a component when you invoke it. By setting the update property to False in the @public decorator, it ensures that it doesn’t attempt to re-render a previously deleted post.
Here is the HTML template:
 template: django_html = """
        <article >
            <small class="text-muted">{{ post.date_posted.date}}</small>

            <h2 class="article-title">{{ post.title }}</h2>
            <p class="article-content">{{ post.content }}</p>

            <div class="post-buttons">
            <button id="delete-button" type="submit" @click="delete_item()"><em>Delete</em></button>
           <button id="update-button"> <em>Update</em> </button>
            </div>

        </article>
    """
The template retrieves the date, title, and content of the post fetched from the load method and renders these values. It also contains buttons to delete and update the post. The Delete button invokes the delete_item method to perform the delete operation on the post. We’ll implement the Update button in the subsequent section.
Here’s the CSS for the template:
 style: css = """

        article{
            margin: 100px;
        }

        .post-buttons{
            position: absolute;
            right: 0;
        }

        #delete-button, #update-button{
            width: 150px;
            padding: 10px;
            border-radius: 9px;
            border-style: none;
            font-weight: bold;
            margin: auto;
        }

        #update-button{
            background: blue;
            color: white;
        }

        #delete-button{
            background: red;
            color: white;
        }

    """
In the PostItem template created in the previous section, update the HTML code by including an anchor tag that will direct the user to the post detail page from the home screen.
@default.register
class PostItem(Component):

  ...

    template: django_html = """

    <article class="post-container" >
           ...
            <a href="{% url 'post-detail' pk=post.id %}"> {{ post.title }}</a>
          ...

        </article>

    """
In the templates folder, create a post-detail.html file that will serve as the root HTML file for the post-detail page and include the following code in the file:
Next, update the views.py and urls.py files to include the path to the post-detail page:
def post_detail(request, **kwargs):
    return render(request, 'post_detail.html', kwargs)
urlpatterns = [
     path("<int:pk>/", views.post_detail, name='post-detail')
]
View the post details in your browser by clicking the post title from the blog home page.
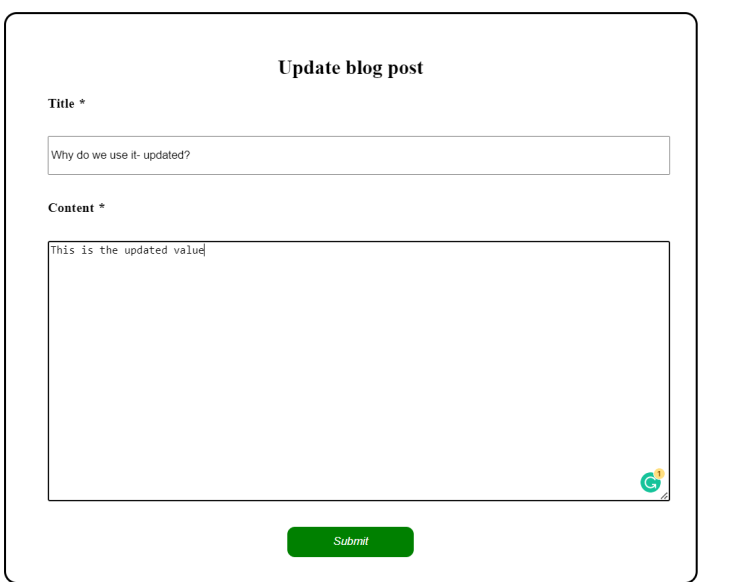
UpdatePost componentThis component is responsible for updating the title and content of an existing post.
@default.register
class PostUpdate(Component):
    title=public("")
    content=public("")


    def load(self, pk):
        self.post = Post.objects.filter(id=pk)[0]
        self.title=self.post.title
        self.content=self.post.content

    @public
    def update_post(self, title, content):
        self.post.title = title
        self.post.content = content

        self.post.save()
The load method receives the ID of the post you want to update and fetches it from the database. Then, it assigns its title and content to the title and content public attributes respectively.
The update_post method receives the updated title and content and assigns them to the fetched post, then saves it to the database.
Below is the HTML template of the component:
 template: django_html = """
        <div class="container">
            <h2>Update blog post</h2>
            <label> Title
            <em>*</em>
            </label>
            <input type="text" maxlength="255" x-model="title" name="title" required/>

            <label> Content
            <em>*</em>
            </label>
            <textarea rows="20" cols="80" x-model="content" name="content" required> </textarea>

            <button type="submit" @click="update_post(title, content)"><em>Submit</em></button>
        </div>
        """
The above template renders the value of the title and content public attributes through the Alpine.js x-model property, while the button uses the Alpine.js @click function to invoke the update_post method and pass the new value of the title and content as arguments.
In the PostDetail template created in the previous section, update the HTML code by including an anchor tag that will direct the user to the post update page from the home screen.
@default.register
class PostDetail(Component):

   ...

    template: django_html = """
        <article  {% ... attrs %} >
            ...
            <a class="nav-item nav-link" href="{% url 'update-post' pk=post.id %}"><button id="update-button"> <em>Update</em> </button></a>
         ...

        </article>
    """
Next, within the template folder, create a post_update.html file that will serve as the root HTML template for the PostUpdate component. Add the following snippet to the file:
{% load tetra %}
<!Doctype html>
<html>
  <head>
    <title> Update post </title>
    {% tetra_styles %}
    {% tetra_scripts include_alpine=True %}
  </head>
  <body>
     <form enctype="multipart/form-data" method="POST">
      {% csrf_token %}
      {% @ post_update pk=pk / %}
    </form>
  </body>
  </html>
Finally, update the views.py and urls.py files with the following code respectively:
def update_post(request, **kwargs):
    return render(request, 'post_update.html', kwargs)
urlpatterns = [
     ...
     path("<int:pk>", views.update_post, name='update-post'),
     ...

]
You can navigate to the update-post page by clicking the Update button on the post detail screen.

At the time of writing this article, Tetra is still in its early stages of development and currently supports Python 3.9 and above. However, the Tetra team is working on expanding the functionalities of this framework to older versions of Python.
One thing you should know before beginning production with Tetra is that the framework documentation needs a lot of improvement. It was too concise, as some dependencies were either not explained at all or were not detailed enough. For example, the documentation does not discuss how to handle images, which is why we built a blog app for this demo.
It wasn’t until after I had completed the project that I realized the framework isn’t as complex as the documentation presented it.
This article introduced you to Tetra and its components. You learned how Tetra functions and performs full-stack operations from a single file by building a simple blog app that performs CRUD operations.
The Tetra home page contains some additional examples of how you can build some simple applications with Tetra. If you’re also interested in learning more about this framework, the documentation is available to guide you. You can check out the full implementation of the blog app on GitHub.
Install LogRocket via npm or script tag. LogRocket.init() must be called client-side, not
server-side
$ npm i --save logrocket

// Code:

import LogRocket from 'logrocket';
LogRocket.init('app/id');
// Add to your HTML:

<script src="https://cdn.lr-ingest.com/LogRocket.min.js"></script>
<script>window.LogRocket && window.LogRocket.init('app/id');</script>

Learn how to build advanced Next.js forms with rule engines, client-side previews, Server Actions, and server-validated form logic.

AI is reshaping engineering teams emotionally as well as technically. A CTO shares insights on fear, trust, burnout, identity, and leading through AI change.

Learn what context rot is, why AI agent sessions degrade over time, and how to fix it with compaction, prompt anchoring, context files, plan files, and RAG.

Learn about TypeScript v6’s breaking changes, new ES2025 features, and deprecated options. A complete migration guide from v5 to prepare for v7.
Hey there, want to help make our blog better?
Join LogRocket’s Content Advisory Board. You’ll help inform the type of content we create and get access to exclusive meetups, social accreditation, and swag.
Sign up now

